Introduction
The REDTIGER Visionpano20 is a 3-channel dash camera system designed to provide comprehensive vehicle surveillance. It features a 2.5K front camera, a 2.5K interior camera with 4 IR lights for enhanced night vision, and a 1080P rear camera, offering a combined 530° field of view. Key functionalities include a responsive touch screen, built-in WiFi for app connectivity, GPS for location and speed tracking, and various parking monitoring modes.

Image: Overview of the 530° field of view provided by the three cameras.
What's in the Box
Verify that all components are present before beginning installation.
- 1 x Visionpano20 Dash Cam
- 1 x 1080P Rear Camera
- 1 x 11.5ft Power Supply Cable with Car Charger
- 1 x Adhesive Mount (built-in GPS)
- 1 x 21.3ft Rear Camera Cable
- 5 x Cable Clips
- 1 x User Manual
- Electrostatic Stickers

Image: All components included in the REDTIGER Visionpano20 package.
Video: Unboxing the Visionpano20 Dash Cam, showing all included items.
Setup and Installation
Main Dash Cam Installation
- Clean the windshield area where the dash cam will be mounted.
- Apply the electrostatic sticker to the chosen area on the windshield.
- Attach the adhesive mount (with built-in GPS) to the electrostatic sticker.
- Mount the Visionpano20 Dash Cam onto the adhesive mount.
- Connect the 11.5ft Power Supply Cable to the dash cam and plug the car charger into your vehicle's cigar socket.
- Use the provided cable clips and pry tool to neatly route the power cable along the windshield and roof, hiding it down the A-pillar to avoid obstructing the driver's view.

Image: Visual guide for hassle-free dash cam installation.
Rear Camera Installation
- Clean the rear windshield area where the rear camera will be installed.
- Apply an electrostatic sticker to the chosen area on the rear windshield.
- Peel off the adhesive on the rear camera and stick it onto the electrostatic sticker.
- Connect the 21.3ft Rear Camera Cable to the rear camera.
- Connect the other end of the rear camera cable to the main dash cam.
- Hide the rear camera cable along the gaps between the car body and the ceiling, and between the rear seats and the ceiling, using the provided cable clips and pry tool.
Operating Instructions
Touch Screen Controls
The 3.18'' touch screen allows for intuitive control of the dash cam's functions:
- Swipe Down: Go to Quick Settings.
- Swipe Up: Go to Video Playback.
- Swipe Right: Switch Display Cameras.
- Swipe Left: Access Camera Settings.

Image: Touch screen gestures for navigating the dash cam interface.
Recording Modes
The Visionpano20 supports multiple recording configurations:
- Loop Recording: Continuously records, overwriting the oldest footage when the memory card is full.
- Emergency Recording (G-Sensor): Automatically locks and saves footage upon detecting a collision or sudden movement, preventing it from being overwritten.
- Parking Monitor: Offers time-lapse and collision recording to safeguard your parked vehicle. This feature requires a hardwire kit (ASIN: B09WCTZ3Y8) for continuous power.

Image: Parking surveillance features protecting against various incidents.
WiFi & GPS Connectivity
Connect your dash cam to the "REDTIGER" app on your smartphone for enhanced functionality:
- Access, download, and share recorded footage directly from your phone.
- View real-time GPS data, including speed, location, and route history.
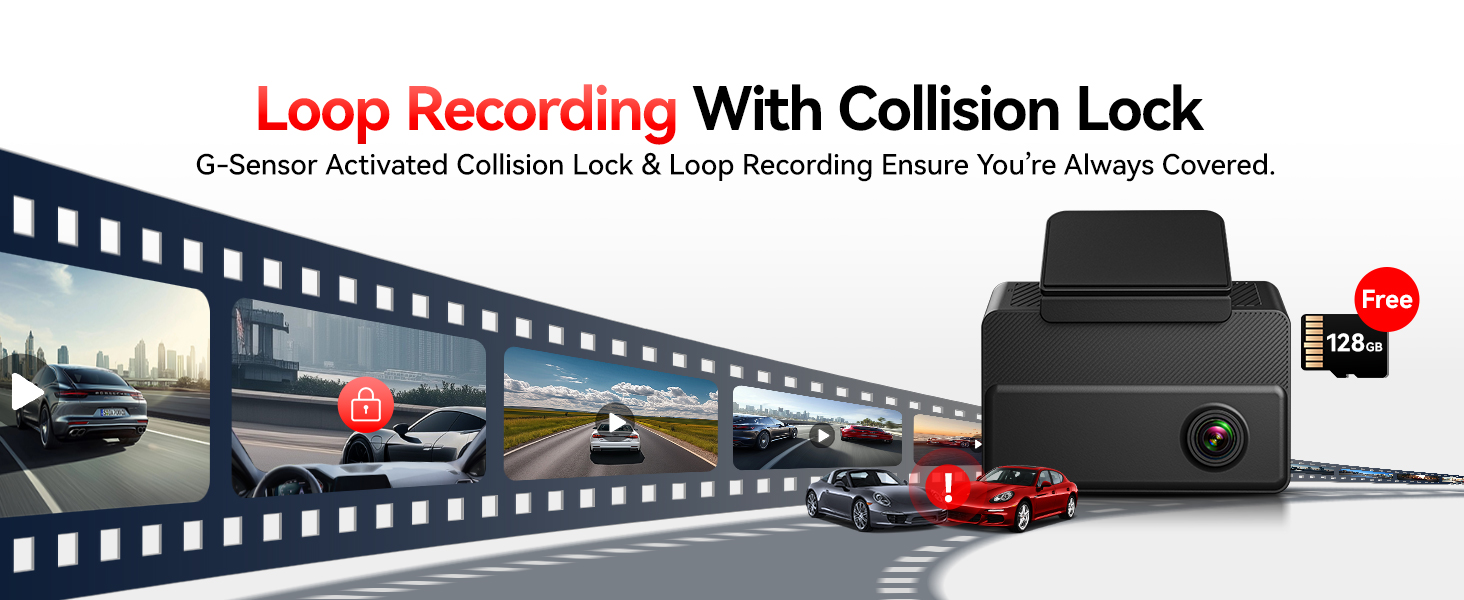
Image: The REDTIGER app displaying video footage and GPS information.
Video: Instructions on how to connect the dash cam to Wi-Fi and set up the app.
Night Vision
The interior camera is equipped with 4 infrared (IR) lights and Wide Dynamic Range (WDR) technology to capture clear footage in low-light conditions, both inside and outside the vehicle.

Image: Night vision capabilities with 4 IR lights for clear recording in dark environments.
Maintenance
- Memory Card: The dash cam comes with a 128GB high-capacity card. Ensure the card is formatted periodically to maintain optimal performance. Loop recording will automatically manage storage by overwriting older files.
- Cleaning: Gently wipe the camera lenses and touch screen with a soft, dry cloth to remove dust or smudges. Avoid using abrasive cleaners.
Troubleshooting
For common issues, refer to the "REDTIGER" app's settings or the detailed user manual for specific solutions. If problems persist, please contact customer support.
Specifications
| Product Dimensions | 3.43 x 1.46 x 3.15 inches |
| Item Weight | 4.6 ounces |
| Video Capture Resolution | Front: 2.5K, Interior: 2.5K, Rear: 1080P |
| Field Of View | 530 Degrees (200° Front, 200° Interior, 130° Rear) |
| Connectivity Technology | USB, Wi-Fi |
| Special Features | 3 Channel Front and Rear Inside, 4 IR Lights, APP Control, Built-In Display, Built-In GPS, Built-In Supercapacitor, G-Sensor, Internal Memory, Loop Recording, Night Vision, Parking Monitor, OTA Firmware Update, Audio Recording, Touch Screen |
| Mounting Type | Windshield Mount |
Warranty and Support
REDTIGER provides an 18-month warranty for the Visionpano20 Dash Cam. For any inquiries or assistance, our dedicated customer support team is available 24/7.
Contact Support: help@redtigercam.com


