1. Introduction
The Fockety LED Pixel Display is a versatile 32x32 pixel art frame designed for creative expression and functional display. It features app control for personalized customization, dynamic animations, and various utility functions, making it suitable for diverse environments such as gaming rooms, desks, or wall decor.

Image 1.1: The Fockety LED Pixel Display showcasing a pixelated hourglass timer. This image illustrates the device's ability to display dynamic pixel art and functional elements like timers.
2. Package Contents
Please verify that all items listed below are included in your package:
- 1 x Pixel Art Digital Picture Frame
- 2 x Tool Kit (for installation/cleaning)
- 1 x Data Cable (USB)
- 1 x Instruction Manual
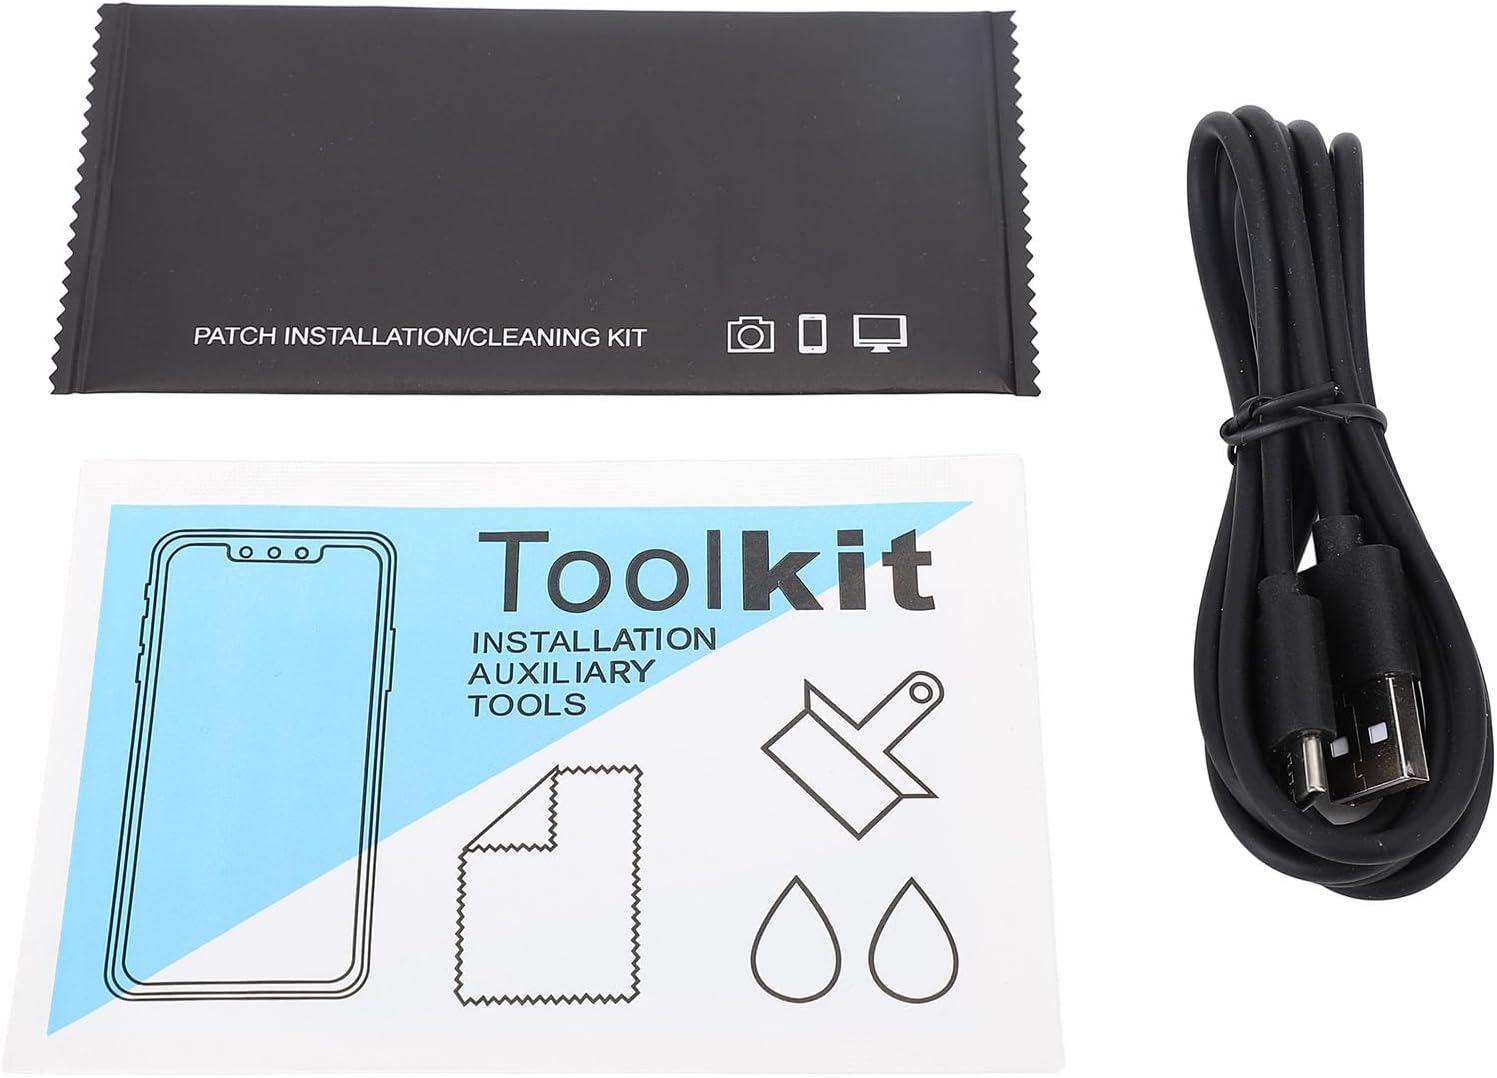
Image 2.1: The complete package contents, featuring the LED Pixel Display, USB data cable, and the included toolkit for installation and cleaning.
3. Specifications
| Item Type | Pixel Art Digital Picture Frame |
| Material | ABS |
| Weight | Approx. 689g / 24.3oz (1.52 pounds) |
| Voltage | 5V |
| Current | 2A |
| Power | 10W |
| Operating Method | APP or Buttons |
| Product Size | Approx. 200x200x24mm / 7.9x7.9x0.9in |
| Resolution | 32x32 pixels (480p equivalent for display content) |
| Power Source | AC/DC (via USB cable) |

Image 3.1: The rear of the LED Pixel Display, indicating the USB power input, voltage/current requirements (5V/2A, 10W), and mounting options.
4. Setup
4.1 Power Connection
- Locate the USB port on the back of the Pixel Display.
- Connect the provided USB data cable to the display.
- Plug the other end of the USB cable into a compatible 5V 2A power adapter (not included) or a powered USB port.
- Ensure the power source provides 5V 2A for optimal brightness and performance. Using a 5W power source may slightly affect brightness. Prolonged usage exceeding 10W power will damage product performance.
4.2 Placement and Mounting
The display can be placed on a desk or mounted on a wall.
- Desk Placement: Position the display on a flat, stable surface.
- Wall Mounting: Use appropriate wall anchors and screws (not included) with the mounting holes on the back of the device. Ensure the wall can support the device's weight.

Image 4.1: The LED Pixel Display positioned on a wooden desk, demonstrating a typical setup for desktop use.
5. Operating Instructions
5.1 APP Control
The primary method of control is through the dedicated mobile application.
- Download the APP: Scan the QR code on the back of the device or visit http://api.e-toys.cn/page/app/140 to download the official application.
- Pairing: Follow the in-app instructions to connect your mobile device to the Pixel Display via Bluetooth or Wi-Fi.
- APP Functions: Once connected, you can access various features:
- Creative Drawing: Design your own pixel art.
- Animation Display: Upload and display custom animations or GIFs.
- Text Effects: Display store promotion text, preset phrases, and massive animated text effects.
- Utility Functions: Set alarm clocks, schedule arrangements, use a stopwatch, countdown timer, or scoreboard.
- Music Rhythm Sync: Light effects can synchronize with music rhythm.
- Brightness Adjustment: Adjust brightness from 0 to 100 percent steplessly.
- Language Options: Choose from 13 language options.
- Energy Saving Mode: Automatically adjust brightness based on time.
- Extensive Material Library: Access built-in holiday themes, game backgrounds, and dynamic effects without additional downloads.
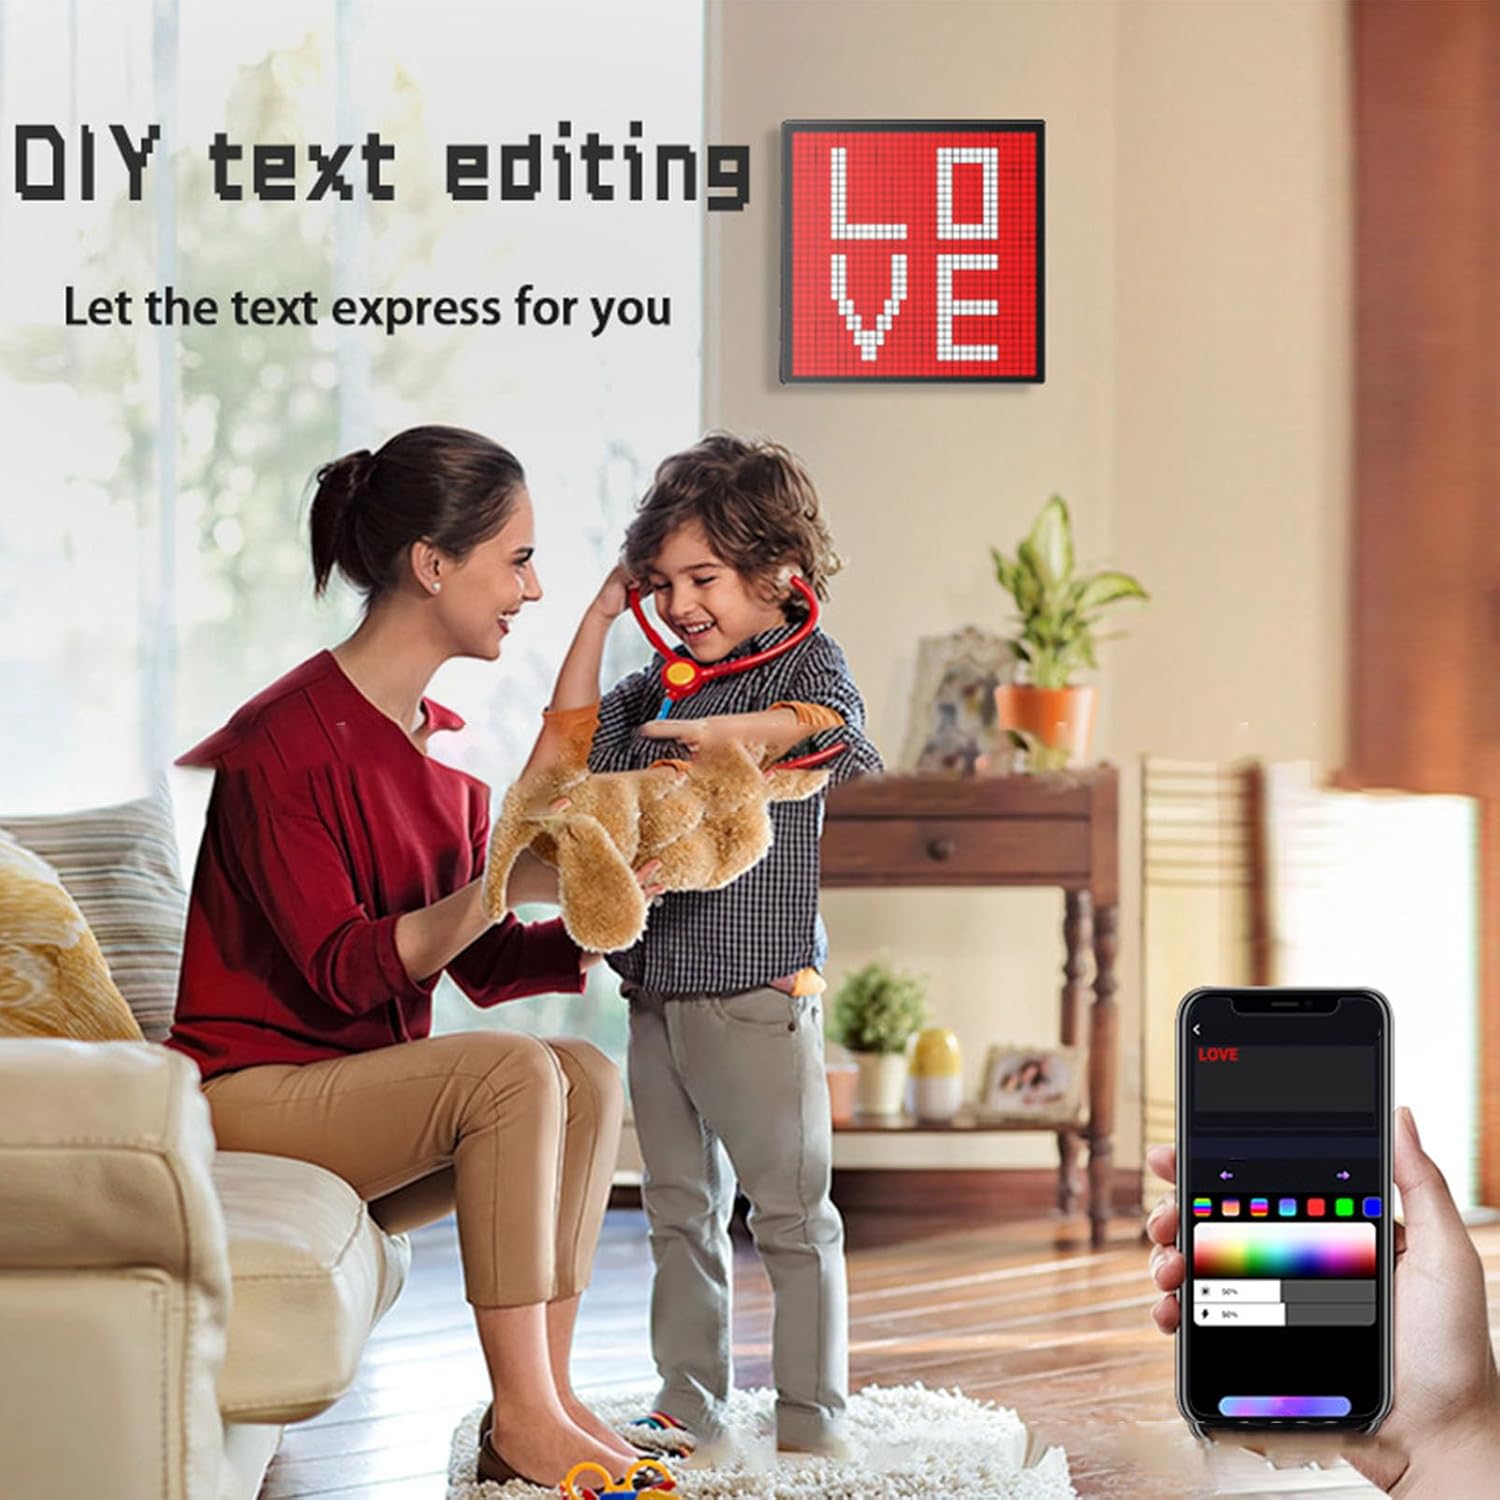
Image 5.1: The mobile application interface demonstrating DIY text editing, with the display showing the word 'LOVE' in pixel art.

Image 5.2: The display showing custom pixel art, such as a heart, in a social setting, highlighting its DIY picture customization feature.
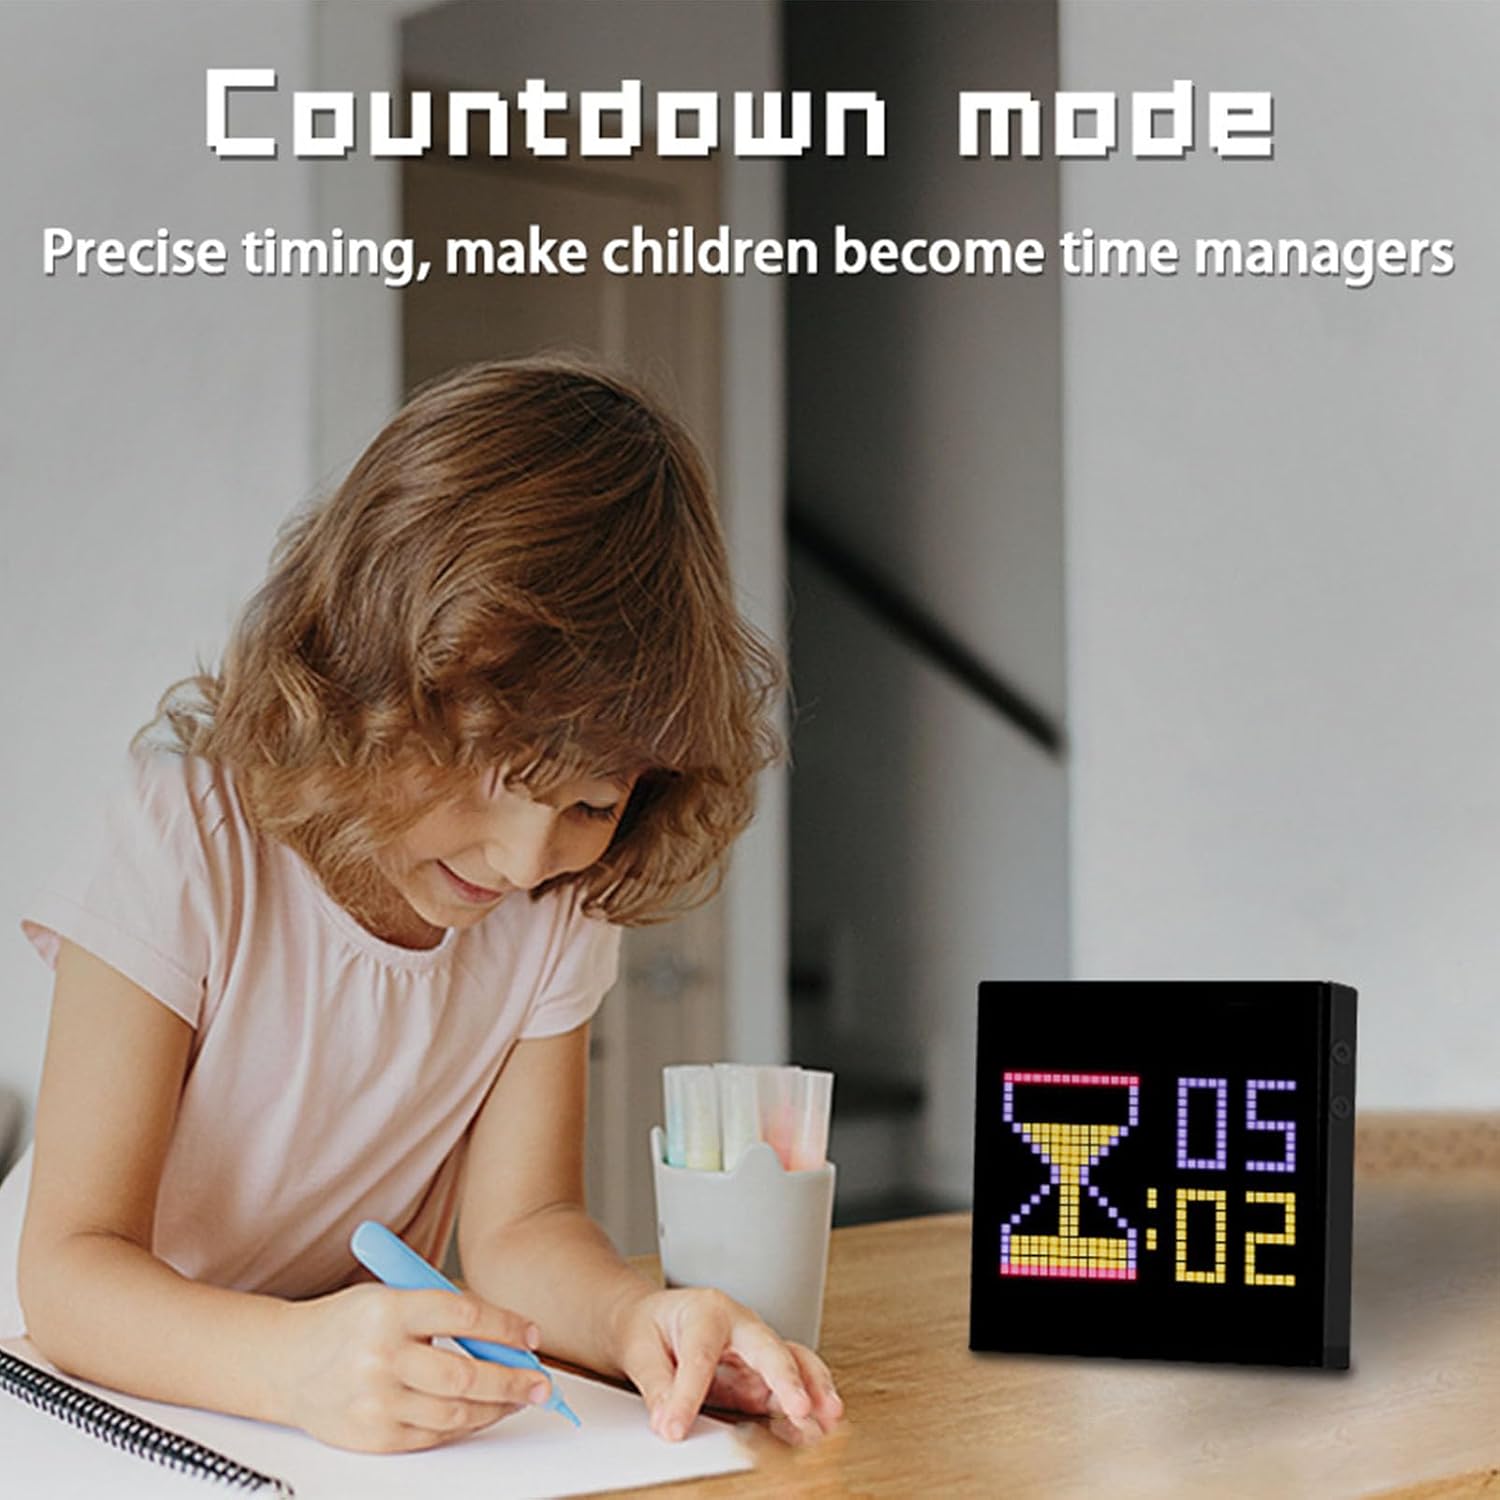
Image 5.3: The display functioning as a countdown timer, demonstrating its utility features in a home environment.

Image 5.4: Multiple displays showcasing various pixel art visualizations, indicating the device's ability to sync with music rhythm and display dynamic effects.
5.2 Button Control
While the APP offers comprehensive control, the device also features physical buttons for basic operations. Refer to the device's physical layout for button locations and their specific functions, which typically include power on/off and cycling through basic display modes.
6. Maintenance
6.1 Cleaning
To maintain the clarity and appearance of your Pixel Display:
- Use a soft, dry, lint-free cloth to gently wipe the screen and frame.
- For stubborn smudges, slightly dampen the cloth with water. Avoid using harsh chemicals or abrasive cleaners.
- Ensure the device is powered off and unplugged before cleaning.
6.2 Power Considerations
Always use a 5V 2A power source. Using a power source that exceeds 10W for prolonged periods can damage the product's performance and lifespan.
7. Troubleshooting
If you encounter issues with your Fockety LED Pixel Display, refer to the following common problems and solutions:
- Display Not Turning On:
- Ensure the USB cable is securely connected to both the display and the power source.
- Verify that the power adapter is functioning and providing 5V 2A.
- Try a different USB cable or power adapter.
- APP Not Connecting to Display:
- Make sure Bluetooth or Wi-Fi is enabled on your mobile device.
- Ensure the display is powered on and within range of your mobile device.
- Restart both the display and your mobile device.
- Check if the app requires any specific permissions on your phone.
- Display Brightness is Low:
- Confirm that your power source is providing the recommended 5V 2A. A lower power output (e.g., 5W) can result in reduced brightness.
- Adjust the brightness settings within the mobile application.
- Check if Energy Saving Mode is active and adjust its settings if necessary.
- Pixel Art Not Displaying Correctly:
- Ensure the image or animation file format is compatible with the app.
- Re-upload the content through the app.
- Check for app updates.
8. Warranty and Support
For warranty information, please refer to the documentation provided at the time of purchase or contact your retailer. For technical support or further assistance, please reach out to the seller or manufacturer directly.