1. Important Safety Warnings
Please read these instructions carefully before operating the HYCHIKA 600W HVLP Paint Spray Gun. Pay particular attention to all safety guidelines regarding the proper handling and use of chemicals, ventilation, and disposal of materials. Failure to follow these instructions may result in electric shock, fire, and/or serious injury.
- Always wear appropriate personal protective equipment (PPE) including safety glasses, gloves, and a respirator when operating the paint sprayer.
- Ensure the work area is well-ventilated to prevent the accumulation of hazardous fumes.
- Keep children and pets away from the work area.
- Do not spray flammable materials near open flames, pilot lights, or other ignition sources.
- Always disconnect the power supply before cleaning, adjusting, or performing maintenance on the unit.
- Never immerse the motor unit in water or other liquids.
- Use only manufacturer-recommended accessories and replacement parts.
2. Product Overview and Components
The HYCHIKA 600W HVLP Paint Spray Gun is designed for efficient and even application of various paints and coatings. It features a powerful 600W motor, HVLP technology for reduced overspray, and a large 1200mL container.
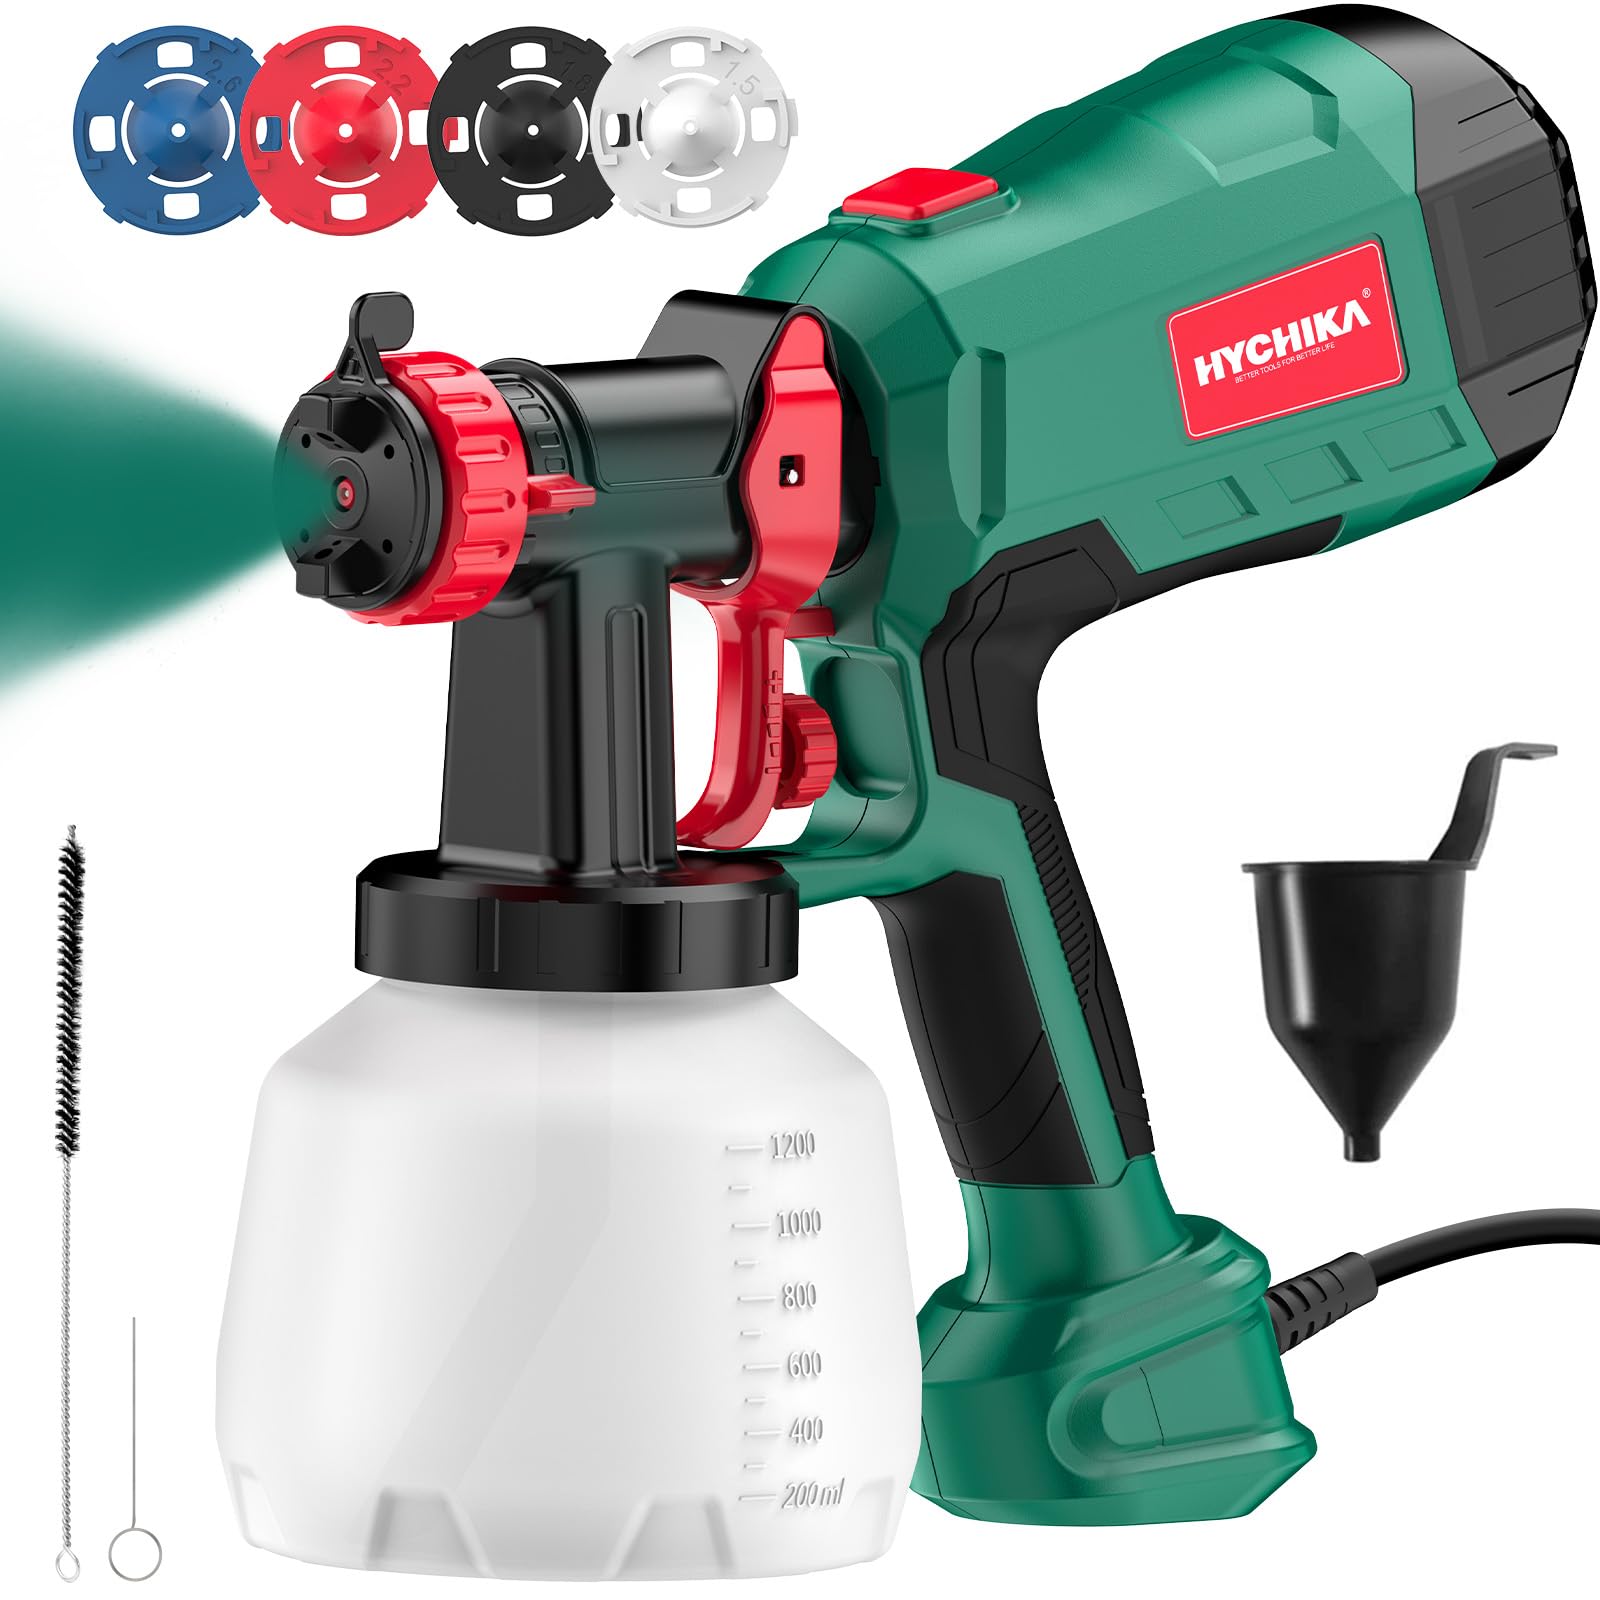
Figure 2.1: Overview of the HYCHIKA 600W HVLP Paint Spray Gun and its included accessories. The image shows the main spray gun unit, the paint container, various nozzles, a viscosity cup, and cleaning tools.
Included Components:
- Main Spray Gun Unit (600W motor)
- 1200 mL Paint Container
- 4 Nozzles (for different paint types and viscosities)
- Viscosity Cup (for paint thinning)
- Cleaning Kit (needles and brushes)
- Instruction Manual (this document)
Key Features:
- Powerful Motor: 600W pure copper motor with 30,000 rpm for efficient spraying.
- HVLP Technology: High Volume Low Pressure for fine atomization and reduced overspray.
- Adjustable Flow Rate: Control knob for precise spray volume, up to 1000 ml/min.
- 3 Spray Modes: Easily switch between round, horizontal, and vertical spray patterns to suit different surfaces.
- Versatile Nozzles: Four different nozzles accommodate various paint types with a maximum viscosity of 100 DIN/s.
- Large Capacity: 1200 mL paint container minimizes refills during use.
- Extended Reach: 2-meter power cord for greater maneuverability.
- Easy Cleaning: Designed for quick disassembly and includes specialized cleaning tools.
3. Setup and Preparation
3.1 Unpacking and Assembly
- Carefully remove all components from the packaging.
- Inspect all parts for any damage. Do not use the unit if any part is damaged.
- Attach the paint container to the spray gun unit by screwing it securely into place.
- Select the appropriate nozzle for your paint type and desired spray pattern. Insert the nozzle into the spray head and secure it with the retaining ring.
3.2 Paint Preparation and Viscosity Test
Proper paint viscosity is crucial for optimal spray performance and to prevent clogging.
- Stir the paint thoroughly.
- Dip the viscosity cup into the paint until it is full.
- Lift the cup and measure the time it takes for the paint to completely drain out. Refer to your paint manufacturer's recommendations for ideal viscosity or use the following general guidelines:
- Water-based paints: 20-30 seconds
- Oil-based paints/varnishes: 25-40 seconds
- Latex paints: 30-50 seconds
- If the paint drains too slowly, thin it gradually with the appropriate solvent (water for water-based, mineral spirits for oil-based) and re-test until the desired viscosity is achieved. The maximum recommended viscosity for this sprayer is 100 DIN/s.
- Filter the prepared paint through a paint strainer to remove any lumps or debris that could clog the nozzle.
3.3 Filling the Paint Container
- Unscrew the paint container from the spray gun unit.
- Pour the prepared and filtered paint into the container, ensuring not to overfill. The maximum capacity is 1200 mL.
- Securely reattach the paint container to the spray gun unit.
4. Operating Instructions
4.1 Adjusting Spray Pattern
The spray gun offers three adjustable spray patterns: round, horizontal, and vertical.
- Round Pattern: Ideal for small objects, corners, and edges.
- Horizontal Pattern: Suitable for spraying vertical surfaces (e.g., fences, walls).
- Vertical Pattern: Suitable for spraying horizontal surfaces (e.g., tabletops, floors).
To change the spray pattern, rotate the air cap on the front of the spray gun to align with the desired pattern indicator.
4.2 Adjusting Flow Rate
The flow control knob located on the trigger allows you to adjust the amount of paint sprayed.
- Turn the knob clockwise to decrease the flow rate (less paint).
- Turn the knob counter-clockwise to increase the flow rate (more paint).
Always test the spray pattern and flow rate on a piece of scrap material before applying to your actual project.
4.3 Spraying Technique
- Hold the spray gun perpendicular to the surface, maintaining a consistent distance of 20-25 cm (8-10 inches).
- Begin spraying off the workpiece, move across the surface in smooth, even strokes, and release the trigger off the workpiece. This prevents paint buildup at the start and end of strokes.
- Overlap each pass by approximately 50% to ensure even coverage.
- Apply multiple thin coats rather than one thick coat to avoid drips and runs. Allow adequate drying time between coats as recommended by the paint manufacturer.
5. Maintenance and Cleaning
Thorough cleaning after each use is essential to maintain the performance and longevity of your HYCHIKA paint spray gun.
- Empty Paint: Disconnect the power. Unscrew the paint container and pour any remaining paint back into its original can.
- Initial Rinse: Fill the container with the appropriate cleaning solution (water for water-based paints, mineral spirits for oil-based paints). Reattach the container.
- Flush System: Plug in the sprayer and spray the cleaning solution into a waste container or designated area until the solution runs clear.
- Disassemble: Disconnect power again. Unscrew the container, remove the nozzle, air cap, and any other removable parts.
- Thorough Cleaning: Use the provided cleaning brushes and needles to clean all disassembled parts, especially the nozzle and air cap, ensuring all paint residue is removed. Pay close attention to small holes and crevices.
- Clean Container: Wash the paint container thoroughly with cleaning solution and rinse.
- Wipe Down: Wipe the exterior of the spray gun unit with a damp cloth. Do not immerse the motor unit in liquid.
- Dry and Store: Allow all parts to dry completely before reassembling. Store the spray gun in a clean, dry place, away from direct sunlight and extreme temperatures.
6. Troubleshooting
| Problem | Possible Cause | Solution |
|---|---|---|
| No spray or weak spray |
|
|
| Uneven spray pattern |
|
|
| Paint drips or runs |
|
|
| Excessive overspray |
|
|
7. Technical Specifications
| Specification | Value |
|---|---|
| Model Number | EP013-1 |
| Power | 600W |
| Motor Speed | 30,000 rpm |
| Technology | HVLP (High Volume Low Pressure) |
| Max Flow Rate | 1000 ml/min |
| Container Volume | 1200 Milliliters |
| Max Viscosity | 100 DIN/s |
| Nozzles Included | 4 |
| Spray Modes | 3 (Round, Horizontal, Vertical) |
| Power Source | Electric Cable |
| Cord Length | 2 meters |
| Recommended Spray Distance | 20-25 cm |
| Product Dimensions (L x W x H) | 23 x 23 x 18 cm |
| Item Weight | 1.5 Kilograms |
| Material | Polypropylene (PP), Rubber, Copper |
| Country of Origin | China |
8. Warranty and Support
For warranty information and customer support, please refer to the warranty card included with your product or visit the official HYCHIKA website. Keep your purchase receipt as proof of purchase for any warranty claims.
If you encounter any issues not covered in the troubleshooting section, please contact HYCHIKA customer service for assistance.


