
1. Important Safety Information
Please read and understand all instructions in this manual before assembling, installing, or operating your SANOTECHNIK Helsinki outdoor Finnish sauna. Failure to follow these safety guidelines may result in injury, electric shock, fire, or property damage.
- Electrical Installation: All electrical wiring and connections must be performed by a qualified and licensed electrician in accordance with local and national electrical codes.
- Ventilation: Ensure adequate ventilation around the sauna for proper operation and heat dissipation. Do not block air vents.
- Health Considerations: Consult a physician before using the sauna, especially if you have pre-existing medical conditions, are pregnant, or are taking medication. Avoid sauna use if you are unwell.
- Substance Use: Do not consume alcohol, drugs, or medications that may impair judgment or cause drowsiness before or during sauna use.
- Children and Pets: Keep children and pets away from the sauna, especially when it is in operation. The sauna can reach high temperatures.
- Water on Stones: Use only small amounts of water on the sauna stones to create steam. Excessive water can damage the heater and create a scalding hazard.
- Sauna Stones: Use only genuine sauna stones recommended by the manufacturer. Do not use other types of rocks or materials.
- Stable Surface: Install the sauna on a solid, level, and stable foundation capable of supporting its weight (420 kg).
- Fire Hazard: Do not place flammable materials inside or near the sauna heater. Keep the area around the heater clear.
- Overheating: Limit sauna sessions to 10-20 minutes to prevent overheating. Cool down gradually after each session.
2. Product Overview
The SANOTECHNIK Helsinki F30150 is a premium outdoor Finnish sauna designed for 2-3 persons. Crafted from high-quality fir wood and featuring a 6mm safety glass door, it provides a robust and authentic sauna experience. The sauna is equipped with a powerful 4.5 kW heater, capable of reaching temperatures between 70-90 °C, and includes essential accessories for immediate use.

Image: Exterior view of the SANOTECHNIK Helsinki outdoor Finnish sauna.
3. Specifications
| Feature | Detail |
|---|---|
| Model Number | F30150 |
| External Dimensions (W x D x H) | 165 cm x 175 cm x 218.9 cm (approx. 210 cm front / 220 cm back height) |
| Internal Dimensions (W x D x H) | 137 cm x 142 cm x 189.4 cm |
| Seating Capacity | 2-3 persons |
| Upper Bench Dimensions | 137 cm x 55 cm |
| Lower Bench Dimensions | 137 cm x 30 cm |
| Heater Power | 4.5 kW |
| Operating Temperature | 70-90 °C |
| Electrical Connection | 220V or 380V (requires professional installation) |
| Material | High-quality Fir Wood, 6mm Safety Glass |
| Roof Type | Asphalt roof |
| Snow Load Capacity | Approx. 150 kg/m² |
| Product Weight | 420 kg |

Image: Detailed external dimensions of the sauna.
4. Package Contents
Upon unpacking, ensure all components listed below are present and undamaged. If any parts are missing or damaged, contact customer support immediately.
- Sauna cabin components (fir wood panels for walls, roof, floor)
- 6mm safety glass door with handle
- Sauna benches (upper and lower)
- 4.5 kW sauna heater
- Sauna stones
- Sauna light fixture (E27 socket, bulb not included)
- Wooden bucket and ladle
- Thermometer
- Hourglass
- Assembly hardware (screws, fasteners, etc.)
- Asphalt roofing material
5. Setup and Installation
Careful planning and adherence to instructions are crucial for safe and proper installation.
5.1 Site Preparation
- Choose a level, stable, and well-drained outdoor location.
- Ensure the foundation (e.g., concrete slab, paved area) is solid and can support the sauna's weight.
- Allow adequate clearance around the sauna for maintenance, ventilation, and safety.
5.2 Assembly
Refer to the detailed assembly instructions provided in the product packaging for step-by-step guidance. General steps include:
- Assemble the base frame and floor panels.
- Erect the wall panels, ensuring they are securely fastened and plumb.
- Install the sauna benches (upper and lower) inside the cabin.
- Mount the 6mm safety glass door.
- Construct and install the roof structure, then apply the asphalt roofing material for weather protection.

Image: Sauna exterior with interior light, indicating a completed assembly.
5.3 Electrical Connection
This step must be performed by a qualified and licensed electrician.
- The 4.5 kW heater requires a dedicated electrical circuit.
- The sauna can be connected to either a 220V or 380V power supply.
- Ensure proper grounding for safety.
- Connect the sauna light fixture (E27 socket) to the electrical supply.
5.4 Heater and Accessory Installation
- Install the 4.5 kW sauna heater according to its specific instructions, ensuring it is securely mounted and has adequate clearance from wooden surfaces.
- Carefully place the sauna stones into the heater's stone compartment.
- Mount the thermometer and hourglass on an interior wall at a comfortable viewing height.
- Place the wooden bucket and ladle inside the sauna.
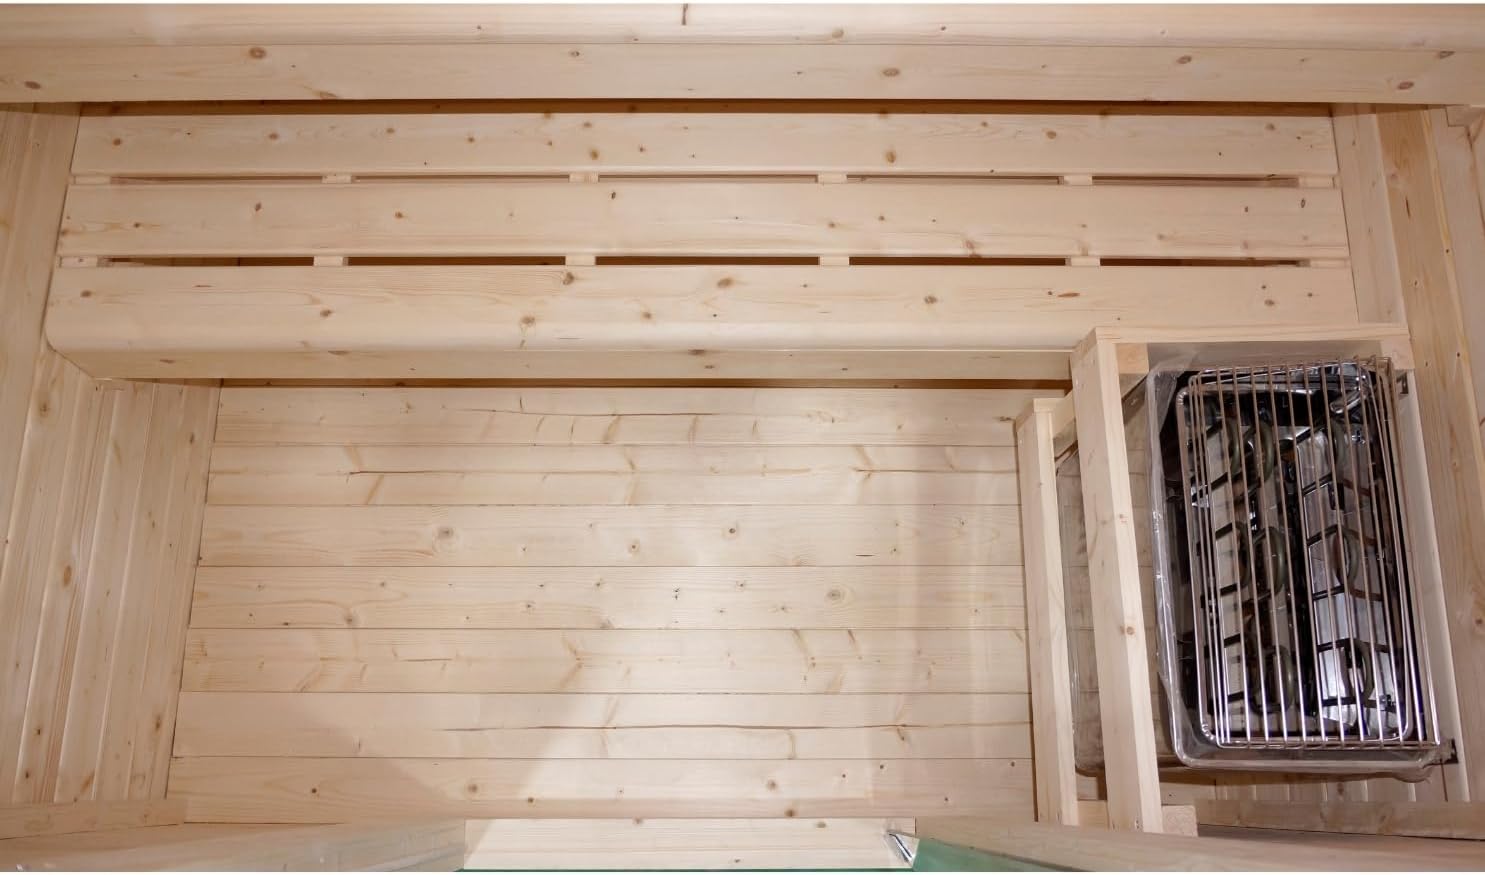
Image: Interior view highlighting the sauna heater and upper bench.

Image: Interior view with sauna light, bucket, and ladle.

Image: Overhead view of the sauna interior layout.
6. Operating Instructions
Follow these steps for a safe and enjoyable sauna experience.
- Pre-Sauna Check: Ensure the sauna is clean, free of obstructions, and the door closes properly.
- Power On: Turn on the sauna heater using its control panel. Set the desired temperature (typically 70-90 °C).
- Heating Time: Allow 30-60 minutes for the sauna to reach the set temperature. The thermometer will indicate the current temperature.
- Creating Steam (Löyly): Once the sauna stones are hot, carefully pour small amounts of water (using the wooden ladle and bucket) over the stones to create steam and increase humidity. Do not pour excessive water.
- Sauna Session: Enter the sauna and relax. Use the hourglass to monitor your session duration. Limit sessions to 10-20 minutes.
- Cool Down: After a session, exit the sauna and allow your body to cool down gradually. Hydrate by drinking water.
- Power Off: Always turn off the sauna heater and light after use.

Image: Sauna interior with thermometer, hourglass, and light fixture.
7. Maintenance
Regular maintenance ensures the longevity and safe operation of your sauna.
- Cleaning Wood Surfaces: After each use, wipe down interior wood surfaces with a damp cloth. Do not use harsh chemical cleaners, as they can damage the wood and release fumes when heated. Periodically clean benches with mild soap and water, then rinse and dry thoroughly.
- Heater Maintenance: Regularly inspect the heater for any debris or foreign objects. Replace sauna stones every 1-2 years, or if they show signs of crumbling or cracking, to maintain heating efficiency and safety.
- Exterior Wood Care: To protect the fir wood from weathering and prolong its life, consider treating the exterior surfaces with a suitable wood protector designed for outdoor use, following the product manufacturer's instructions.
- Electrical System Check: Periodically, have a qualified electrician inspect the electrical connections for tightness and signs of wear or corrosion.
- Roof Inspection: Inspect the asphalt roof regularly for any damage, cracks, or leaks, especially after severe weather. Repair any issues promptly to prevent water ingress.
8. Troubleshooting
This section addresses common issues you might encounter with your sauna.
- Sauna Not Heating:
- Check the main power supply and circuit breaker.
- Ensure the heater control panel is set correctly and the timer (if applicable) is active.
- If issues persist, contact a qualified electrician to inspect the wiring.
- Insufficient Heat:
- Allow more time for the sauna to pre-heat.
- Ensure the sauna door is fully closed and sealed.
- Check if the sauna stones need replacement (old, crumbling stones heat less efficiently).
- Excessive Steam/Humidity:
- Reduce the amount of water poured on the sauna stones.
- Ensure proper ventilation is maintained.
- Sauna Light Not Working:
- Check if the E27 light bulb needs to be replaced.
- Verify the electrical connection to the light fixture.
9. Warranty and Support
SANOTECHNIK is committed to providing quality products and support.
- Spare Parts Availability: Spare parts for this product are available for a period of 5 years within the European Union.
- Customer Support: For technical assistance, warranty claims, or to inquire about spare parts, please contact Sanotechnik customer service. Refer to your purchase documentation or the official Sanotechnik website for specific contact details.