1. Product Overview
The ANNKE 5MP 16-Channel PoE Security Camera System provides comprehensive surveillance for home and business environments. This system includes a 16-channel Network Video Recorder (NVR) and 5MP IP PoE cameras, designed for reliable and high-quality video monitoring.

Image 1.1: Overview of the ANNKE 5MP 16-Channel PoE Security Camera System, showing the NVR and eight 5MP bullet IP PoE cameras.
1.1 What's in the Box
Verify all components are present upon unboxing:
- 1 x 16-Channel 12MP PoE NVR with 2TB Hard Drive
- 8 x 5MP Bullet IP PoE Cameras
- 1 x HDMI Cable
- 1 x Ethernet Cable
- 1 x Power Adapter
- 4 x 60ft Network Cables
- 4 x 100ft Network Cables
- 1 x USB Mouse
- 1 x User Manual
- 8 x Screw Kits
- 1 x Wall Sticker
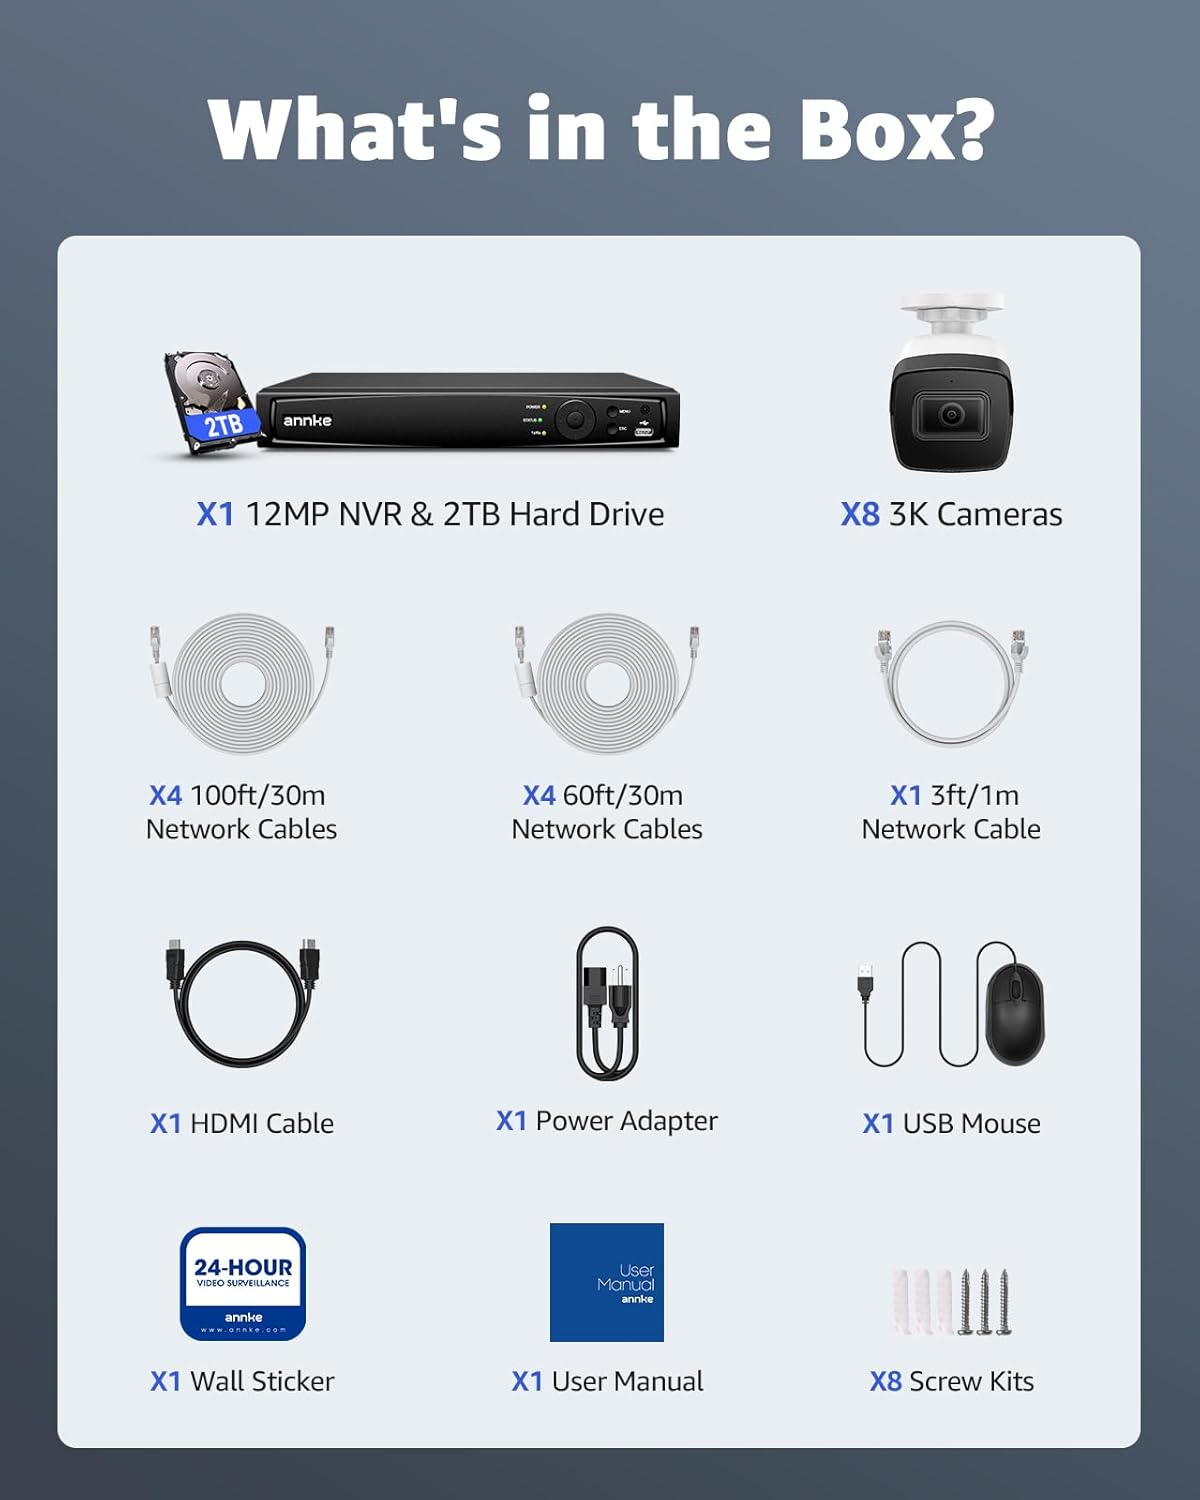
Image 1.2: Visual representation of all items included in the ANNKE 5MP 16-Channel PoE Security Camera System package.
1.2 NVR and Camera Components
Familiarize yourself with the key components of the NVR and cameras:

Image 1.3: Detailed diagram illustrating the built-in microphone, 2.8mm lens, SD card slot, IP67 housing, power port, and network port on the camera, along with the Ethernet ports, audio input/output, HDMI/VGA output, USB ports, and power adapter connection on the NVR.
2. Setup Instructions
Follow these steps to set up your ANNKE 5MP 16-Channel PoE Security Camera System.
2.1 Unboxing and Initial Inspection
Carefully unbox all components and inspect for any damage. Refer to the 'What's in the Box' section to ensure all items are present.
Video 2.1: An unboxing video demonstrating the contents and initial setup of the ANNKE 16CH 3K PoE Security Camera System.
2.2 Connecting the NVR
- Connect the NVR to a monitor using the provided HDMI cable.
- Connect the USB mouse to the NVR's USB port.
- Connect the NVR to your router using an Ethernet cable for network access.
- Plug the power adapter into the NVR and then into a power outlet.
2.3 Installing Cameras
The cameras are Power over Ethernet (PoE), meaning they receive power and data through a single Ethernet cable. This simplifies installation.
- Choose suitable locations for your cameras, ensuring they cover desired areas and are within cable reach of the NVR.
- Mount the cameras using the provided screw kits and drill templates.
- Connect each camera to an available PoE port on the NVR using the provided network cables.
- Ensure waterproof lids are properly installed on cable connections for outdoor cameras.
2.4 Hard Drive Installation (if not pre-installed)
If your NVR did not come with a pre-installed hard drive, follow these steps:
- Unplug the NVR from power.
- Remove the top cover of the NVR by unscrewing the retaining screws.
- Connect the SATA data and power cables from the NVR to the hard drive.
- Secure the hard drive inside the NVR using the provided screws.
- Replace the NVR cover and reconnect power.
3. Operating the System
Once the system is set up, you can begin monitoring and managing your surveillance.
3.1 Live View and Recording
The NVR will automatically detect and display connected cameras. You can view live feeds on your connected monitor or through the ANNKE Vision app.
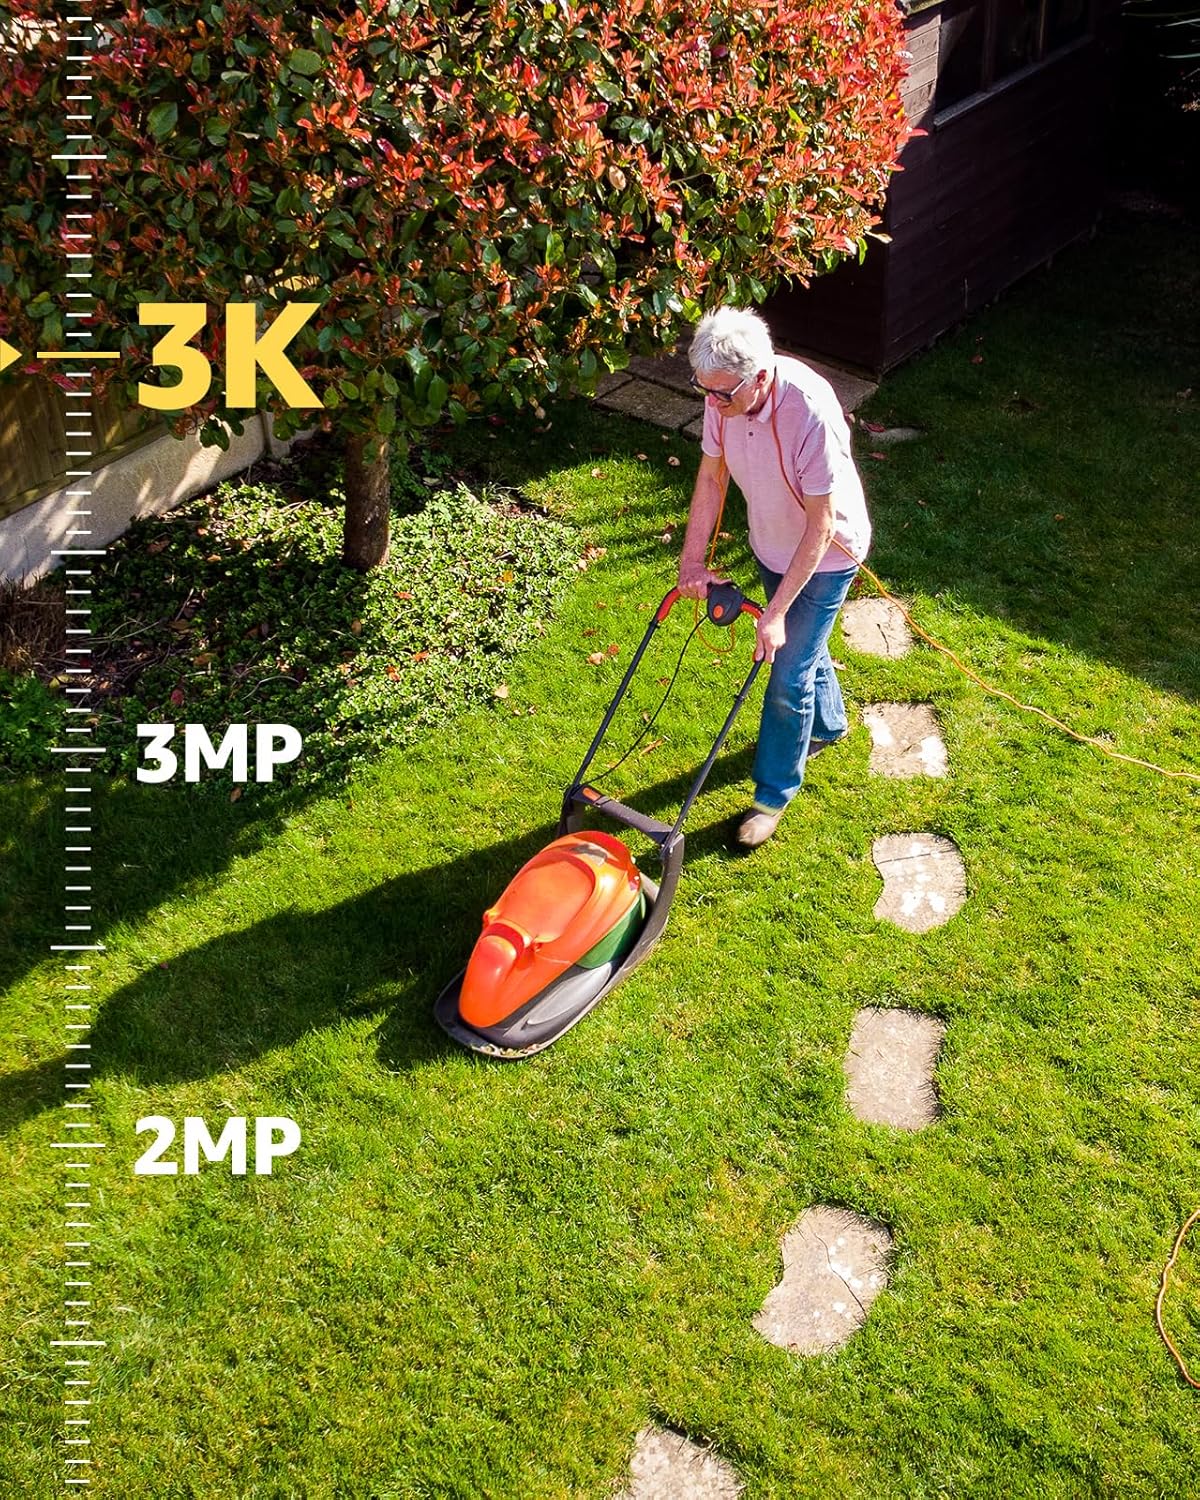
Image 3.1: Demonstrates the crystal-clear 3K visual experience provided by the ANNKE security cameras, showing a person mowing a lawn with high detail.
3.2 AI Motion Detection 2.0
The system features advanced AI algorithms for accurate human and vehicle detection, reducing false alarms. Alerts can be received via app pushes and emails.
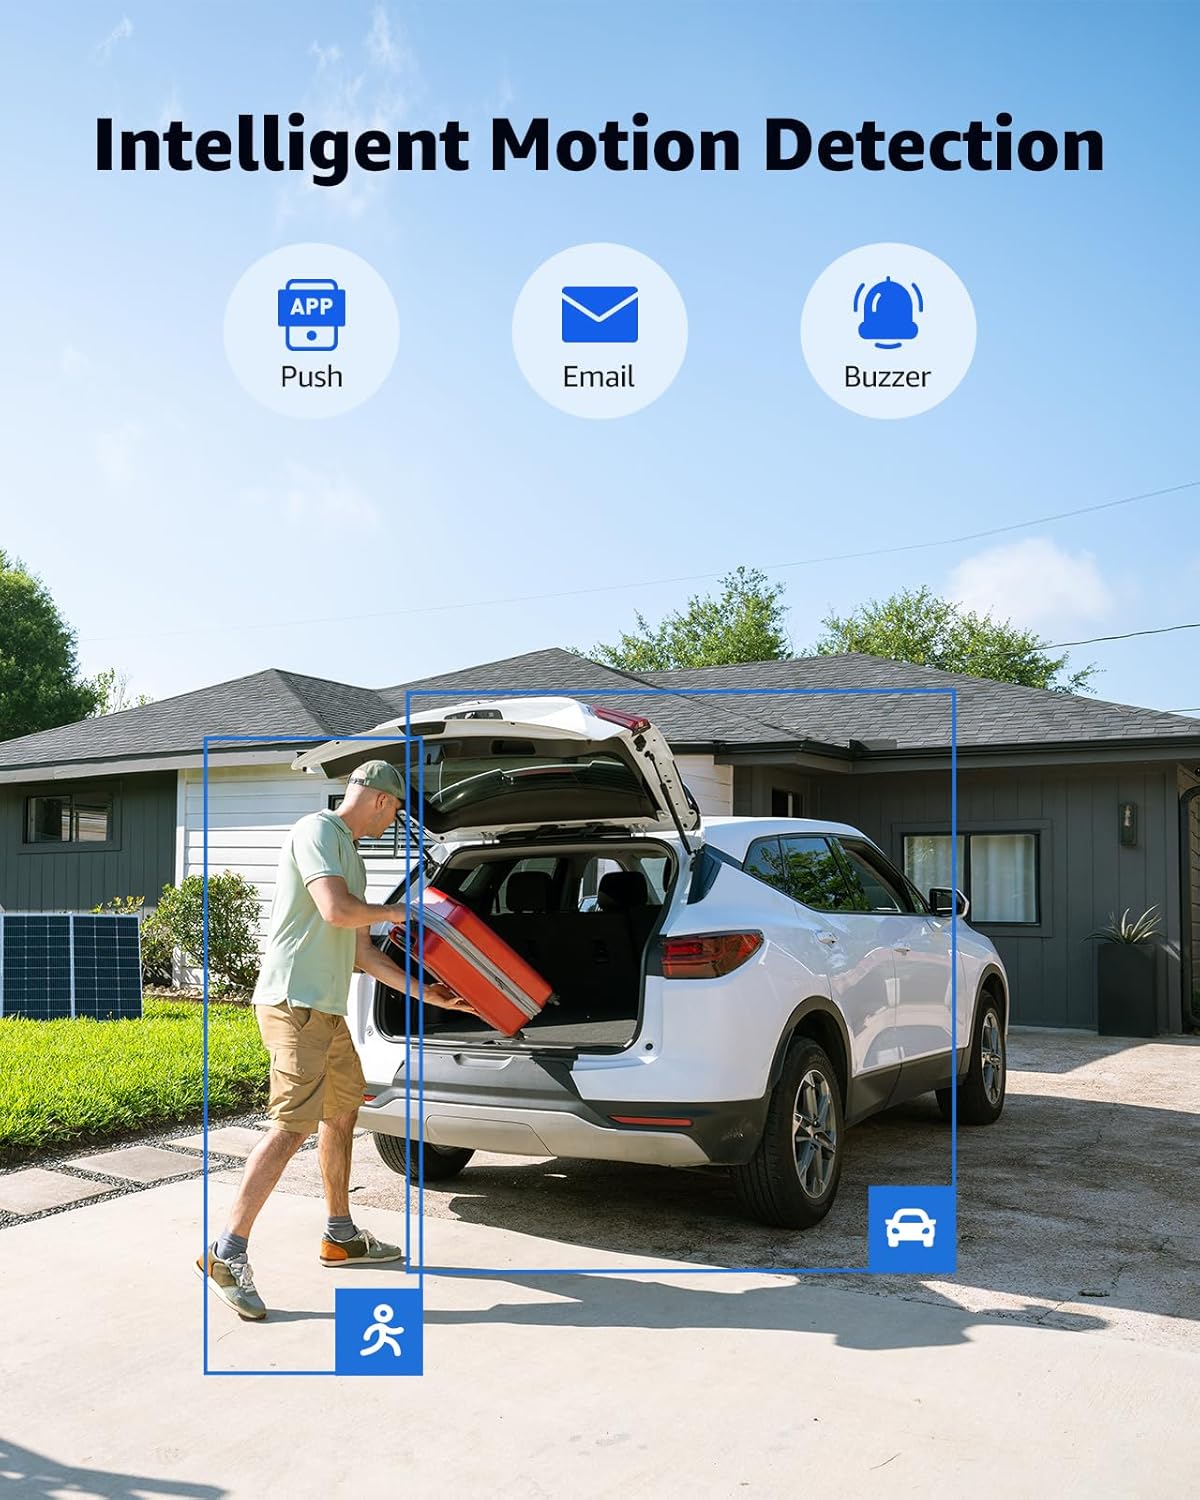
Image 3.2: Illustrates the AI Motion Detection 2.0 feature, highlighting detected human and vehicle activity in a driveway with on-screen notifications for push, email, and buzzer alerts.
3.3 Built-in Microphone
Each 5MP camera includes a high-sensitivity microphone to record audio and filter environmental noise, providing an additional layer of surveillance.

Image 3.3: A smartphone screen showing a live camera feed with a person speaking into the camera, demonstrating the built-in microphone's two-way audio capability.
3.4 Wide Dynamic Range (WDR)
The 120dB WDR technology ensures clear images in challenging lighting conditions, such as scenes with both very bright and very dark areas.
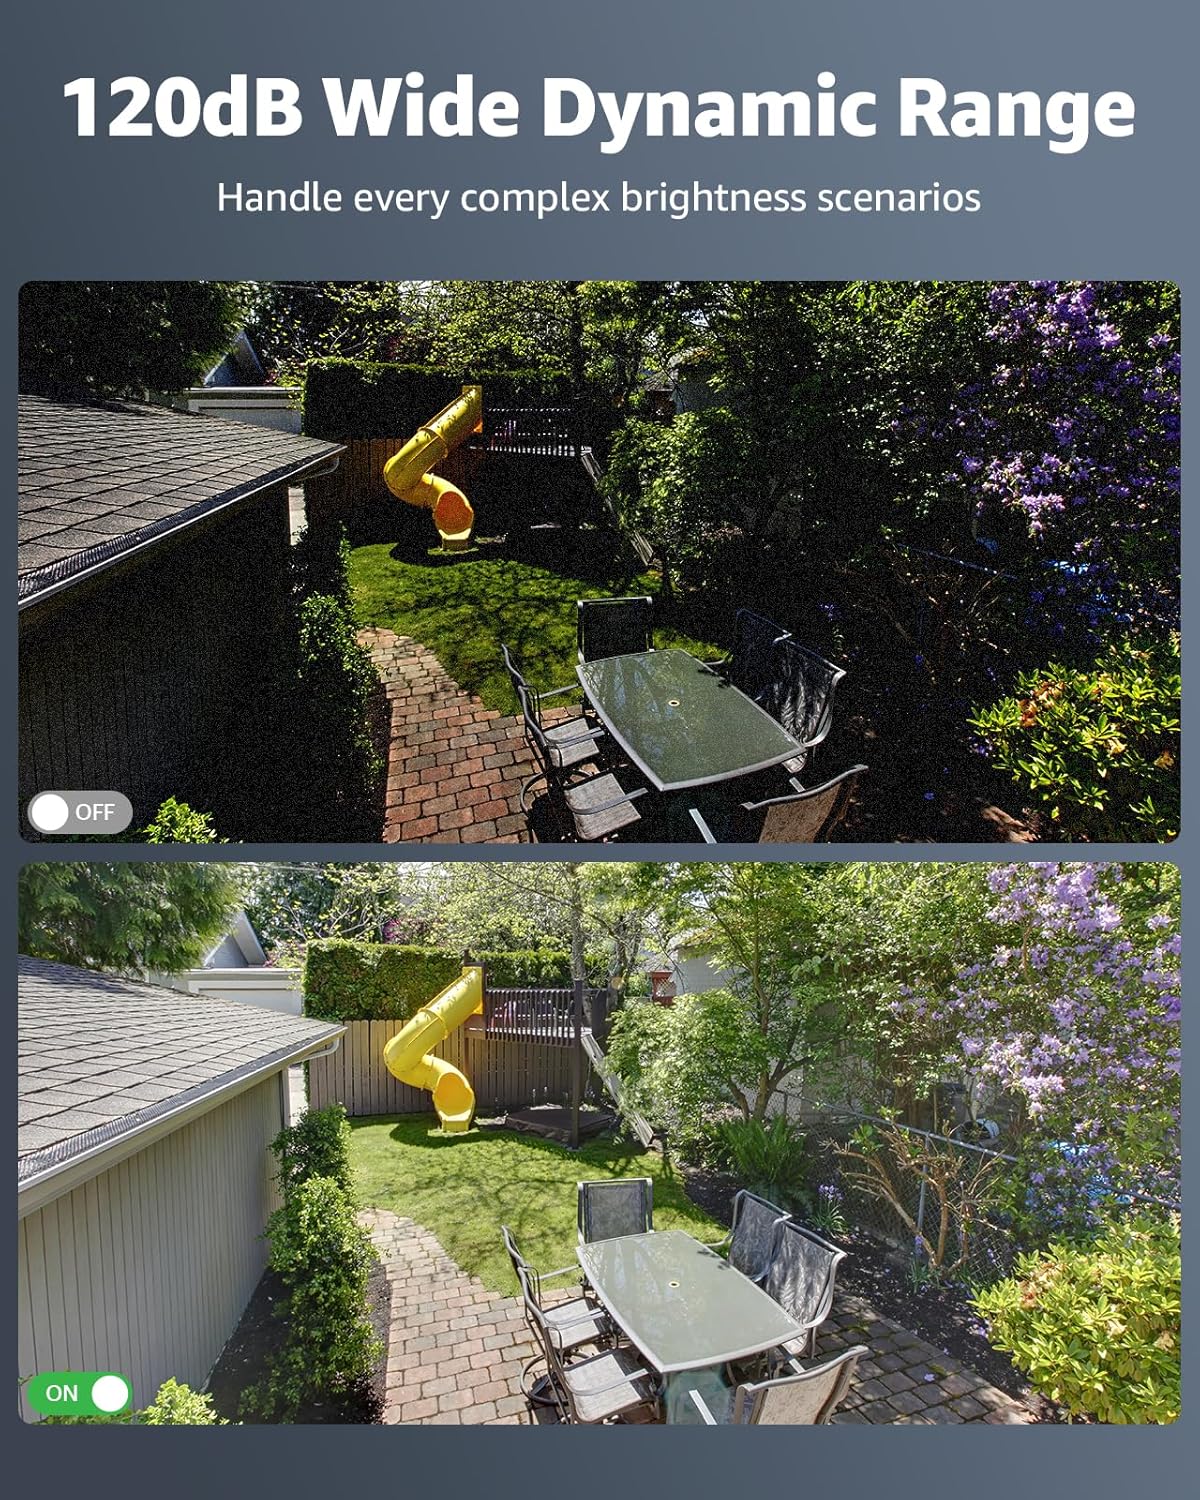
Image 3.4: A side-by-side comparison showing the improved image clarity in complex brightness scenarios when 120dB Wide Dynamic Range (WDR) is enabled on the camera.
3.5 IP67 Weatherproof Rating
The cameras are designed to withstand various harsh weather conditions, ensuring continuous operation outdoors.
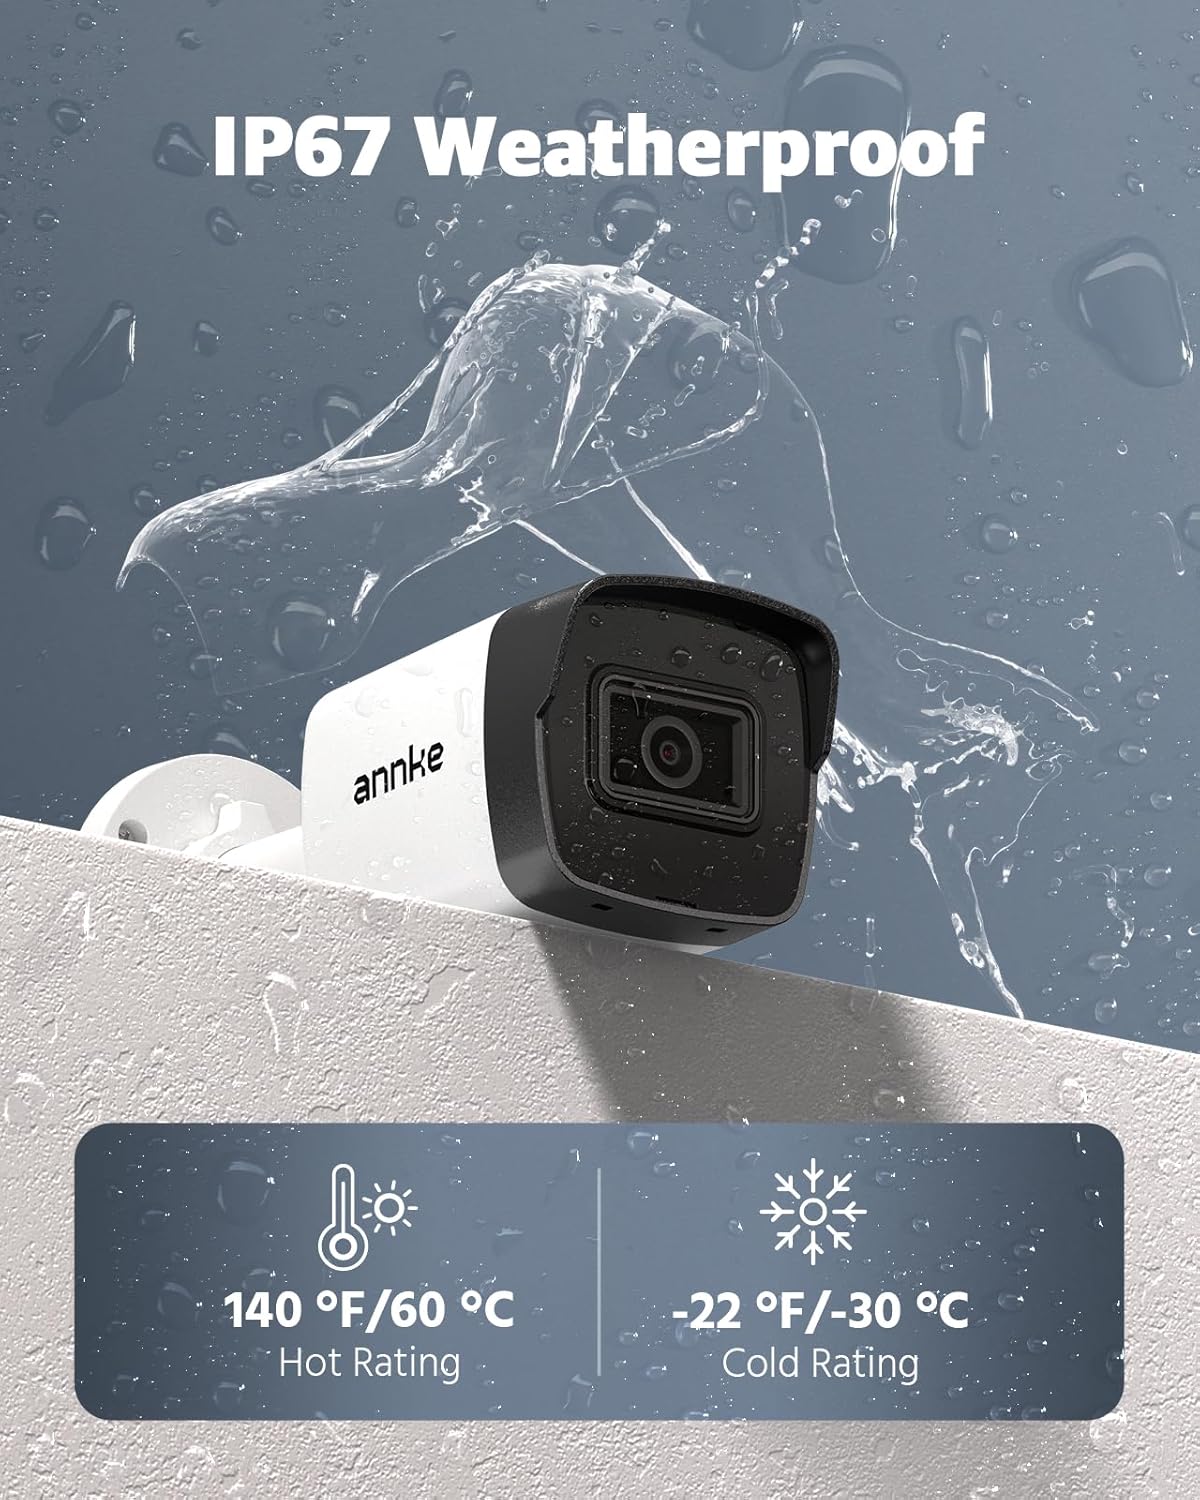
Image 3.5: An ANNKE camera shown under simulated rain, illustrating its IP67 weatherproof rating and ability to operate in extreme temperatures (-22°F to 140°F).
3.6 Remote Access via App
Download the ANNKE Vision app to view live feeds, playback recordings, and receive alerts on your smartphone or tablet.

Image 3.6: A hand holding a smartphone displaying the ANNKE Vision app, showing a live camera feed and controls for home security management.
Video 3.7: A short video highlighting key features of the ANNKE 16CH 5MP PoE Security Camera System, including its visual quality and detection capabilities.
4. Maintenance
Regular maintenance ensures optimal performance and longevity of your security system.
4.1 Cleaning
- Periodically clean camera lenses with a soft, damp cloth to remove dust and smudges.
- Ensure the NVR is kept in a well-ventilated area, free from dust accumulation.
4.2 Firmware Updates
Check the ANNKE website or app regularly for firmware updates to ensure your system has the latest features and security enhancements.
4.3 Hard Drive Management
The 2TB HDD supports continuous recording with automatic overwrite functionality, ensuring new footage replaces the oldest when storage is full. You can configure recording schedules and motion-triggered recording via the NVR interface.
5. Troubleshooting
This section addresses common issues you might encounter. For detailed troubleshooting, refer to the full user manual.
5.1 No Video Display
- Check Power: Ensure the NVR and cameras are properly powered.
- Cable Connections: Verify all HDMI and Ethernet cables are securely connected.
- NVR Status: Check the NVR's status indicator lights.
5.2 Network Connectivity Issues
- Ethernet Cable: Ensure the NVR's Ethernet cable is connected to a working router port.
- Router Status: Verify your router is functioning correctly and has internet access.
- IP Address: Check the NVR's network settings to ensure it has a valid IP address.
5.3 Motion Detection Not Triggering or Too Sensitive
- Sensitivity Settings: Adjust the motion detection sensitivity in the NVR or app settings.
- Detection Zones: Configure specific detection zones to focus on critical areas and exclude irrelevant ones.
- AI Detection: Ensure human/vehicle detection is enabled if you wish to filter out other movements.
6. Specifications
Key technical specifications for the ANNKE 5MP 16-Channel PoE Security Camera System:
| Feature | Specification |
|---|---|
| Brand | ANNKE |
| Model Number | AU-N46PCK2-V4-58DL-V5-P |
| Connectivity Technology | Wired (PoE) |
| Video Capture Resolution | 3K (3072x1728@20fps) |
| Number of Channels | 16 |
| Memory Storage Capacity | 2 TB HDD (expandable) |
| Special Features | App Control, Automatic Overwrite, Human Detection, Motion Sensor, Vehicle Detection, Built-in Mic, 120dB WDR |
| IP Rating | IP67 Weatherproof |
| Lens Type | Fixed 2.8mm lens |
| Viewing Angle | 116 Degrees (diagonal FOV) |
| Night Vision Range | Up to 100 Feet with EXIR 2.0 |
| Operating Temperature | -22 °F – 140 °F (-30 °C – 60 °C) |
| Compatible Devices | Cameras, Laptops, Personal Computers, Smartphones, Tablets |
7. Warranty and Support
ANNKE is committed to providing reliable products and customer satisfaction.
7.1 Technical Support
The product includes lifetime technical support. For assistance, please visit the official ANNKE website or contact their customer service.
7.2 Product Warranty
Refer to the official ANNKE warranty policy for details regarding product coverage and terms. Protection plans may also be available for extended coverage.


