
1. Introduction
Thank you for choosing the Shinmax Bicycle Helmet. This helmet is designed to provide enhanced safety and visibility for cyclists, featuring integrated turn signal lights, a front light, and a rechargeable rear light. It is suitable for various cycling activities including commuting, mountain biking, and city riding. Please read this manual thoroughly before using the helmet to ensure proper setup, operation, and maintenance.
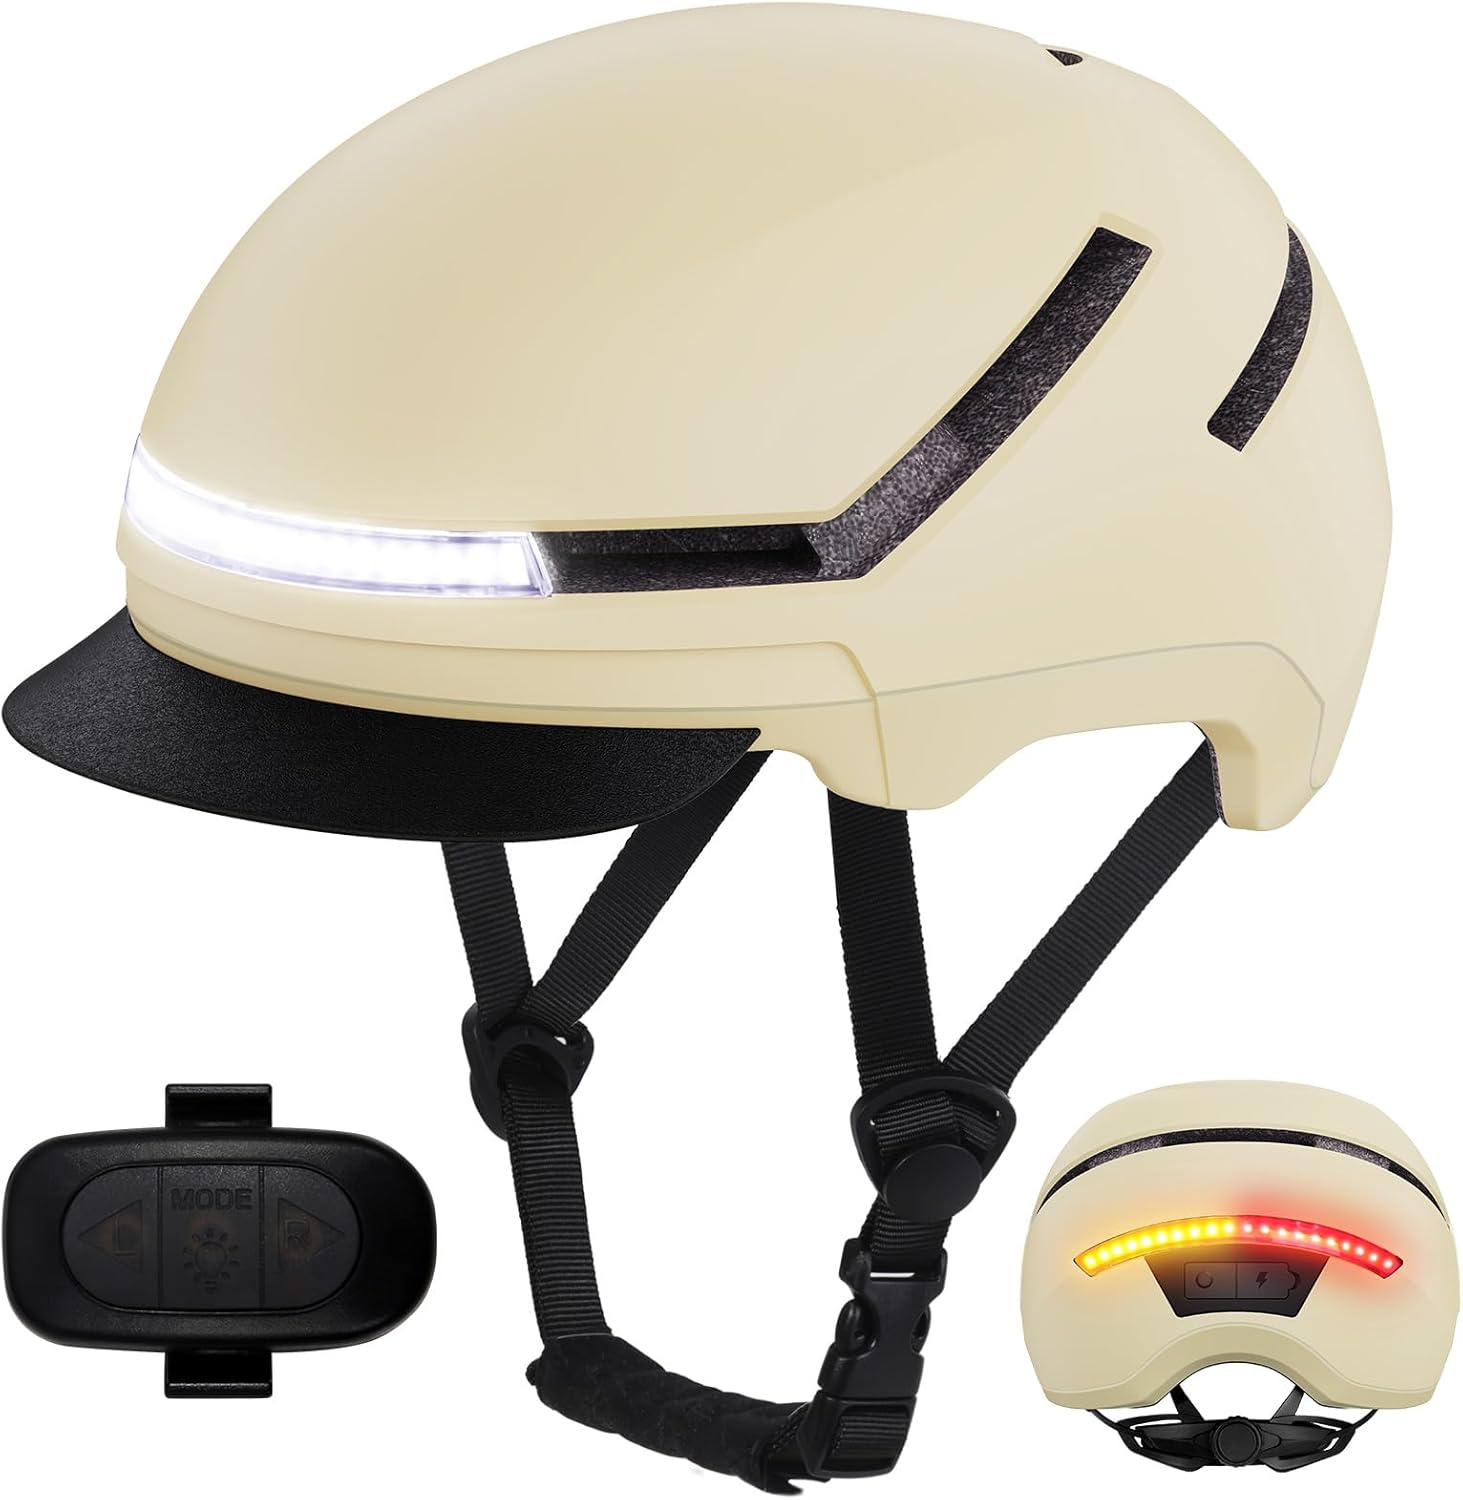
Image 1.1: Shinmax Bicycle Helmet, showcasing its beige color, front light, and rear light remote control.
2. Safety Information
Your safety is paramount. This helmet is engineered to meet stringent safety standards. Always wear your helmet correctly and ensure it is properly fitted before every ride.
2.1 Certifications
The Shinmax Bicycle Helmet complies with the following safety standards:
- CPSC (Consumer Product Safety Commission)
- NTA 8776 (Dutch Technical Agreement for Speed Pedelec Helmets)
- CE (Conformité Européenne)

Image 2.1: The helmet is certified by CPSC, NTA 8776, and CE standards, ensuring high levels of protection.
2.2 General Safety Guidelines
- Always ensure the helmet fits snugly and securely on your head.
- Do not modify the helmet in any way, as this may compromise its protective capabilities.
- Replace your helmet after any significant impact, even if visible damage is not apparent.
- The front LED light is for visibility, not for primary illumination in dark conditions.
3. Package Contents
Please check the box to ensure all items are present:
- Shinmax Bicycle Helmet
- Remote Control for Turn Signals
- USB Type-C Charging Cable
- Silicone Bands (for remote attachment)
- User Manual (this document)

Image 3.1: Contents of the Shinmax Bicycle Helmet package.
4. Product Features
The Shinmax Bicycle Helmet is equipped with advanced features for safety and comfort:
- Integrated Turn Signal Lights: Rear lights function as left and right turn signals, controlled by a wireless remote.
- Rechargeable Front & Rear Lights: Enhances visibility in low-light conditions. The rear light offers multiple modes.
- Detachable Visor: Provides protection from sun glare, wind, and rain, easily attachable and removable.
- Triple Certified Safety: Meets CPSC, NTA 8776, and CE safety standards with a durable PC shell and high-density EPS foam.
- Precision Fit System: Features a 360° dial fit retention system and adjustable straps for a customized and stable fit.
- Removable & Washable Liner: For easy cleaning and hygiene maintenance.
- Quick Release Buckle: For convenient and secure fastening.
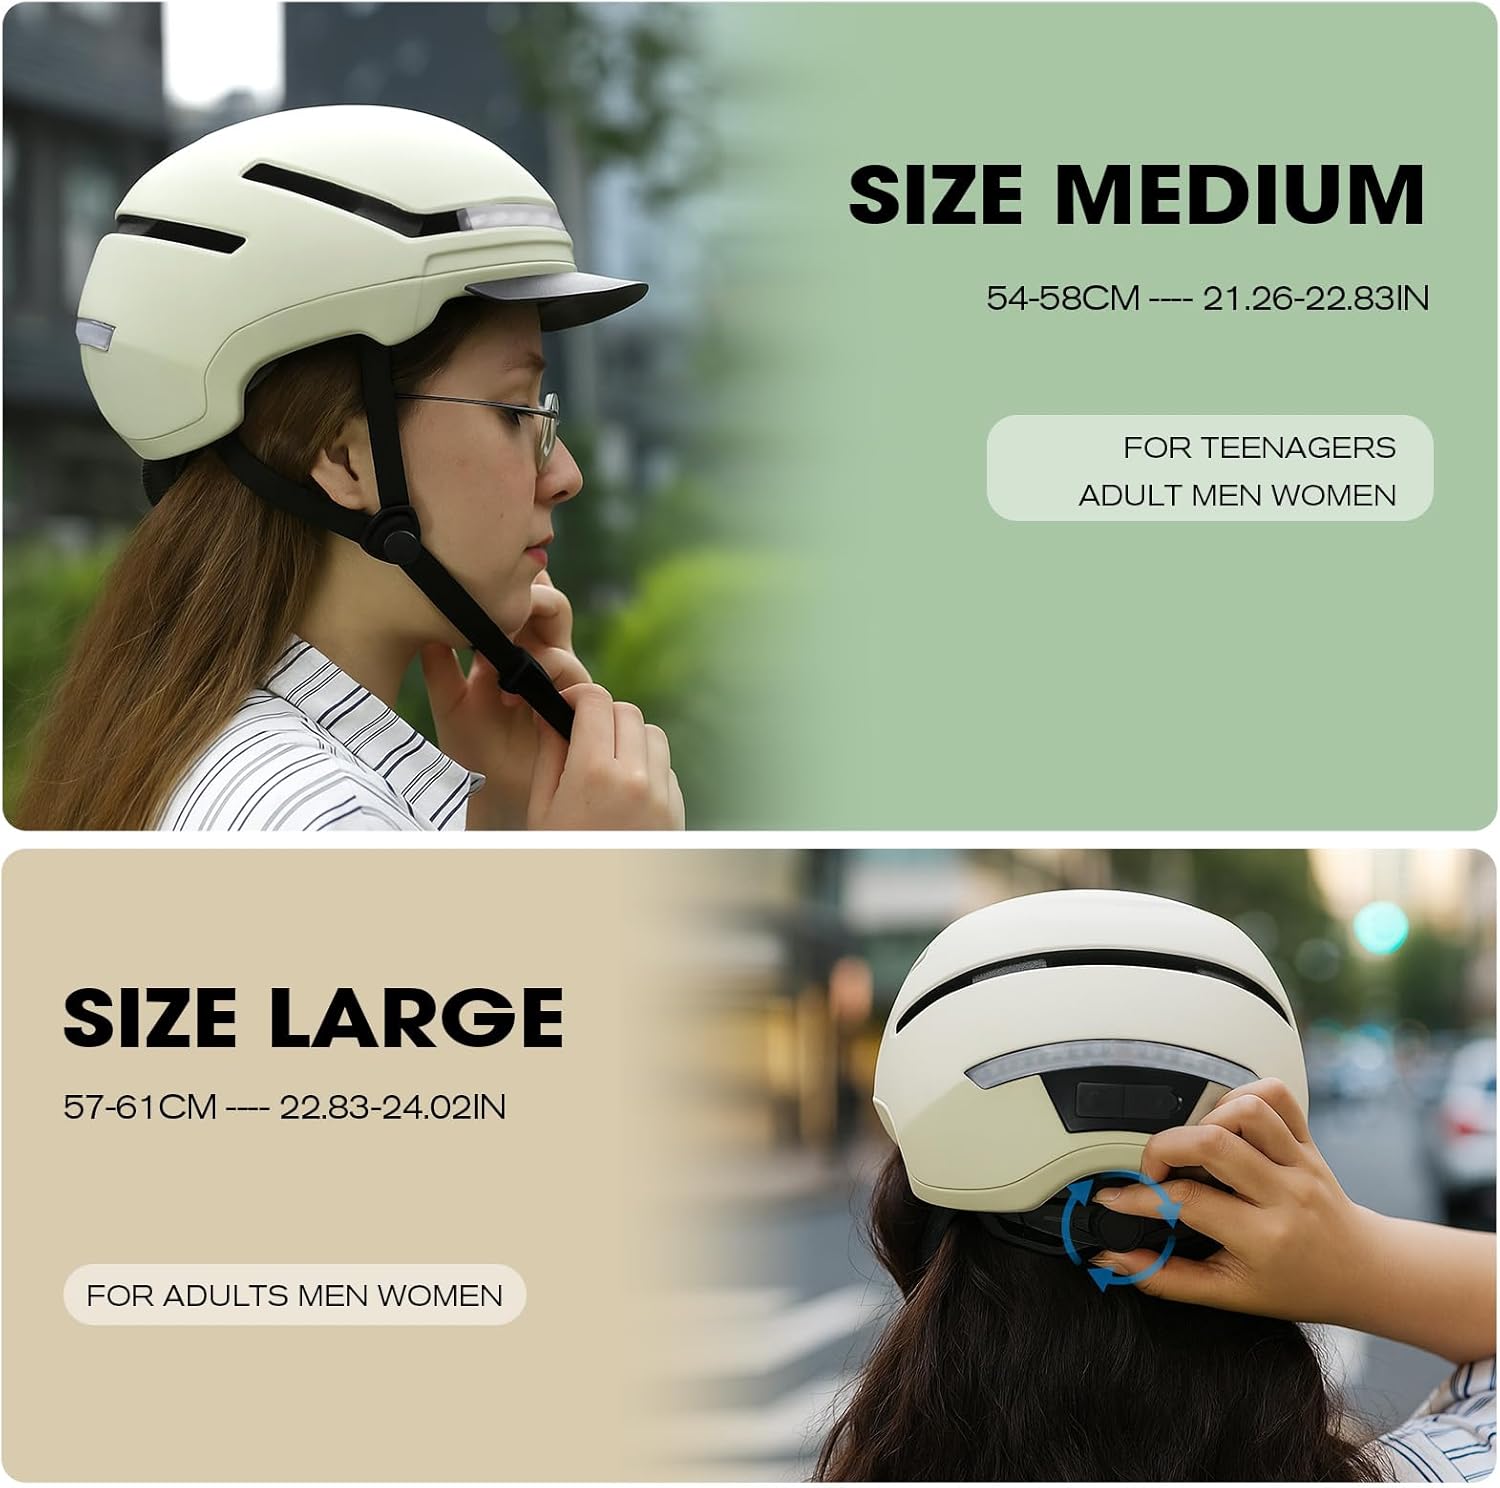
Image 4.1: Details of the helmet's internal features, including the quick-release buckle, adjustable dial, and impact-absorbing EPS foam.

Image 4.2: Close-up of the helmet's comfort and security features.
5. Setup
5.1 Charging the Helmet Lights
- Locate the Type-C charging port on the rear of the helmet, usually protected by a waterproof cover.
- Connect the provided USB Type-C cable to the helmet and a compatible USB power source (e.g., computer, wall adapter).
- The indicator light will show charging status (e.g., red for charging, green/off for full).
- A full charge typically takes approximately 2.5 hours.
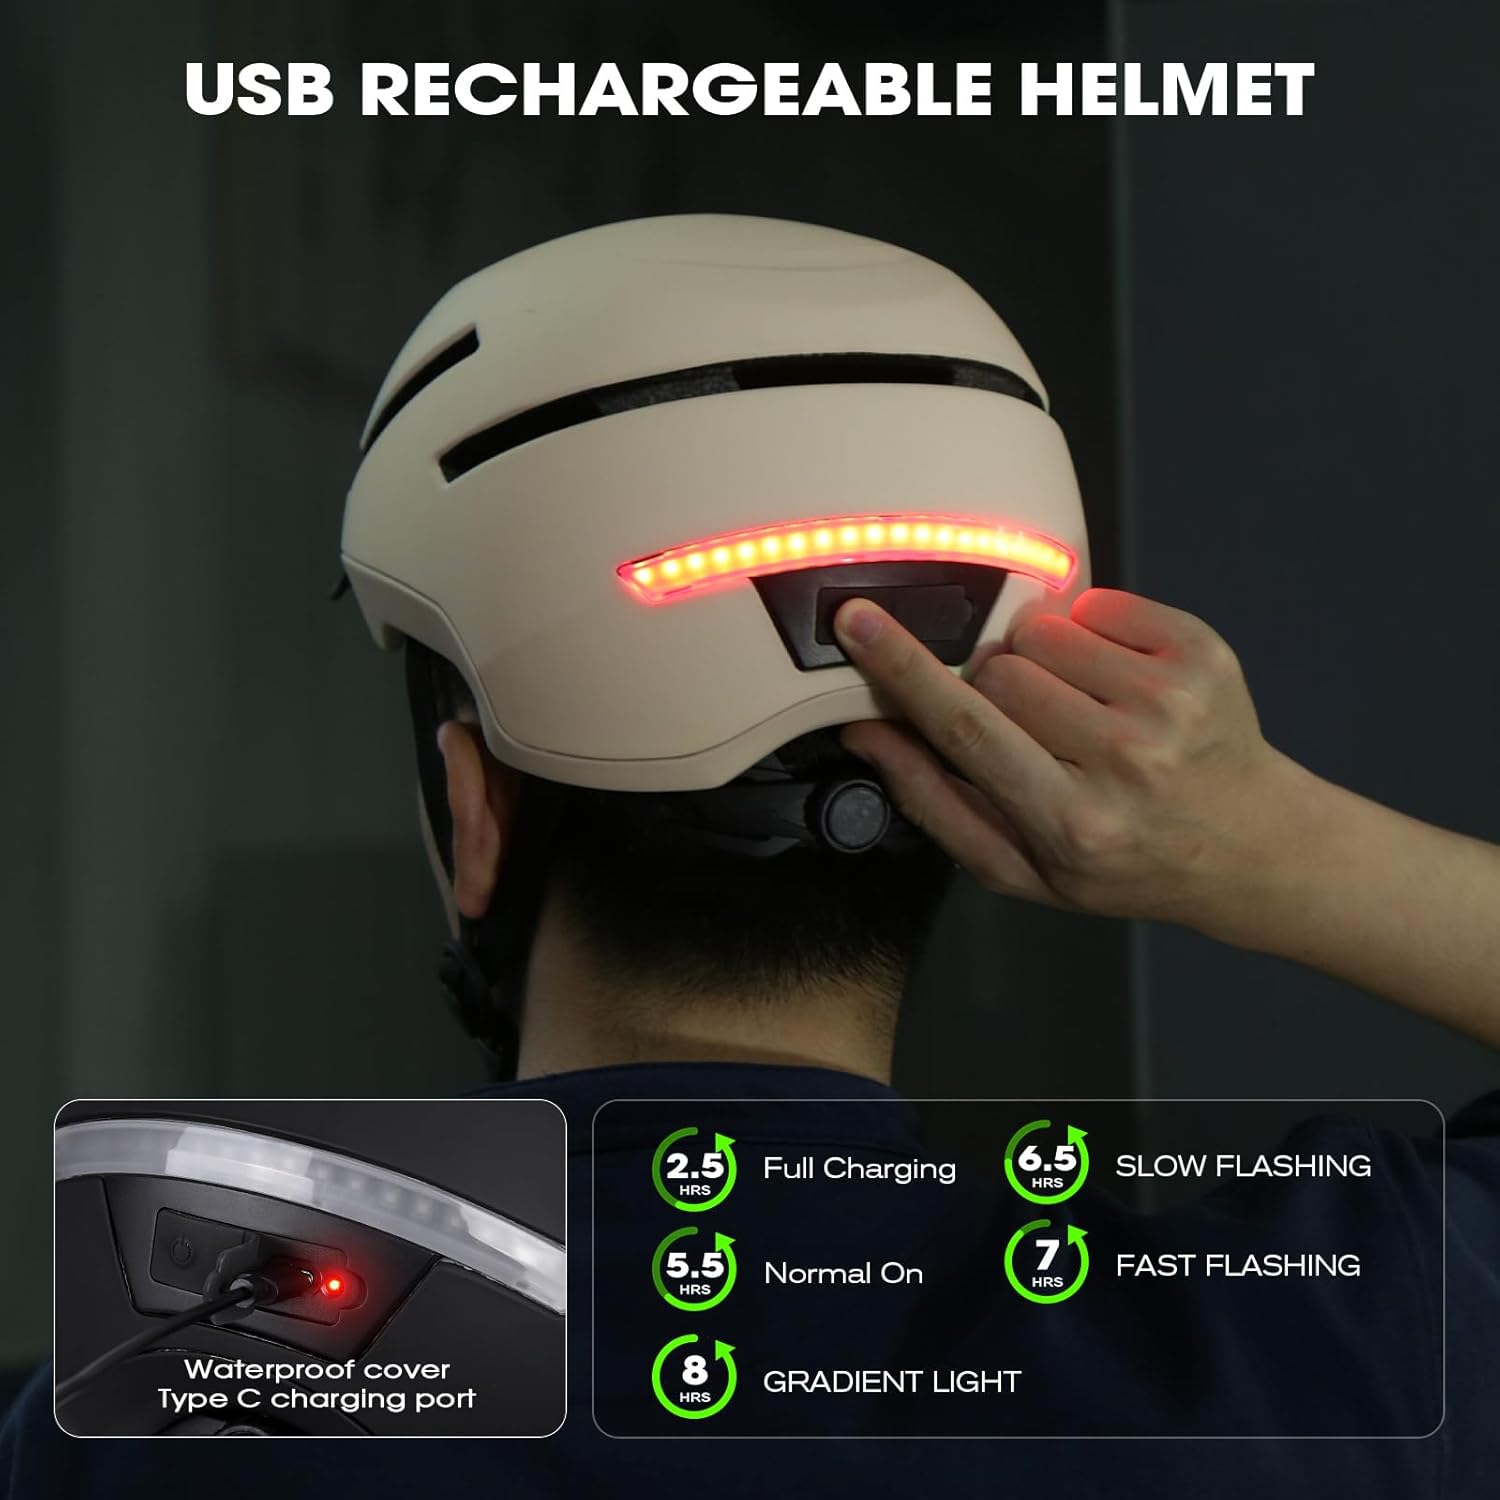
Image 5.1: The helmet features a USB Type-C charging port for convenient recharging of its integrated lights.

Image 5.2: Detailed view of the waterproof cover for the Type-C charging port.
5.2 Adjusting Helmet Fit
Proper fit is crucial for safety and comfort. The helmet is available in two sizes: Medium (54-58 cm) and Large (57-61 cm).
- Positioning: Place the helmet squarely on your head, ensuring it covers your forehead.
- Adjusting the Dial Retention System: Use the 360° dial at the back of the helmet to tighten or loosen the fit until it feels snug but comfortable. The dial can be pulled out to loosen and pushed in to secure.
- Adjusting Straps: Adjust the side straps so they form a 'V' shape just below your ears. The chin strap should be tightened so that only one or two fingers can fit between the strap and your chin.
- Buckle: Fasten the quick-release buckle securely.

Image 5.3: Sizing guide for the Shinmax Bicycle Helmet (Medium 54-58cm, Large 57-61cm).

Image 5.4: Instructions for using the adjustable dial retention system.
5.3 Attaching/Detaching the Visor
The visor can be easily attached or detached as needed:
- To Attach: Align the pegs on the visor with the corresponding holes on the helmet and gently push until they snap into place.
- To Detach: Gently pull the visor away from the helmet at the attachment points until it releases.

Image 5.5: The helmet's visor is easily detachable for user preference and cleaning.
6. Operating Instructions
6.1 Powering On/Off and Light Modes
The helmet features a power button on the rear for controlling the lights.
- Power On/Off: Press and hold the power button on the rear of the helmet for a few seconds to turn the lights on or off.
- Change Modes: Short press the power button to cycle through the available rear light modes: Steady light, Gradient light, Slow flash light, Fast flash light. The front light is steady when on.
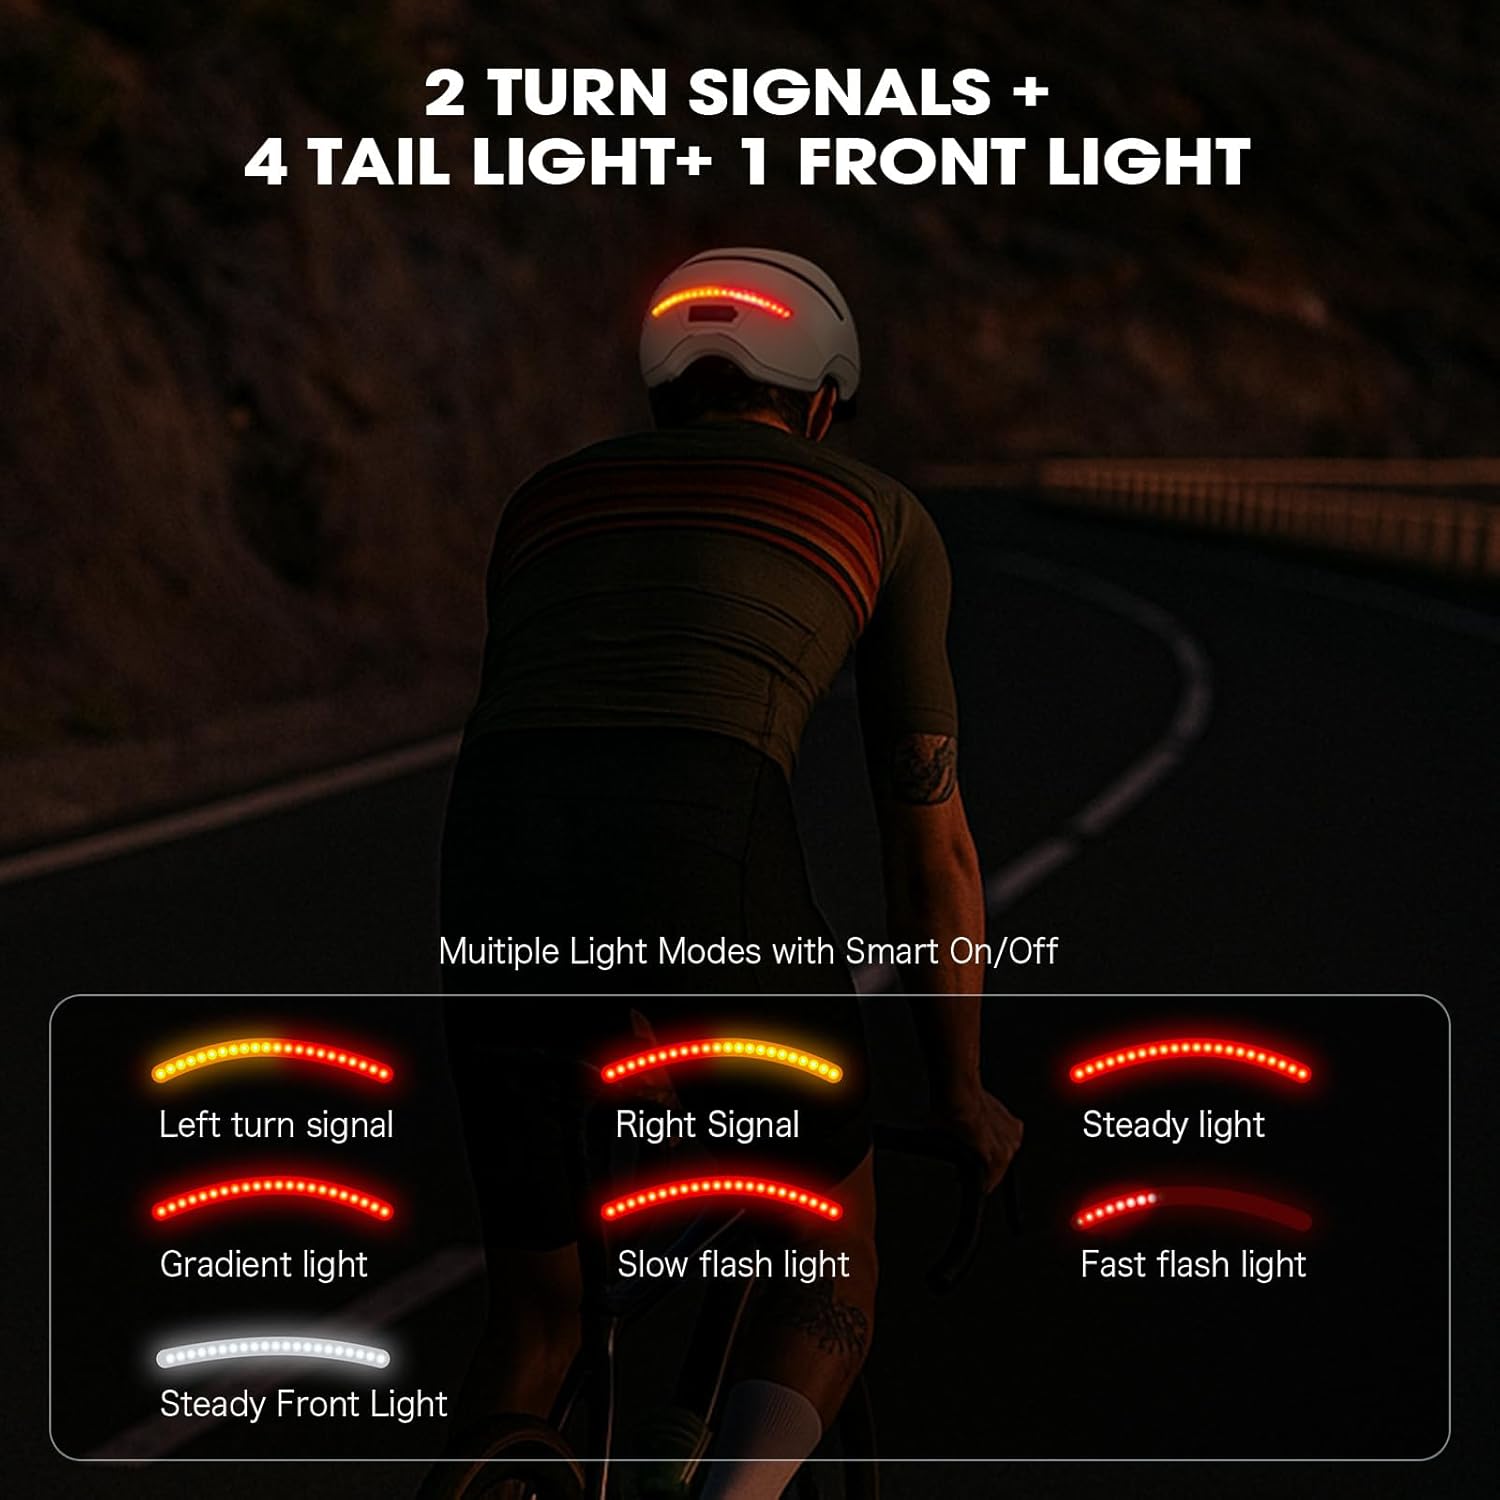
Image 6.1: Overview of the helmet's multiple light modes for enhanced visibility.
6.2 Using the Turn Signal Remote Control
The wireless remote allows for easy activation of the turn signals.
- Attach Remote: Use the provided silicone bands to securely attach the remote control to your bicycle's handlebar in an easily accessible position.
- Activate Turn Signal: Press the left arrow button on the remote for a left turn signal, or the right arrow button for a right turn signal. The corresponding rear lights will flash, accompanied by an audible 'didi' sound.
- Deactivate Turn Signal: The turn signal will automatically turn off after a short period, or you can press the active turn signal button again to cancel it manually.
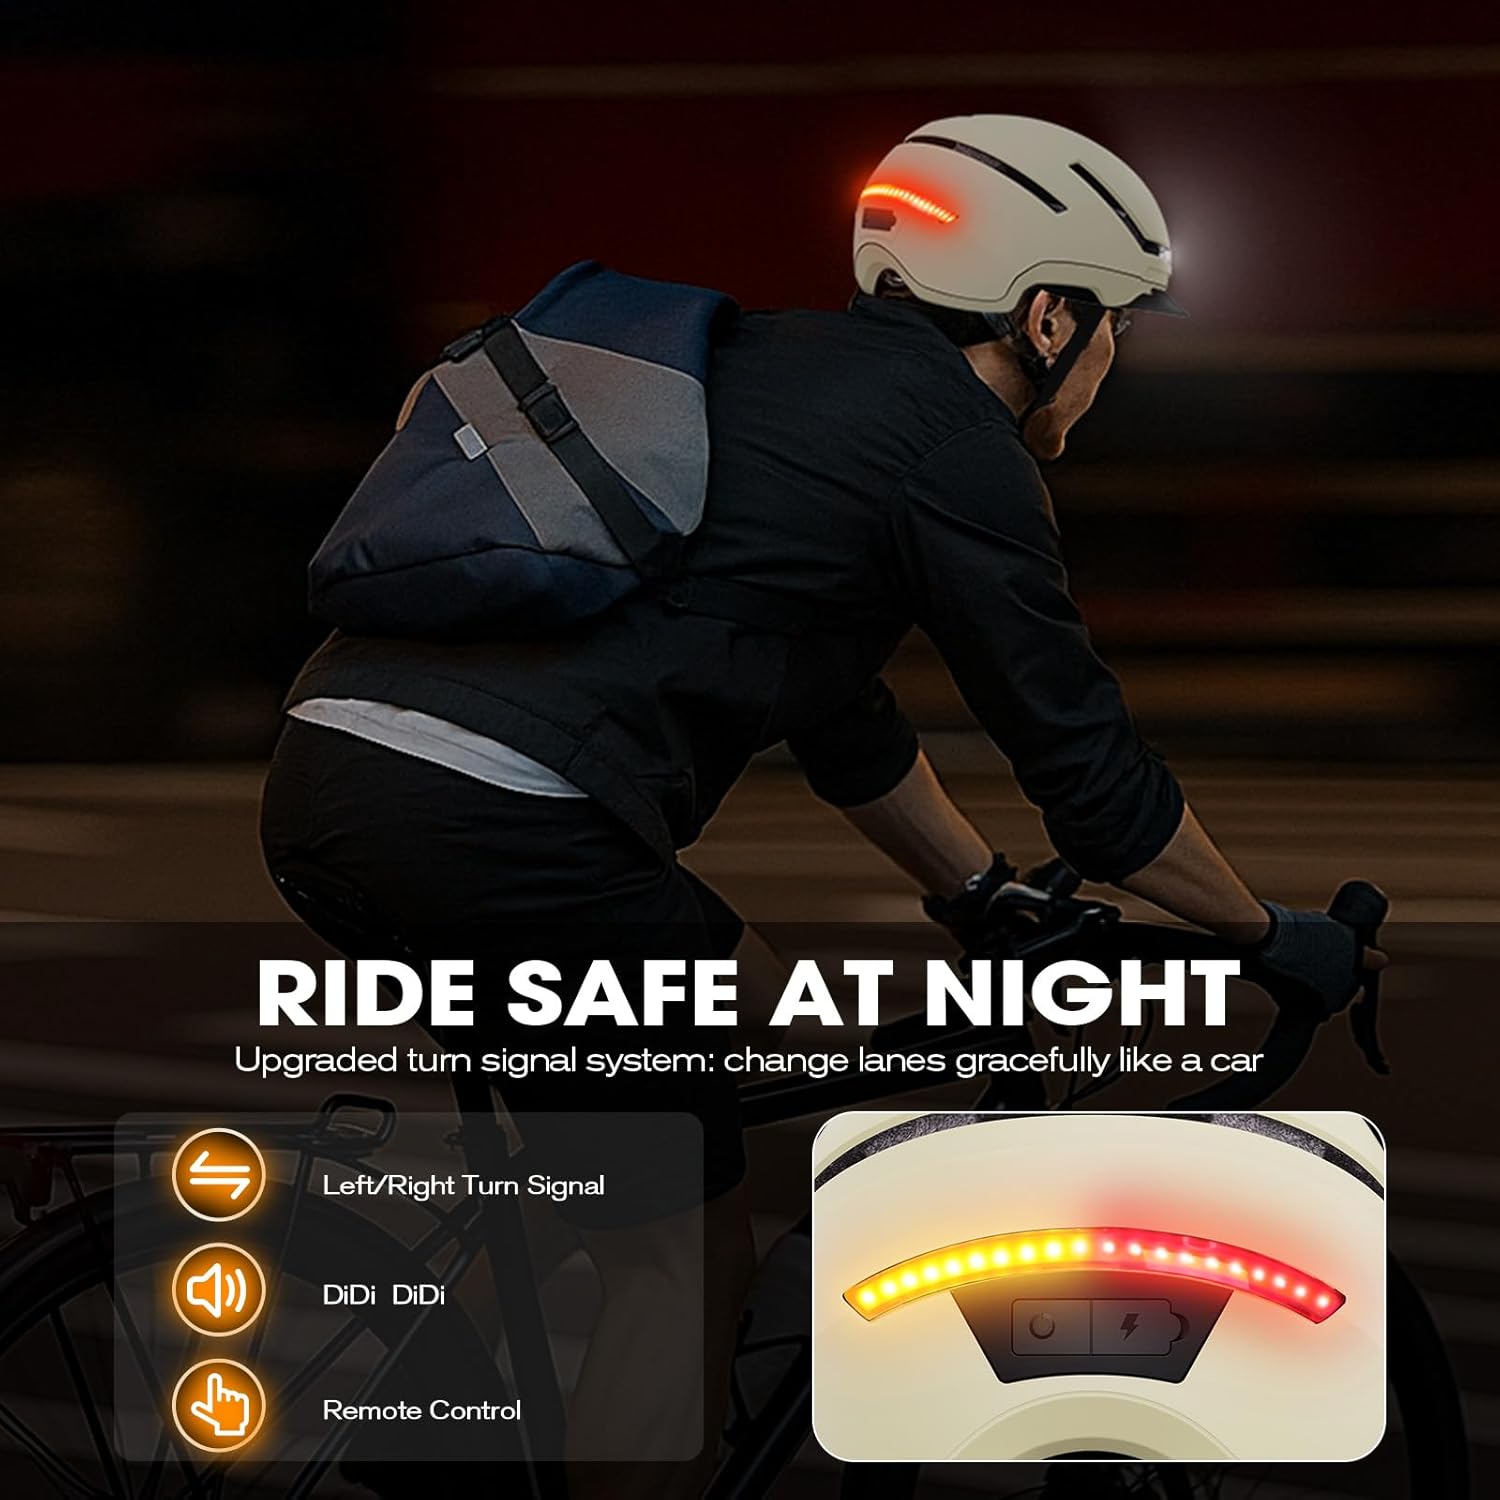
Image 6.2: The helmet's upgraded turn signal system, controlled by a remote for easy lane changes.

Image 6.3: Easy operation of the turn signals using the handlebar-mounted remote control.
7. Maintenance
7.1 Cleaning the Helmet
- Outer Shell: Wipe the exterior of the helmet with a soft, damp cloth and mild soap. Avoid harsh chemicals or abrasive materials.
- Inner Liner: The inner liner is removable and machine-washable. Detach it from the helmet, wash according to fabric care instructions, and allow it to air dry completely before reattaching.
- Visor: Clean the visor with a soft cloth and water.
7.2 Battery Care
- Recharge the helmet lights regularly, even if not frequently used, to maintain battery health.
- Avoid fully depleting the battery before recharging.
- Store the helmet in a cool, dry place away from direct sunlight and extreme temperatures.
8. Troubleshooting
| Problem | Possible Cause | Solution |
|---|---|---|
| Helmet lights not turning on. | Battery is depleted. | Charge the helmet fully using the provided USB cable. |
| Turn signals not working. | Remote control battery low or not paired. | Check remote control battery. Ensure remote is within range and properly paired (refer to remote's specific instructions if available). |
| Helmet feels loose or uncomfortable. | Improper fit adjustment. | Adjust the dial retention system and straps for a snug, comfortable fit (refer to Section 5.2). |
| Audible 'didi' sound not heard with turn signals. | Sound feature deactivated or malfunction. | Ensure the sound feature is enabled (if applicable). If issue persists, contact customer support. |
9. Specifications
| Attribute | Detail |
|---|---|
| Model Name | GH-37 |
| Brand | Shinmax |
| Outer Material | Polycarbonate (PC) |
| Inner Material | Foam, Polyester |
| Sizes Available | Medium (54-58 cm), Large (57-61 cm) |
| Item Weight | 356 Grams |
| Special Features | Lightweight, Rear Light, Turn Signal Light, Ventilation, Visor |
| Certifications | CPSC, NTA 8776, CE |
| Recommended Use | Cycling (Commuting, MTB, Scooter, E-bike, City, Road) |
10. Warranty and Support
For warranty information, technical support, or any inquiries regarding your Shinmax Bicycle Helmet, please contact Shinmax customer service through the retailer where the product was purchased or visit the official Shinmax website. Keep your purchase receipt as proof of purchase.
Shinmax Store: Visit the Shinmax Store on Amazon