
1. Product Overview
This document provides instructions for the AMECA Refrigerator Ice Maker Control Board, a replacement component designed for specific refrigerator models. This board acts as a combination switch, emitting a beam of light that enables the icemaker to turn on and off. It is specifically designed for refrigerators where ice cubes are dispensed directly into an ice bin located in the freezer door.
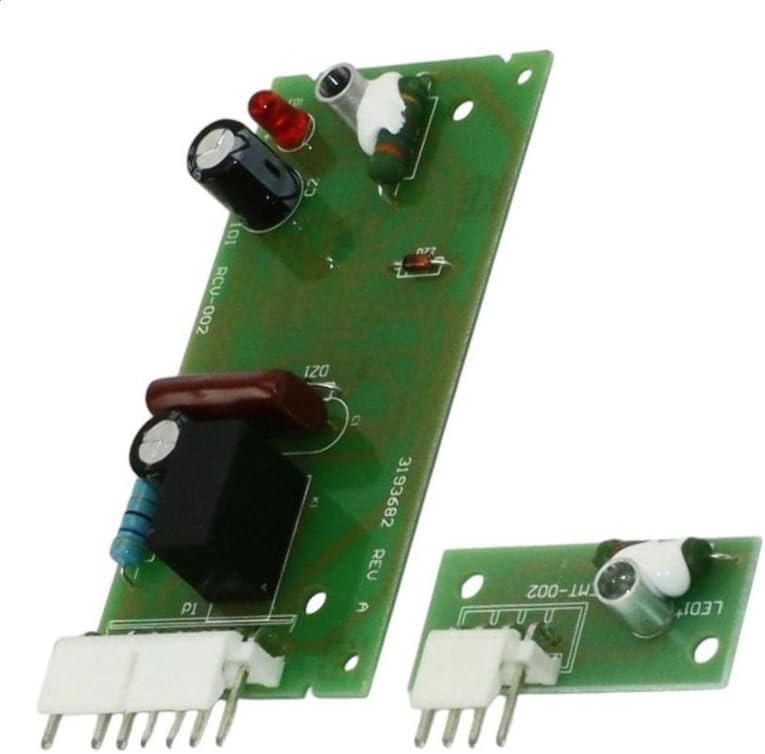
Image: The AMECA Refrigerator Ice Maker Control Board. This image displays the main AMECA Refrigerator Ice Maker Control Board, a green circuit board with various electronic components including capacitors, resistors, and connectors. Alongside it is a smaller, separate green circuit board, which appears to be a sensor or light emitter, also with its own connector. Both boards are designed to work together in a refrigerator's ice maker system.
2. Safety Information
Before attempting any installation or repair, always prioritize safety. Failure to follow these instructions could result in electric shock, fire, or personal injury.
- Disconnect Power: Always unplug the refrigerator from the power outlet before beginning any work.
- Wear Protective Gear: Use appropriate personal protective equipment, such as gloves, to prevent injury.
- Handle with Care: Electronic components can be sensitive to static electricity. Avoid touching circuit board components directly.
- Professional Assistance: If you are unsure about any step, consult a qualified appliance repair technician.
3. Installation Guide
This section outlines the general steps for replacing the refrigerator ice maker control board. Specific procedures may vary by refrigerator model. Refer to your appliance's service manual for detailed instructions.
Required Tools:
- Screwdriver (Phillips or flathead, depending on fasteners)
- Needle-nose pliers (optional, for stubborn connectors)
Installation Steps:
- Disconnect Power: Unplug the refrigerator from the wall outlet.
- Access the Icemaker: Locate the icemaker assembly within the freezer compartment. This may require removing shelves or the ice bin.
- Locate the Control Board: Identify the existing ice maker control board. It is typically mounted near the icemaker mechanism.
- Disconnect Wiring: Carefully disconnect all wiring harnesses connected to the old control board. Note the orientation and connection points, or take a photograph for reference.
- Remove Old Board: Unscrew or unclip the old control board from its mounting bracket.
- Install New Board: Position the new AMECA control board in the same location and secure it with the original screws or clips.
- Reconnect Wiring: Connect all wiring harnesses to the new board, ensuring they are firmly seated in the correct ports. Double-check all connections.
- Reassemble: Reinstall any removed shelves or the ice bin.
- Restore Power: Plug the refrigerator back into the power outlet.
- Test Operation: Allow time for the refrigerator to cool and the icemaker to cycle. Verify that the icemaker is producing ice.
4. Operation
Once correctly installed, the AMECA Refrigerator Ice Maker Control Board operates automatically as part of your refrigerator's ice production system. Its primary function is to control the icemaker's cycles by emitting a light beam, signaling when to turn on and off. The icemaker will then proceed to fill with water, freeze it into ice, and then eject the ice into the ice bin.
Ensure the ice bin is properly seated and the icemaker's bail arm (if present) is in the down position to allow for ice production.
5. Compatibility
This control board is designed for specific WP manufactured refrigerator models, including those from Amana, J-Air, Kenmore, Maytag (M Chef), and Whirlpool (MTag). It replaces numerous part numbers, ensuring broad compatibility.
Compatible Refrigerator Models (Examples):
- 106.51252102
- 106.51252104
- 106.51254102
- 106.51254104
Replaces Part Numbers:
- 2198585, 2198586, 2220398, 2220402, 2255114
- 4388635, 4389102, 4389102R
- AP5956767, AP3137510
- PS557945, PS10064583
- TJ4389102R
- W10193666, W10193840, W10290817, W10757851
If you have questions regarding compatibility with your specific refrigerator model or part number, please refer to the Support Information section.
6. Product Specifications
| Manufacturer | AMECA |
| Part Number | 589 |
| ASIN | B0F1LJ39BF |
| First Available | March 16, 2025 |
| Item Type | Refrigerator Ice Maker Control Board (Combination Switch) |
7. Troubleshooting
If your icemaker is not functioning correctly after installing the new control board, consider the following common issues:
- No Ice Production:
- Ensure the refrigerator is plugged in and receiving power.
- Verify all wiring connections to the control board are secure and correctly seated.
- Check if the water supply line to the refrigerator is connected and the water valve is open.
- Confirm the freezer temperature is set correctly (typically 0°F / -18°C).
- Ensure the icemaker's bail arm is in the down position.
- Partial Ice Production or Small Cubes:
- Check water pressure to the refrigerator.
- Inspect the water filter for clogging; replace if necessary.
- Unusual Noises:
- Ensure the icemaker assembly is securely mounted and not vibrating against other components.
If troubleshooting steps do not resolve the issue, it is recommended to contact customer support or a qualified technician.
8. Care and Maintenance
The AMECA Refrigerator Ice Maker Control Board is designed for durability and requires minimal maintenance once installed. To ensure its longevity and proper function:
- Keep Dry: Ensure the area around the icemaker and control board remains dry to prevent moisture damage to electronic components.
- Avoid Physical Damage: Handle the board with care during installation and avoid dropping or bending it.
- Regular Cleaning: When cleaning the freezer interior, ensure no cleaning solutions or water come into direct contact with the control board.
9. Support Information
For any questions regarding compatible models, part numbers, installation, or troubleshooting that is not covered in this manual, please contact the manufacturer or seller.
While specific warranty details are not provided in this document, it is advisable to retain your purchase receipt for any potential warranty claims. For warranty-related inquiries, please reach out to the point of purchase or the AMECA customer service.