1. Introduction
This manual provides detailed instructions for the safe and effective use of your IKOVWUK F-660K Compact Tripod. Designed for use with laser levels, laser distance tapes, and other compatible tools, this tripod offers adjustable height, multi-angle positioning, and robust stability. Please read this manual thoroughly before operating the device.
1.1 Package Contents
- IKOVWUK F-660K Compact Tripod
- Storage Bag
- 1/4" Quick Release Plate (pre-installed)
- 5/8" Adapter

Figure 1.1: IKOVWUK F-660K Compact Tripod, showing its overall structure.
2. Product Components
Familiarize yourself with the key components of your IKOVWUK F-660K tripod:
- Tripod Head: Features a 3-way pan head for precise angle adjustments.
- Quick Release Plate: Allows for fast attachment and detachment of devices. Includes a standard 1/4" thread.
- Center Column: Extends vertically for additional height adjustment, controlled by a locking knob.
- Legs: Three-section aluminum legs with flip locks for height adjustment.
- Flip Locks: Securely lock the leg sections at desired heights.
- Bubble Level: Integrated into the tripod head to ensure a level setup.
- Non-slip Rubber Feet: Provide stability on various surfaces.
- Weight Gain Hook: Located at the bottom of the center column for adding stability by hanging weight.

Figure 2.1: Key stability and leveling features including the built-in bubble level, non-slip rubber feet, and the weight gain hook.
3. Setup
Follow these steps to set up your IKOVWUK F-660K Compact Tripod:
3.1 Extending the Tripod Legs
- Place the tripod on a flat, stable surface.
- Release the flip locks on each leg section.
- Extend the legs to the desired height. The tripod can extend from 18.5 inches to 59.8 inches.
- Securely close all flip locks to ensure stability.
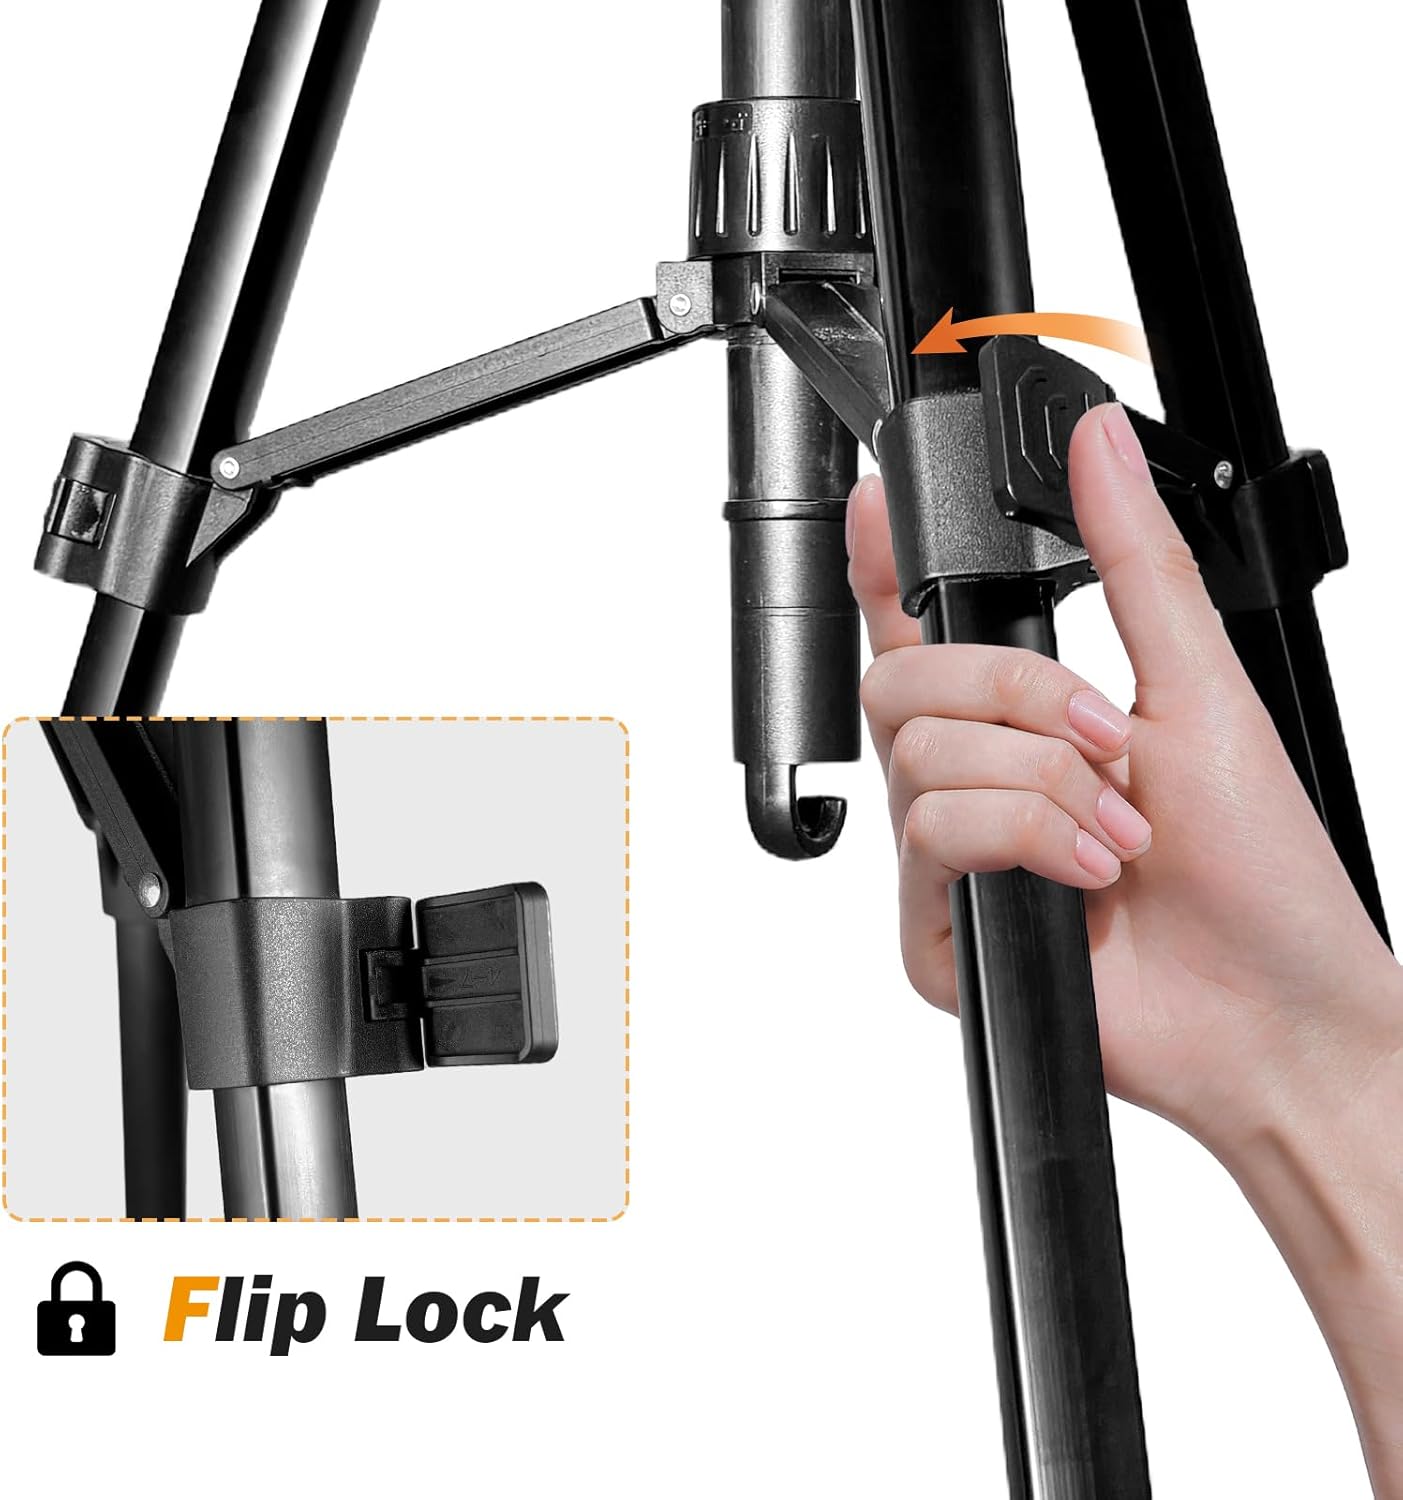
Figure 3.1: Detail of the flip lock mechanism on the tripod legs for height adjustment.
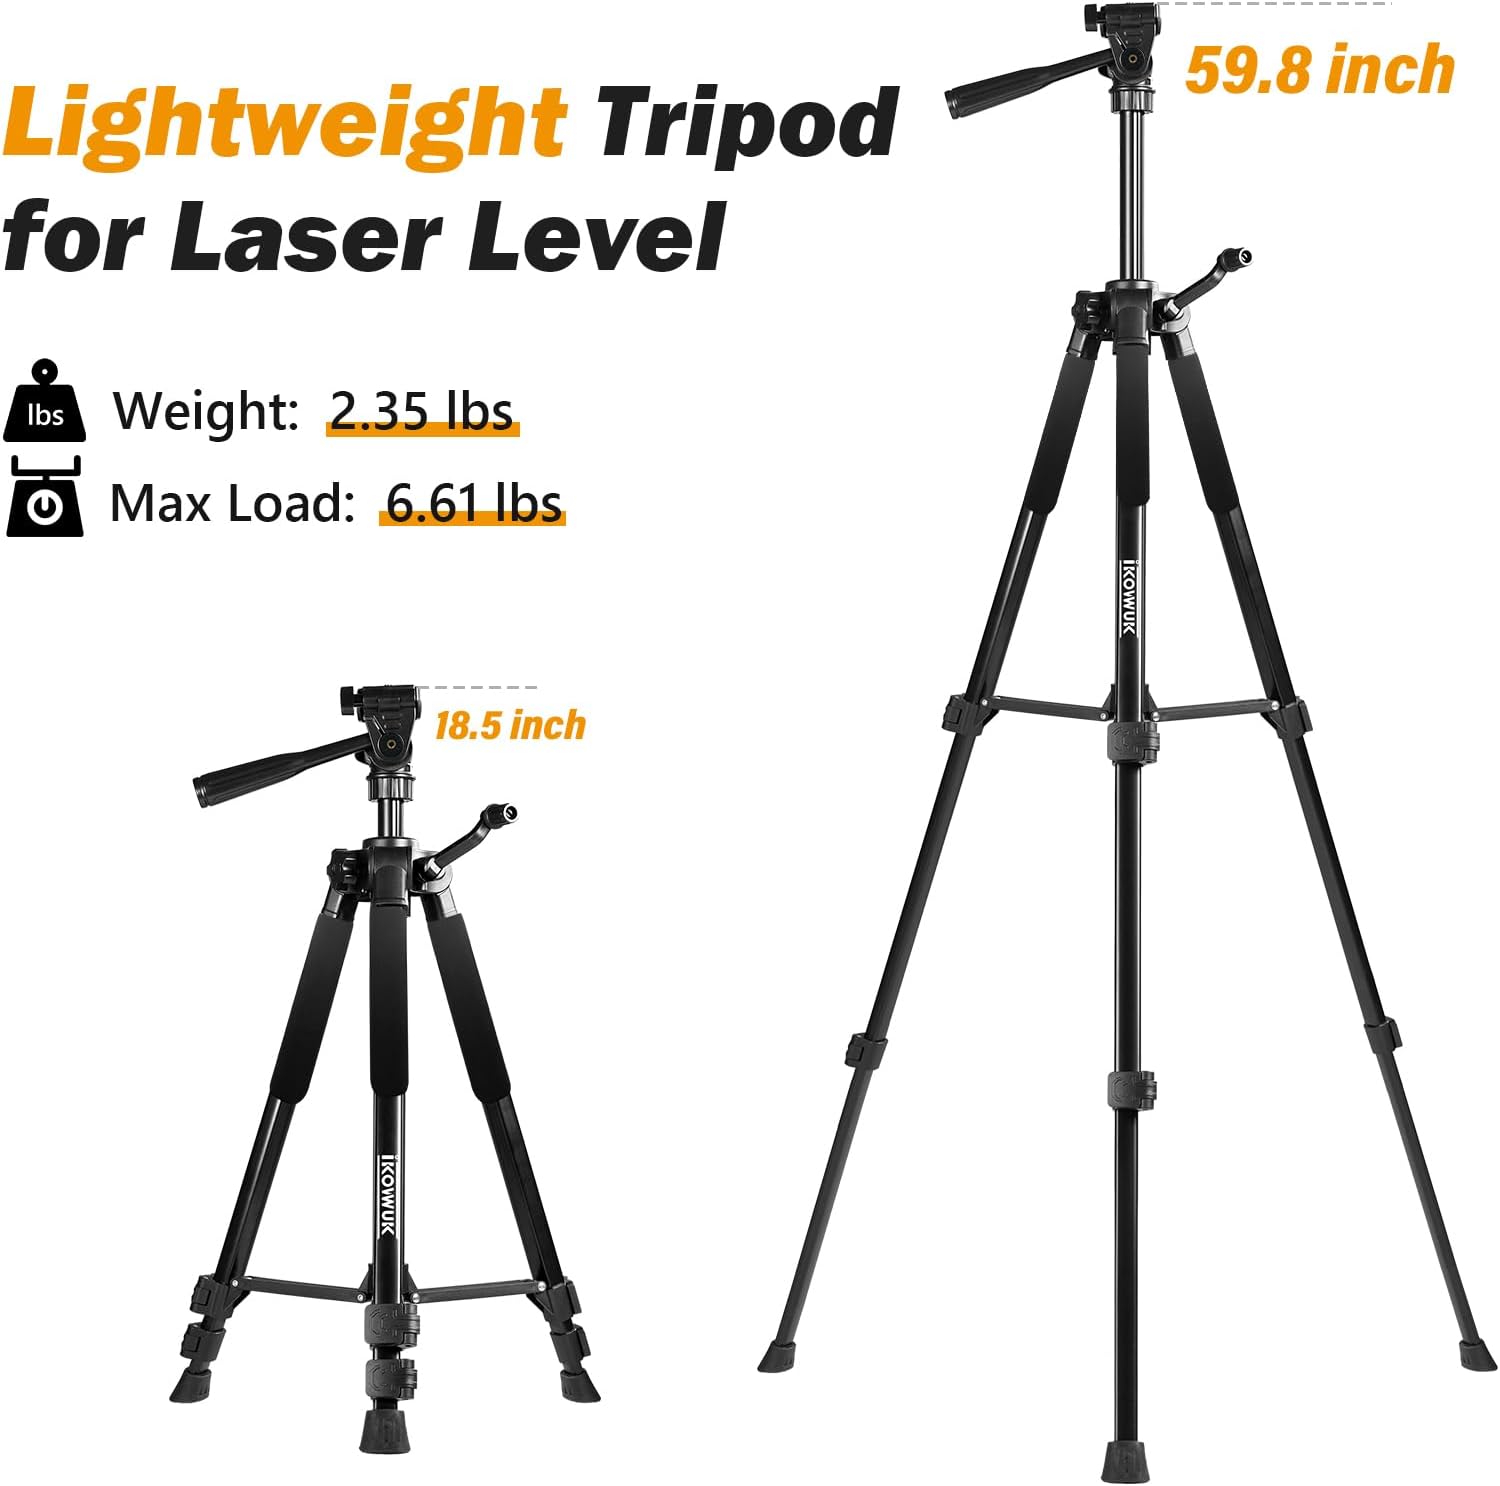
Figure 3.2: The tripod's adjustable height range from 18.5 inches (collapsed) to 59.8 inches (fully extended).
3.2 Attaching Your Device
- Locate the quick release plate on the tripod head.
- Press the release lever to detach the quick release plate from the tripod head.
- Screw your laser level or other compatible device onto the 1/4" male thread on the quick release plate. If your device requires a 5/8" mounting thread, use the included 5/8" adapter.
- Slide the quick release plate with your device back into the tripod head until it clicks securely into place.

Figure 3.3: Detaching the quick release plate with its 1/4" female thread for device attachment.

Figure 3.4: Example of a laser level quickly installed onto the tripod using the 1/4" female thread.
4. Operating Instructions
4.1 Adjusting Height with Center Column
To fine-tune the height, use the center column:
- Loosen the center column locking knob.
- Rotate the crank handle to raise or lower the center column to the desired height.
- Tighten the center column locking knob to secure the position.

Figure 4.1: Adjusting the center column height using the locking knob and crank.
4.2 Adjusting Angles with 3-Way Pan Head
The 3-way pan head allows for versatile positioning:
- 360° Horizontal Adjustment: Loosen the horizontal pan lock to rotate the head freely for panoramic views or precise alignment.
- 130° Front and Rear Adjustment: Use the tilt handle to adjust the device's vertical angle (up and down).
- 90° Left and Right Adjustment: Tilt the head sideways for portrait orientation or specific angular requirements.

Figure 4.2: Illustrates the multi-directional adjustments of the 3-way pan head.
4.3 Using the Bubble Level
The built-in bubble level ensures your setup is perfectly horizontal for accurate measurements. Adjust the tripod legs and head until the bubble is centered within the indicator.
4.4 Enhancing Stability with Weight Gain Hook
For increased stability, especially in windy conditions or with heavier devices, hang a weight (e.g., a sandbag or backpack) from the hook located at the bottom of the center column.
5. Maintenance
Proper care will extend the life of your tripod:
- Cleaning: Wipe down the tripod with a soft, dry cloth after each use. If necessary, use a slightly damp cloth to remove dirt, then dry thoroughly. Avoid harsh chemicals or abrasive cleaners.
- Storage: Collapse the tripod fully and store it in the provided storage bag when not in use. Store in a cool, dry place away from direct sunlight and extreme temperatures.
- Inspection: Periodically check all screws, locks, and moving parts for tightness and smooth operation. Do not force any parts.

Figure 5.1: The included storage bag for convenient transport and protection.
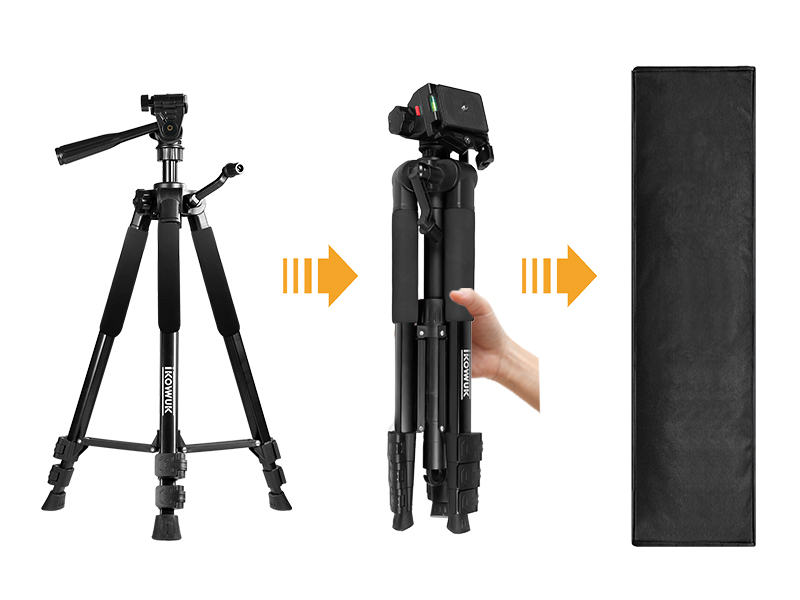
Figure 5.2: Steps for collapsing the tripod for storage or transport.
6. Troubleshooting
If you encounter issues with your tripod, refer to the following common problems and solutions:
| Problem | Possible Cause | Solution |
|---|---|---|
| Tripod is unstable or wobbly. | Legs not fully extended or locked; uneven surface; excessive load. | Ensure all flip locks are securely closed. Adjust legs to compensate for uneven ground. Reduce load if exceeding maximum capacity. Use the weight gain hook. |
| Device not securely attached. | Quick release plate not fully engaged; device not screwed on tightly. | Ensure the quick release plate clicks into place. Tighten the device onto the 1/4" thread. |
| Head adjustments are stiff or loose. | Locking knobs/handles are too tight or too loose. | Adjust the tension of the respective locking knobs/handles. Do not overtighten. |
7. Specifications
| Feature | Specification |
|---|---|
| Model Name | Tripod-F-660K |
| Material | Aluminum |
| Adjustable Height Range | 18.5 inches to 59.8 inches |
| Item Weight | 2.87 pounds |
| Maximum Load-Bearing Capacity | 6.61 lbs (approx.) |
| Head Type | 3-Way Pan Head |
| Mounting Threads | 1/4"-20 (standard), 5/8" (with adapter) |
| Collapsed Dimensions | 18.5 inches (length) |
8. Warranty and Support
IKOVWUK products are manufactured to high-quality standards. For any questions, technical support, or warranty inquiries, please contact IKOVWUK customer service through the official channels or visit the IKOVWUK Store on Amazon.


