Introduction
Thank you for choosing the Allsmartlife Flush Mount Ceiling Fan. This manual provides detailed instructions to ensure safe and efficient operation of your new ceiling fan. Please read all instructions carefully before beginning installation and retain this manual for future reference.
Safety Information
To reduce the risk of electrical shock, fire, or personal injury, always follow these basic safety precautions:
- Always turn off power at the main circuit breaker before installation or servicing.
- Ensure all electrical connections comply with local codes and ordinances.
- Mount the fan only to an outlet box marked 'Acceptable for Fan Support of 35 lbs (15.9 kg) or less'.
- Do not bend the blade holders during installation or cleaning.
- Keep hands, clothing, and other objects clear of the fan blades when the fan is operating.
- This fan is designed for both indoor and outdoor use, but avoid direct exposure to rain and ensure ambient humidity does not exceed 70% for outdoor installations.
Package Contents
Verify that all components are present and undamaged before proceeding with installation. The package includes:
- Ceiling Fan Motor Assembly
- Fan Blades (5 pieces)
- Blade Holders
- LED Light Kit
- Remote Control with Wall Mount Bracket
- Hardware Pack (screws, wire nuts, etc.)
- Instruction Manual
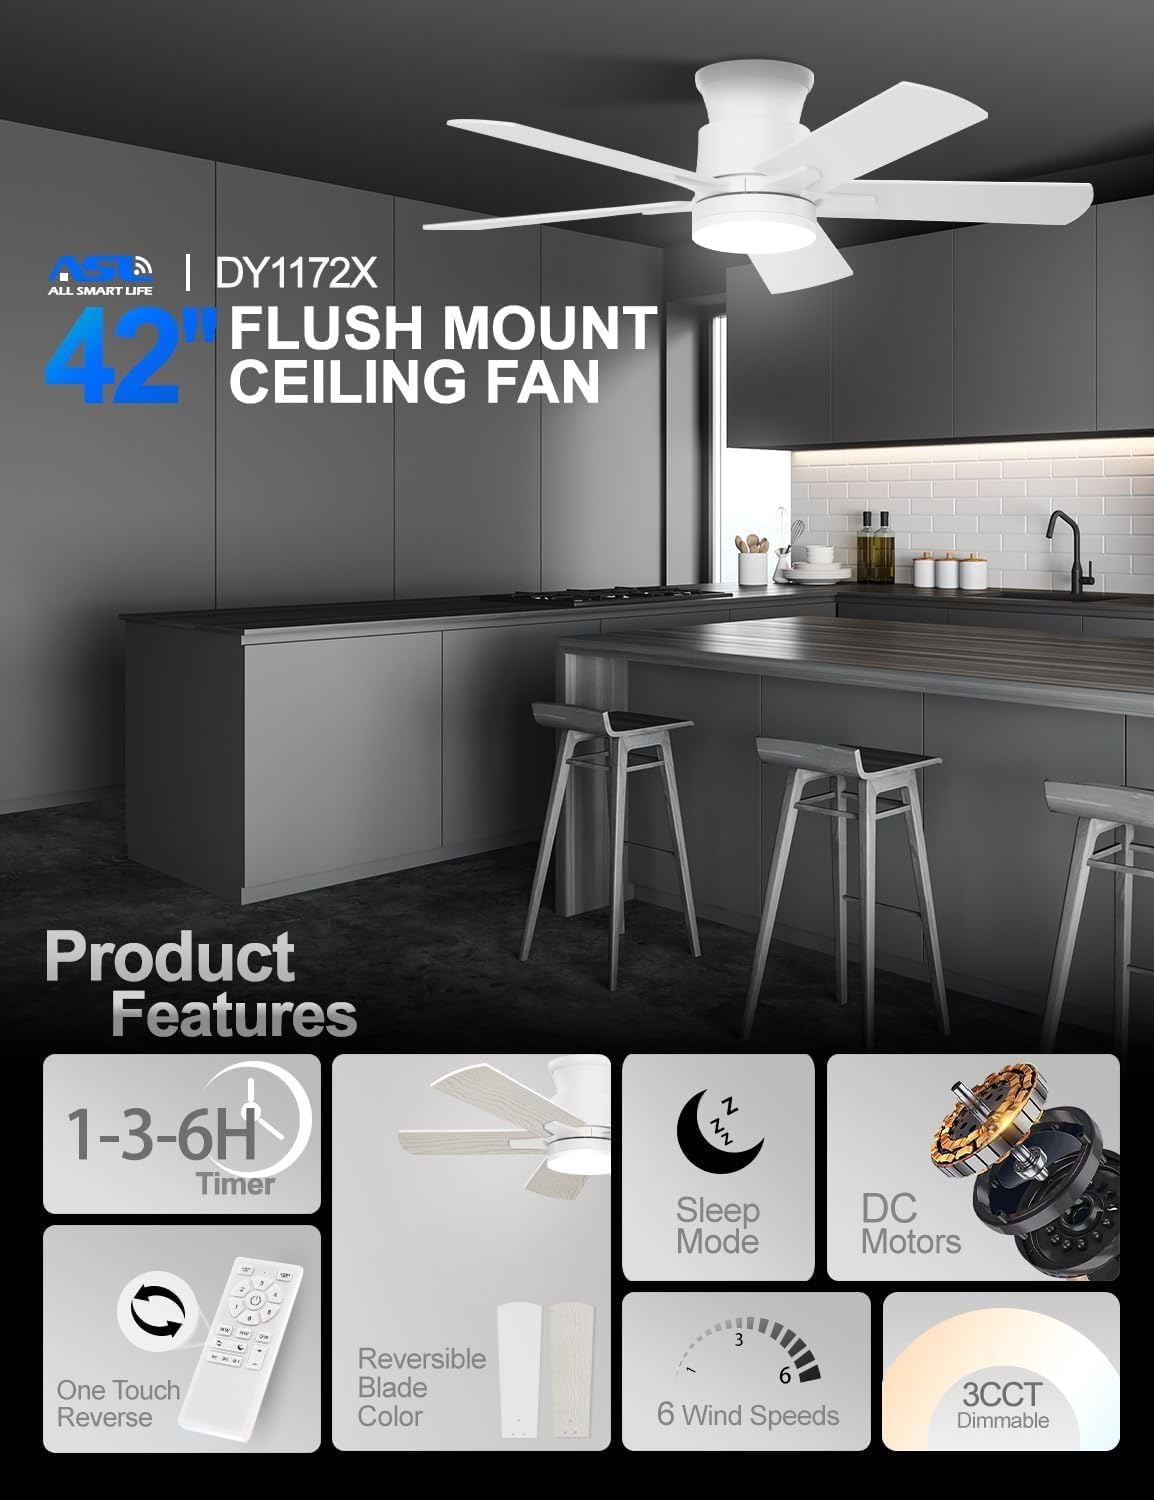
Image: Overview of the Allsmartlife ceiling fan's key features and main components, including the remote control and reversible blades.
Video: A detailed look at the unboxing and assembly process, showing all included parts and how they fit together. This video also demonstrates the fan's quiet operation and lighting features.
Installation Guide
Follow these steps for proper installation. It is recommended to have two people for installation.
- Preparation: Turn off power at the circuit breaker. Ensure the mounting surface is structurally sound and capable of supporting the fan's weight.
- Mounting Bracket Installation: Secure the mounting bracket to the ceiling outlet box using the provided screws.
- Wiring: Connect the fan's electrical wires to the household wiring according to the wiring diagram in the instruction manual. Use the provided wire nuts.
- Fan Assembly: Attach the fan blades to the motor housing using the blade holders and screws.
- Light Kit Installation: Connect and secure the LED light kit to the bottom of the fan motor assembly.
- Final Assembly: Carefully lift the fan assembly and attach it to the mounting bracket. Secure all screws.
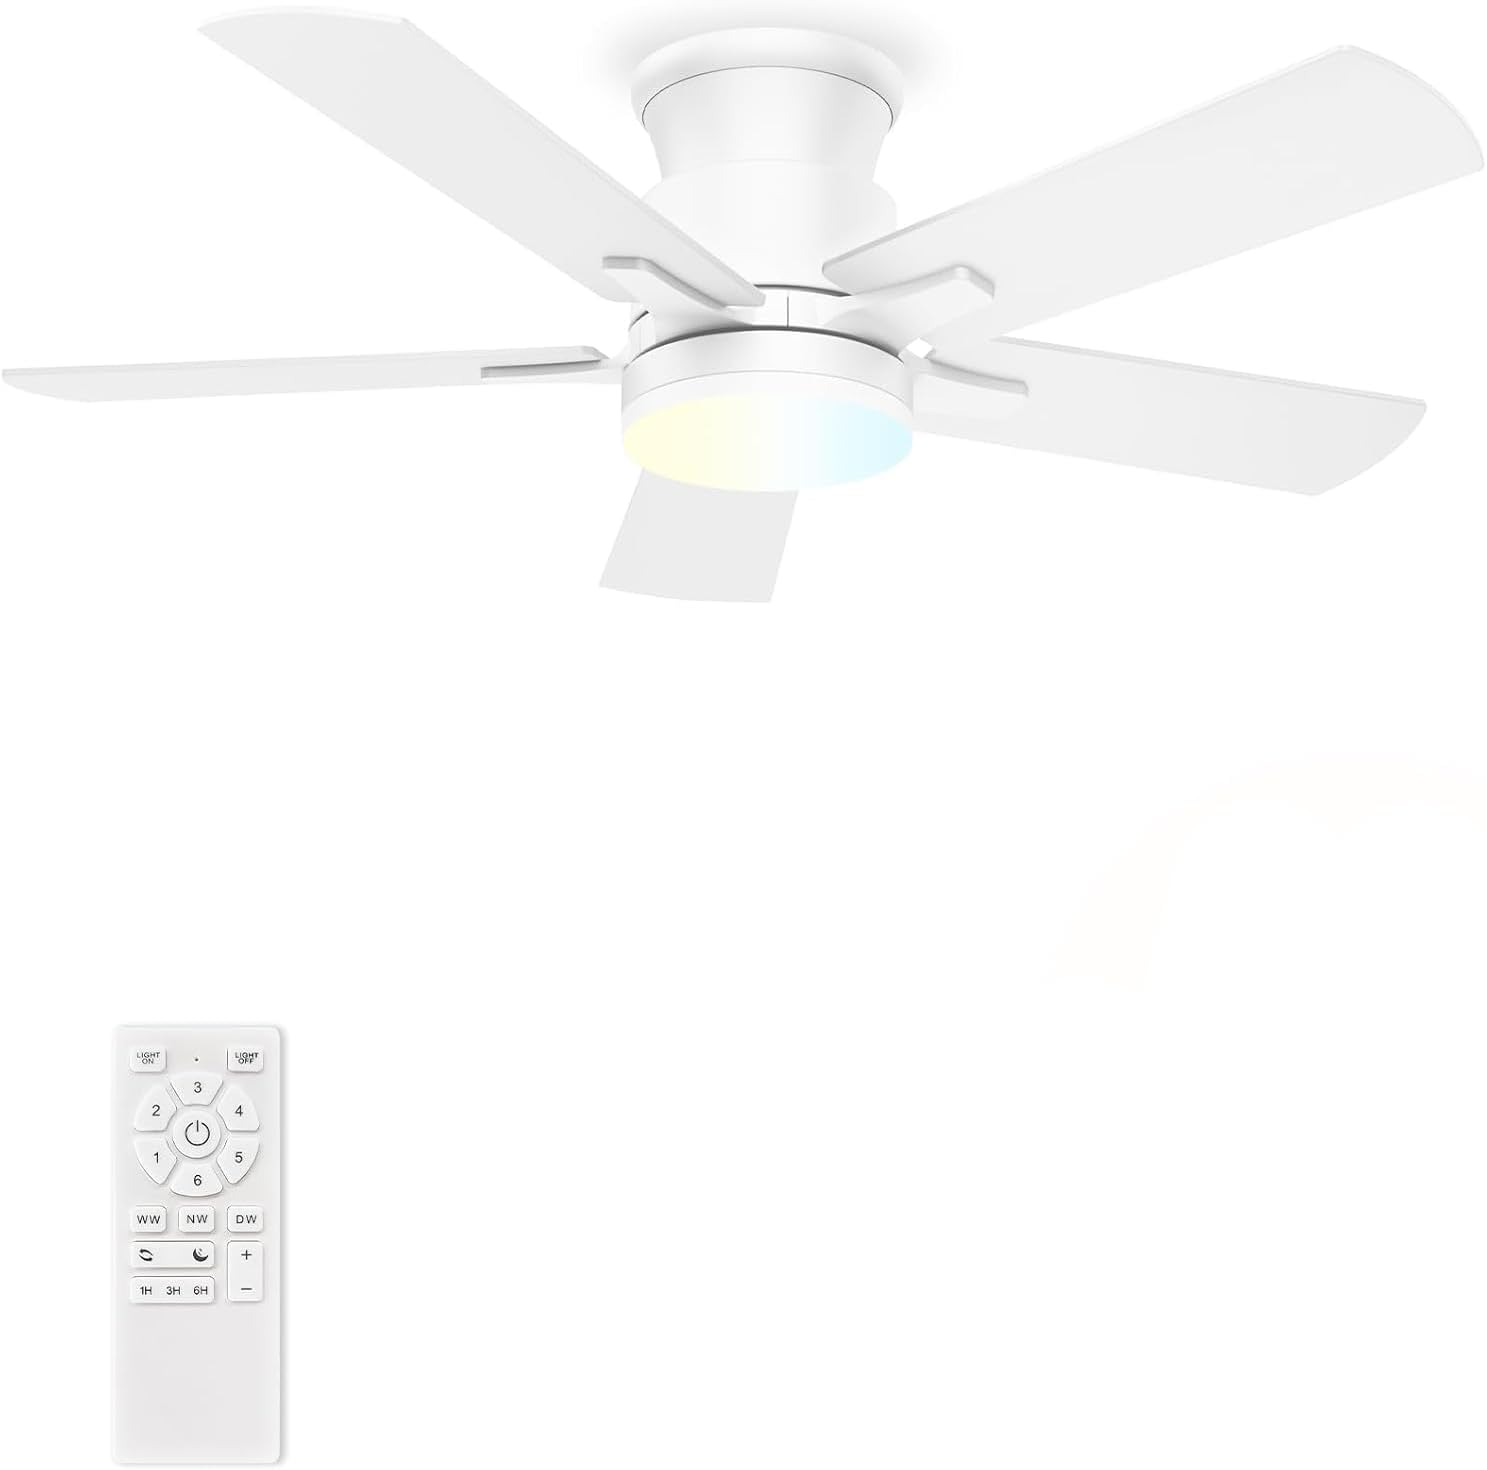
Image: The Allsmartlife 42-inch flush mount ceiling fan with integrated LED light, shown installed on a ceiling.
Operating Instructions
Your Allsmartlife ceiling fan is controlled by the included remote. Familiarize yourself with its functions:
- Power On/Off: Press the power button to turn the fan on or off.
- Fan Speed: Select from 6 different fan speeds (1-6) to adjust airflow intensity.
- Light Control: Turn the LED light on/off independently.
- Color Temperature (3CCT): Cycle through 3000K (Warm White), 4000K (Natural White), and 6500K (Daylight White) with a single touch. The light has a memory function.
- Brightness Adjustment: Dim the light from 10% to 100% to suit your preference.
- Sleep Mode: Activate the patented Sleep Mode for a natural wind simulation, varying fan speed automatically.
- Reverse Function: Switch between forward (summer mode for cooling) and reverse (winter mode for air circulation) blade rotation.
- Timer: Set the fan to turn off automatically after 1, 3, or 6 hours.
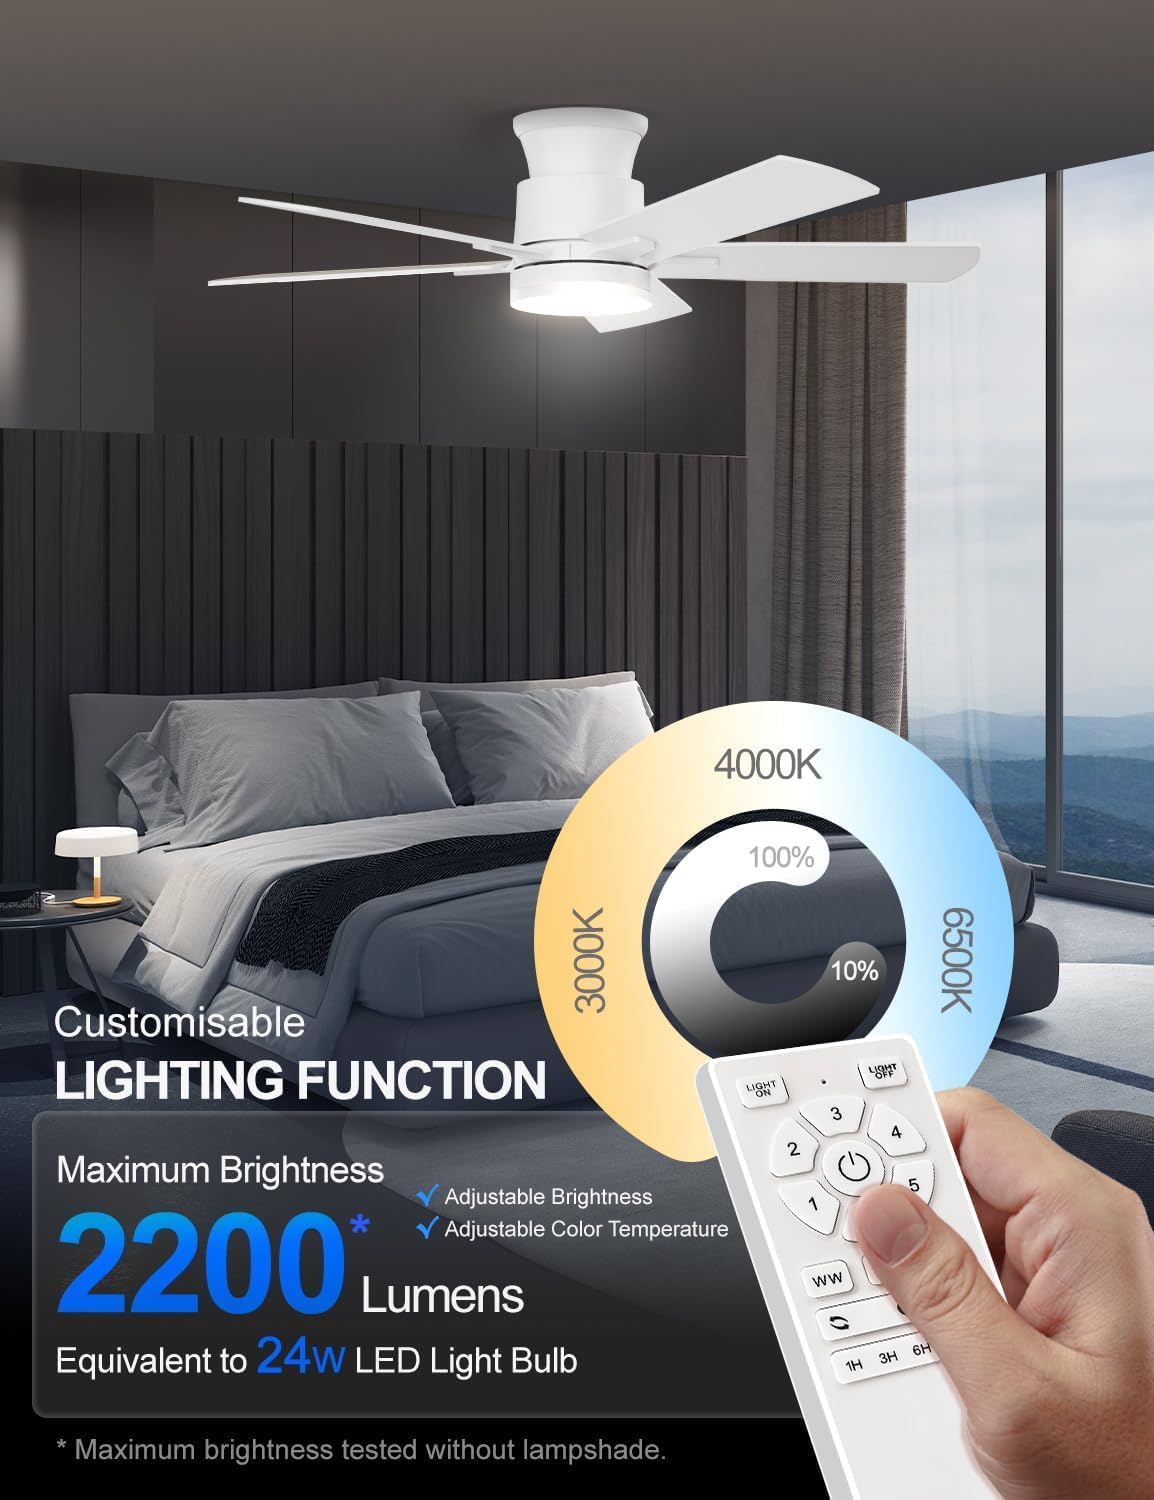
Image: Illustration of the customizable lighting function, showing adjustable brightness from 10% to 100% and three color temperature options (3000K, 4000K, 6500K).
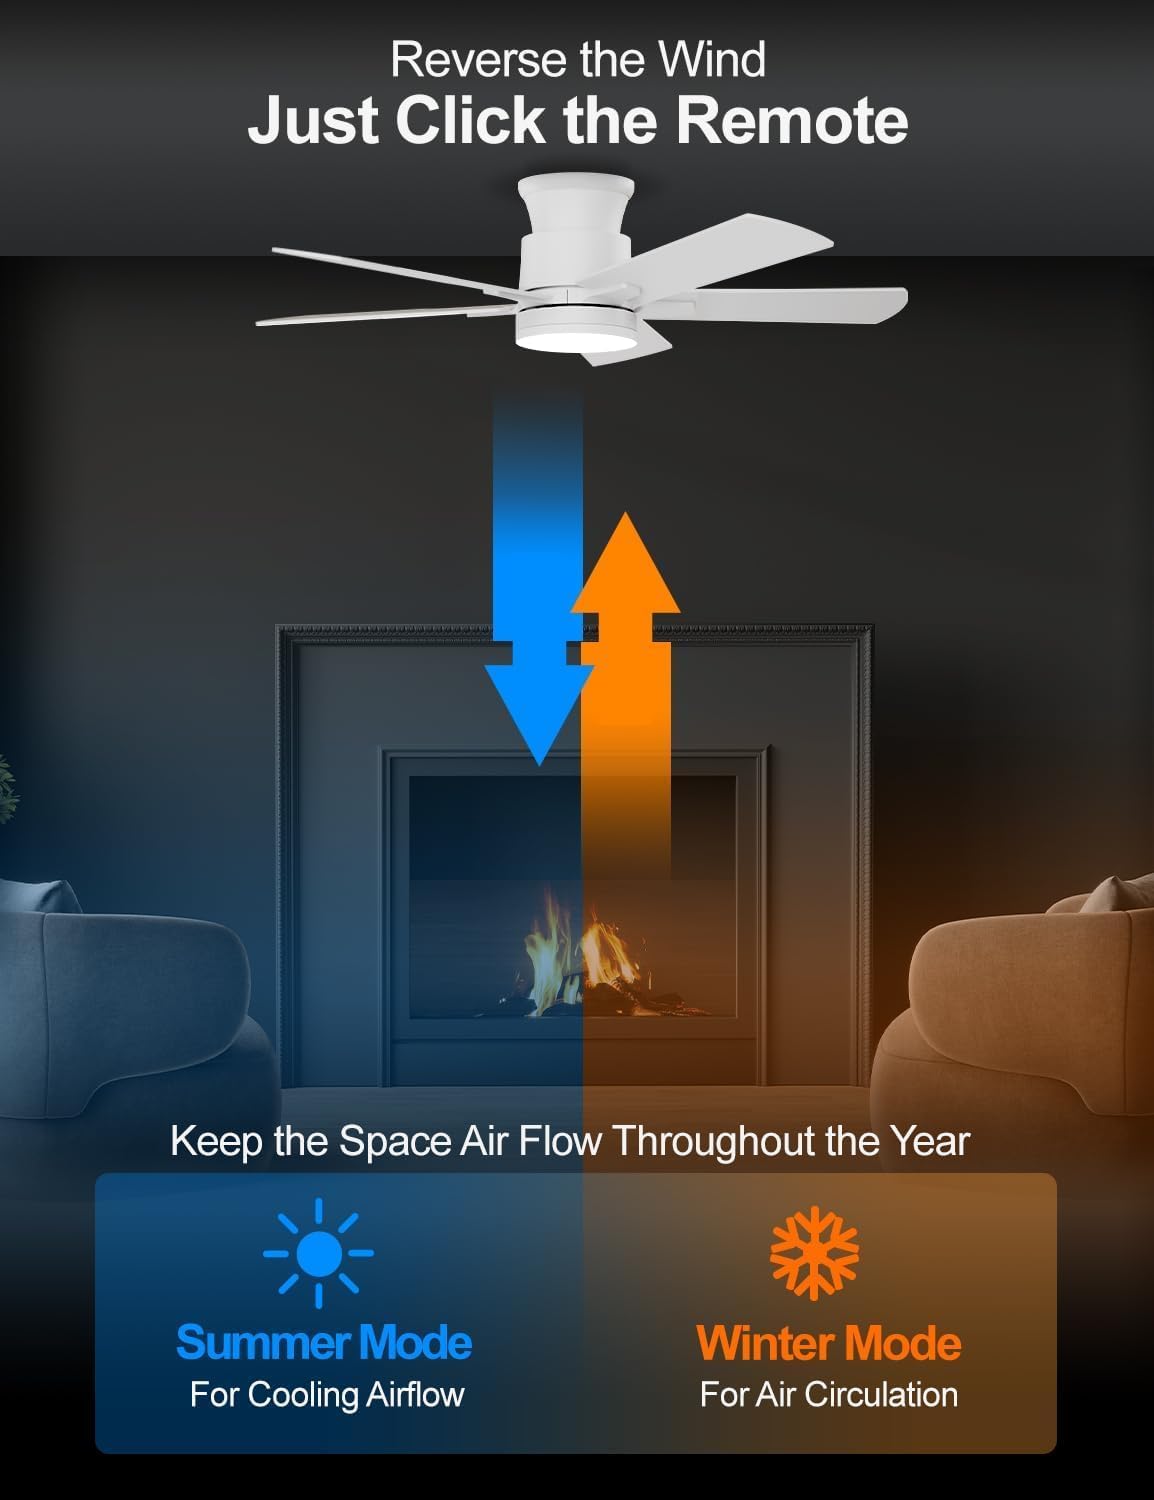
Image: Visual representation of the fan's reversible function, illustrating downward airflow for cooling in summer and upward airflow for circulation in winter.
Maintenance
Regular maintenance will prolong the life and performance of your fan:
- Cleaning: Use a soft, damp cloth to clean the fan. Do not use abrasive cleaners or solvents.
- Blade Care: Periodically check the blade screws for tightness. Loose blades can cause wobbling and noise.
- Light Source: The integrated LED light source is designed for long-term use and does not require replacement under normal conditions.
Troubleshooting Common Issues
If you encounter any issues, refer to the table below for potential solutions:
| Problem | Possible Cause | Solution |
|---|---|---|
| Fan does not start | No power to the fan; loose wire connections; remote control battery low. | Check circuit breaker; ensure all wires are securely connected; replace remote control battery. |
| Fan wobbles | Loose blade screws; unbalanced blades; improper mounting. | Tighten all blade screws; use balancing kit (not included) if necessary; ensure mounting bracket is securely installed. |
| Light does not work | Loose wire connection to light kit; light kit failure. | Check light kit wiring; contact customer support if light kit is faulty. |
| Fan is noisy | Loose screws; motor noise; blades hitting an obstruction. | Check all screws for tightness; ensure no obstructions are in the fan's path. The DC motor is designed for quiet operation. |
Product Specifications
| Feature | Detail |
|---|---|
| Brand | Allsmartlife |
| Model Name | 1172X |
| Size | 42-inch |
| Color | Fresh White |
| Material | Engineered Wood, Metal |
| Motor Type | DC Brushless Motor |
| Speeds | 6 |
| Light Type | Integrated LED (3CCT Dimmable) |
| Max Lumens | 2200 Lumens |
| Control Method | Remote Control |
| Mounting Type | Flush Mount |
| Product Dimensions | 42 x 42 x 10.5 inches |
| Item Weight | 12.77 pounds |
| Certification | ETL |
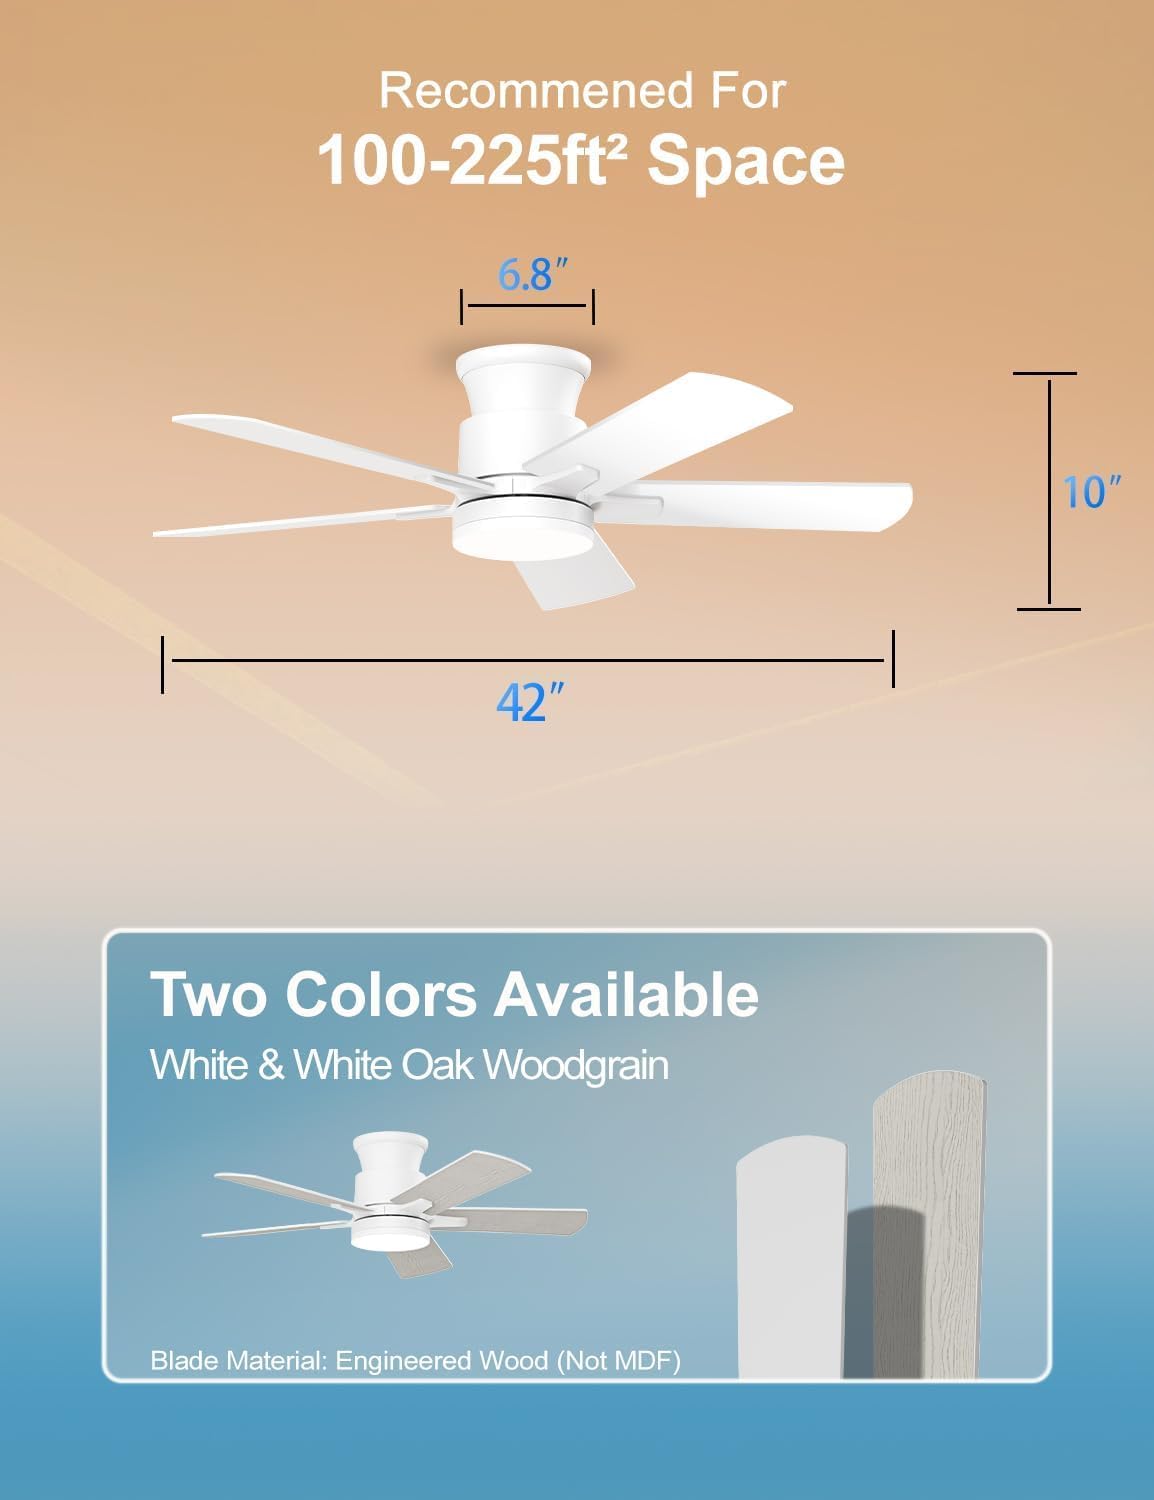
Image: Detailed dimensions of the 42-inch flush mount ceiling fan, indicating its width, height, and recommended room size for optimal performance.

Image: Illustration highlighting the high-performance, low-noise DC brushless motor, comparing its quiet operation to traditional AC motors.
Warranty and Customer Support
Allsmartlife offers a lifetime of free replacement service for parts for your ceiling fan. For any further assistance, technical support, or warranty claims, please contact our customer support team. You can find contact information on our official website or through your purchase platform.
For installation videos and ETL certification information, please search for [DY1172X] on Google.
