1. Introduction
Thank you for choosing the Cool-Living 12,000 BTU Window Air Conditioner. This manual provides important information for the proper installation, operation, and maintenance of your new air conditioner. Please read this manual thoroughly before use and keep it for future reference.
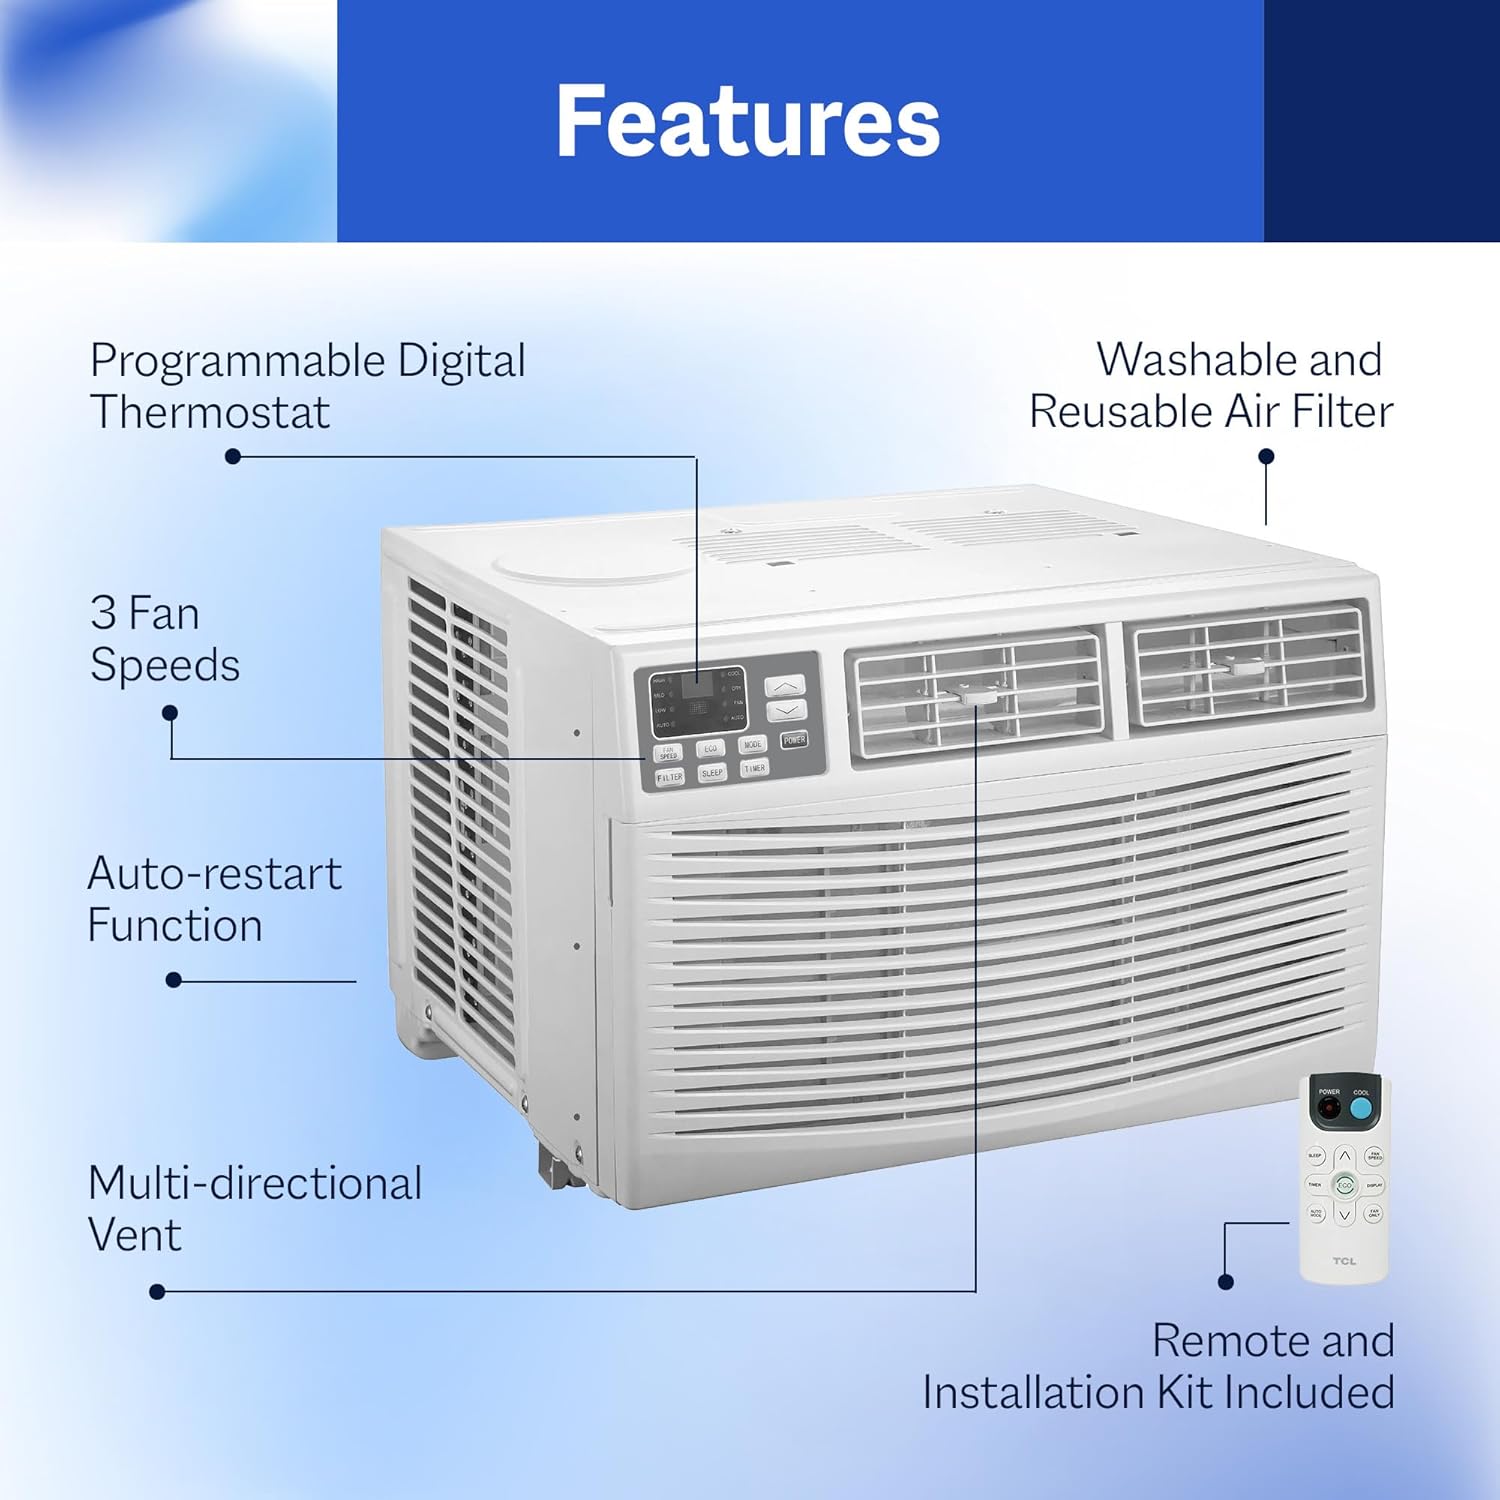
Key Features:
- Powerful Cooling: Cools rooms up to 450 square feet with 12,000 BTUs, ideal for offices, bedrooms, or dorm rooms.
- Convenient Controls: Features a digital display and remote control for easy adjustments of 3 cool modes and 3 fan speeds.
- Efficient Airflow: Multi-directional vent ensures air can be directed where needed.
- Easy Maintenance: Side-out filter access simplifies cleaning.
- User-Friendly Features: Includes auto-restart function and sleep mode.


2. Safety Information
To prevent injury to the user or other people and property damage, the following instructions must be followed. Incorrect operation due to ignoring instructions may cause harm or damage.
General Safety Precautions:
- Always plug into a grounded 115V outlet. Do not use extension cords or adapter plugs.
- Do not operate the air conditioner with a damaged power cord or plug.
- Do not insert fingers or foreign objects into the air inlet or outlet.
- Keep flammable materials away from the unit.
- Ensure the unit is securely installed in the window according to installation instructions.
- Unplug the unit before cleaning or servicing.
3. What's in the Box
Your Cool-Living 12,000 BTU Window Air Conditioner package includes the following components:
- Air Conditioner Unit
- Remote Control
- Installation Kit (including side panels, top rail, and mounting hardware)
4. Setup and Installation
This window air conditioner is designed for installation in standard double-hung windows. Proper installation is crucial for optimal performance and safety. Refer to the detailed installation instructions provided in the separate installation guide included with your unit.
General Installation Steps:
- Prepare the window opening, ensuring it meets the required dimensions for the unit.
- Attach the top rail and side panels to the air conditioner unit.
- Carefully place the unit into the window opening, ensuring it is level and securely supported.
- Extend the side panels to fill the window opening and secure them.
- Install the window sash seal and any additional sealing materials to prevent air leakage.


5. Operating Instructions
Your air conditioner can be operated using the control panel on the unit or the included remote control.
Control Panel:
The control panel features a digital display and buttons for Power, Mode, Fan Speed, Filter Reset, Sleep, and Timer. The display shows the set temperature and various indicators for the selected mode and fan speed.
Remote Control:
The remote control allows you to conveniently adjust settings from a distance. It includes buttons for Power, Mode, Fan Speed, Timer, Sleep, ECO, Turbo, Display, and iFeel.

Operating Modes:
- Cool Mode: Provides powerful cooling. Adjust temperature and fan speed as desired.
- Fan Mode: Circulates air without cooling. Select desired fan speed (Low, Med, High).
- Dry Mode (Dehumidify): Reduces humidity in the room.
- Auto Mode: Automatically selects cooling or fan mode based on the room temperature.
- Sleep Mode: Gradually increases the set temperature and operates quietly for comfortable sleep.
- Timer Function: Set the unit to turn on or off automatically after a set period.
- Auto-Restart Function: The unit automatically restarts with the previous settings after a power outage.

6. Maintenance
Regular maintenance ensures optimal performance and extends the lifespan of your air conditioner.
Air Filter Cleaning:
The air filter should be cleaned every two weeks or more frequently depending on usage and air quality. A dirty filter can reduce cooling efficiency and airflow.
- Unplug the air conditioner from the power outlet.
- Open the front panel and slide out the air filter.
- Wash the filter with warm, soapy water. Rinse thoroughly.
- Allow the filter to dry completely before reinserting it.
- Close the front panel and plug the unit back in.

General Cleaning:
- Wipe the cabinet with a soft, damp cloth. Do not use harsh chemicals or abrasives.
- Ensure the drainage area is clear of obstructions.
7. Troubleshooting
Before contacting customer service, please refer to the following troubleshooting guide for common issues.
| Problem | Possible Cause | Solution |
|---|---|---|
| Unit does not start | No power; Plug not fully inserted; Blown fuse/tripped breaker. | Check power supply; Ensure plug is secure; Reset breaker/replace fuse. |
| Unit not cooling sufficiently | Dirty air filter; Air intake/outlet blocked; Room too large; Doors/windows open. | Clean air filter; Clear obstructions; Ensure room size is within capacity; Close doors/windows. |
| Water dripping outside | Unit not tilted slightly outwards. | Ensure proper tilt during installation for drainage. |
| Noisy operation | Loose installation; Fan blade hitting something. | Check installation for tightness; Contact service if noise persists. |
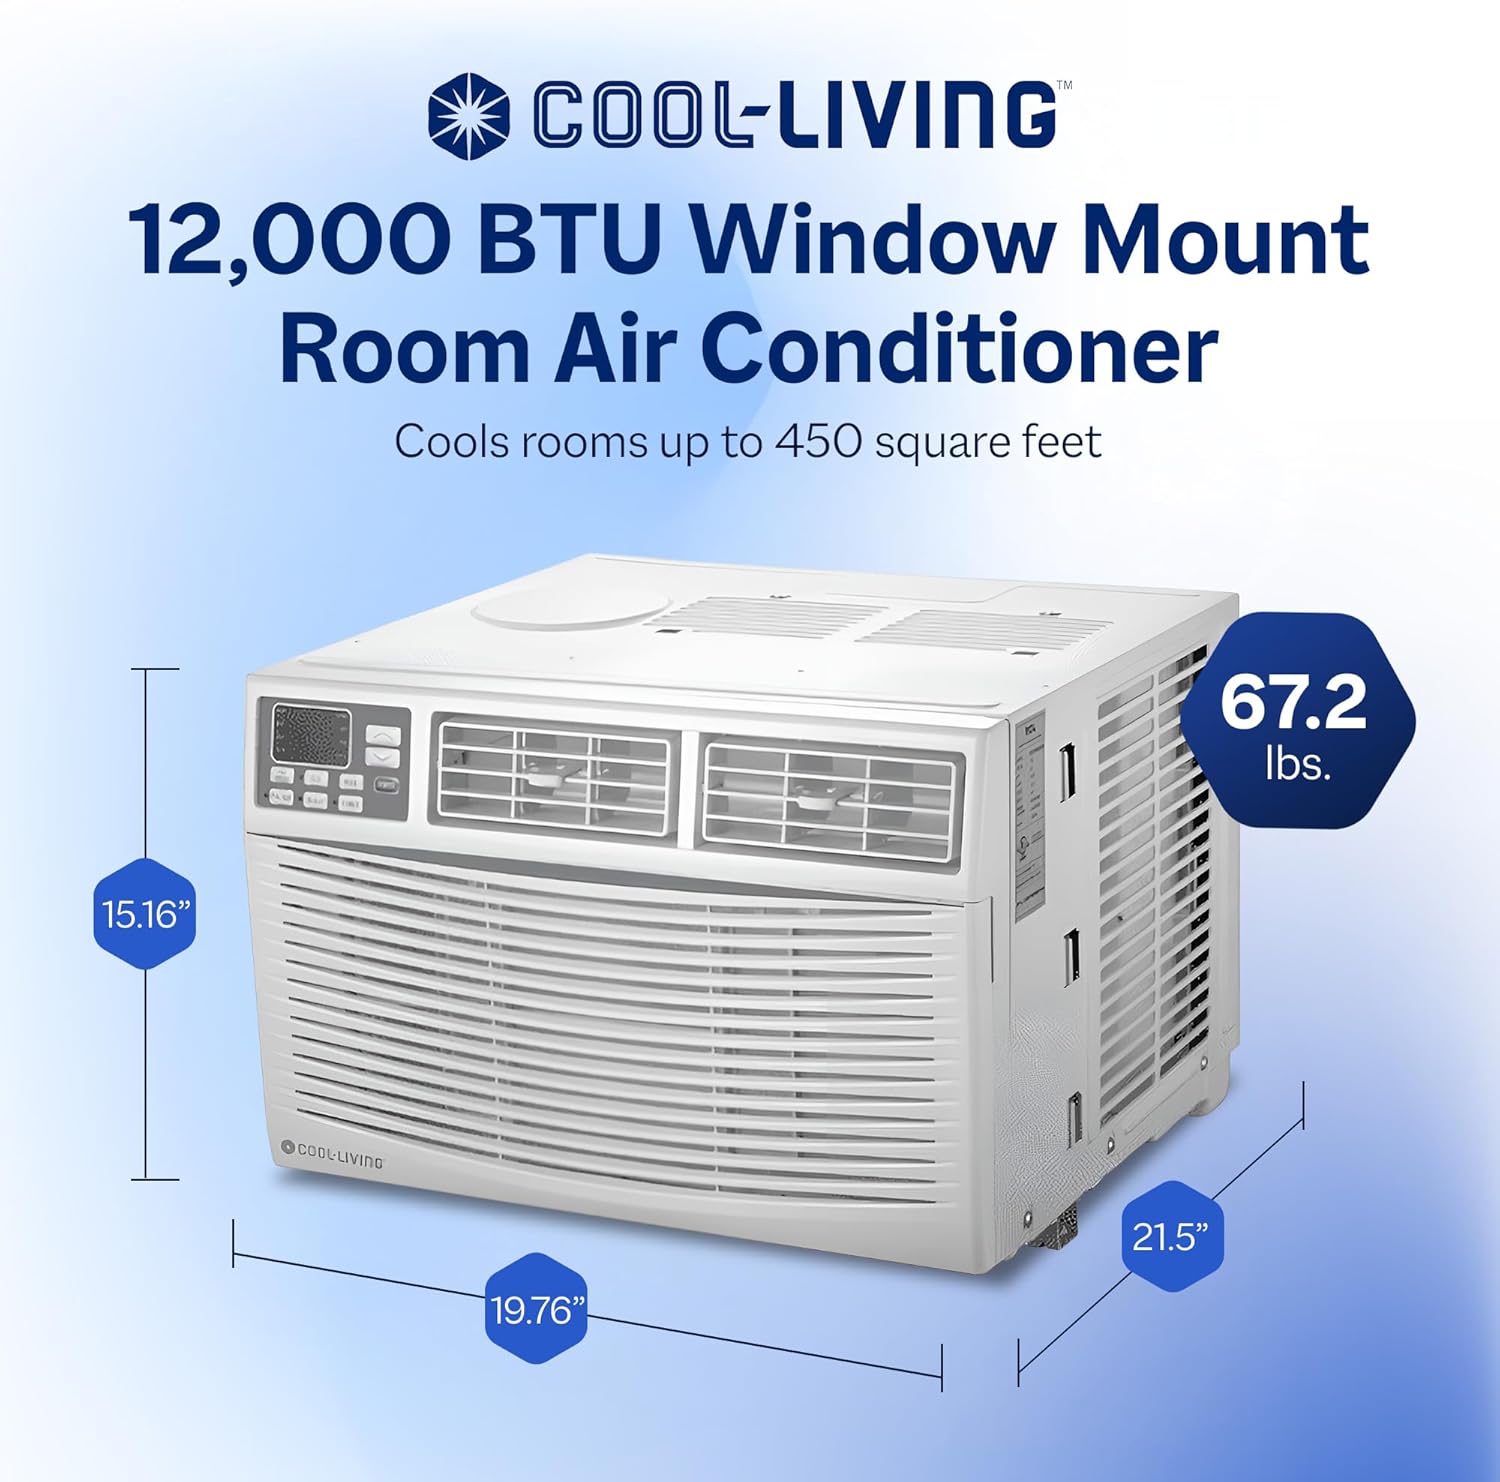
8. Specifications
Detailed technical specifications for the Cool-Living 12,000 BTU Window Air Conditioner.
| Specification | Value |
|---|---|
| Brand Name | Cool-Living |
| Model Info | CL-12CMD1 |
| Cooling Power | 12,000 British Thermal Units |
| Capacity | 460 Cubic Feet |
| Floor Area Coverage | Up to 450 Square Feet |
| Annual Energy Consumption | 830 Kilowatt Hours |
| Noise Level | 59 dB |
| Installation Type | Window Mounted |
| Color | White |
| Voltage | 115 Volts |
| Wattage | 1040 watts |
| Product Dimensions (D x W x H) | 21.5" x 19.76" x 15.16" |
| BEE Star Rating | 1 Star |
| Seasonal Energy Efficiency Ratio (SEER) | 11.4 |
9. Warranty and Support
For warranty information and customer support, please refer to the warranty card included with your product or visit the official Cool-Living website. Keep your purchase receipt as proof of purchase for any warranty claims.
Customer Support: For technical assistance, troubleshooting not covered in this manual, or parts inquiries, please contact Cool-Living customer support through the contact information provided on your warranty documentation.