Introduction
This manual provides detailed instructions for the installation, operation, and maintenance of your AQUBT 20-inch Smart Low Profile Ceiling Fan with Light. Please read this manual thoroughly before installation and use to ensure safe and efficient operation.
Safety Information
- Always turn off power at the circuit breaker before beginning installation or maintenance.
- Ensure all electrical connections comply with local codes and ordinances. If you are unsure, consult a qualified electrician.
- Mount the fan to a ceiling outlet box marked "Acceptable for Fan Support" and capable of supporting 35 lbs (15.9 kg).
- Do not connect the fan to a dimmer switch or a variable speed switch. Only connect to an ordinary ON/OFF switch.
- Keep children and pets away from the work area during installation.
Product Components
Verify that all components are present before beginning installation.
- Ceiling Fan Unit
- Remote Control
- Hardware accessories (Expansion Screws, Expansion Tube, Washer, Wire Connector, Self-tapping Screw, Junction Box Screw, Remote Controller Wall Plate)
- Instruction Manual

Image: List of included accessories for the AQUBT Smart Ceiling Fan, including the fan unit, remote, and various screws and connectors.
Specifications
| Brand | AQUBT |
| Model Name | 1138-Bwifi |
| Color | Black |
| Material | Aluminum, Acrylic |
| Product Dimensions | 19.7"L x 19.7"W x 5.1"H |
| Light Source Type | LED |
| Brightness | 4800 Lumens |
| Color Temperature | 3000K-6500K (Adjustable) |
| Fan Speeds | 6-Speed |
| Control Method | App, Remote, Voice (Alexa, Google Home) |
| Connectivity Protocol | Wi-Fi (2.4 GHz only) |
| Installation Type | Flush Mount |

Image: Detailed view of the fan's components, including the metal base, aluminum frame, acrylic lampshade, 7 PC fan blades, and pure copper DC motor.
Setup and Installation
- Prepare for Installation:
Before starting, ensure the power to the installation area is turned off at the circuit breaker. Gather all necessary tools and components as listed in the "Product Components" section.
- Remove Mounting Bracket:
Unscrew and remove the mounting bracket from the fan unit. This bracket will be attached to your ceiling.

Image: The AQUBT Smart Ceiling Fan with its remote control, a smart speaker, and a smartphone displaying the control app, illustrating its smart features.
- Install Mounting Bracket:
Attach the mounting bracket to your ceiling's electrical junction box using the provided screws. Ensure the bracket is securely fastened. Use the included drywall anchors if needed for additional support.
Video: A step-by-step guide demonstrating the installation process of the AQUBT Smart Ceiling Fan, including mounting the bracket and connecting wires.
- Wire Connections:
Connect the electrical wires from the ceiling to the fan unit. Match the colors: typically black to black (live), white to white (neutral), and green/bare copper to green (ground). Use the provided wire connectors to secure the connections. Utilize the safety hook to temporarily hang the fan during wiring to ease the process.
- Attach Fan Unit to Bracket:
Carefully lift the fan unit and align it with the installed mounting bracket. Secure the fan to the bracket using the screws. Ensure all connections are tucked neatly into the junction box.
- Power On and Test:
Once the fan is securely installed, restore power at the circuit breaker. Test the fan and light functions using the remote control or the smart app.

Image: Illustration showing that the fan should only be connected to a standard ON/OFF switch, not a dimmer or variable speed switch.
Operating Instructions
Remote Control Operation
The included remote control allows for convenient adjustment of fan and light settings.
- Power On/Off: Use the dedicated ON/OFF buttons for the fan and light.
- Fan Speed: Select from 6 adjustable wind speeds (buttons 1-6).
- Reversible Airflow: Use the F/R button to switch between downward airflow (summer mode) and upward airflow (winter mode).
- Light Brightness: Adjust the light intensity from 10% to 100% using the brightness +/- buttons.
- Color Temperature: Change the light color between warm, neutral, and cool white using the color temperature +/- buttons.
- Timer Function: Set a 1-hour or 4-hour timer for automatic shutdown.
- Night Light Mode: Activate a low-brightness setting suitable for nighttime.

Image: Diagram illustrating the functions of the remote control and the mobile app for the AQUBT Smart Ceiling Fan, highlighting 6-speed wind, reversible motor, infinite dimming, memory function, and timing function.
Smart App and Voice Control
The fan can be controlled via a dedicated smartphone app (supports 2.4 GHz WiFi only) and voice commands through Alexa or Google Home.
- App Control: Download the companion app (refer to the full manual for download links). The app allows for precise scheduling, global remote access, and all functions available on the remote.
- Voice Control: Integrate the fan with your Alexa or Google Home device for hands-free operation. Use commands such as "Alexa, turn on fan light" or "Hey Google, set fan speed to 3."
- Memory Function: The fan retains your last brightness and color temperature settings when turned off and on.
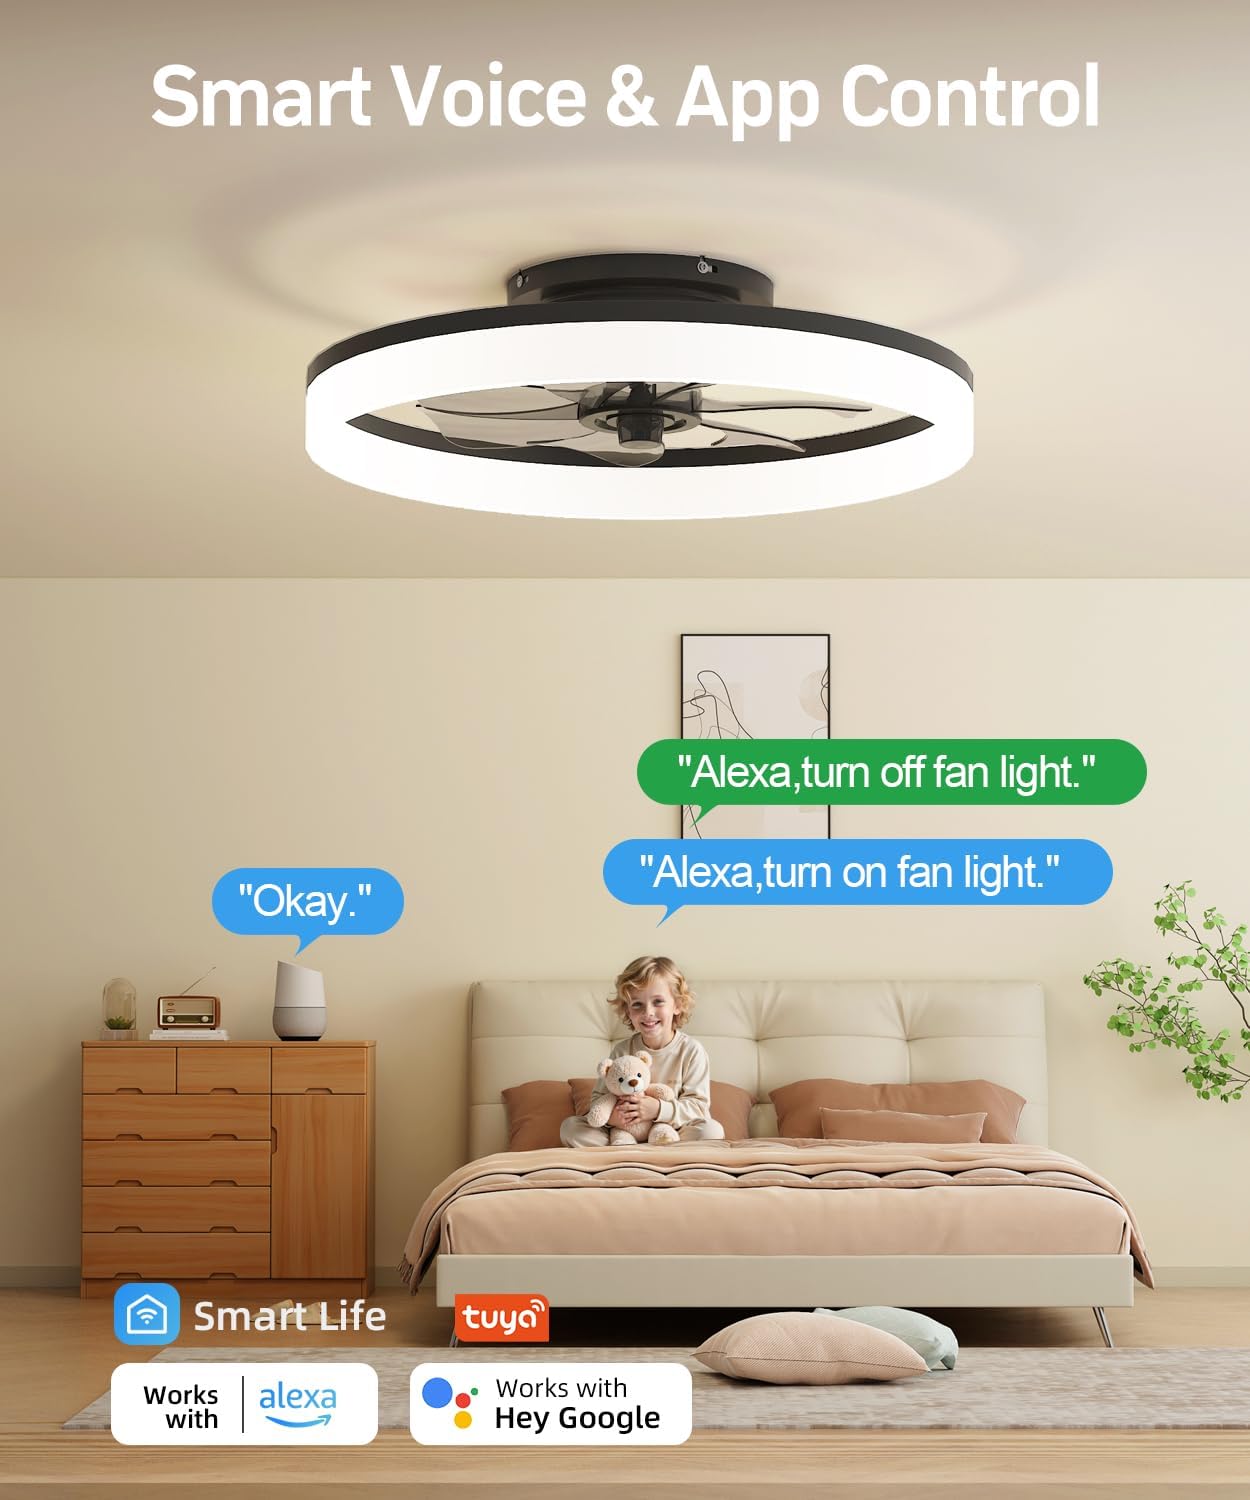
Image: A bedroom scene showcasing the AQUBT Smart Ceiling Fan being controlled by voice commands via Alexa and a smartphone app, emphasizing smart home integration.

Image: Visual representation of the AQUBT Smart Ceiling Fan's 3 color changing light options (3000K warm white, 4000K neutral white, 6500K cool white) and 10%-100% dimmable brightness.

Image: Diagram illustrating the reversible motor function of the AQUBT Smart Ceiling Fan, showing downward airflow for summer cooling and upward airflow for winter air circulation.
Maintenance
- Cleaning: To clean the fan, wipe with a soft, damp cloth. Do not use abrasive cleaners or solvents. Ensure power is off before cleaning.
- Bulb Replacement: The LED light source is integrated and not user-replaceable. If the light fails, contact customer support.
- Tighten Fasteners: Periodically check all screws and fasteners to ensure they are secure.
Troubleshooting
| Problem | Possible Cause | Solution |
| Fan does not operate. | No power to the fan; loose wire connections; remote control battery low. | Check circuit breaker; ensure all wire connections are secure; replace remote control batteries. |
| Light does not turn on. | No power to the light; loose wire connections; remote control battery low. | Check circuit breaker; ensure all wire connections are secure; replace remote control batteries. |
| Fan makes unusual noise. | Loose screws; fan not properly balanced. | Tighten all mounting screws; ensure fan is securely attached to the bracket. |
| Remote control not working. | Batteries are dead; remote not paired with fan. | Replace batteries; refer to the full manual for remote pairing instructions. |
| App/Voice control not working. | Incorrect WiFi connection (not 2.4GHz); app not properly configured; device not linked to Alexa/Google Home. | Ensure your WiFi is 2.4GHz; reconfigure the app; relink the device in your smart home assistant app. |
Warranty and Support
This AQUBT product comes with a two-year quality guarantee service. For technical support or warranty claims, please contact AQUBT customer service. 24-hour online technical support is available.

Image: AQUBT logo with text indicating 24-hour online technical support and a 2-year quality guarantee service.


