Download PDFFree PDF. The Save button below keeps a bookmark and private notes in your account.
wirsh Espresso Machine User Manual
Model: CM-1665
Introduction
This manual provides comprehensive instructions for the safe and efficient operation, maintenance, and troubleshooting of your wirsh Home Barista Plus Semi-Automatic Espresso Machine. Please read this manual thoroughly before first use and retain it for future reference.
Important Safety Instructions
Read all instructions before using the appliance.
Do not touch hot surfaces. Use handles or knobs.
To protect against fire, electric shock, and injury to persons, do not immerse cord, plugs, or appliance in water or other liquid.
Close supervision is necessary when any appliance is used by or near children.
Unplug from outlet when not in use and before cleaning. Allow to cool before putting on or taking off parts, and before cleaning the appliance.
Do not operate any appliance with a damaged cord or plug or after the appliance malfunctions, or has been damaged in any manner.
The use of accessory attachments not recommended by the appliance manufacturer may result in fire, electric shock, or injury to persons.
Do not use outdoors.
Do not let cord hang over edge of table or counter, or touch hot surfaces.
Do not place on or near a hot gas or electric burner, or in a heated oven.
Always attach plug to appliance first, then plug cord into the wall outlet. To disconnect, turn any control to "off", then remove plug from wall outlet.
Do not use appliance for other than intended use.
Product Components
Familiarize yourself with the parts of your wirsh Espresso Machine.
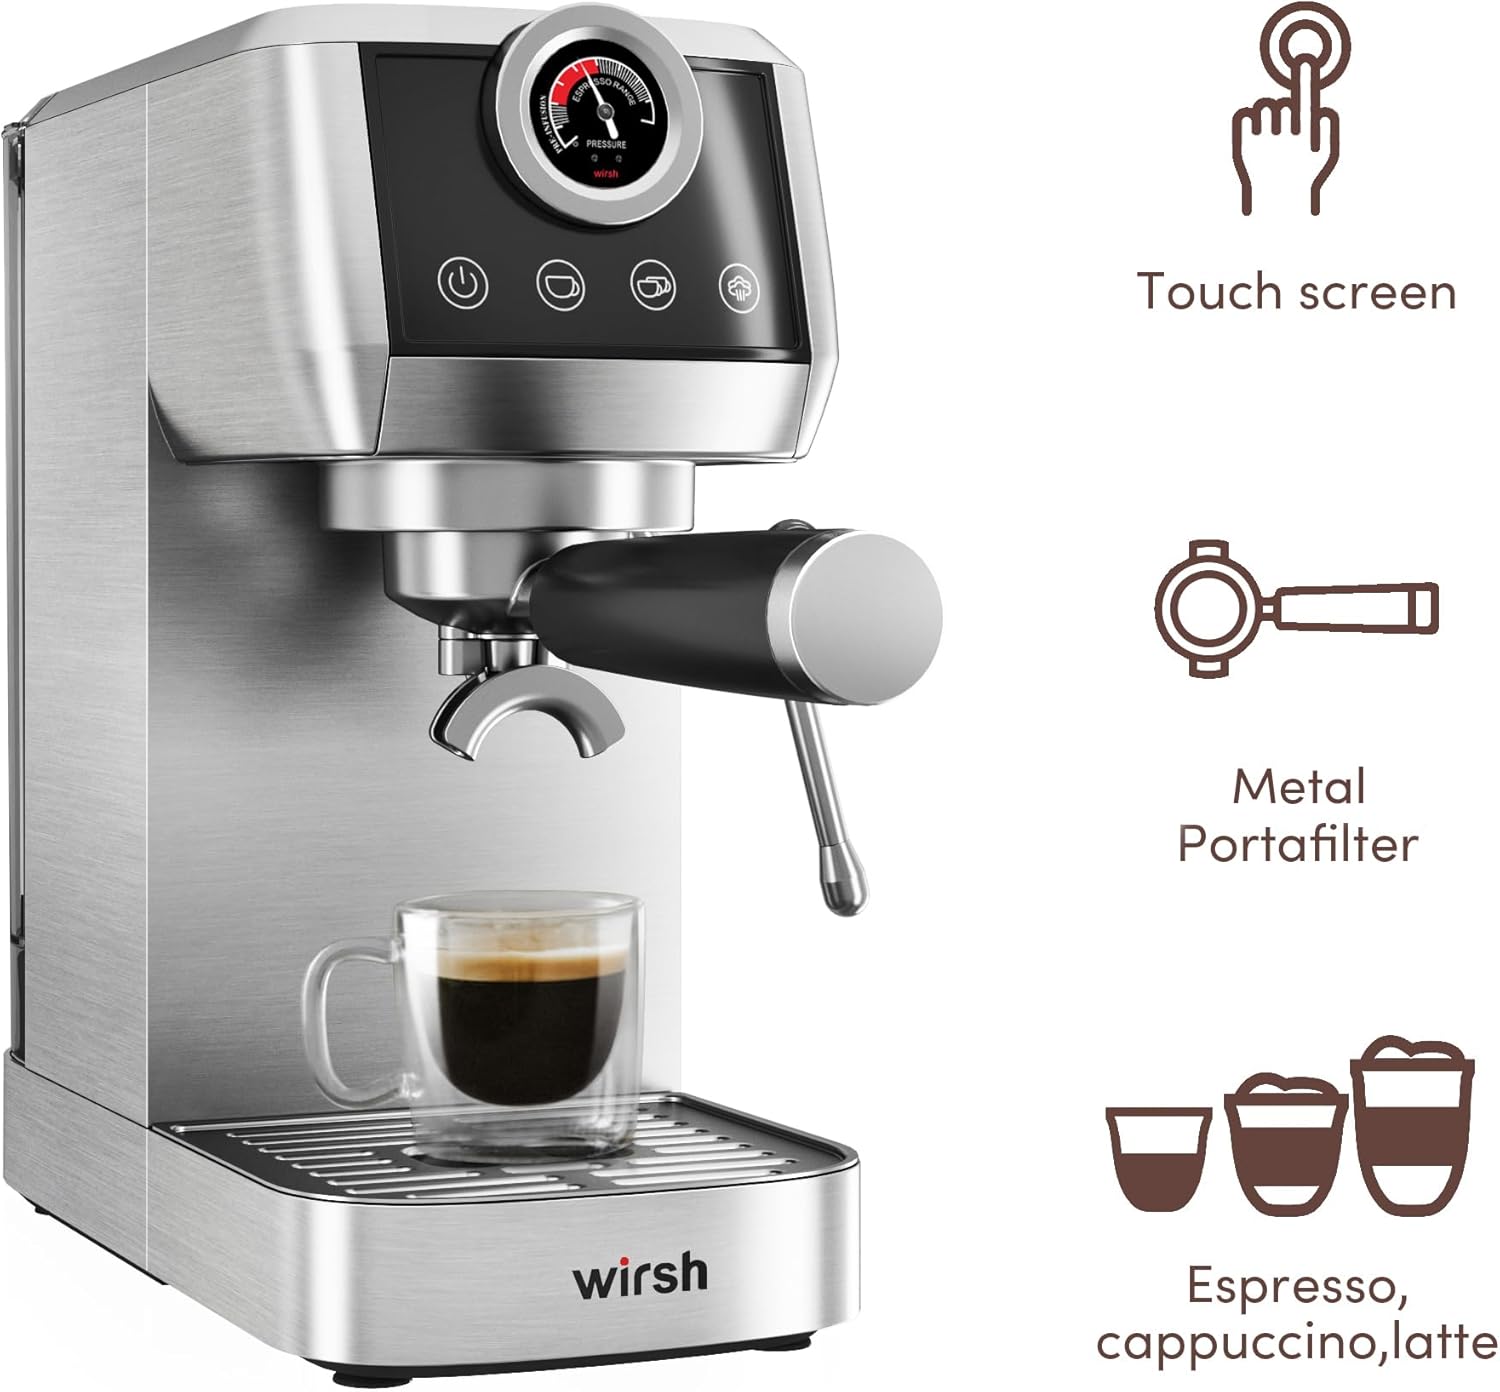
Figure 1: Front view of the wirsh Espresso Machine, showing the portafilter, drip tray, control panel, and pressure gauge.
Figure 2: Key features including touch screen controls, metal portafilter, and capability for espresso, cappuccino, and latte.
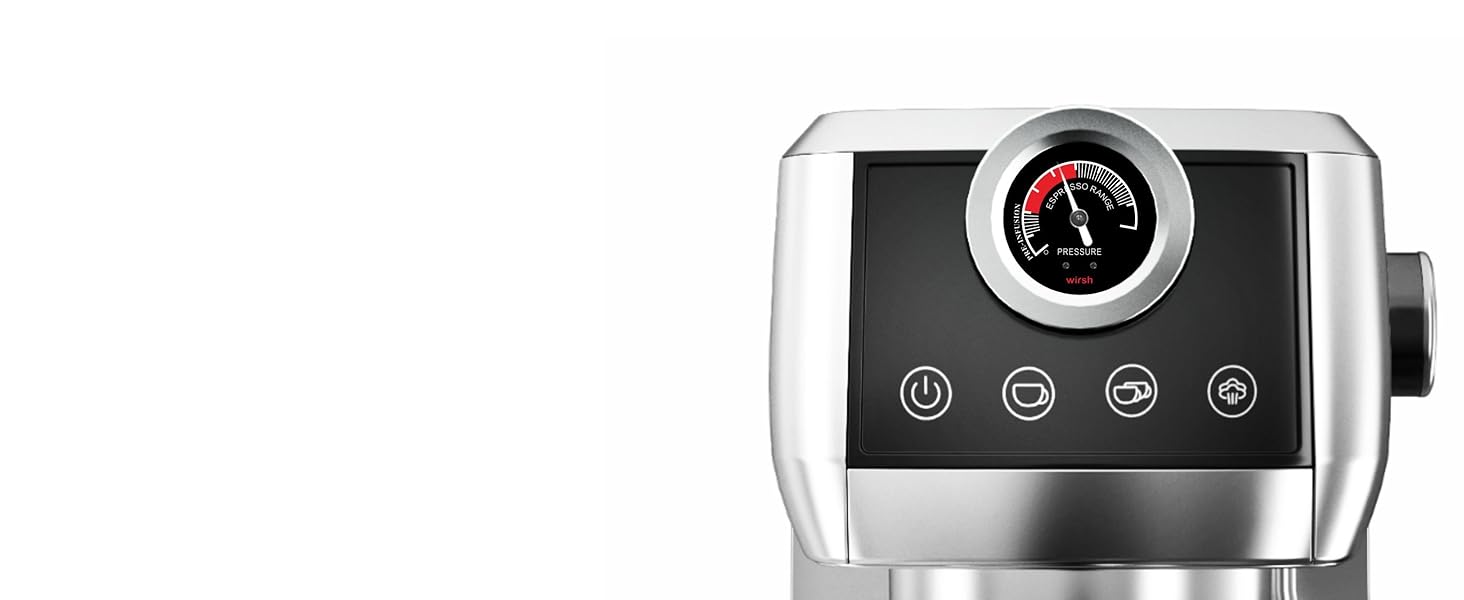
Figure 3: Close-up of the control panel with power button, single shot, double shot, and steam functions, alongside the pressure gauge.
Figure 4: Illustration of the removable water tank for easy refilling and cleaning.
Figure 5: Exploded view of the detachable drip tray components for convenient cleaning.
Unpacking: Carefully remove all packaging materials and ensure all components are present.
Placement: Place the machine on a stable, level, and heat-resistant surface, away from water sources.
Water Tank: Remove the water tank (refer to Figure 4), fill it with fresh, cold water up to the MAX line, and place it back securely.
Initial Rinse: Before first use, perform an initial rinse cycle without coffee.
Plug in the machine.
Press the power button to turn it on.
Place a cup under the portafilter.
Press the single shot button to run water through the system. Repeat for the double shot button.
Turn the steam knob to release steam for a few seconds, then turn it off.
Pre-heating: Allow the machine to pre-heat for approximately 30 seconds until the indicator lights are stable, indicating it's ready for brewing.
Operating Instructions
1. Brewing Espresso
Prepare Ground Coffee: Use freshly ground coffee. For optimal results, grind coffee beans to a fine consistency suitable for espresso.
Fill Portafilter: Place the desired filter basket (single or double shot) into the portafilter. Fill the basket with ground coffee.
Tamp Coffee: Use the tamper to press the coffee grounds firmly and evenly. Ensure the surface is level.
Attach Portafilter: Insert the portafilter into the group head and turn it to the right until it is securely locked in place.
Place Cup: Position your espresso cup(s) on the drip tray directly under the portafilter spouts.
Select Shot: Press the single shot button for one espresso or the double shot button for two espressos. The machine will automatically stop when the programmed volume is dispensed.
Monitor Pressure: Observe the pressure gauge during brewing. The needle should ideally be in the optimal range for proper extraction.
Figure 7: Espresso being extracted into two glasses, demonstrating the brewing process.
2. Using the Steam Wand for Milk Frothing
Prepare Milk: Fill a stainless steel frothing pitcher with cold milk (dairy or non-dairy) up to just below the spout.
Activate Steam: Press the steam button on the control panel. Wait for the steam indicator light to illuminate steadily, indicating the machine has reached steaming temperature.
Purge Steam Wand: Position the steam wand over the drip tray and turn the steam knob to release any condensed water. Turn the knob off once steam flows consistently.
Froth Milk: Immerse the tip of the steam wand just below the surface of the milk. Turn the steam knob fully open.
For frothing (cappuccino), keep the tip near the surface to incorporate air, creating foam.
For texturing (latte), immerse the tip deeper to heat the milk and create a smooth, velvety texture.
Monitor Temperature: Continue steaming until the milk reaches the desired temperature (approximately 140-150°F / 60-65°C). The pitcher will become hot to the touch.
Turn Off Steam: Turn the steam knob to the "off" position, then remove the pitcher.
Clean Steam Wand: Immediately wipe the steam wand with a damp cloth to remove any milk residue. Purge the wand again briefly to clear any internal milk.
Figure 8: A hand holding a frothing pitcher while the steam wand textures milk.
3. Hot Water Function
The machine can dispense hot water for tea or Americanos.
Ensure the machine is powered on and heated.
Place a cup under the steam wand.
Turn the steam knob to dispense hot water.
Turn the knob off when the desired amount of hot water is reached.
4. Customizing Coffee Settings
The machine allows for adjustment of brewing temperature and coffee volume.
Adjustable Temperature: Refer to the full instruction manual for specific steps on how to adjust the brewing temperature (e.g., between 92°C-96°C).
Adjustable Volume: The volume of a single or double shot can be programmed. Consult the detailed manual for programming instructions.
Maintenance and Cleaning
Daily Cleaning:
Empty and clean the drip tray and grid after each use (refer to Figure 5).
Remove the portafilter and discard used coffee grounds. Rinse the portafilter and filter basket under running water.
Wipe down the exterior of the machine with a damp cloth.
Clean the steam wand immediately after each use to prevent milk residue buildup.
Water Tank Cleaning: Clean the water tank regularly with mild detergent and rinse thoroughly.
Descaling: Over time, mineral deposits can build up in the machine. Descaling is essential for optimal performance and longevity.
The frequency of descaling depends on water hardness and usage.
Use a commercial descaling solution specifically designed for espresso machines.
Follow the descaling instructions provided with your descaling solution and in the full product manual.
Troubleshooting
Problem
Possible Cause
Solution
No coffee dispenses or flow is very slow.
Water tank empty.
Coffee grounds too fine or tamped too hard.
Filter basket clogged.
Machine needs descaling.
Refill water tank.
Use coarser grind or tamp less firmly.
Clean filter basket.
Perform descaling procedure.
Espresso is watery or lacks crema.
Coffee grounds too coarse or not enough coffee.
Insufficient tamping.
Machine not fully pre-heated.
Use finer grind or more coffee.
Tamp more firmly and evenly.
Allow machine to pre-heat completely.
Steam wand not producing steam or weak steam.
Steam wand clogged with milk residue.
Machine not at steaming temperature.
Clean steam wand thoroughly.
Wait for steam indicator light to stabilize.
Machine leaks water.
Water tank not seated correctly.
Drip tray full.
Seal around portafilter worn or dirty.
Re-seat water tank firmly.
Empty and clean drip tray.
Clean or replace portafilter seal (gasket).
If the problem persists after attempting these solutions, please contact customer support.
Specifications
Brand: wirsh
Model Name: Home Barista Plus
Item Model Number: CM-1665
Product Dimensions: 10"D x 6.5"W x 12.5"H
Item Weight: 8.5 pounds
Color: Silver/Black
Coffee Maker Type: Espresso Machine
Operation Mode: Semi-Automatic
Pressure: 20 Bar
Voltage: 120 Volts
Coffee Input Type: Ground Coffee
Special Features: Auto Shut-Off, Control Panel, Pressure Gauge, Removable Drip Tray, Steam Wand
Included Components: Espresso Machine, Filter, Steam Wand, Tamper
UPC: 768534299337
Warranty and Support
For warranty information and customer support, please refer to the documentation included with your product or visit the official wirsh website. Keep your purchase receipt as proof of purchase for warranty claims.
For additional instructional videos, you may visit the wirsh YouTube Channel.
Ask a question about this manual
Ask about setup, troubleshooting, compatibility, parts, safety, or missing instructions. Manuals+ will review the question and use this page’s manual context to help answer it.