1. Introduction
Thank you for choosing the JUCFRDNJ Tuya Smart Life Bluetooth Glass Door Lock. This digital biometric fingerprint lock is designed for glass doors, offering multiple unlocking methods including fingerprint, password, card, mechanical key, and app control. Its no-drill installation design ensures a convenient setup process. This manual provides detailed instructions for installation, setup, operation, and maintenance to ensure optimal performance and security.

Image 1.1: Overview of the Tuya Smart Glass Door Fingerprint Lock highlighting its key features such as Tuya App Management, wiring-free installation, metal locking tongue, USB power, low battery reminder, adjustable directions, and mechanical key unlocking.
2. Safety Information
- Read all instructions carefully before installation and use.
- Do not attempt to disassemble or repair the lock yourself. Refer to qualified personnel for service.
- Use only specified battery types (Dry Battery). Do not mix old and new batteries or different types of batteries.
- Keep mechanical keys in a safe place outside the premises, accessible only in emergencies.
- Protect your fingerprint, password, and card information. Do not share them with unauthorized individuals.
- Ensure the door thickness is within the specified range of 10-12mm for proper installation.
- This lock is IP67 rated for outdoor use, designed to withstand various weather conditions.
3. Package Contents
Please check the package contents to ensure all items are present:
- Smart Glass Door Lock Unit (Front and Rear Panels)
- Locking Tongue/Mechanism
- Mounting Hardware (screws, pads)
- Mechanical Keys
- User Manual (this document)
- (Optional) Remote Control
- (Optional) RFID Cards
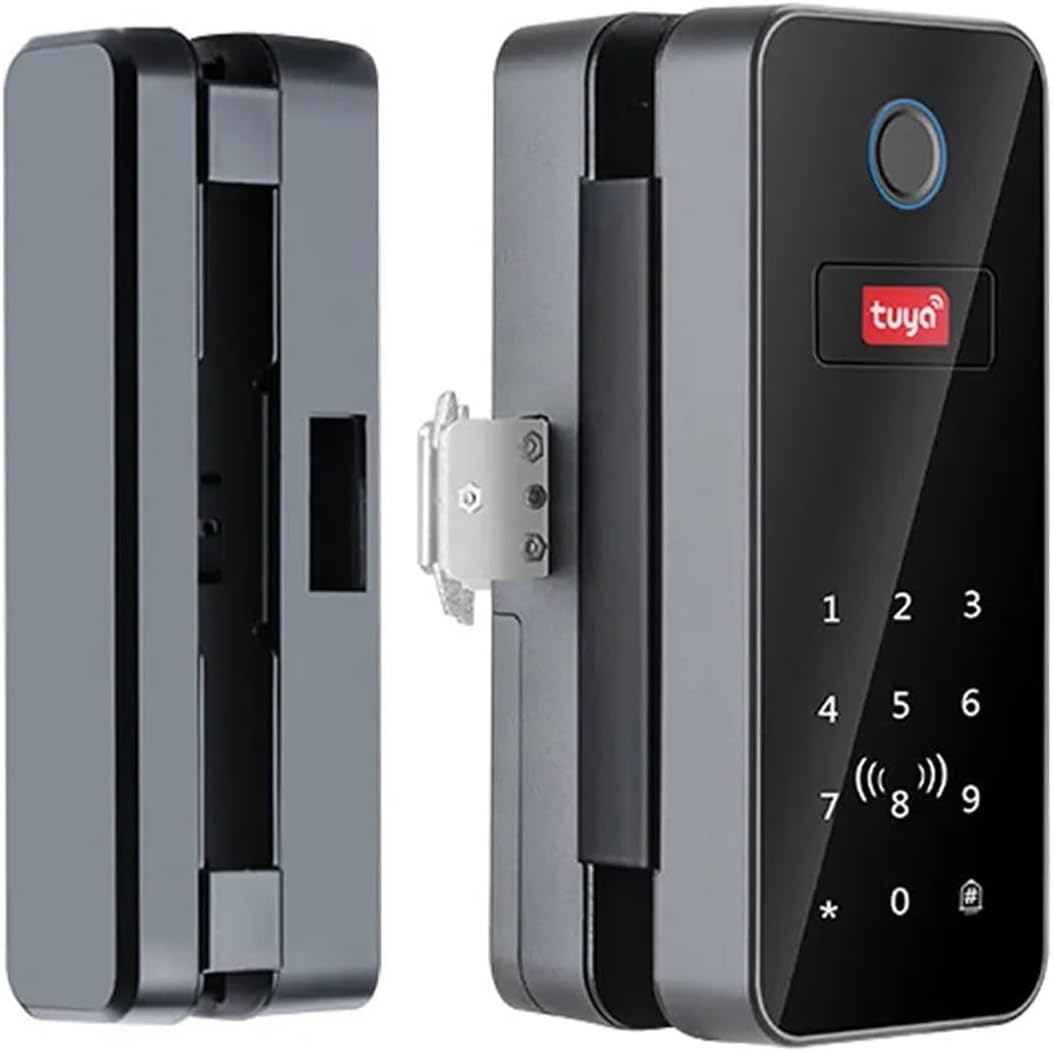
Image 3.1: Main components of the smart lock, including the exterior keypad unit, interior battery unit, and the central locking mechanism.
4. Product Overview
Familiarize yourself with the different parts of your smart lock:
- Front Panel: Contains the fingerprint sensor, keypad, and Tuya logo.
- Rear Panel: Houses the battery compartment, reset button, and interior locking mechanism.
- Fingerprint Sensor: For biometric unlocking.
- Keypad: For password entry.
- Mechanical Keyhole: For emergency unlocking with physical keys.
- USB Port: For emergency power supply (e.g., via power bank) if batteries are completely drained.
- Locking Tongue: The part that secures the door. This model features an upgraded metal double hook design for enhanced security.

Image 4.1: Detailed view of the semiconductor fingerprint chip and keypad, showing rapid recognition capabilities (less than 1 second) and capacity for 100 fingerprints and 1000 passwords/cards.
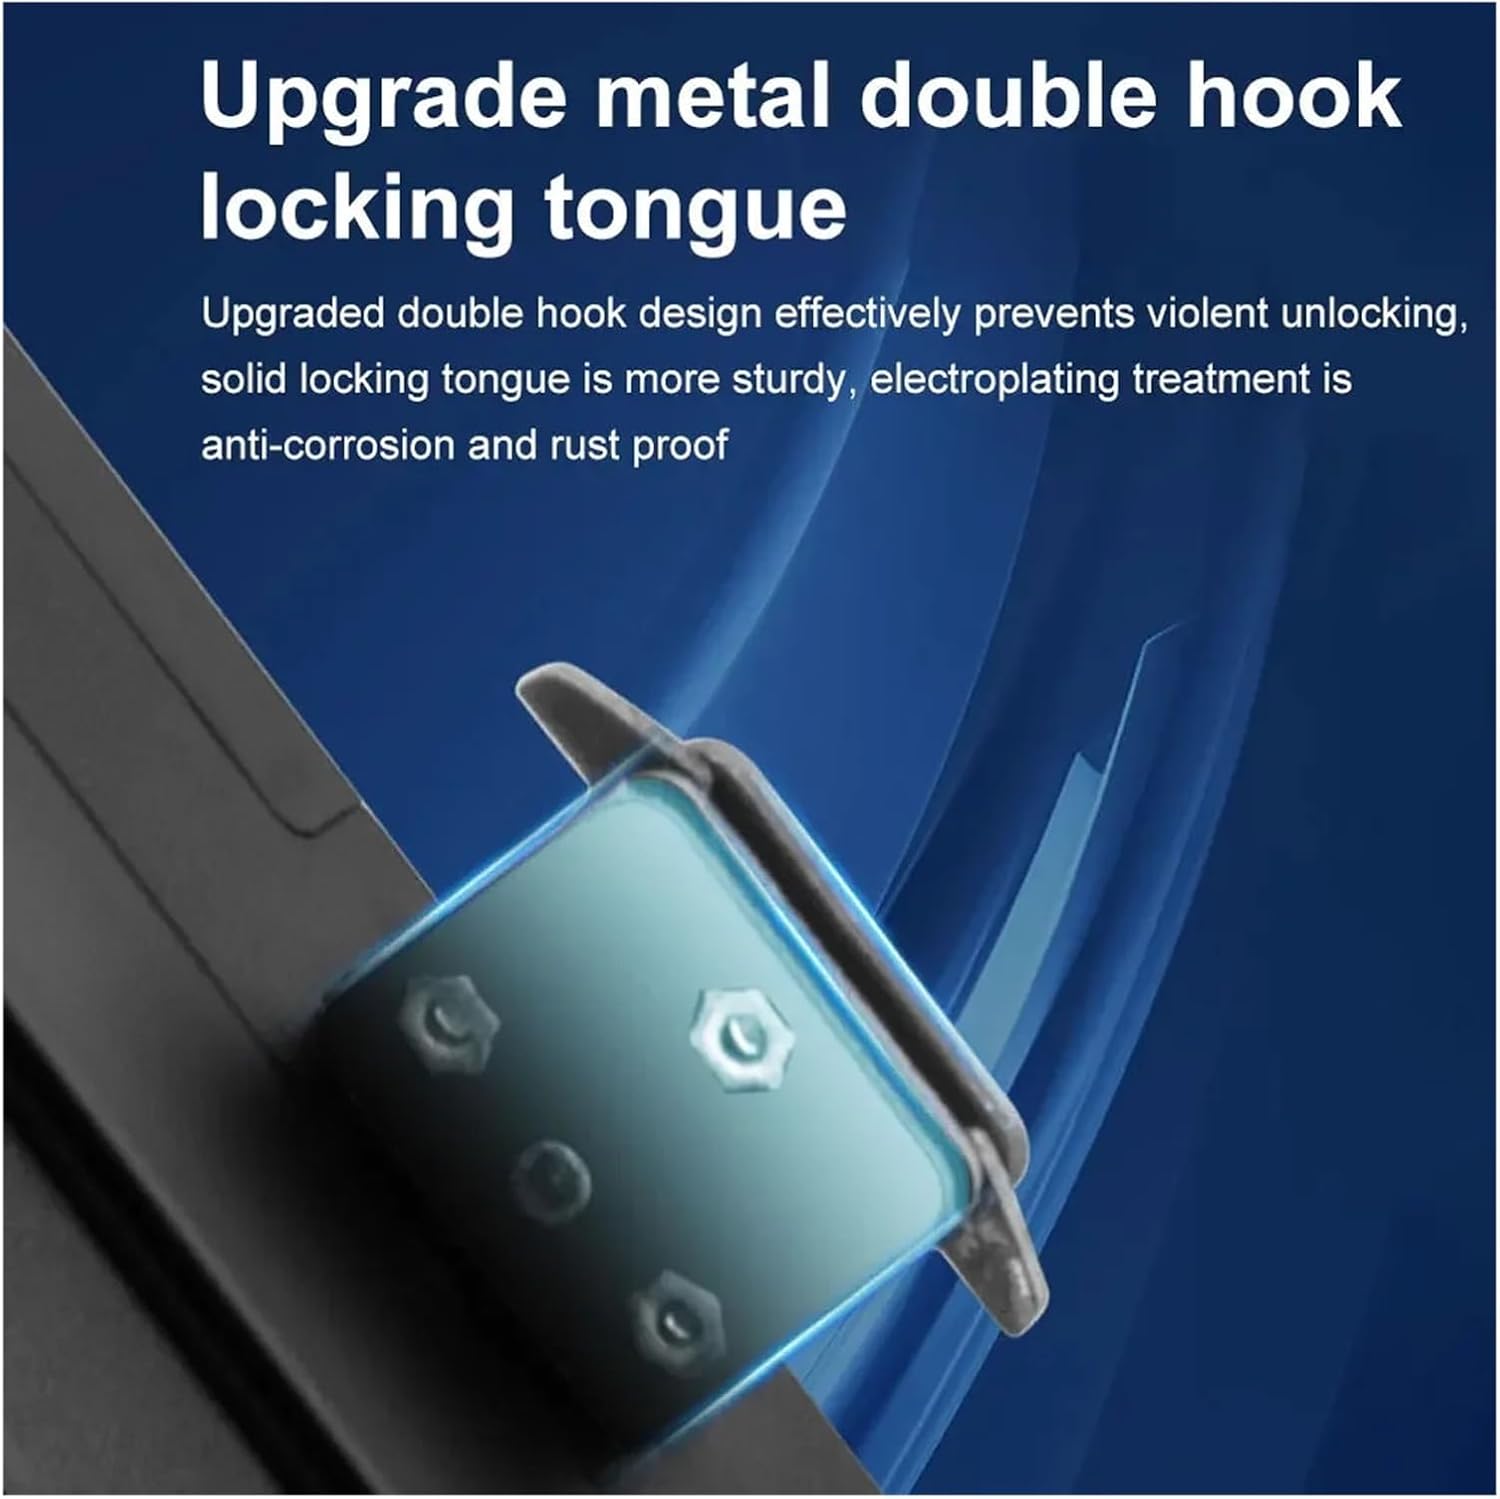
Image 4.2: Illustration of the upgraded metal double hook locking tongue, designed for enhanced security and resistance against forced entry, featuring anti-corrosion and rust-proof electroplating treatment.
5. Installation
This smart lock features a no-drill, easy clip-on installation design, making it suitable for glass doors with a thickness of 10-12mm. Only a screwdriver is needed for installation.
- Prepare the Door: Ensure the glass door is clean and free of obstructions where the lock will be mounted.
- Attach the Locking Tongue: Secure the locking tongue mechanism to the edge of the glass door. This typically involves clamping it onto the glass.
- Mount the Front Panel: Position the front panel (keypad side) on one side of the glass door, aligning it with the locking tongue.
- Mount the Rear Panel: Position the rear panel (battery compartment side) on the opposite side of the glass door, aligning it with the front panel and the locking tongue.
- Secure the Panels: Use the provided screws to securely fasten the front and rear panels together through the glass, clamping the lock firmly onto the door. Ensure the lock is level and stable.
- Test Mechanism: After installation, manually check the locking tongue to ensure it moves smoothly and engages properly.

Image 5.1: The rear panel of the smart lock showing the battery compartment and the screws used for securing the lock to the glass door, demonstrating the easy clip-on, no-wiring installation.
6. Setup
6.1 Battery Installation
Open the battery compartment on the rear panel. Insert the specified dry batteries, ensuring correct polarity. Close the compartment. The lock will typically emit a sound or light up to indicate power.
6.2 Initial Administrator Setup
Upon first power-up, you will need to set up an administrator. This is usually the first fingerprint or password registered.
- Press the setup button (refer to the lock's specific button, often inside the battery cover or a dedicated button).
- Follow the voice prompts or indicator lights to register the first administrator fingerprint or password. Typically, you will need to scan your finger multiple times or enter the password twice for confirmation.
- This administrator will have full control over adding/deleting other users.
6.3 Tuya Smart Life App Connection
The lock connects to the Tuya Smart Life app via Bluetooth for remote control and management.
- Download App: Download the "Tuya Smart" or "Smart Life" app from your smartphone's app store.
- Register/Login: Create an account or log in.
- Add Device: In the app, tap "+" to add a new device. Select "Security & Video Surveillance" > "Door Lock (Bluetooth)".
- Enable Bluetooth: Ensure Bluetooth is enabled on your smartphone and the lock is in pairing mode (refer to lock's manual for specific pairing mode activation, often by pressing a button or entering a specific sequence on the keypad).
- Connect: The app will scan for nearby Bluetooth locks. Select your lock from the list to connect.
- Gateway Connection (Optional): For remote Wi-Fi control beyond Bluetooth range, you may need a Tuya M1 Gateway (sold separately). Connect the gateway to your home Wi-Fi network and then link the lock to the gateway through the app.

Image 6.1: Diagram showing the connectivity options: direct Bluetooth communication between the lock and a smartphone, and remote gateway control via cloud services for extended range and functionality.
6.4 Adding Users (Fingerprints, Passwords, Cards)
Only an administrator can add or delete users.
- Adding Fingerprints:
- Access the user management menu (via administrator fingerprint/password or app).
- Select "Add Fingerprint".
- Follow prompts to scan the finger multiple times from different angles until successfully registered.
- Adding Passwords:
- Access the user management menu.
- Select "Add Password".
- Enter a new password (6-8 digits recommended) and confirm it.
- Adding Cards:
- Access the user management menu.
- Select "Add Card".
- Present the RFID card to the card reader area on the lock until successfully registered.
- Temporary Passwords: The Tuya Smart Life app allows generation of temporary or one-time passwords for guests.
7. Operating Instructions
7.1 Unlocking the Door
- Fingerprint: Place your registered finger on the fingerprint sensor. The lock will unlock if the fingerprint is recognized.
- Password: Enter your registered password on the keypad, followed by the '#' key (or equivalent confirmation key). The lock will unlock if the password is correct.
- Card: Present your registered RFID card to the card reader area. The lock will unlock if the card is recognized.
- App: Open the Tuya Smart Life app, select your lock, and tap the unlock button. Ensure Bluetooth is enabled or a gateway is connected for remote unlocking.
- Mechanical Key: Insert the mechanical key into the keyhole and turn to unlock. This is primarily for emergency use.
- Remote Control (Optional): If you have the remote control variant, press the unlock button on the remote.
7.2 Locking the Door
The lock typically supports automatic locking or manual locking.
- Automatic Locking: The lock will automatically engage after a few seconds of being closed.
- Manual Locking: Press the '#' key (or equivalent lock button) on the keypad, or use the app to manually lock the door.
8. Maintenance
8.1 Battery Replacement
The lock features a low battery reminder. When the battery is low, the lock will typically emit a warning sound or light. Replace all batteries promptly to avoid being locked out.
- Open the battery compartment on the rear panel.
- Remove the old batteries.
- Insert new batteries of the specified type, ensuring correct polarity.
- Close the battery compartment.
Note: If batteries are completely drained, you can use a power bank connected to the emergency USB port to temporarily power the lock and unlock it.
8.2 Cleaning
Wipe the lock's surface with a soft, dry cloth. Do not use abrasive cleaners or solvents, as they may damage the finish or electronic components.
9. Troubleshooting
| Problem | Possible Cause | Solution |
|---|---|---|
| Lock does not respond. | Dead batteries. | Replace batteries. Use emergency USB power if needed. |
| Fingerprint not recognized. | Finger is dirty, wet, or sensor is dirty; fingerprint not registered correctly. | Clean finger and sensor. Try different angle. Re-register fingerprint if issue persists. |
| Password not accepted. | Incorrect password entered; password not registered. | Ensure correct password and confirmation key. Re-register password. |
| Cannot connect to Tuya app. | Bluetooth off; lock not in pairing mode; app issues. | Ensure phone Bluetooth is on. Put lock in pairing mode. Restart app/phone. Check app permissions. |
| Locking tongue not engaging. | Misalignment; obstruction. | Check alignment of lock components. Remove any obstructions. |
10. Specifications
| Feature | Detail |
|---|---|
| Model Number | B12-tuya |
| Connectivity | Bluetooth (Tuya Smart Life App) |
| Unlocking Methods | Fingerprint, Password, Card, Mechanical Key, App, Remote Control (Optional), WiFi Gateway (Optional) |
| Fingerprint Capacity | 50 |
| Password/Card Capacity | 249 |
| Suitable Door Type | Glass Door |
| Fit Door Thickness | 10-12mm |
| Power Supply | Dry Battery |
| Protection Level | IP67 Rated (Waterproof) |
| Statistic Current | <55mA (Battery life over 1 Year) |
| Working Current | <250mA |
| Item Weight | 1.76 ounces |
| Package Dimensions | 1.18 x 0.79 x 0.39 inches |
11. Warranty and Support
For warranty information, please refer to the specific terms provided at the point of purchase or contact your retailer.
If you encounter any issues or have questions regarding your JUCFRDNJ Tuya Smart Life Bluetooth Glass Door Lock, please contact customer support through the retailer's platform or the manufacturer's official channels. Provide your model number (B12-tuya) and a detailed description of the issue for faster assistance.