
1. Introduction
This manual provides essential information for the safe and efficient operation of your Renogy 12V 20A AC-to-DC Portable LFP Battery Charger. Please read this manual thoroughly before use and retain it for future reference. This charger is designed specifically for Lithium Iron Phosphate (LiFePO4) batteries, offering automatic charging with a wide input voltage range and multiple electronic protections.
2. Safety Instructions
Always observe the following safety precautions to prevent personal injury or damage to the charger or battery.
- Read all instructions: Before using the charger, read all instructions and cautionary markings on the charger, the battery, and the product using the battery.
- Use in well-ventilated areas: Operate the charger in a well-ventilated area. Do not cover the charger during operation.
- Avoid moisture: Do not expose the charger to rain, snow, or excessive moisture.
- Proper connections: Ensure all connections are secure and correct before plugging the charger into an AC outlet.
- Disconnect power: Always disconnect the AC power before making or breaking connections to the battery.
- Battery type: This charger is designed exclusively for 12V Lithium Iron Phosphate (LiFePO4) batteries. Do not attempt to charge other battery types (e.g., lead-acid, Ni-Cd, Ni-MH) as this may cause damage or injury.
- Damaged equipment: Do not operate the charger if it has received a sharp blow, been dropped, or otherwise damaged. Contact Renogy support for assistance.
- Children and unauthorized personnel: Keep the charger out of reach of children and ensure only qualified individuals operate the device.
3. Package Contents
Verify that all items are present upon unpacking:
- Renogy 12V 20A AC-to-DC Portable LFP Battery Charger (Model RBC20A1P)
- AC Charger Power Adapter Cable (1200mm 18AWG)
- Alligator Clips Cable (600mm 14AWG) with Blade Automotive Fuse Holder (30A) and Blade Fuse (30A)

4. Product Features
The Renogy 12V 20A AC-to-DC Portable LFP Battery Charger offers advanced features for reliable battery charging:
- Automatic LFP Battery Charging: Designed for 12V Lithium Iron Phosphate (LiFePO4) batteries, providing an optimal charging profile.
- Wide Input Voltage Range: Compatible with 100-240V AC power sources, making it versatile for various regions.
- Easy-to-Understand LED Indicator: A single LED provides clear status updates on the charging process.
- Simple Plug-and-Play Technology: Features alligator clips for straightforward connection to battery terminals.
- Electronic Protections: Includes safeguards against short circuit, over-current, over-voltage, under-voltage, and reverse polarity.
- Lithium Activation: Capable of activating deeply discharged lithium batteries.
- Silent and Efficient Heat Dissipation: Fanless design ensures quiet operation.


5. Setup and Installation
Follow these steps to set up your Renogy battery charger:
- Prepare the Battery: Ensure the battery is a 12V Lithium Iron Phosphate (LiFePO4) type. Check the battery terminals for cleanliness and ensure they are free of corrosion.
- Connect Alligator Clips: Connect the red positive (+) alligator clip to the positive (+) terminal of the battery. Connect the black negative (-) alligator clip to the negative (-) terminal of the battery. Ensure a secure connection.
- Connect AC Power: Plug the AC Charger Power Adapter Cable into the charger's AC port. Then, plug the other end of the AC power adapter cable into a standard 100-240V AC electrical outlet.
- Verify Connection: The charger's LED indicator will illuminate to show the charging status.
6. Operating Instructions
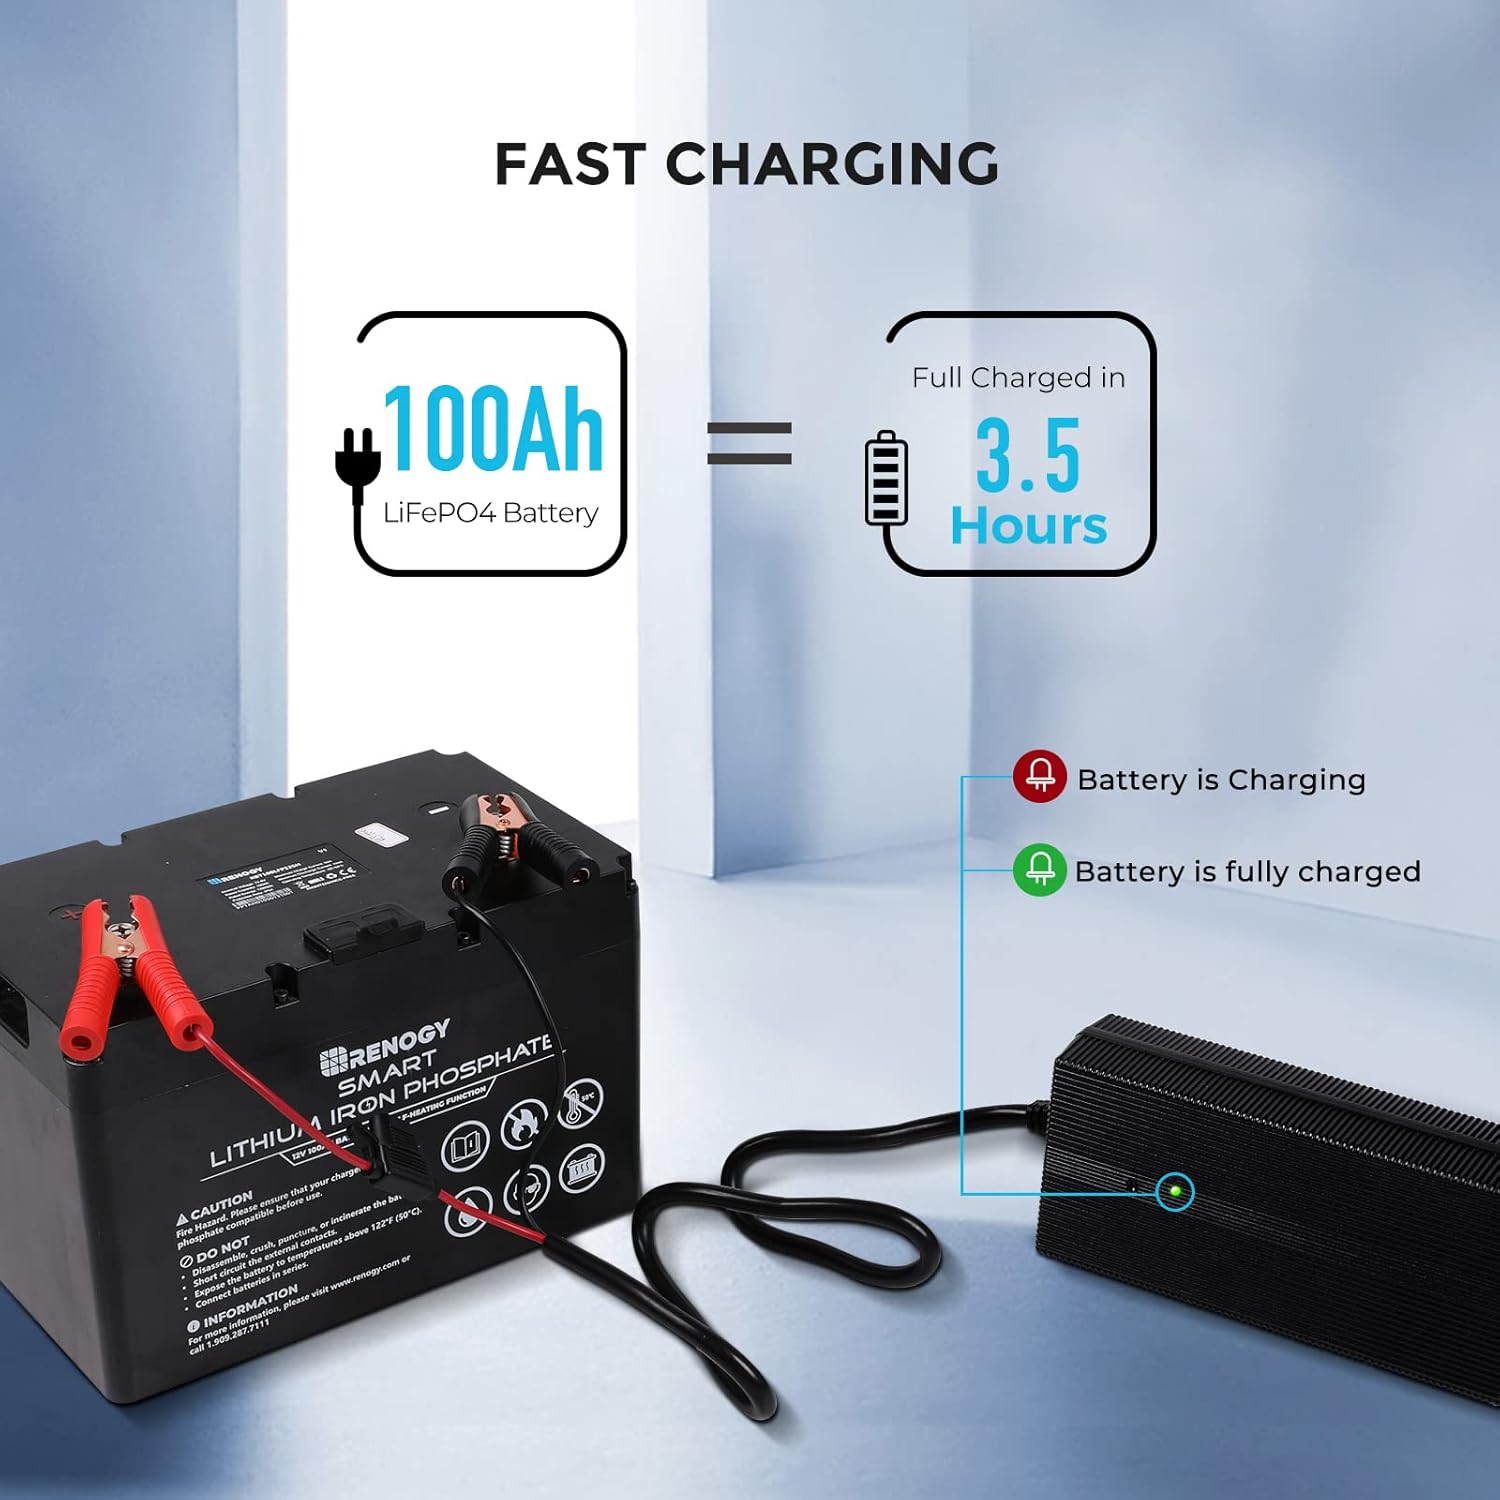
Once connected, the charger will automatically begin the charging process. The LED indicator provides visual feedback:
- Red LED: Indicates the battery is currently charging.
- Green LED: Indicates the battery is fully charged.
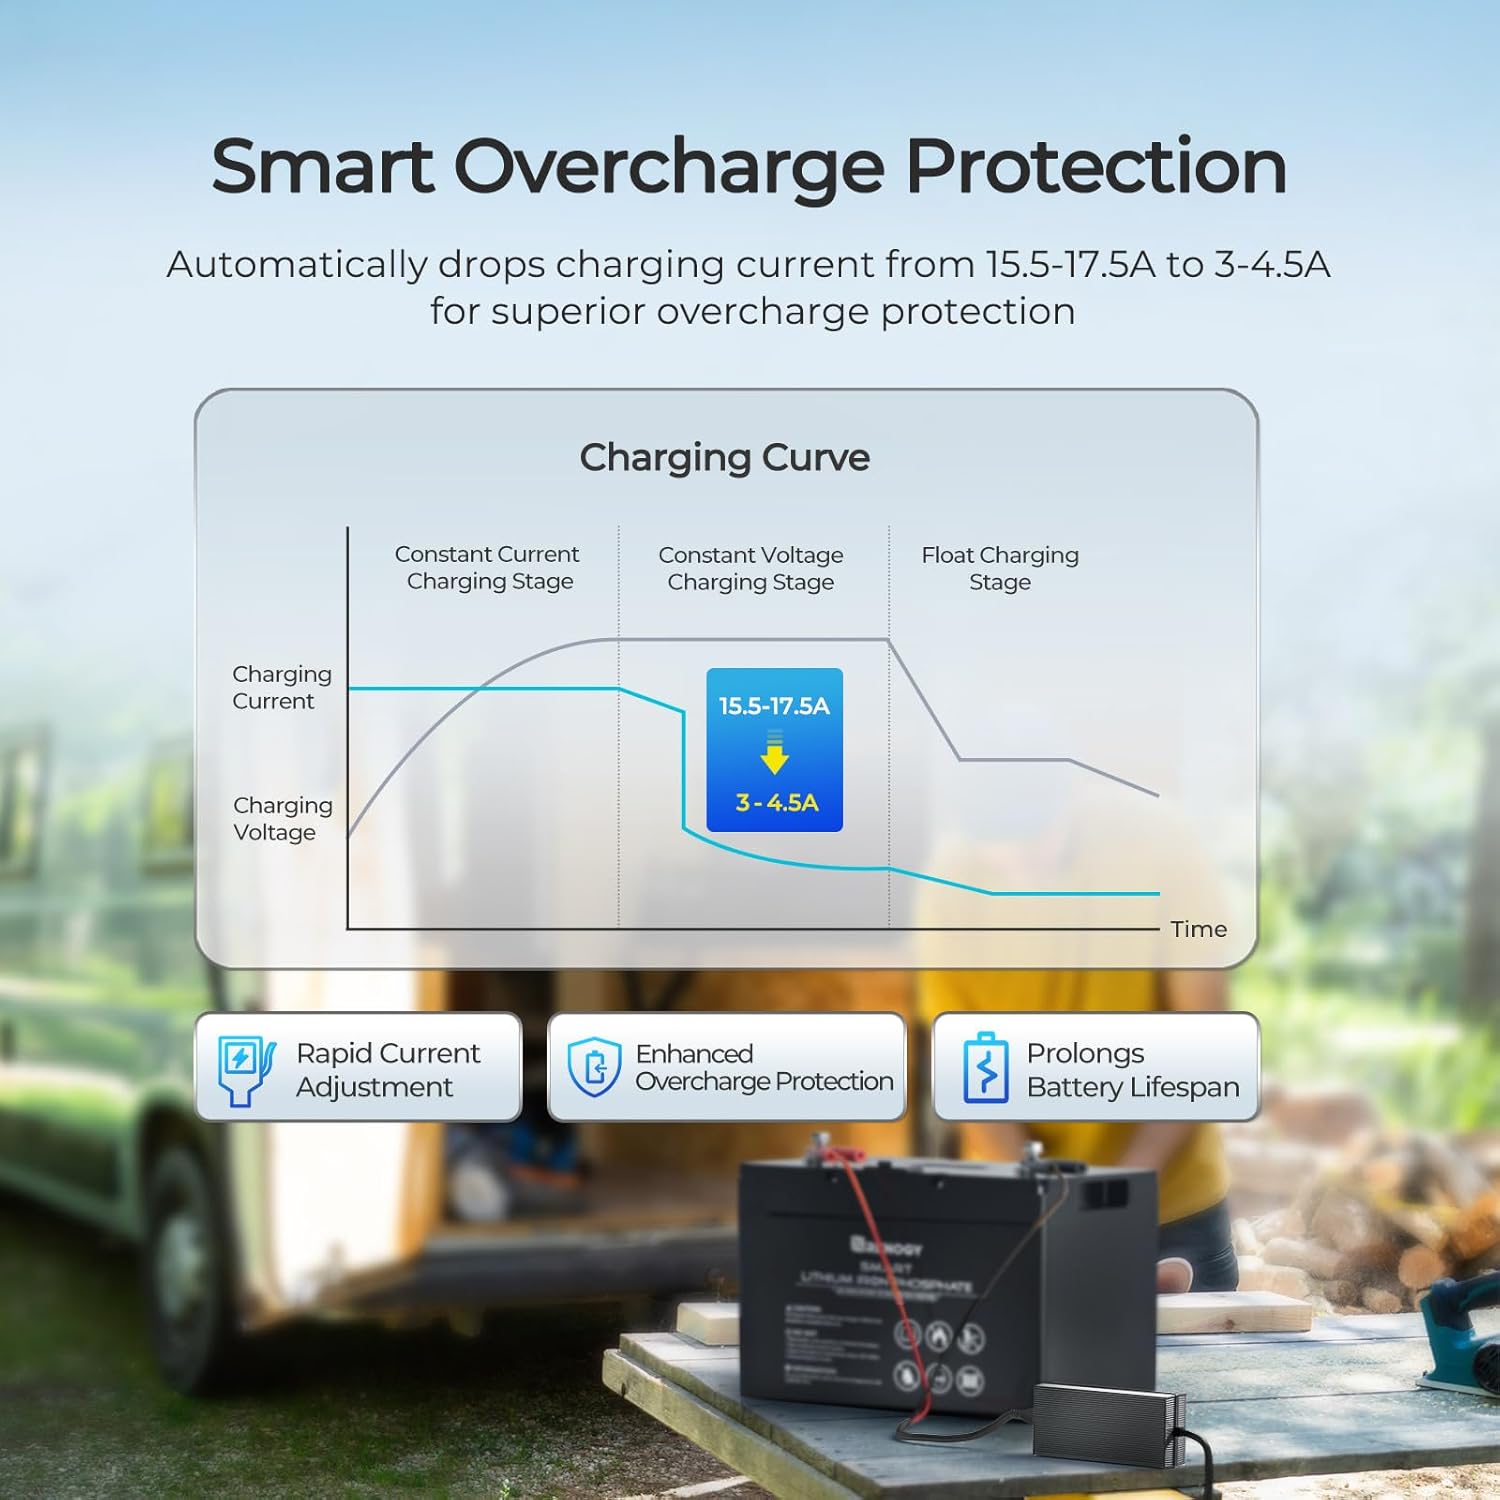
The charger employs a smart overcharge protection mechanism, automatically adjusting the charging current to maintain optimal battery health and prolong lifespan.
A 100Ah LiFePO4 battery can be fully charged in approximately 3.5 hours with this 20A charger.
7. Maintenance
To ensure the longevity and optimal performance of your charger:
- Cleaning: Keep the charger clean and free from dust and debris. Use a dry cloth to wipe the exterior.
- Storage: When not in use, store the charger in a cool, dry place, away from direct sunlight and extreme temperatures.
- Cable Inspection: Periodically inspect the AC power cable and alligator clips cable for any signs of damage, fraying, or exposed wires. Replace if damaged.
- Fuse Check: The alligator clips cable includes an inline blade fuse. If the charger stops working, check and replace the fuse if necessary (30A blade fuse).
8. Troubleshooting
If you encounter issues with your charger, refer to the following table:
| Problem | Possible Cause | Solution |
|---|---|---|
| Charger LED does not light up. | No AC power; Loose connections; Blown fuse; Faulty charger. | Check AC outlet and power cable. Ensure all connections are secure. Check and replace the 30A blade fuse in the alligator clips cable. If issues persist, contact Renogy support. |
| Charger LED is red but battery is not charging. | Poor battery connection; Battery fault. | Ensure alligator clips are securely attached to battery terminals. Verify battery voltage and health. |
| Charger LED is green but battery is not fully charged. | Incorrect battery type; Battery fault. | Confirm battery is a 12V LiFePO4 type. Test battery health. |
| Charger gets excessively hot. | Poor ventilation; Overload. | Ensure charger is in a well-ventilated area and not covered. Disconnect and allow to cool. If overheating persists, contact Renogy support. |
9. Specifications
| Parameter | Value |
|---|---|
| Model | RBC20A1P |
| Product Dimensions | 2.52"D x 9.17"W x 4.25"H (64 x 233 x 108 mm) |
| Item Weight | 5 pounds (2.27 kg) |
| Output Voltage | 12 Volts (DC) |
| Charging Current | 20A |
| Input Voltage Range | 100-240V AC |
| Self-Consumption | 50mA |
| Compatible Battery Type | Lithium Iron Phosphate (LiFePO4) |
| Safety Certifications | UKCA, CE, CB, PSE |
| Color | Black |
10. Warranty and Support
Renogy products are manufactured to high-quality standards. For warranty information, technical support, or service inquiries, please visit the official Renogy website or contact their customer service department. Keep your purchase receipt as proof of purchase for warranty claims.
Renogy Contact Information:
Website: www.renogy.com
Support Email: [Refer to Renogy website for current support email]
Support Phone: [Refer to Renogy website for current support phone number]


