1. Introduction
Thank you for choosing the RAOO MIN F8000H 4-in-1 Foldable Treadmill. This manual provides essential information for safe operation, assembly, maintenance, and troubleshooting. Please read it thoroughly before using the treadmill to ensure proper function and your safety.
2. Important Safety Instructions
WARNING: To reduce the risk of serious injury, read all instructions before using this equipment.
- Always place the treadmill on a flat, stable surface.
- Keep children and pets away from the treadmill during operation.
- Ensure adequate clear space around the treadmill (at least 2 meters behind and 0.6 meters on each side).
- Do not operate the treadmill if it has a damaged cord or plug, or if it is not working properly.
- Wear appropriate athletic footwear and clothing.
- Do not use the treadmill in damp or wet conditions.
- Always use the safety key. Attach the clip to your clothing before starting your workout.
- Consult a physician before starting any exercise program.
- Do not attempt to service the treadmill yourself. Contact customer support for assistance.
- Maximum user weight: 100 kg.
3. Product Overview
3.1 Package Contents
The following components are included in your package:
- RAOO MIN F8000H Treadmill (Main Unit)
- Remote Control
- Silicone Oil (for lubrication)
- iPad Holder
- Hex Wrench
- Screws (x2)
- Knobs (x2)
- Safety Key
- User Manual (this document)
- Warranty Documentation

Figure 3.1: Included Accessories
3.2 Key Features
- 4-in-1 Functionality: Supports Walking Mode (1-3 km/h), Walking Mode (4-6 km/h), Running Mode (6-12 km/h), and Climbing Mode (up to 15% incline).
- Automatic Electric Incline: Adjust incline up to 15% electrically via remote control for varied workout intensity.
- Multi-function LED Display: Shows real-time data including speed, incline, distance, and calories burned.
- Quiet Operation: Equipped with a high-power brushless motor designed for low noise levels (below 40dB).
- Advanced Running Belt: Features a 5-layer running belt (100 x 40 cm) with anti-slip texture and silicone shock absorption for joint protection.
- Compact & Portable Design: Foldable structure with transportation wheels for easy movement and storage, fitting under furniture with a height of 15cm.

Figure 3.2: 4-in-1 Treadmill Modes (Walking, Running, Work, Climbing)

Figure 3.3: Electrically Adjustable Incline (5-15%)

Figure 3.4: Powerful and Low Noise Motor

Figure 3.5: Stable and Broad Running Area

Figure 3.6: Easy Movement and Compact Design
4. Setup
- Unpacking: Carefully remove all components from the packaging. Retain packaging for future storage or transport.
- Placement: Choose a flat, stable surface for the treadmill. Ensure there is at least 2 meters of clear space behind the treadmill and 0.6 meters on each side for safety.
- Unfolding (if applicable): If the treadmill is in a folded state, gently lift the handlebar until it locks into the upright position. Secure any locking pins or knobs as instructed in the quick start guide.
- Handlebar Assembly: Attach the handlebar to the main unit using the provided screws and hex wrench. Ensure it is securely fastened.
- Power Connection: Plug the power cord into a grounded electrical outlet.
- Safety Key: Locate the safety key and its clip. This must be attached to your clothing during operation.
5. Operating Instructions
5.1 Getting Started
- Power On: Connect the treadmill to power and turn on the main power switch (if present, usually near the power cord inlet).
- Attach Safety Key: Clip the safety key to your clothing. The treadmill will not operate without the safety key in place.
- Stand on Side Rails: Step onto the side rails of the treadmill, not directly onto the running belt.
- Start: Press the 'Start' button on the console or remote control. The treadmill will typically begin with a countdown and then start at a low speed.
5.2 Using the Control Panel and Remote Control

Figure 5.1: Control Panel and Remote Control
- Speed Adjustment: Use the '+' and '-' buttons on the console or remote to increase or decrease speed. Speed range is 1-12 km/h.
- Incline Adjustment: Use the 'Incline +' and 'Incline -' buttons on the remote control to adjust the electric incline from 0% to 15%.
- Mode Selection: The remote control may have a 'Mode' button to switch between different workout programs or display modes.
- Stop: Press the 'Stop' button to gradually slow down and stop the treadmill. Pulling the safety key will also immediately stop the treadmill.
5.3 LED Display
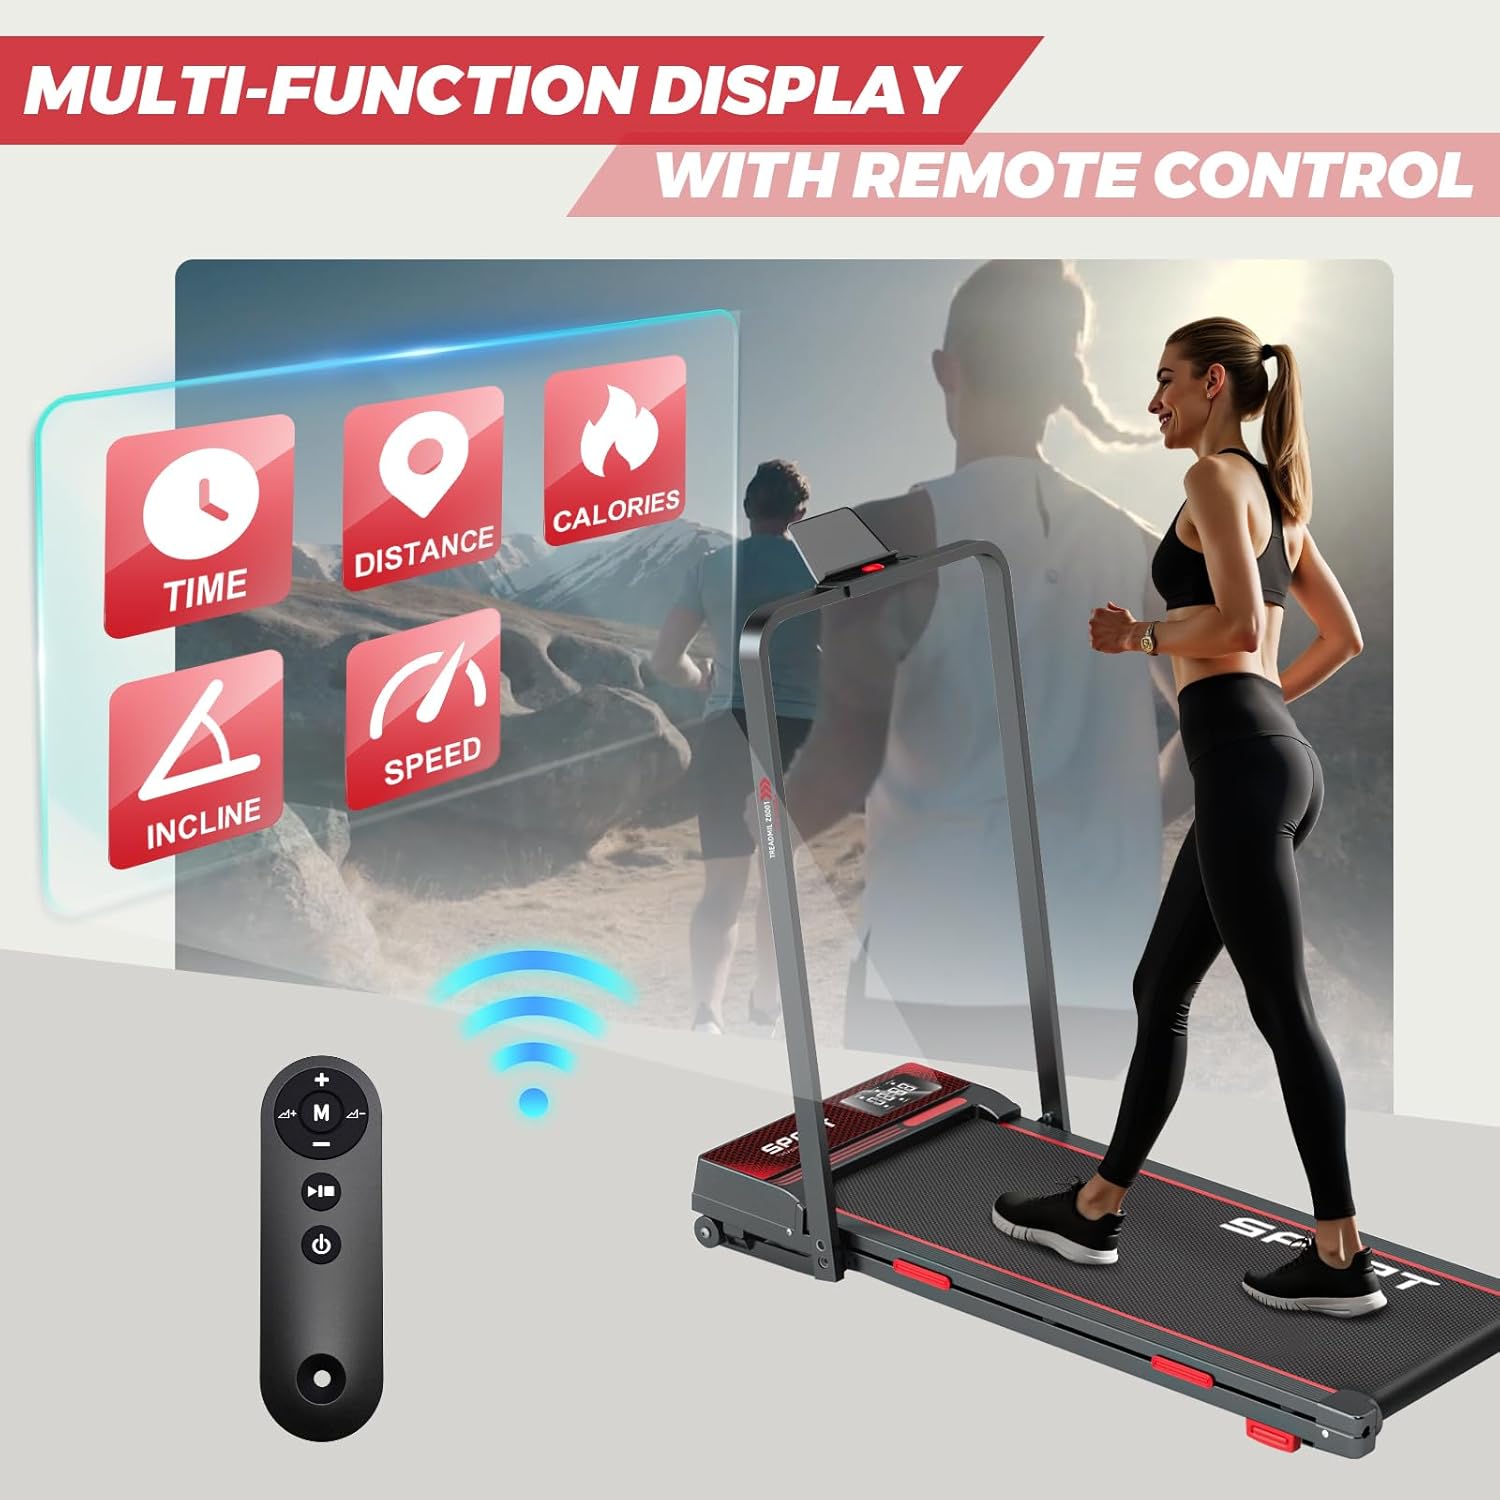
Figure 5.2: Multi-function LED Display
The LED display provides real-time feedback on your workout:
- Time: Duration of your workout.
- Distance: Total distance covered.
- Calories: Estimated calories burned.
- Speed: Current speed in km/h.
- Incline: Current incline percentage.
5.4 Using the iPad/Phone Holder
Place your iPad or smartphone securely in the designated holder on the console for entertainment or to follow workout programs during your exercise.
5.5 Folding and Storage
To fold the treadmill for storage:
- Ensure the treadmill is stopped and powered off.
- Carefully lower the handlebar until it is flat against the running deck. Secure any locking mechanisms.
- Utilize the transportation wheels to move the folded treadmill to your desired storage location. It can be stored flat under a bed or sofa (minimum 15cm clearance required).

Figure 5.3: Folding Treadmill Dimensions

Figure 5.4: Easy to Move and Space-Saving Design
6. Maintenance
- Cleaning: Regularly wipe down the treadmill with a damp cloth. Do not use abrasive cleaners or solvents.
- Belt Lubrication: The running belt requires periodic lubrication to ensure smooth operation and prolong its lifespan. Use the provided silicone oil. Refer to the quick start guide for specific lubrication intervals and instructions. Generally, lubricate every 3 months or after 100 hours of use.
- Belt Adjustment: If the running belt becomes off-center or slips, it may need adjustment. Use the hex wrench to adjust the tension bolts at the rear of the treadmill. Refer to the quick start guide for detailed instructions.
- Inspection: Periodically check all bolts and nuts for tightness.
7. Troubleshooting
| Problem | Possible Cause | Solution |
|---|---|---|
| Treadmill does not start. | Power cord not plugged in, main switch off, safety key not in place. | Check power connection, turn on main switch, ensure safety key is correctly inserted. |
| Running belt slips. | Belt too loose, insufficient lubrication. | Adjust belt tension (refer to maintenance section), lubricate the belt. |
| Running belt is off-center. | Uneven belt tension. | Adjust belt alignment (refer to maintenance section). |
| Unusual noise during operation. | Loose parts, lack of lubrication, foreign object. | Check for loose bolts, lubricate the belt, inspect for foreign objects. If noise persists, contact support. |
| Incline not adjusting. | Motor issue, remote control battery low. | Check remote control battery. If issue persists, contact support. |
8. Specifications
| Feature | Detail |
|---|---|
| Model Number | F8000H |
| Brand | RAOO MIN |
| Speed Range | 1 - 12 km/h |
| Incline Adjustment | Electric, up to 15% |
| Motor Power | 2.5 HP (Peak Horsepower) |
| Max Weight Capacity | 100 kg |
| Running Area (L x W) | 100 x 40 cm |
| Product Dimensions (L x W x H) | 120 x 56 x 100 cm |
| Folded Dimensions (Approx.) | 124 x 56 x 15 cm (under 15cm height for storage) |
| Product Weight | 25.5 kg |
| Material | Acrylonitrile Butadiene Styrene (ABS), Iron |
| Power Source | Corded Electric |
| Special Features | Shockproof, Compact Design, Automatic Incline, Lightweight, Wheels |
9. Warranty and Support
Your RAOO MIN F8000H Treadmill comes with a warranty as detailed in the included warranty documentation. For technical assistance, troubleshooting beyond this manual, or warranty claims, please contact RAOO MIN customer support. We are committed to providing professional technical support and will respond within 24 hours.
Please refer to your warranty documentation for specific terms and conditions.
10. Product Video
Video 10.1: Overview of the RAOO MIN F8000H Foldable Treadmill in use, demonstrating its features and portability. This video is provided by the seller.


