
1. Introduction
The SEEIRIR S450 is a high-performance digital multimeter designed for precise electrical measurements. It features a 20000-count display, real-time waveform recording, and capabilities for measuring voltage, current, resistance, capacitance, and temperature. This manual provides essential information for safe and effective operation of your S450 multimeter.
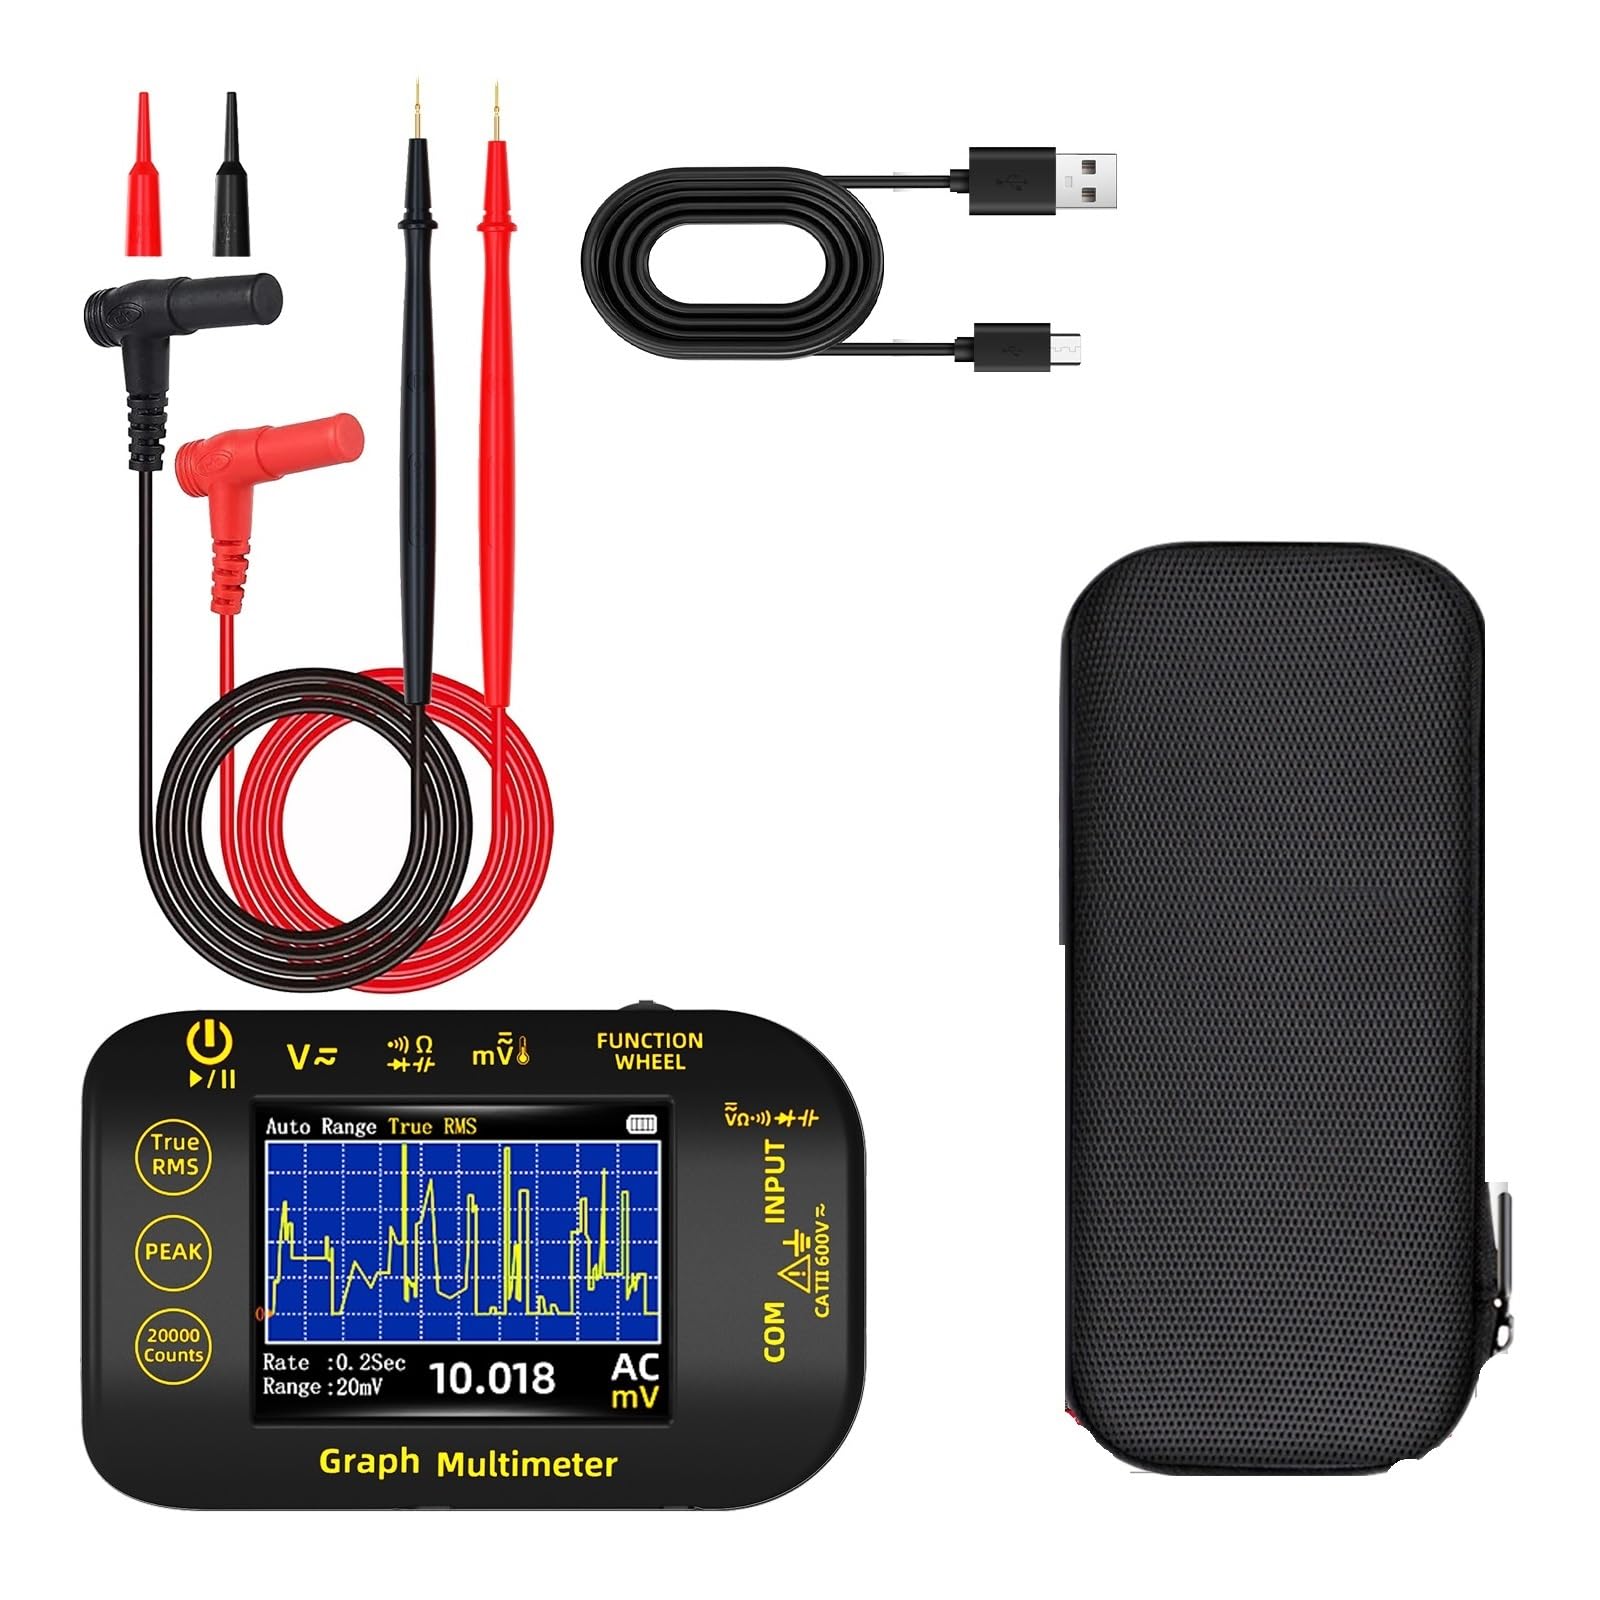
Image 1.1: Front view of the SEEIRIR S450 Digital Multimeter, showing the display, rotary dial, and input jacks.
2. Safety Information
Always observe safety precautions when using the multimeter to prevent electric shock or personal injury. Read all safety information before operating the device.
- Do not exceed the maximum input limits for any measurement function.
- Ensure test leads are in good condition and properly connected before making measurements.
- Do not use the multimeter if it appears damaged or is not operating correctly.
- Exercise extreme caution when working with voltages above 30V AC RMS, 42V peak, or 60V DC.
- Replace the battery when the low battery indicator appears to ensure accurate readings.
3. Product Features
The S450 Digital Multimeter offers a range of features designed for versatility and safety:
- Supports multiple measurements including voltage, current, resistance, capacitance, and temperature.
- High-resolution screen for clear display and accurate readings.
- Overload protection and anti-burn design for enhanced safety.
- Robust construction, anti-fall and earthquake-resistant, suitable for various working environments.
- One-click switching function and automatic shutdown for power saving.
4. Package Contents
Verify that all items are present in your package:
- SEEIRIR S450 Digital Multimeter
- Test Leads (Red and Black)
- Temperature Probe (K-type thermocouple)
- User Manual
- Storage Pouch (optional, may vary by package)
5. Setup
5.1 Battery Installation
The S450 multimeter operates on a lithium battery. To install or replace the battery:
- Ensure the multimeter is powered off and test leads are disconnected.
- Locate the battery compartment cover on the back of the device.
- Use a screwdriver to open the battery compartment.
- Insert the lithium battery, observing correct polarity (+ and -).
- Replace the cover and secure it with the screw.
Image 5.1: Diagram showing the location and opening of the battery compartment.
5.2 Powering On/Off
To power on the multimeter, rotate the function dial from the OFF position to any desired measurement function. To power off, rotate the dial back to the OFF position. The device features an automatic shutdown function to conserve battery life after a period of inactivity.
6. Operating Instructions
Before making any measurement, ensure the test leads are correctly inserted into the appropriate input jacks.
6.1 Measuring DC/AC Voltage
- Insert the red test lead into the 'VΩmA' jack and the black test lead into the 'COM' jack.
- Rotate the function dial to the 'V~' (AC Voltage) or 'V=' (DC Voltage) position.
- Connect the test leads in parallel across the circuit or component to be measured.
- Read the voltage value on the display.
6.2 Measuring DC/AC Current
Caution: Never connect the multimeter in parallel with a voltage source when measuring current. Always connect in series with the load.
- For current up to 200mA, insert the red test lead into the 'VΩmA' jack. For higher currents, consult the manual for specific high current jacks (if available). Insert the black test lead into the 'COM' jack.
- Rotate the function dial to the 'A~' (AC Current) or 'A=' (DC Current) position.
- Open the circuit and connect the multimeter in series with the load.
- Read the current value on the display.
6.3 Measuring Resistance
- Insert the red test lead into the 'VΩmA' jack and the black test lead into the 'COM' jack.
- Rotate the function dial to the 'Ω' (Resistance) position.
- Ensure the circuit or component is de-energized before measuring resistance.
- Connect the test leads across the component.
- Read the resistance value on the display.
6.4 Measuring Capacitance
- Insert the red test lead into the 'VΩmA' jack and the black test lead into the 'COM' jack.
- Rotate the function dial to the 'F' (Capacitance) position.
- Ensure the capacitor is fully discharged before measurement to prevent damage to the multimeter.
- Connect the test leads across the capacitor terminals.
- Read the capacitance value on the display.
6.5 Measuring Temperature
- Insert the temperature probe (K-type thermocouple) into the designated input jacks (usually marked 'TEMP' or with a thermometer symbol).
- Rotate the function dial to the '°C/°F' (Temperature) position.
- Place the tip of the temperature probe on or near the object whose temperature is to be measured.
- Read the temperature value on the display.
6.6 Waveform Recording
The S450 features real-time waveform recording. Refer to the on-screen menu or specific button functions for activating and configuring this mode. This function allows for capturing and analyzing transient signals over time. Detailed instructions for waveform recording are typically accessed via the multimeter's menu system.
Image 6.1: Example of a waveform displayed on the S450 multimeter screen during recording mode.
7. Maintenance
7.1 Cleaning
Wipe the case with a damp cloth and mild detergent. Do not use abrasives or solvents. Ensure the device is powered off and disconnected from all circuits before cleaning.
7.2 Battery Replacement
Refer to Section 5.1 for instructions on replacing the lithium battery. Always use the specified battery type.
7.3 Fuse Replacement
If the current measurement function stops working, the fuse may need replacement. Fuse replacement should only be performed by qualified personnel. Refer to the specifications for the correct fuse type and rating. Always disconnect test leads and power off the device before opening the fuse compartment.
8. Troubleshooting
| Problem | Possible Cause | Solution |
|---|---|---|
| No display or dim display | Low battery; Device off | Replace battery; Turn function dial to an ON position |
| Inaccurate readings | Incorrect function selected; Poor test lead connection; External interference | Select correct function; Ensure secure connections; Move away from strong electromagnetic fields |
| Current measurement not working | Blown fuse | Replace fuse (refer to Section 7.3) |
| Temperature reading incorrect | Probe not properly connected; Damaged probe | Check probe connection; Replace probe if damaged |
9. Specifications
| Parameter | Value |
|---|---|
| Model Number | S450 |
| Display Type | Digital (20000 Counts) |
| DC Voltage Range | Up to 1000V |
| AC Voltage Range | Up to 1000V |
| Resistance Range | Up to 200MΩ |
| Capacitance Range | Up to 100mF |
| Operating Temperature | 0 - 40 °C |
| Dimensions | 108 x 69.5 x 33 mm |
| Item Weight | 300 g |
| Certifications | CE, FCC, RoHS |
| Power Source | Lithium Battery |
10. Warranty and Support
The SEEIRIR S450 Digital Multimeter comes with a standard manufacturer's warranty. Please refer to the warranty card included in your package for specific terms and conditions. For technical support, troubleshooting assistance, or warranty claims, please contact SEEIRIR customer service or visit our official website.
Official Website: www.seeirir.com (Placeholder link, please refer to actual product documentation for correct URL)