
1. Introduction
Thank you for purchasing the GODOX ML100R RGB LED Video Light. This compact and portable full-color video light is designed for diverse applications, including outdoor mobile shooting and indoor lighting setups. It offers a wide color temperature range, precise color control, and various special effects. Please read this manual carefully before use to ensure proper operation and optimal performance.

Image: The GODOX ML100R RGB LED Video Light in use, showcasing its adaptability for different shooting environments.
2. Safety Information
- Do not disassemble or modify this product.
- Keep the product dry. Do not handle with wet hands or immerse in water.
- Keep out of reach of children.
- Do not use in the presence of flammable gases or liquids.
- Ensure the power adapter is compatible with the local voltage.
- Unplug the power adapter during thunderstorms or when not in use for extended periods.
- Avoid direct eye exposure to the light source.
- The light body can become hot during extended use. Exercise caution when handling.

Image: Top-down view of the GODOX ML100R light, showing the "Caution: High Temperature" warning label.
3. What's in the Box
Verify that all items listed below are included in your package:
- Light Body x1
- Lens Reflector ML-L15 x1
- Adapter x1
- Lamp Head Protective Cover x1
- Holder AD-E2 x1

Image: All components included in the GODOX ML100R package, laid out for inspection.
4. Product Overview
4.1 Light Body
The ML100R features a compact design with integrated controls and a display screen for easy adjustments.

Image: Angled view of the GODOX ML100R light body, highlighting its compact size.
4.2 Controls and Display
The rear panel of the light body houses the control buttons and display screen for adjusting settings.
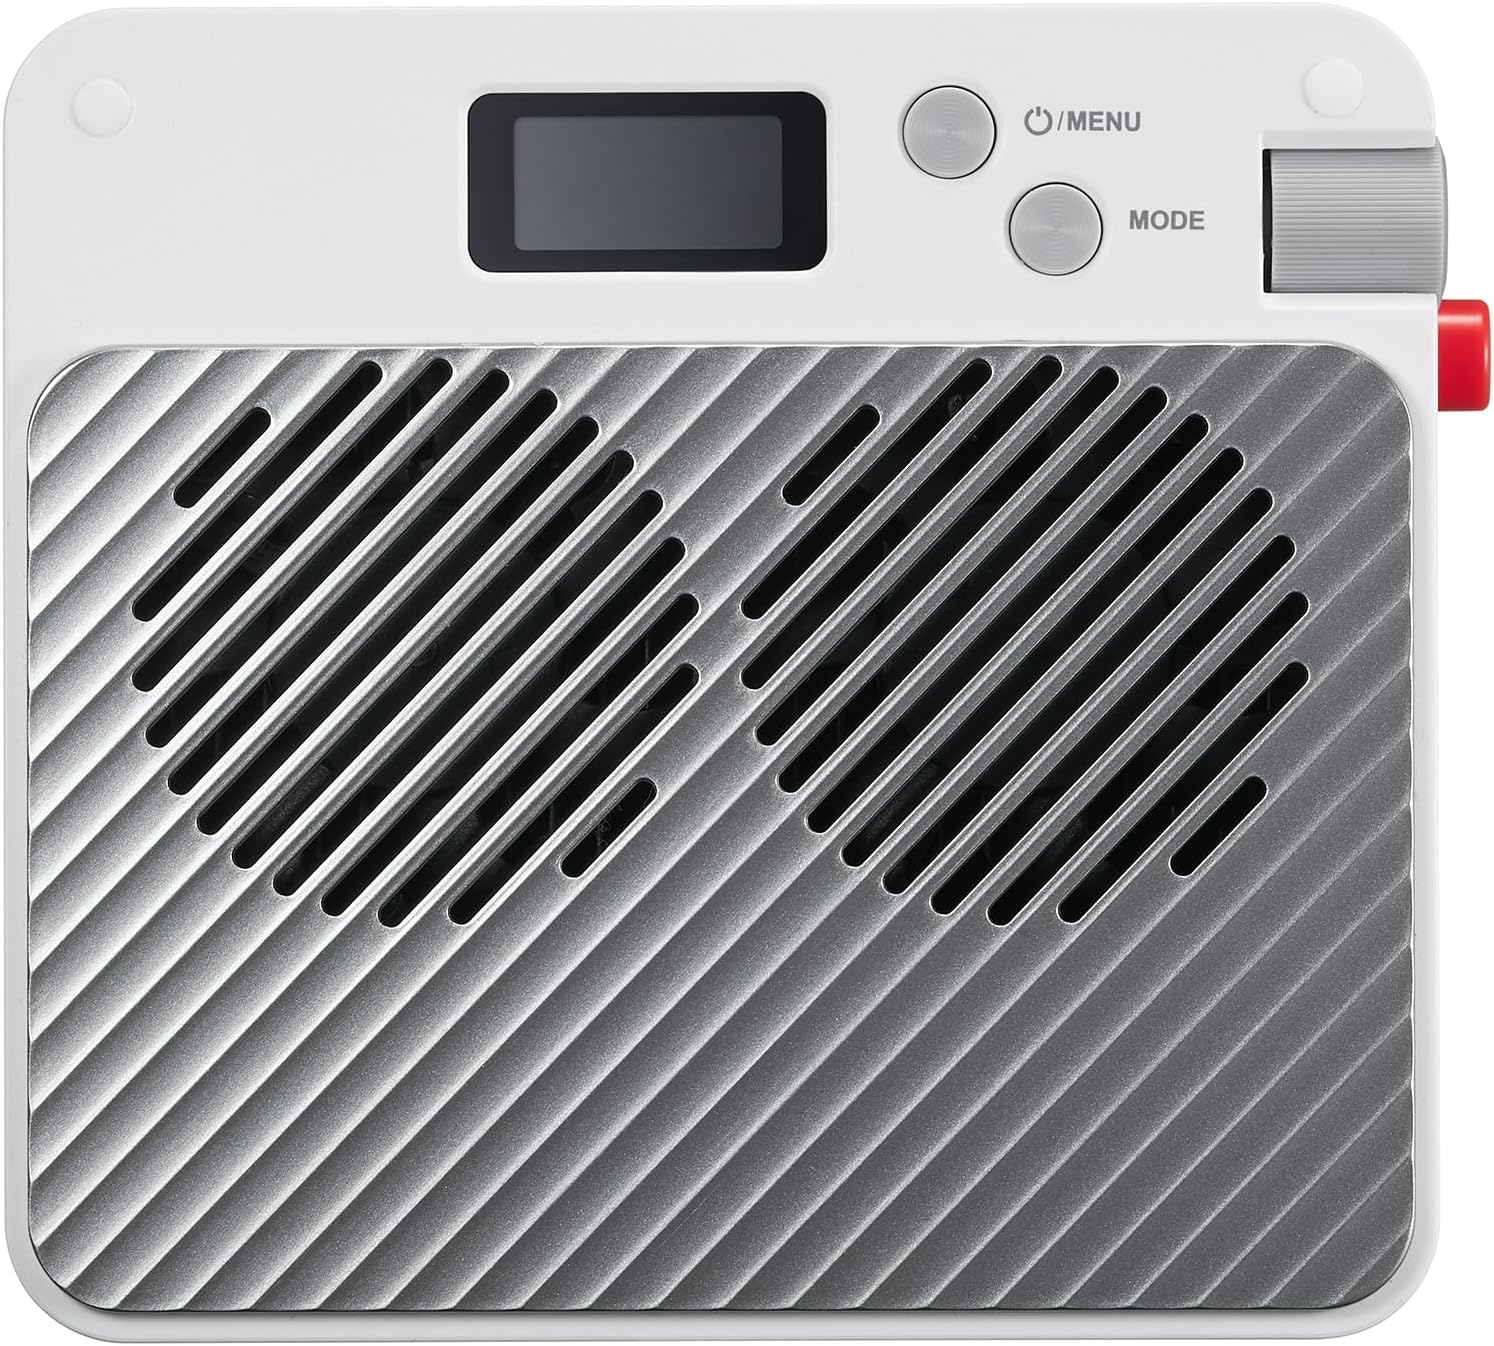
Image: Rear view of the GODOX ML100R, detailing the control panel with its display, menu button, mode button, and adjustment dial.
4.3 Lens Reflector ML-L15
The included ML-L15 lens reflector helps to focus and direct the light output.
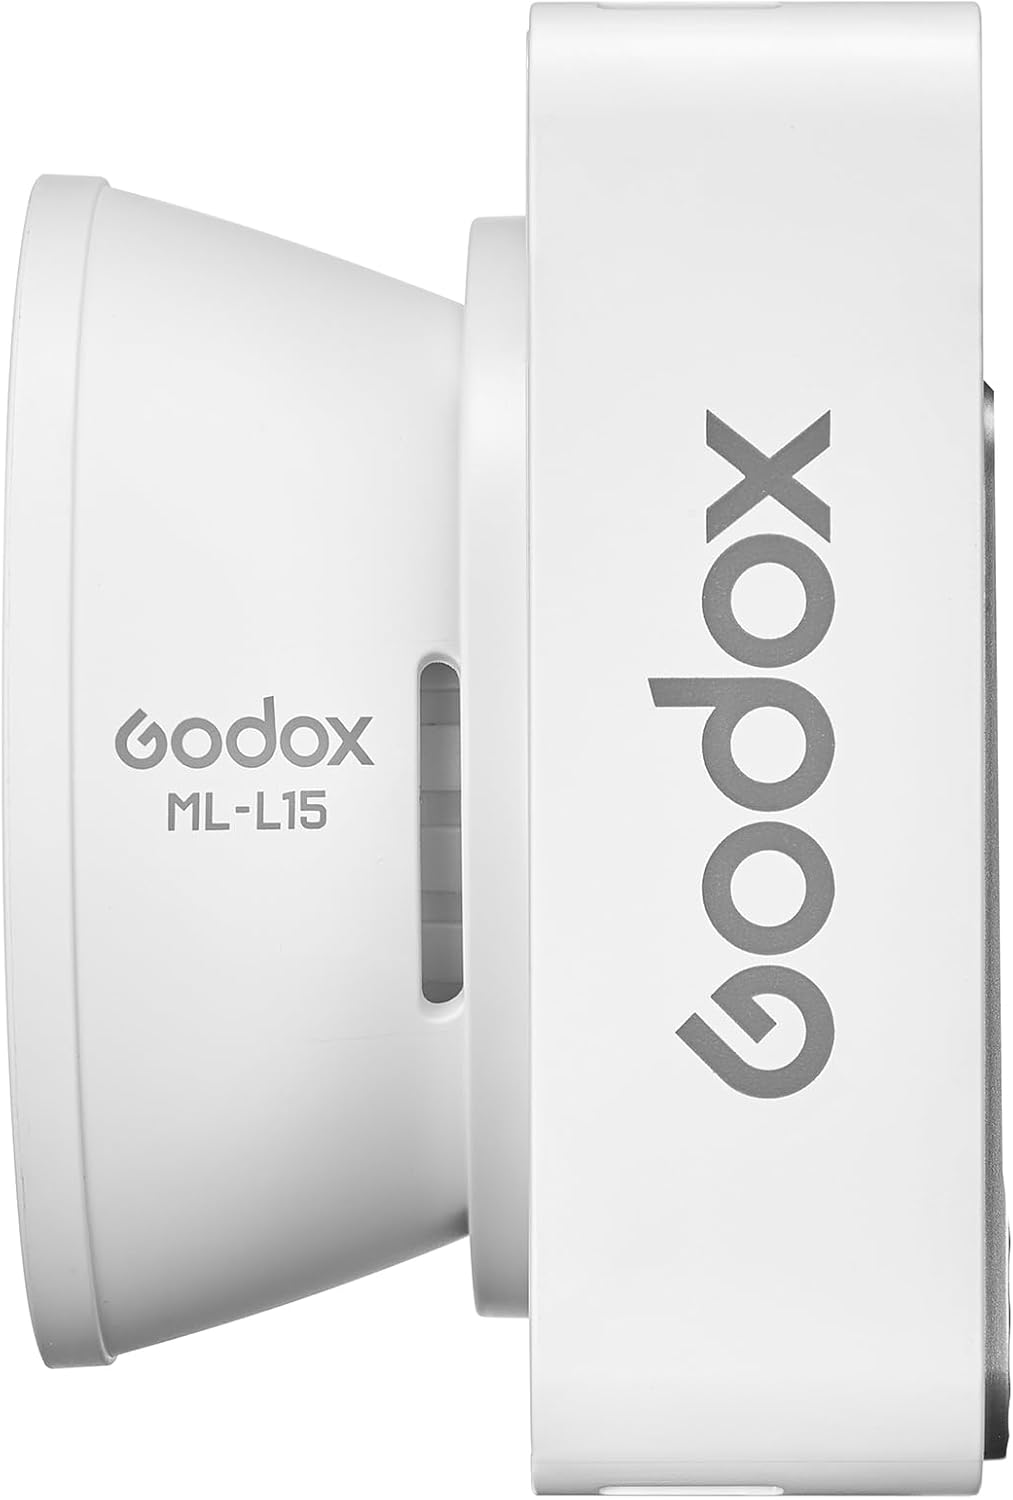
Image: Side profile of the GODOX ML-L15 lens reflector, illustrating its design and how it attaches to the light.
5. Setup
5.1 Attaching the Reflector
- Align the ML-L15 Lens Reflector with the front of the light body.
- Twist the reflector clockwise until it locks securely into place.
5.2 Mounting the Light
Use the included Holder AD-E2 to mount the ML100R onto a light stand or C-stand.
- Attach the Holder AD-E2 to the bottom of the ML100R light body.
- Secure the holder onto your desired light stand or mounting accessory.
5.3 Powering the Light
The ML100R offers versatile power options:
- AC Power Supply: Connect the included DC adapter to the light's DC 24V input and plug it into a wall outlet.
- Portable Battery Solutions: The light supports various portable battery solutions for greater mobility. These include the Battery Grip BG02, V-mount battery supply (AK-BO2), NPF battery supply (AK-B01), and USB-C Power Bank (requires a PD-capable USB-C cable and power supply for full 100W output). Batteries and some accessories are not included.

Image: Illustration of different power supply methods for the ML100R, such as AC adapter, battery grips, and USB-C power banks.
6. Operating Instructions
6.1 Power On/Off
Press and hold the Power/Menu button to turn the light on or off.
6.2 Mode Selection
Press the MODE button to cycle through different lighting modes, such as CCT (Correlated Color Temperature), HSI (Hue, Saturation, Intensity), and FX (Special Effects).
6.3 Adjusting Settings (CCT/HSI)
In CCT mode, you can adjust the color temperature from 1800K to 10000K and GM (Green/Magenta) adjustability for precise color correction. In HSI mode, you can control hue, saturation, and intensity.
- Use the adjustment dial to change the selected parameter (e.g., color temperature, brightness).
- Press the Menu button to navigate between different parameters within a mode.

Image: The ML100R light producing various colors, illustrating its wide color temperature range and precise color control capabilities.
6.4 FX Effects
The ML100R includes 14 pre-programmed FX effects to create diverse atmospheres. These effects simulate natural elements like fire and lightning, as well as creative options such as cop car and party lights.

Image: Visual representation of the 14 built-in special effects, such as RGB Cycle, Party, Flash, and Police Car.
6.5 App Control (Godox Light App)
For enhanced control and efficiency, download the Godox Light App. The app allows you to adjust HSI or CCT settings, and connect and control multiple ML100R lights simultaneously via Bluetooth.
- Download the "Godox Light" app from your device's app store.
- Enable Bluetooth on your mobile device.
- Open the app and follow the on-screen instructions to connect to your ML100R light(s).
- Once connected, you can adjust all parameters remotely.

Image: A smartphone displaying the Godox Light App, illustrating its interface for HSI and CCT adjustments.
7. Maintenance
- Cleaning: Use a soft, dry cloth to clean the light body and reflector. Do not use abrasive cleaners or solvents.
- Storage: Store the light in a dry, cool place, away from direct sunlight and moisture. Use the provided protective cover for the lamp head.
- Battery Care: If using external batteries, follow the manufacturer's guidelines for charging and storage.
8. Troubleshooting
| Problem | Possible Cause | Solution |
|---|---|---|
| Light does not turn on. | No power supply or low battery. | Ensure AC adapter is properly connected or external battery is charged and connected. Check USB-C power supply for adequate wattage (100W for full output). |
| Cannot connect to Godox Light App. | Bluetooth is off or light is out of range. | Ensure Bluetooth is enabled on your device and the light is within range. Restart the app and the light. |
| Light output is dim when using USB-C. | Insufficient power from USB-C source. | Use a PD-capable USB-C cable and a power supply that can deliver 100W for full brightness. The display will indicate available wattage. |
| Light becomes very hot. | Normal operation at high power. | This is normal for high-power LED lights. Ensure proper ventilation. Reduce power output if prolonged high temperature is a concern. |
9. Specifications
| Model | ML100R |
| Color Temperature Range | 1800K-10000K |
| FX Effects | 14 pre-programmed effects |
| Control Methods | On-board controls, Godox Light App (Bluetooth) |
| Connectivity Technology | Bluetooth |
| Power Supply | AC Adapter (DC 24V), Portable Battery Solutions (e.g., BG02, V-mount, NPF, USB-C PD 100W) |
| Item Weight | Approximately 4.18 pounds (light body only) |
| Package Dimensions | 9.84 x 9.05 x 4.33 inches |
| Manufacturer | GODOX |
10. Warranty and Support
For warranty information and technical support, please refer to the official GODOX website or contact your local distributor. Keep your purchase receipt as proof of purchase for warranty claims.
Online Resources: Visit the GODOX Store on Amazon for additional product information and accessories.