1. Introduction
This manual provides essential information for the safe operation, maintenance, and troubleshooting of your Oxseryn 4000 Watts Inverter Generator, Model EDOG04. Please read this manual thoroughly before operating the generator to ensure proper use and to prevent injury or damage.
1.1. Safety Information
WARNING: Carbon Monoxide Hazard
- Using a generator indoors CAN KILL YOU IN MINUTES. Generator exhaust contains carbon monoxide (CO), a colorless and odorless gas.
- NEVER use in an enclosed area or partially enclosed area. Always use outdoors far away from windows, doors, and vents.
WARNING: Electrical Shock Hazard
- Do not operate the generator in wet conditions.
- Ensure proper grounding before use.
WARNING: Fire Hazard
- Gasoline is highly flammable. Always refuel in a well-ventilated area with the engine off and cooled.
- Keep flammable materials away from the generator during operation.
Familiarize yourself with all warning labels on the generator before use.
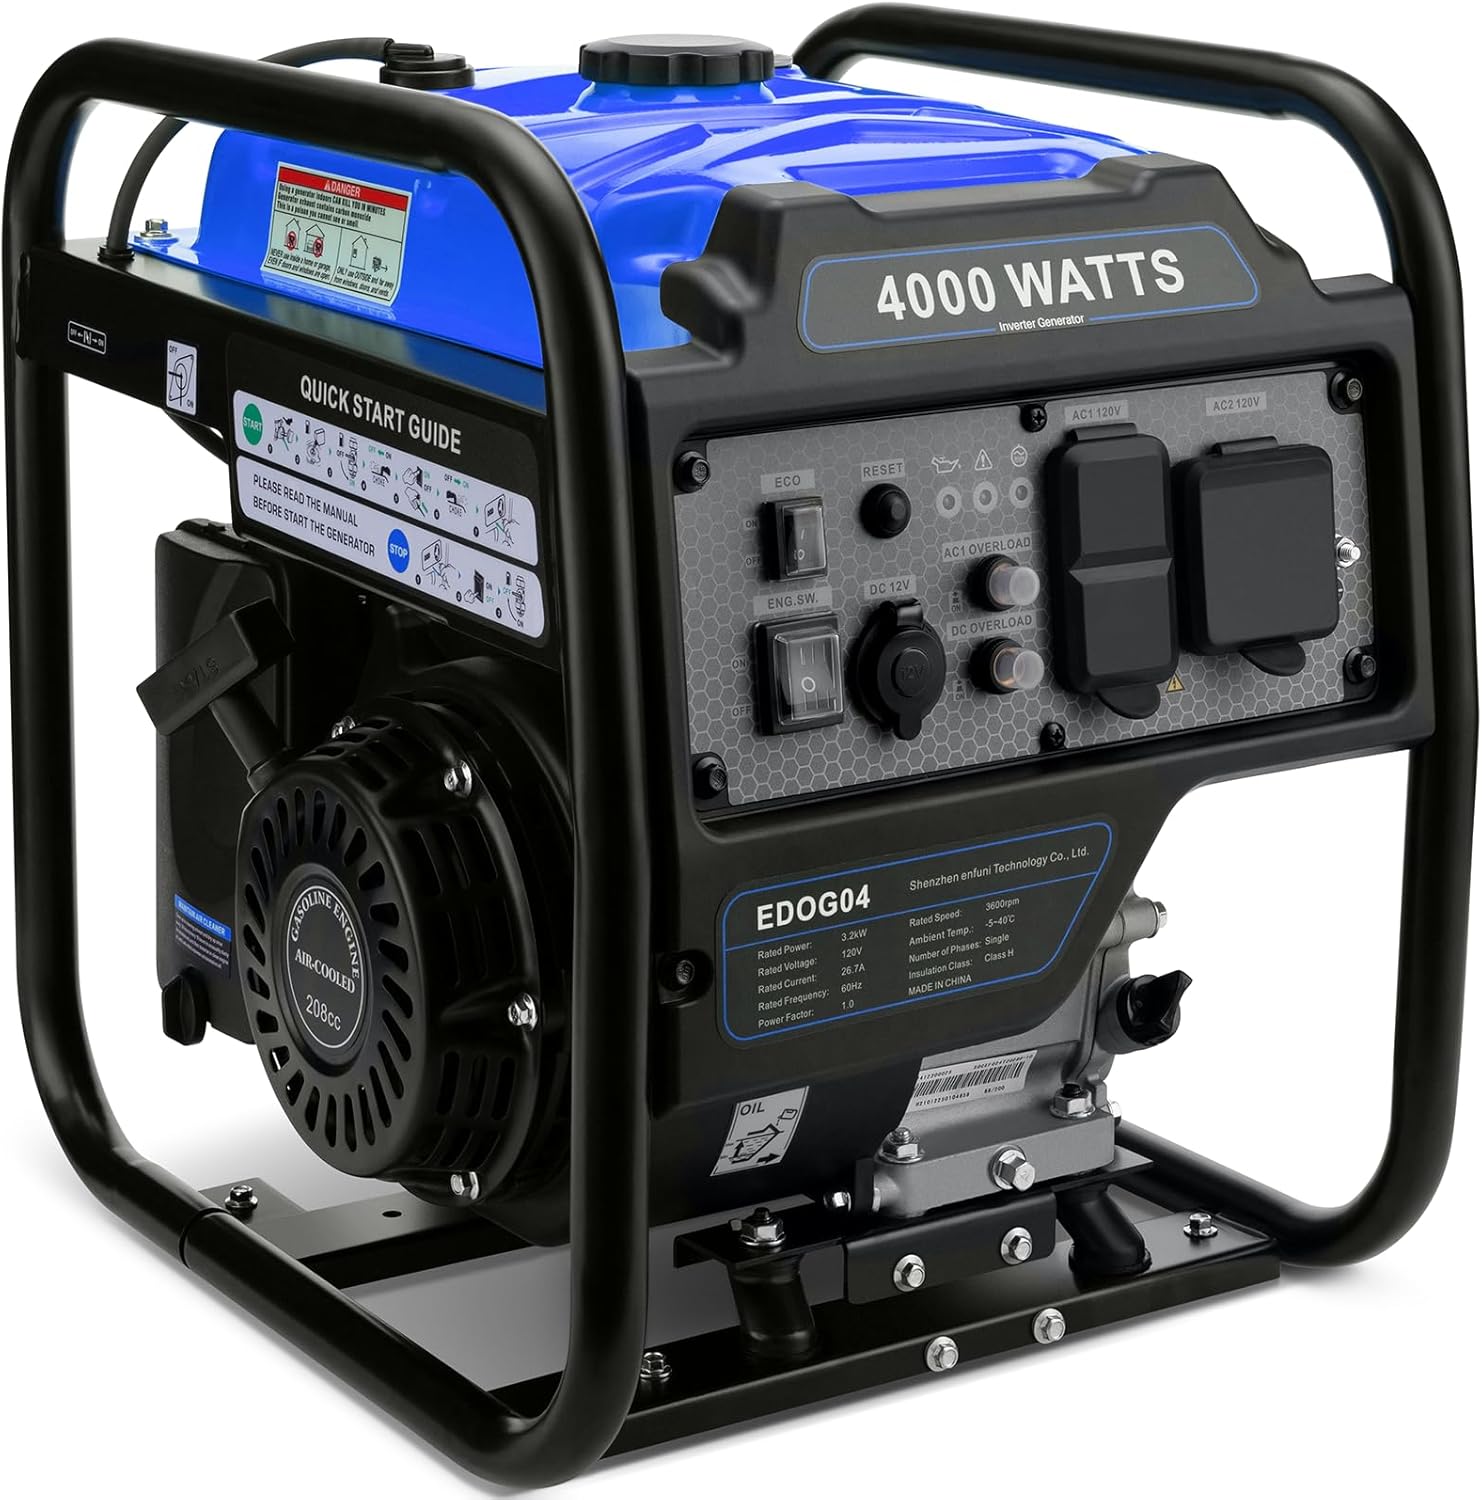
Figure 1: Front view of the Oxseryn 4000 Watts Inverter Generator.

Figure 2: Overview of key features including multi-purpose outlets, overload protection, oil level sensor, clean power, fuel saving, long runtime, low noise, and lightweight design.
2. Setup and Initial Preparation
2.1. Unboxing and Inspection
Carefully remove the generator from its packaging. Inspect for any shipping damage. Ensure all accessories are present: oil funnel, maintenance tools, and user manual.
Video 1: Unboxing the Oxseryn 4000W Inverter Generator, showing included accessories and initial setup steps.
2.2. Adding Engine Oil
The generator is shipped without engine oil. It is crucial to add the correct type and amount of oil before the first start. Use 4-stroke engine oil (SAE 10W-30 is generally recommended for most temperatures).
- Unscrew the oil gauge/dipstick.
- Using the provided oil funnel, slowly add approximately 0.6 liters (600ml) of 4-stroke engine oil.
- Check the oil level using the dipstick. The oil level should be between the upper and lower marks on the dipstick. Do not overfill.
- Tighten the oil gauge securely.
2.3. Adding Fuel
Use fresh, unleaded gasoline with an octane rating of 87 or higher. Do not use E85 or any other fuel containing more than 10% ethanol.
- Ensure the generator is on a level surface and the engine is off and cool.
- Open the fuel tank cap.
- Carefully fill the fuel tank with gasoline, leaving a small space at the top for expansion. Do not overfill.
- Securely tighten the fuel tank cap.
Video 2: Demonstrates the preparation steps before starting the generator, including adding oil and fuel.
2.4. Removing Transport Brackets
Before operating the generator, remove the two red transport brackets located at the front and back of the engine base. These brackets are for shipping protection only and must be removed to allow proper engine vibration isolation during operation.

Figure 3: Illustration of removing the red transport brackets from the generator base.
3. Operating Instructions
3.1. Control Panel Overview

Figure 4: The control panel features an ECO switch, engine switch, reset button, DC 12V port, AC 120V ports (x2), RV port, and indicator lights for low oil, overload, and running status.
3.2. Starting the Generator
- Ensure the generator is on a level surface and all electrical loads are disconnected.
- Turn the fuel valve to the 'ON' position.
- Move the choke lever to the 'CHOKE' position (usually to the left for cold starts).
- Turn the engine switch to the 'ON' position.
- Pull the recoil starter handle slowly until resistance is felt, then pull sharply to start the engine.
- Once the engine starts, gradually move the choke lever to the 'RUN' position (usually to the right).
- Allow the engine to warm up for a few minutes before connecting electrical loads.
3.3. ECO Mode Operation
The ECO mode switch allows the engine speed to automatically adjust to the load, improving fuel efficiency and reducing noise when less power is required. Turn the ECO switch to 'ON' for this feature. For full power output or when starting high-load appliances, turn ECO mode 'OFF'.
3.4. Stopping the Generator
- Disconnect all electrical loads from the generator.
- Turn the engine switch to the 'OFF' position.
- Turn the fuel valve to the 'OFF' position to prevent fuel from flowing to the carburetor during storage.
Video 3: Demonstrates the correct procedure for starting and stopping the generator, including choke and fuel valve operation.

Figure 5: The generator can run for up to 14 hours at 25% load with ECO mode, and 4 hours at 100% load.

Figure 6: The generator weighs approximately 56 lbs, making it portable.
4. Maintenance
Regular maintenance is essential for the longevity and reliable operation of your generator. Always ensure the engine is off and cooled before performing any maintenance.
4.1. Engine Oil Check and Change
- Check the oil level before each use.
- Change the engine oil after the first 20 hours of operation, and then every 100 hours or annually, whichever comes first.
4.2. Air Filter Maintenance
- Inspect the air filter every 50 hours or more frequently in dusty conditions.
- Clean or replace the air filter as needed to ensure proper engine performance.
4.3. Spark Plug Inspection
- Inspect the spark plug every 100 hours.
- Clean or replace the spark plug if it is fouled or damaged.
4.4. Fuel System Maintenance
- Drain the fuel tank and carburetor if storing the generator for more than 30 days to prevent fuel degradation.
- Use a fuel stabilizer if you cannot drain the fuel system for short-term storage.
5. Troubleshooting
This section provides solutions to common operational issues. For problems not listed here, contact customer support.
5.1. Generator Will Not Start
- No Fuel: Check fuel level and add fresh gasoline if necessary.
- No Oil: Check engine oil level. The generator has a low oil shutdown feature. Add oil if low.
- Choke Position: Ensure the choke is in the correct position for starting (closed for cold engine, open for warm engine).
- Engine Switch: Verify the engine switch is in the 'ON' position.
- Spark Plug: Inspect the spark plug for fouling or damage. Clean or replace if needed.
5.2. No Power Output
- Circuit Breaker Tripped: Check the AC and DC overload circuit breakers on the control panel. Reset if tripped.
- Overload Indicator: If the overload indicator light is on, disconnect all loads and restart the generator. Reduce the load before reconnecting.
- ECO Mode: Ensure ECO mode is off if maximum power is required for starting high-load appliances.
5.3. Engine Runs Poorly
- Stale Fuel: Drain old fuel and refill with fresh gasoline.
- Air Filter: Clean or replace a dirty air filter.
- Spark Plug: Inspect and clean or replace the spark plug.
6. Specifications
| Feature | Specification |
|---|---|
| Brand | Oxseryn |
| Model Name | EDOG04 |
| Starting Wattage | 4000 Watts |
| Running Wattage | 3200 Watts |
| Engine Type | 4 Stroke, 208 Cubic Centimeters (208CC) |
| Fuel Type | Gasoline |
| Tank Volume | 2 Gallons |
| Voltage | 120 Volts |
| Item Weight | 56 Pounds |
| Product Dimensions | 19.1"L x 15.5"W x 19.1"H |
| Noise Level | Under 72 dBA (from 23FT away) |
| Special Features | Automatic Shut Down, Cold Start Technology, Extra-Long Run Time, Fuel Gauge, Low Oil Shutdown |
7. Warranty and Support
7.1. Warranty Information
This Oxseryn generator comes with a 1-year limited warranty from the date of purchase. The warranty covers defects in materials and workmanship under normal use. Please retain your proof of purchase for warranty claims.
7.2. Customer Support
For technical assistance, parts, or warranty inquiries, please contact Oxseryn customer support. Refer to the contact information provided with your product packaging or visit the official Oxseryn website.