
1. Introduction
This manual provides detailed instructions for the assembly, operation, and maintenance of your WLIVE 4-Drawer Dresser with Charging Station and LED Light. Please read this manual thoroughly before assembly and use to ensure proper function and safety.
2. Safety Information
- Always follow assembly instructions carefully.
- Do not overload drawers or shelves. Refer to specifications for weight limits.
- Ensure the anti-tip device is properly installed, especially in households with children or pets.
- Keep electrical components (charging station, LED lights) away from water.
- Use only the provided power cord and ensure it is not pinched or damaged.
- Periodically check all connections and fasteners to ensure they remain tight.

Figure 2.1: Installation of the anti-tip device is crucial for stability and safety, preventing accidental tipping.
3. Package Contents
Before beginning assembly, verify that all parts listed below are present and undamaged. If any parts are missing or damaged, please contact WLIVE customer support.
| Component | Quantity | Description |
|---|---|---|
| Metal Frame Parts | 1 Set | Main structural components. |
| Wooden Boards | 2 | Top surface and middle shelf. |
| Fabric Drawers | 4 | Collapsible storage drawers. |
| Charging Station Unit | 1 | Includes USB ports and AC outlets. |
| LED Light Strip | 1 | RGB LED strip for illumination. |
| Assembly Hardware | 1 Set | Screws, wrench, anti-tip kit, adjustable feet. |
| Instruction Manual | 1 | This document. |
4. Assembly Instructions
Follow these steps carefully to assemble your dresser. It is recommended to assemble on a soft, clean surface to prevent scratches.
- Step 1: Assemble the Metal Frame.
Connect the vertical and horizontal metal bars using the provided screws. Ensure all connections are secure but do not overtighten until the frame is fully assembled.

Figure 4.1: The sturdy metal frame forms the core structure of the dresser, featuring an X-shaped support design for enhanced stability.
- Step 2: Install Wooden Boards.
Place the top wooden board onto the designated frame supports and secure it with screws. Repeat for the middle wooden shelf.

Figure 4.2: The high-quality wooden top is designed to be water-resistant, making it easy to clean and maintain.
- Step 3: Attach Charging Station and LED Light.
Mount the charging station unit into its recessed slot on the top wooden board. Adhere the LED light strip to the underside of the top shelf or as indicated in the detailed diagram in the included paper manual. Connect the power cables.

Figure 4.3: The integrated charging station provides convenient access to power with 2 AC outlets and 3 USB ports.
- Step 4: Insert Fabric Drawers.
Unfold each fabric drawer and insert the bottom panel to make it rigid. Slide the assembled drawers into their respective slots in the metal frame.

Figure 4.4: The four fabric drawers offer ample storage space for various items, keeping your bedroom tidy.
- Step 5: Install Adjustable Feet and Anti-Tip Device.
Screw the adjustable feet into the bottom of the metal frame. Adjust them to ensure the dresser is level on uneven surfaces. Secure the dresser to the wall using the provided anti-tip device as per the instructions in Section 2.

Figure 4.5: Adjustable feet allow for easy leveling of the dresser on various floor types, ensuring stability.
5. Operating Instructions
5.1. Using the Charging Station
The integrated charging station provides convenient power access. Simply plug the dresser's main power cord into a standard wall outlet. You can then use the 2 AC outlets and 3 USB ports to charge your electronic devices.
- AC Outlets: 125V/12A capacity.
- USB Ports: 5V/2.4A output.
- The charging station is ETL certified for safety.
5.2. Controlling the RGB LED Lights
The LED light strip can be controlled using the included remote control (if applicable) or integrated buttons. Refer to the specific instructions provided with the LED light kit for detailed operation.
- Color Change: Select from 10 different colors.
- Brightness Adjustment: Adjust brightness with 10 levels.
- Dynamic Modes: Choose from 19 dynamic lighting modes.
- Speed Adjustment: Control the flashing frequency of dynamic modes.
Figure 5.1: The RGB LED light strip offers customizable lighting options to enhance your room's ambiance.
6. Maintenance
- Cleaning: Wipe the wooden surfaces with a soft, damp cloth. Avoid harsh chemicals or abrasive cleaners. The fabric drawers can be spot cleaned with a mild detergent and air-dried.
- Dusting: Regularly dust all surfaces to prevent buildup.
- Drawer Care: If drawers become stiff, ensure they are properly aligned within the frame. Do not force them.
- Electrical Components: Ensure the charging station and LED lights are kept dry. Do not attempt to repair electrical components yourself.
7. Troubleshooting
| Problem | Possible Cause | Solution |
|---|---|---|
| Dresser is wobbly. | Uneven floor; loose connections. | Adjust the leveling feet at the bottom of the frame. Check and tighten all screws. |
| LED lights not working. | Not plugged in; loose connection; remote battery dead. | Ensure the dresser's power cord is plugged in. Check the connection of the LED strip. Replace remote battery if applicable. |
| Charging station not providing power. | Not plugged in; device not compatible; power surge. | Verify the dresser's power cord is securely plugged into a working outlet. Test with another device. If issues persist, contact customer support. |
| Drawers do not slide smoothly. | Overloaded; misaligned; foreign object. | Reduce drawer contents. Ensure drawers are unfolded correctly and aligned within the frame. Check for obstructions. |
8. Specifications
| Attribute | Value |
|---|---|
| Brand | WLIVE |
| Model | B0DZGS3CJJ (Floral Painted) |
| Overall Dimensions (D x W x H) | 11.41"D x 15.67"W x 37.48"H |
| Small Drawer Size (D x W x H) | 10.9" x 13.9" x 4.8" |
| Large Drawer Size (D x W x H) | 10.9" x 13.9" x 9.5" |
| Item Weight | 15.95 pounds |
| Top/Shelf Load Capacity | Up to 22 lbs (55 lbs for wooden board capacity as per image) |
| Drawer Load Capacity | Up to 5.5 lbs per drawer |
| Charging Station | 2 AC Outlets (125V/12A), 3 USB Ports (5V/2.4A) |
| LED Lights | RGB, 10 colors, 10 brightness levels, 19 dynamic modes |
| Material | Metal frame, non-woven fabric, FSC-Certified wood |
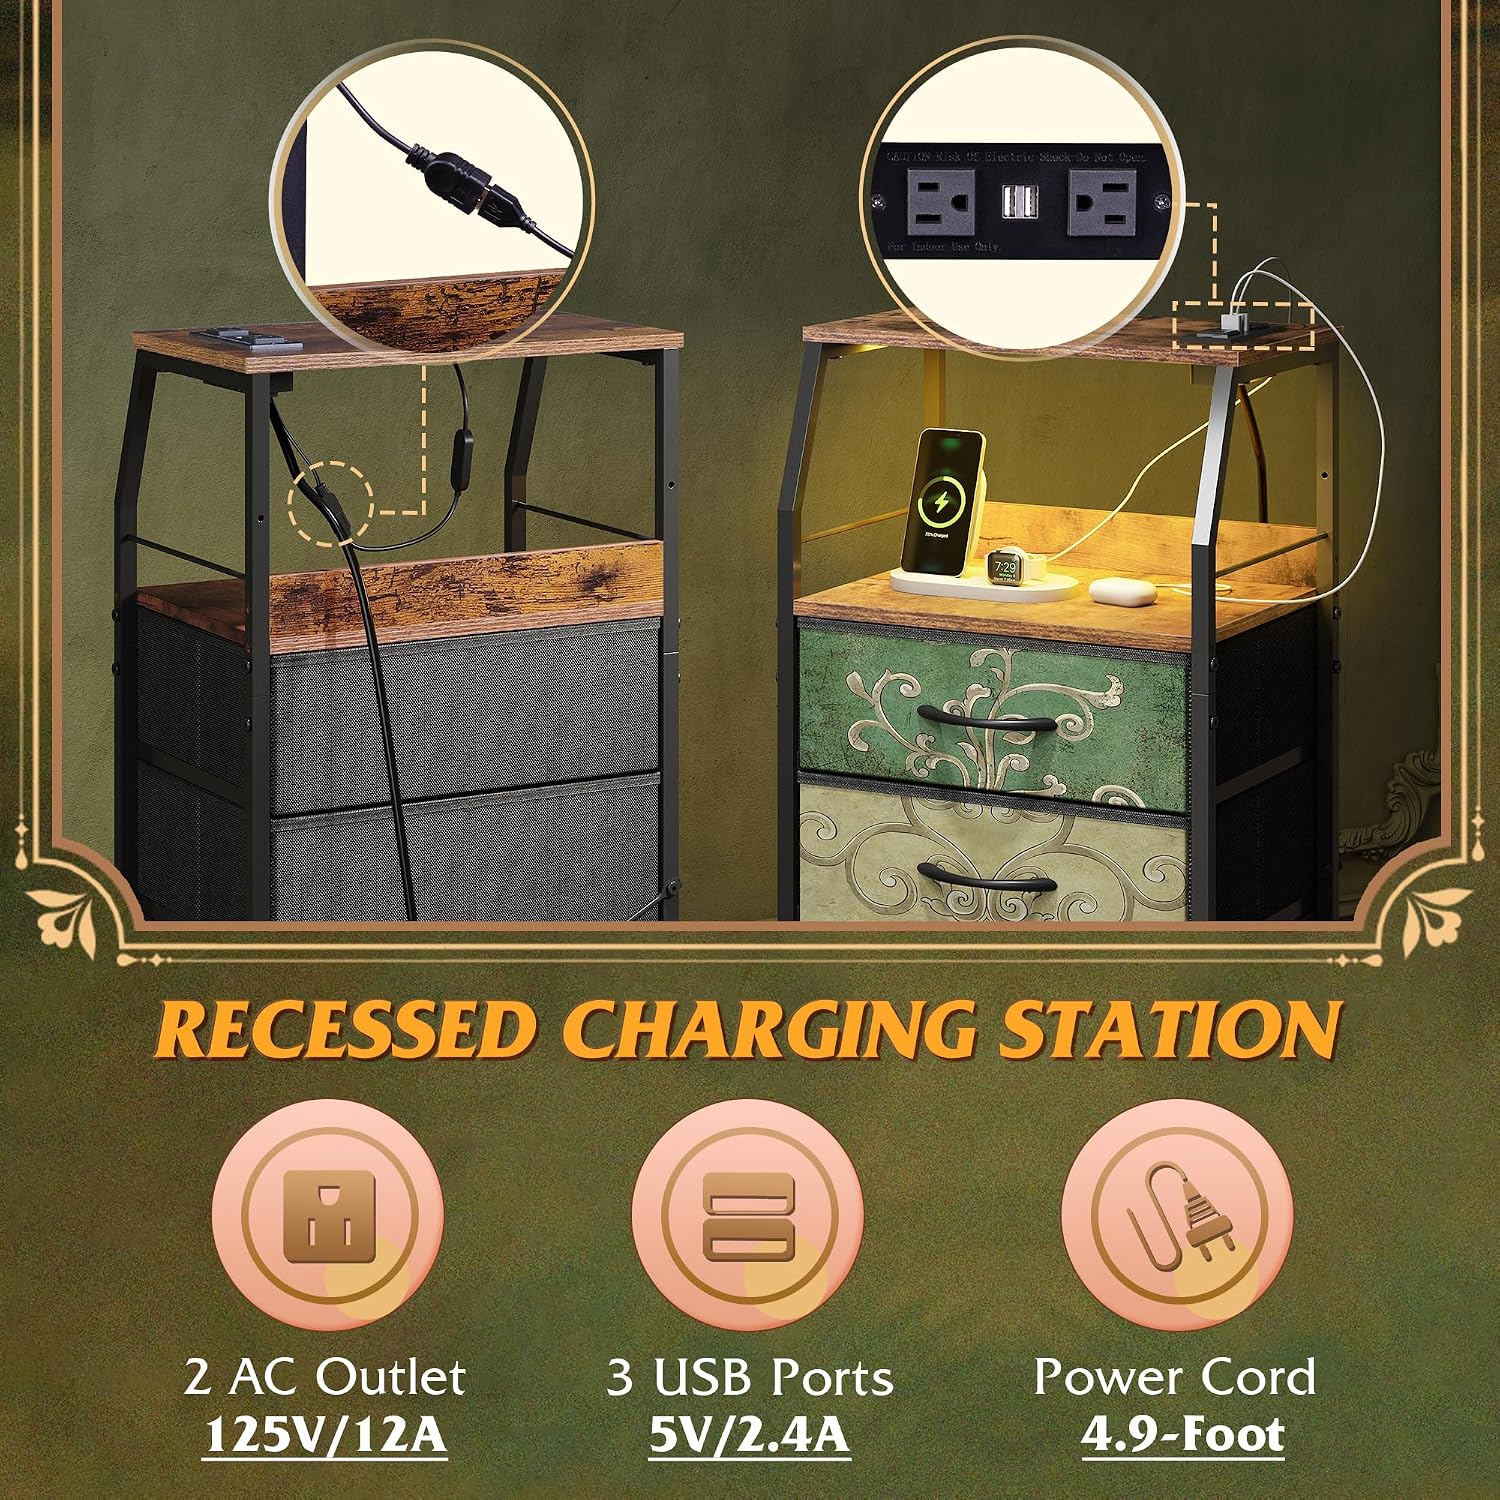
Figure 8.1: Detailed product dimensions and weight capacities for the dresser and its components.
9. Warranty and Support
WLIVE products are designed for quality and durability. For specific warranty information, please refer to the documentation included with your purchase or visit the official WLIVE website. If you encounter any issues or have questions regarding your dresser, please contact WLIVE customer support for assistance.
WLIVE Customer Support: Visit the WLIVE Store on Amazon


