1. Introduction
The Wiltec Oscillating Spindle and Belt Sander is a versatile woodworking tool designed for precise sanding of various materials, primarily wood. This machine combines the functionality of both a spindle sander and a belt sander, offering flexibility for different sanding tasks. Its oscillating motion ensures smooth, even finishes and reduces the risk of gouging or uneven surfaces. The tiltable work table allows for angled sanding, expanding its application range for both straight and curved edges.
This manual provides essential information for the safe operation, setup, maintenance, and troubleshooting of your Wiltec sander. Please read it thoroughly before operating the machine to ensure proper use and to maximize its lifespan.

Figure 1.1: Main view of the Wiltec Oscillating Spindle and Belt Sander.
2. Safety Instructions
Always follow basic safety precautions when using electrical tools to reduce the risk of fire, electric shock, and personal injury.
2.1 General Safety Rules
- Read and understand all instructions before operating the sander.
- Wear appropriate personal protective equipment (PPE), including safety glasses, hearing protection, and a dust mask.
- Keep the work area clean and well-lit. Cluttered or dark areas invite accidents.
- Do not operate power tools in explosive atmospheres, such as in the presence of flammable liquids, gases, or dust.
- Keep children and bystanders away while operating a power tool. Distractions can cause you to lose control.
- Always disconnect the power plug from the outlet before making any adjustments, changing accessories, or storing the tool.
2.2 Electrical Safety
- Power tool plugs must match the outlet. Never modify the plug in any way.
- Avoid body contact with grounded surfaces such as pipes, radiators, ranges, and refrigerators. There is an increased risk of electric shock if your body is grounded.
- Do not expose power tools to rain or wet conditions. Water entering a power tool will increase the risk of electric shock.
- Do not abuse the cord. Never use the cord for carrying, pulling, or unplugging the power tool. Keep cord away from heat, oil, sharp edges, or moving parts.
2.3 Personal Safety
- Stay alert, watch what you are doing, and use common sense when operating a power tool.
- Do not use the tool while tired or under the influence of drugs, alcohol, or medication.
- Dress properly. Do not wear loose clothing or jewelry. Keep your hair and clothing away from moving parts.
- Use dust extraction and collection facilities if provided. These can reduce dust-related hazards.
3. Components Overview
Familiarize yourself with the main components of your Wiltec sander before assembly and operation.
- Work Table: The main surface where the workpiece rests. It can be tilted for angled sanding.
- Spindle Sander Post: The vertical shaft for attaching sanding sleeves.
- Belt Sander Assembly: The horizontal belt for linear sanding.
- Power Switch: On/Off switch for the machine.
- Dust Port: Connection point for a dust extraction system.
- Sanding Sleeves: Cylindrical abrasive sleeves for spindle sanding (various diameters).
- Sanding Belt: Abrasive belt for belt sanding.
- Wrenches: Tools for assembly and adjustments.

Figure 3.1: Included sanding sleeves and wrenches.

Figure 3.2: Rear view of the sander, highlighting the power cord and spindle area.
4. Setup
4.1 Unpacking and Inspection
- Carefully remove all components from the packaging.
- Inspect the machine for any shipping damage. If damage is found, do not operate the machine and contact customer support immediately.
- Verify that all listed components are present. Refer to the "Components Overview" section.
4.2 Assembly
The Wiltec sander comes largely pre-assembled. Minor assembly may be required for specific components or accessories.
- Place the sander on a stable, level workbench.
- Ensure the power switch is in the "OFF" position and the machine is unplugged.
- If using the spindle sanding function, ensure the appropriate sanding sleeve and corresponding table insert are installed.
- If using the belt sanding function, ensure the belt assembly is correctly positioned and the belt is tensioned.
4.3 Connecting to Power
Connect the power cord to a grounded 230V AC outlet. Ensure the circuit can handle the 500W power consumption of the sander.
5. Operating Instructions
5.1 General Operation
- Ensure the workpiece is free of nails, screws, or other foreign objects.
- Always hold the workpiece firmly against the work table.
- Apply light, even pressure when sanding. Excessive pressure can lead to poor results and motor strain.
- Move the workpiece smoothly across the sanding surface.
5.2 Spindle Sanding
The spindle sanding function is ideal for sanding curved edges and internal contours.
- Select the appropriate sanding sleeve diameter for your workpiece.
- Install the chosen sanding sleeve onto the spindle post.
- Ensure the correct table insert is in place to minimize the gap around the spindle.
- Turn on the machine.
- Carefully bring the workpiece into contact with the oscillating and rotating sanding sleeve.
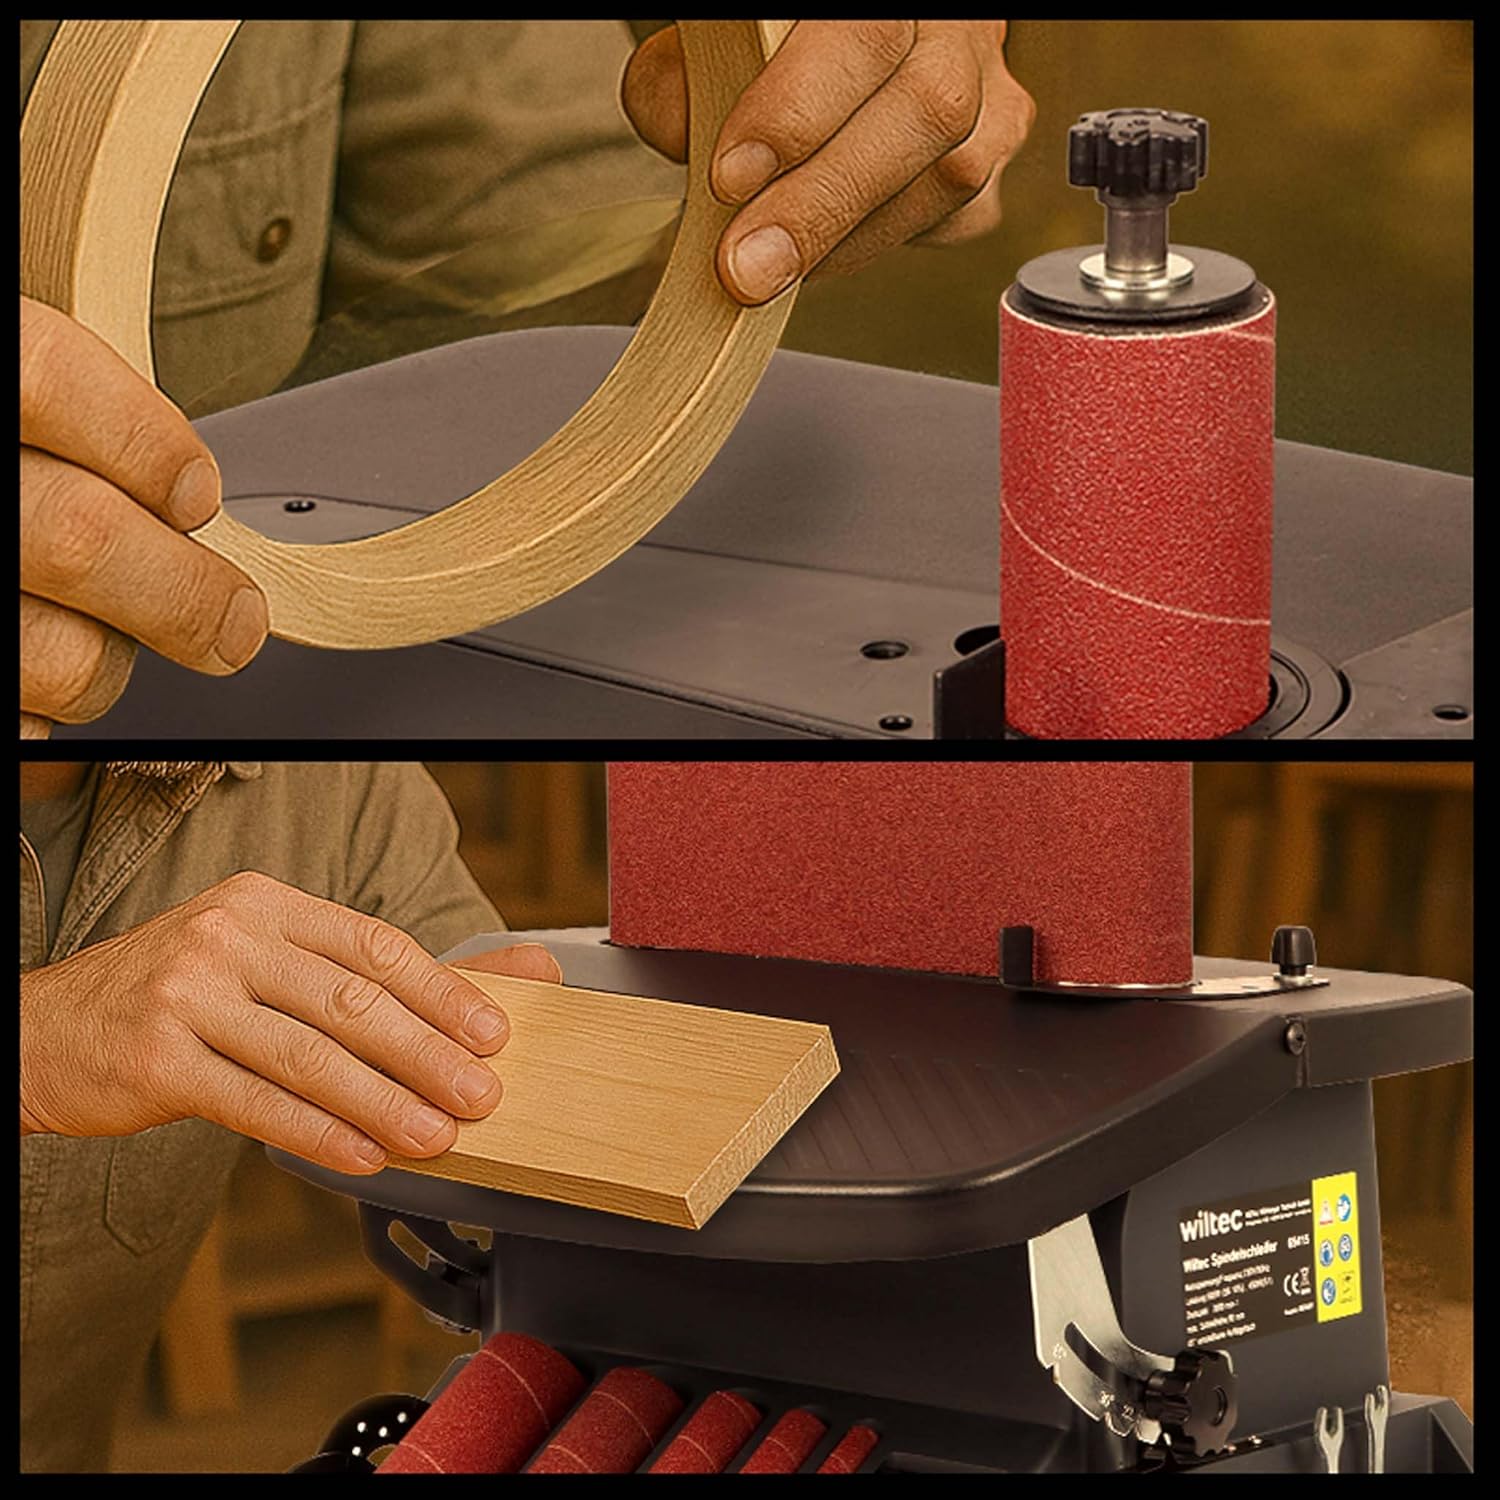
Figure 5.1: Demonstrating sanding of curved and straight edges.
5.3 Belt Sanding
The belt sanding function is suitable for sanding straight edges and larger flat surfaces.
- Ensure the belt sanding assembly is engaged.
- Check the tension and alignment of the sanding belt.
- Turn on the machine.
- Feed the workpiece smoothly against the moving sanding belt.

Figure 5.2: The sander demonstrating its tiltable table and dual sanding modes.
5.4 Tilting the Work Table
The work table can be tilted up to 45 degrees for bevel sanding.
- Loosen the table locking knob.
- Adjust the table to the desired angle using the angle scale.
- Tighten the table locking knob securely before operating.
6. Maintenance
Regular maintenance ensures optimal performance and extends the life of your sander.
6.1 Cleaning
- Always unplug the machine before cleaning.
- Use a brush or compressed air to remove sawdust from the machine, especially around the motor vents and sanding areas.
- Wipe down external surfaces with a damp cloth. Do not use solvents.
- Regularly empty the dust collection bag/system.
6.2 Sanding Sleeve/Belt Replacement
- Replace sanding sleeves and belts when they become worn or lose their abrasive quality.
- Refer to the machine's specific instructions for detailed steps on changing sleeves and belts. Ensure proper tensioning for belts.
6.3 Lubrication
The machine's internal components are generally sealed and do not require user lubrication. Do not attempt to lubricate internal parts unless specifically instructed by the manufacturer.
7. Troubleshooting
This section addresses common issues you might encounter with your Wiltec sander.
| Problem | Possible Cause | Solution |
|---|---|---|
| Machine does not start. | No power supply; Power switch off; Thermal overload. | Check power connection; Ensure switch is ON; Allow motor to cool down. |
| Poor sanding results / Uneven finish. | Worn sanding sleeve/belt; Excessive pressure; Incorrect sleeve/belt for material. | Replace abrasive; Reduce pressure; Use appropriate grit. |
| Excessive vibration. | Loose components; Unbalanced sanding sleeve/belt; Machine not on stable surface. | Check and tighten all fasteners; Replace damaged abrasive; Secure machine to workbench. |
| Motor overheats. | Overloading the motor; Blocked ventilation; Continuous operation. | Reduce load; Clean ventilation openings; Allow machine to rest periodically. |
If the problem persists after attempting these solutions, please contact Wiltec customer support.
8. Specifications
| Feature | Detail |
|---|---|
| Model Number | 65415 |
| Power Input | 500 W |
| Voltage | 230 V (AC) |
| Max Speed | 2000 RPM |
| Oscillation Stroke | 16 mm |
| Work Table Tilt | 0° to 45° |
| Sanding Sleeve Diameters | Approx. 13 mm to 51 mm (0.5" to 2") |
| Material | Cast Iron, PP |
| Item Weight | 17.4 kg (approx. 38.36 lbs) |
| Package Dimensions | 51 x 47.5 x 40 cm (approx. 20.1 x 18.7 x 15.7 inches) |

Figure 8.1: Product dimensions.
9. Warranty and Support
9.1 Warranty Information
Wiltec products are manufactured with high-quality materials and are subject to strict quality controls. This product comes with a standard manufacturer's warranty against defects in materials and workmanship. The warranty period typically covers 14 days for returns/replacements as per standard policy, but specific terms may vary by region and purchase date. Please retain your proof of purchase for warranty claims.
The warranty does not cover damage caused by improper use, neglect, unauthorized repairs, or normal wear and tear of consumable parts (e.g., sanding sleeves/belts).
9.2 Customer Support
For technical assistance, spare parts, or warranty claims, please contact Wiltec customer support. You can find contact information on the official Wiltec website or through your point of purchase. When contacting support, please have your model number (65415) and proof of purchase ready.
For more information, visit the Wiltec Store on Amazon.


