
1. Product Overview
This document provides essential information for the installation, operation, and maintenance of the WKNYSYK Central Relay Junction Fuse Box. This unit serves as a centralized electrical control point, integrating relays and fuses to protect and manage the electrical systems of compatible utility vehicles (UTVs).
The fuse box is manufactured to precise standards, ensuring stable performance and reliability. It is designed for direct replacement of original or faulty units, simplifying the installation process.
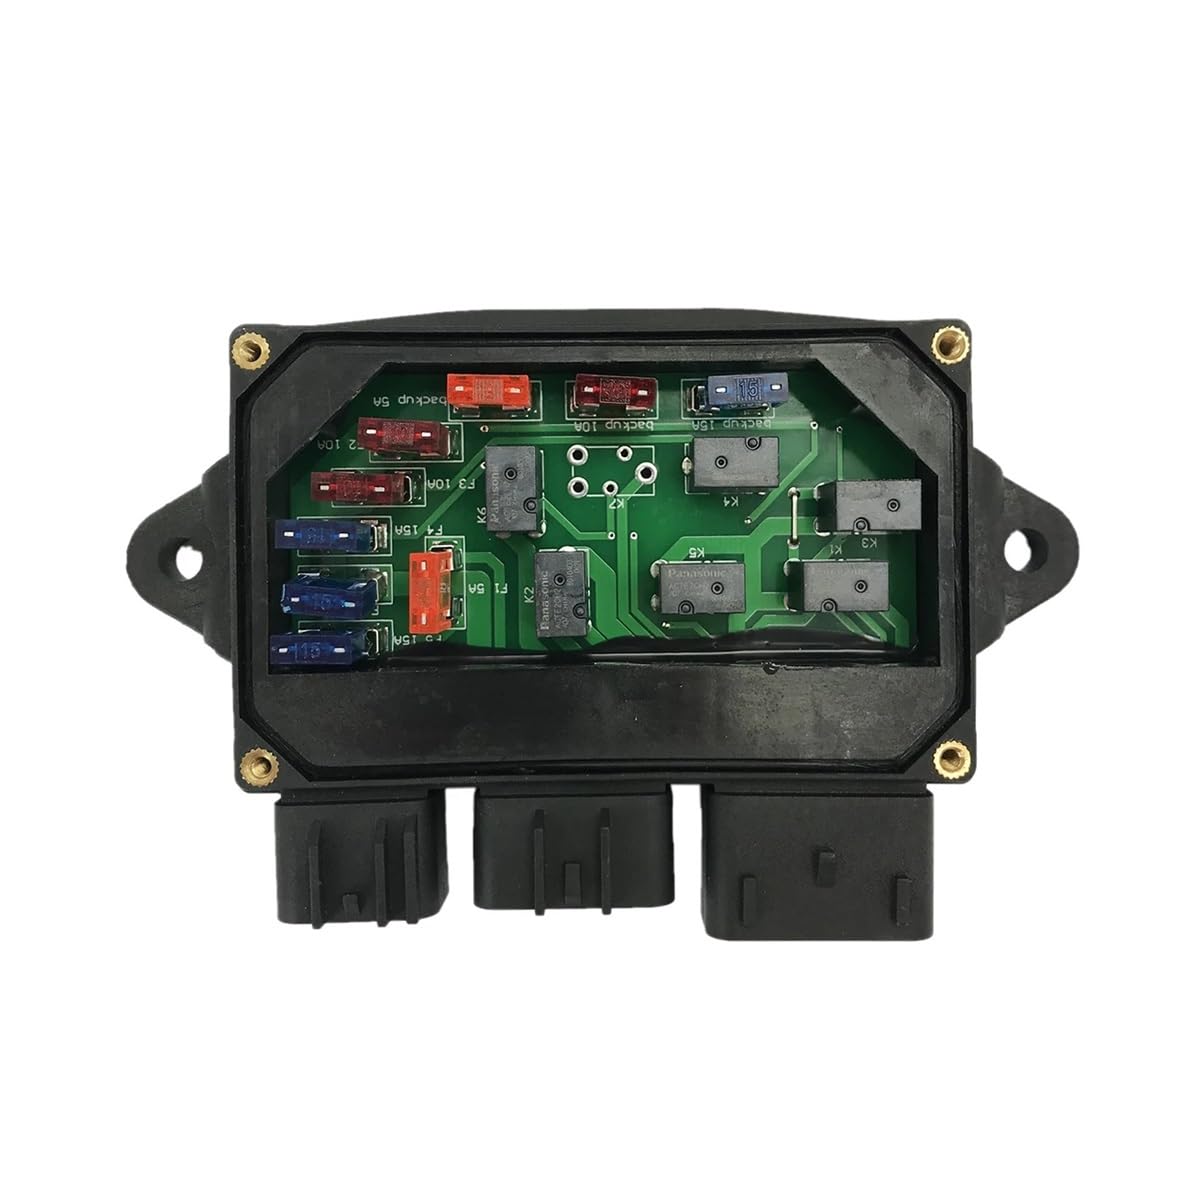
Figure 1: Top view of the WKNYSYK Central Relay Junction Fuse Box.
2. Compatibility
This Central Relay Junction Fuse Box is compatible with various UTV models. Please verify your vehicle's part number against the following:
- Hisun UTV Models: 400, 500, 700
- Part Numbers: 37700-115H-0000, 37700-115-0000
- Also compatible with UTVs from brands such as: Massimo, Bennche, Coleman, and similar models that utilize the specified part numbers.
3. Specifications
| Specification | Detail |
|---|---|
| Brand Name | WKNYSYK |
| Part Numbers | 37700-115H-0000, 37700-115-0000 |
| Model Number | WKNYSYK123 |
| Item Weight | 0.3 kg (50 Grams as per some listings) |
| Unit Count | 1.0 Count |
| Material | Aluminum (housing) |
| Origin | Mainland China |
4. Installation (Setup)
Proper installation is crucial for the safe and effective operation of your UTV's electrical system. If you are unsure about any steps, it is recommended to consult a qualified technician.
Safety Precautions:
- Always disconnect the UTV's battery (negative terminal first) before beginning any electrical work to prevent electrical shock or damage to components.
- Wear appropriate personal protective equipment, including safety glasses and gloves.
- Ensure the work area is well-lit and free from obstructions.
Installation Steps:
- Locate the Existing Fuse Box: Identify the current central relay junction fuse box in your UTV. Refer to your UTV's service manual for its exact location.
- Disconnect Wiring: Carefully disconnect all wiring harnesses and cables connected to the old fuse box. Note the position of each connector to ensure correct re-connection. Taking photos before disconnection can be helpful.
- Remove Old Unit: Unmount the old fuse box from its mounting points.
- Mount New Unit: Position the WKNYSYK Central Relay Junction Fuse Box in the same location as the old unit. Secure it using the existing mounting hardware or appropriate fasteners.
- Connect Wiring: Reconnect all wiring harnesses and cables to the new fuse box. Ensure each connector is firmly seated and matches its original position. The unit features multiple distinct connectors for various circuits.

Figure 2: Bottom view showing the electrical connectors for the fuse box.
- Reconnect Battery: Once all connections are secure, reconnect the UTV's battery (positive terminal first, then negative).
- Test System: Turn on the UTV's ignition and test all electrical functions (lights, starter, accessories, etc.) to ensure proper operation.
5. Operation
The Central Relay Junction Fuse Box operates automatically as part of your UTV's electrical system. It houses various fuses and relays that protect electrical circuits from overcurrents and control the flow of power to different components.
- Fuses: Each fuse is designed to blow (break the circuit) if the current exceeds a safe level, preventing damage to the wiring or connected devices.
- Relays: Relays are electrical switches that allow a low-power signal to control a high-power circuit, commonly used for components like headlights, fuel pumps, and starter motors.
No direct user interaction is typically required for the operation of the fuse box itself, beyond ensuring it is correctly installed and maintained.
6. Maintenance
Regular inspection and basic maintenance can extend the lifespan of your fuse box and ensure reliable electrical performance.
- Visual Inspection: Periodically inspect the fuse box for any signs of physical damage, corrosion, or loose connections.
- Fuse Replacement: If a circuit stops working, check the corresponding fuse. If a fuse is blown, replace it only with a new fuse of the exact same amperage rating. Using a fuse with a higher rating can lead to severe electrical damage or fire.
- Cleaning: Keep the fuse box and its surroundings clean and free from dirt, dust, and moisture. Use a soft, dry cloth for cleaning. Avoid using harsh chemicals.
- Connection Integrity: Ensure all wiring harnesses are securely connected to the fuse box.
7. Troubleshooting
If you experience electrical issues with your UTV, consider the following troubleshooting steps related to the fuse box:
- No Power to a Component: Check the fuse associated with the non-functional component. A blown fuse will have a broken wire inside. Replace if necessary.
- Intermittent Electrical Issues: Inspect all connections to the fuse box for looseness or corrosion. Ensure the battery terminals are clean and tight.
- Repeated Blown Fuses: If a fuse blows repeatedly, it indicates an underlying electrical problem, such as a short circuit or an overloaded circuit. Do not continue to replace fuses without addressing the root cause, as this can lead to more serious damage. Consult a qualified technician.
- Relay Malfunction: If a specific component controlled by a relay (e.g., headlights) is not working, and its fuse is intact, the relay itself might be faulty. Relays can often be swapped with an identical working relay from a non-critical circuit for testing purposes.
8. Warranty and Support
For information regarding product warranty, returns, or technical support, please refer to the purchase documentation or contact your retailer. Keep your proof of purchase for any warranty claims.