
1. Important Safety Information
Before proceeding with the installation of the laptop bottom case, please read and understand the following safety precautions:
- Always disconnect the laptop from its power adapter and remove the battery (if removable) before beginning any disassembly or assembly.
- Use appropriate tools to avoid damaging screws or plastic components.
- Work in a clean, well-lit, and static-free environment. Consider using an anti-static wrist strap.
- Handle components with care to prevent damage to delicate parts or connectors.
- If you are unsure about any step, seek professional assistance.
2. Product Overview
This product is a replacement bottom case designed for specific CLEVO laptop models. It provides structural integrity and protection for the internal components of your laptop.
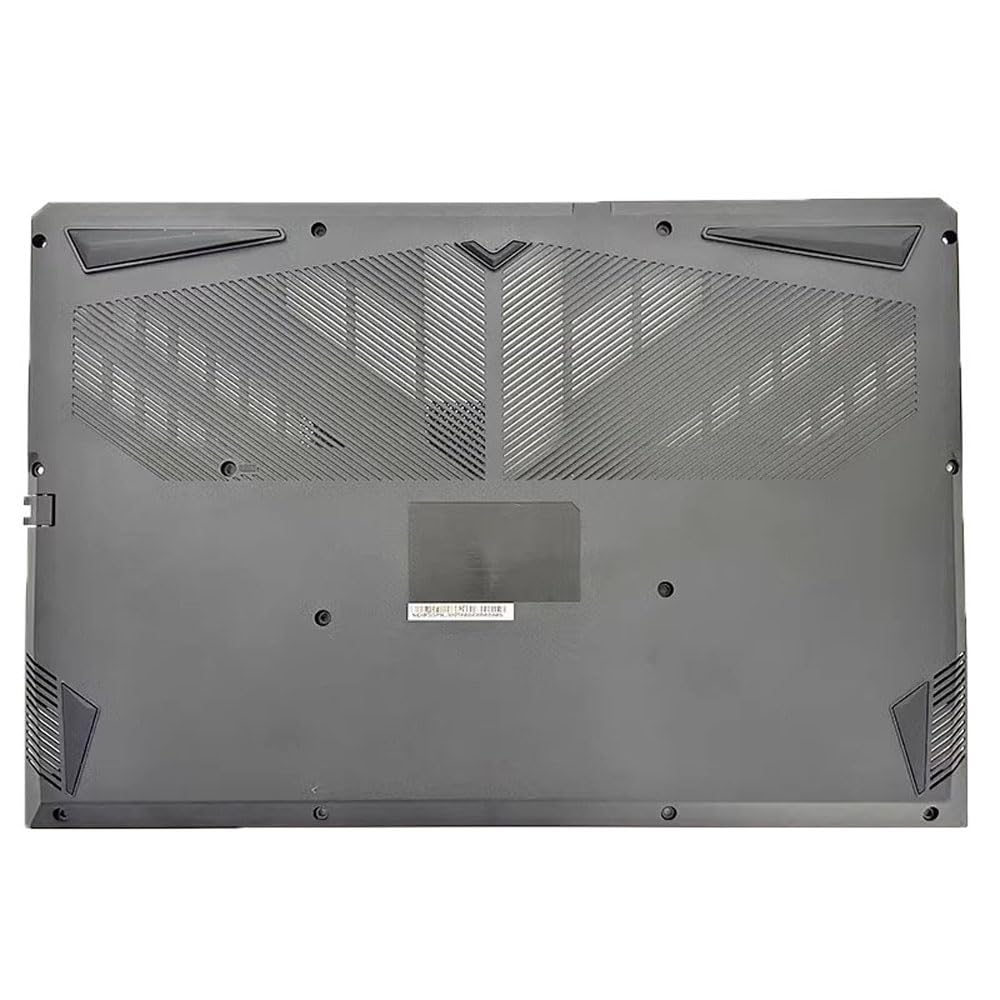
Figure 1: Generic Laptop Bottom Case. This image displays the exterior of the replacement laptop bottom case. It features a matte black finish with patterned ventilation grilles for heat dissipation and various screw points for secure attachment to the laptop chassis.
3. Compatibility
This bottom case is compatible with the following CLEVO laptop models:
- CLEVO NP50RN
- CLEVO NP50RNA
- CLEVO NP50RNB1
- CLEVO NP50RNB-Y
- CLEVO NP50RNC1
- CLEVO NP50RNC-Y
Please verify your laptop's model number before proceeding with the installation.
4. Preparation for Installation
Gather the necessary tools and prepare your workspace:
- Small Phillips head screwdriver
- Plastic prying tool (optional, for separating clips)
- Anti-static wrist strap (recommended)
- Clean, flat work surface
Before you begin:
- Power off your laptop completely.
- Disconnect the AC adapter.
- Remove the main battery if it is externally accessible. For internal batteries, follow your laptop's specific service manual to disconnect it.
- Discharge any residual power by holding the power button for 15-20 seconds.
5. Installation Guide
Follow these steps carefully to replace the laptop bottom case:
- Remove Existing Bottom Case:
Carefully turn your laptop upside down. Locate and remove all screws securing the existing bottom case. Keep track of screw locations as they may vary in size. Gently pry open the old bottom case using a plastic tool, working around the edges until it detaches from the chassis.
- Prepare for New Case Installation:
Inspect the new bottom case for any manufacturing defects. Ensure all internal components (e.g., rubber feet, vents) are correctly aligned if they need to be transferred from the old case.
- Install New Bottom Case:
Align the new bottom case with the laptop chassis. Gently press down around the edges to ensure all clips engage properly. Once seated, reinsert and tighten all screws that were removed in step 1. Do not overtighten screws.
6. Post-Installation Checks
After installing the new bottom case, perform the following checks:
- Ensure the bottom case is securely attached and there are no gaps.
- Verify that all screws are properly tightened.
- Reconnect the battery (if internal) and then reattach the external battery (if applicable).
- Connect the AC adapter and power on the laptop to ensure it functions correctly.
- Check for proper ventilation and ensure no unusual noises are present.
7. Maintenance and Care
To ensure the longevity and proper function of your laptop's bottom case:
- Keep the laptop on a clean, flat surface to prevent dust and debris from entering ventilation grilles.
- Regularly clean the exterior of the bottom case with a soft, dry, or slightly damp cloth. Avoid harsh chemicals.
- Do not obstruct the ventilation openings, as this can lead to overheating.
- Avoid dropping or subjecting the laptop to impacts, which can damage the case and internal components.
8. Troubleshooting
If you encounter issues after installation, consider the following:
| Problem | Possible Cause | Solution |
|---|---|---|
| Bottom case does not fit properly. | Incorrect model number; clips not fully engaged; foreign object obstructing fit. | Double-check laptop model compatibility. Re-align and press firmly to engage clips. Inspect for debris. |
| Screws do not tighten. | Stripped screw hole; incorrect screw size. | Ensure correct screw is used for each hole. Do not overtighten. If stripped, professional repair may be needed. |
| Laptop does not power on. | Battery not reconnected; internal component dislodged during installation. | Verify battery connection. Re-open and check all internal connections. |
9. Specifications
- Item Description: Laptop Bottom Case
- Brand: Generic
- Model Number: NP50RN NP50RNA Bottom Case
- Compatible Models: CLEVO NP50RN, NP50RNA, NP50RNB1, NP50RNB-Y, NP50RNC1, NP50RNC-Y
- Item Weight: 1.8 kg
- Number of Items: 1
10. Warranty Information
This product comes with a 90-day warranty from the date of purchase. The warranty covers manufacturing defects. It does not cover damage caused by improper installation, misuse, accidents, or unauthorized modifications. Please retain your proof of purchase for warranty claims.
11. Customer Support
For further assistance or if you encounter issues not covered in this manual, please contact your retailer or the product's manufacturer. Provide your product model number and a detailed description of the problem for efficient support.