
Fexhull TFK2
Fexhull Third Function Valve Kit (Model TFK2) Instruction Manual
For Kubota L2501, L3200, L3301, and L3901 Tractors
1. Introduction
This manual provides comprehensive instructions for the installation, operation, and maintenance of the Fexhull Third Function Valve Kit, Model TFK2. This kit is designed to add auxiliary hydraulic functions to compatible Kubota tractors, enabling the use of various hydraulic attachments such as grapples, augers, snowplow tilts, and snow blowers.
Please read this manual thoroughly before attempting installation or operation to ensure safe and efficient use of the product.
2. Compatibility
The Fexhull Third Function Valve Kit (Model TFK2) is specifically designed for the following Kubota tractor models:
- Kubota L2501
- Kubota L3200
- Kubota L3301
- Kubota L3901
It is also compatible with the following loaders:
- L2501, L3301, L3901: LA 525 Loader
- L3200, L3800: LA 524 Loader

Figure 2.1: Compatibility overview for the Fexhull TFK2 Third Function Valve Kit, highlighting supported Kubota tractor and loader models.
3. Package Contents
Upon unpacking, please verify that all components listed below are present and undamaged. If any items are missing or damaged, contact Fexhull customer support immediately.

Figure 3.1: Overview of all components included in the Fexhull Third Function Valve Kit.

Figure 3.2: Visual representation of the kit's contents with item descriptions.
- Solenoid Control Valve Spool
- Valve Manifold Subplate
- Joystick Handle Switch
- Harness Deutsch Connector
- Valve Mounting Bracket
- Quick Coupler Mounting Bracket
- Socket Head Cap Screw (2)
- U-Bolt Nut (2)
- U-Bolt
- Hydraulic Hose - Pressure Line (P)
- Hydraulic Hose - Tank Line (T)
- A & B Work-Line Hose (2)
- Male Quick Coupler (3)
- Female Quick Coupler (3)
- 3/8" JIC Male x #8 SAE Male (2)
- #8 SAE Male x #8 SAE Male (2)
- 1/2" JIC Male x 1/2" JIC Bulkhead Adapter (2)
- #8 SAE/ORB O-Ring (2)
4. Product Specifications
The Fexhull Third Function Valve Kit is engineered with the following technical specifications:

Figure 4.1: Key technical specifications and features of the valve kit.
| Feature | Specification |
|---|---|
| Valve Power | 12V Solenoid Operated |
| Max Operating Pressure (Pressure Line P) | 5080 PSI |
| Max Operating Pressure (A & B Work Line) | 5080 PSI |
| Max Operating Pressure (Tank Line T) | 3050 PSI |
| Flow Rating | 15 GPM (Gallons Per Minute) |
| Valve Pressure Rating | 3000 PSI Rated |
| Material | Aluminum Alloy (Valve Manifold) |
| Connection Type | SAE8 O-Ring Port |
| Item Dimensions (L x W x H) | 10 x 10 x 10 inches |
| Item Weight | 24.91 Pounds |
| Exterior Finish | Stainless Steel (components) |
| Number of Ports | 3 |
Additional features include:
- Completely weatherproof design.
- Mounts to existing loader joystick shafts.
- Removable adapter bushing to fit various joystick shafts.
- Ergonomic design with 2 momentary push-button switches for control.

Figure 4.2: Key design and functional features of the Fexhull TFK2 kit.
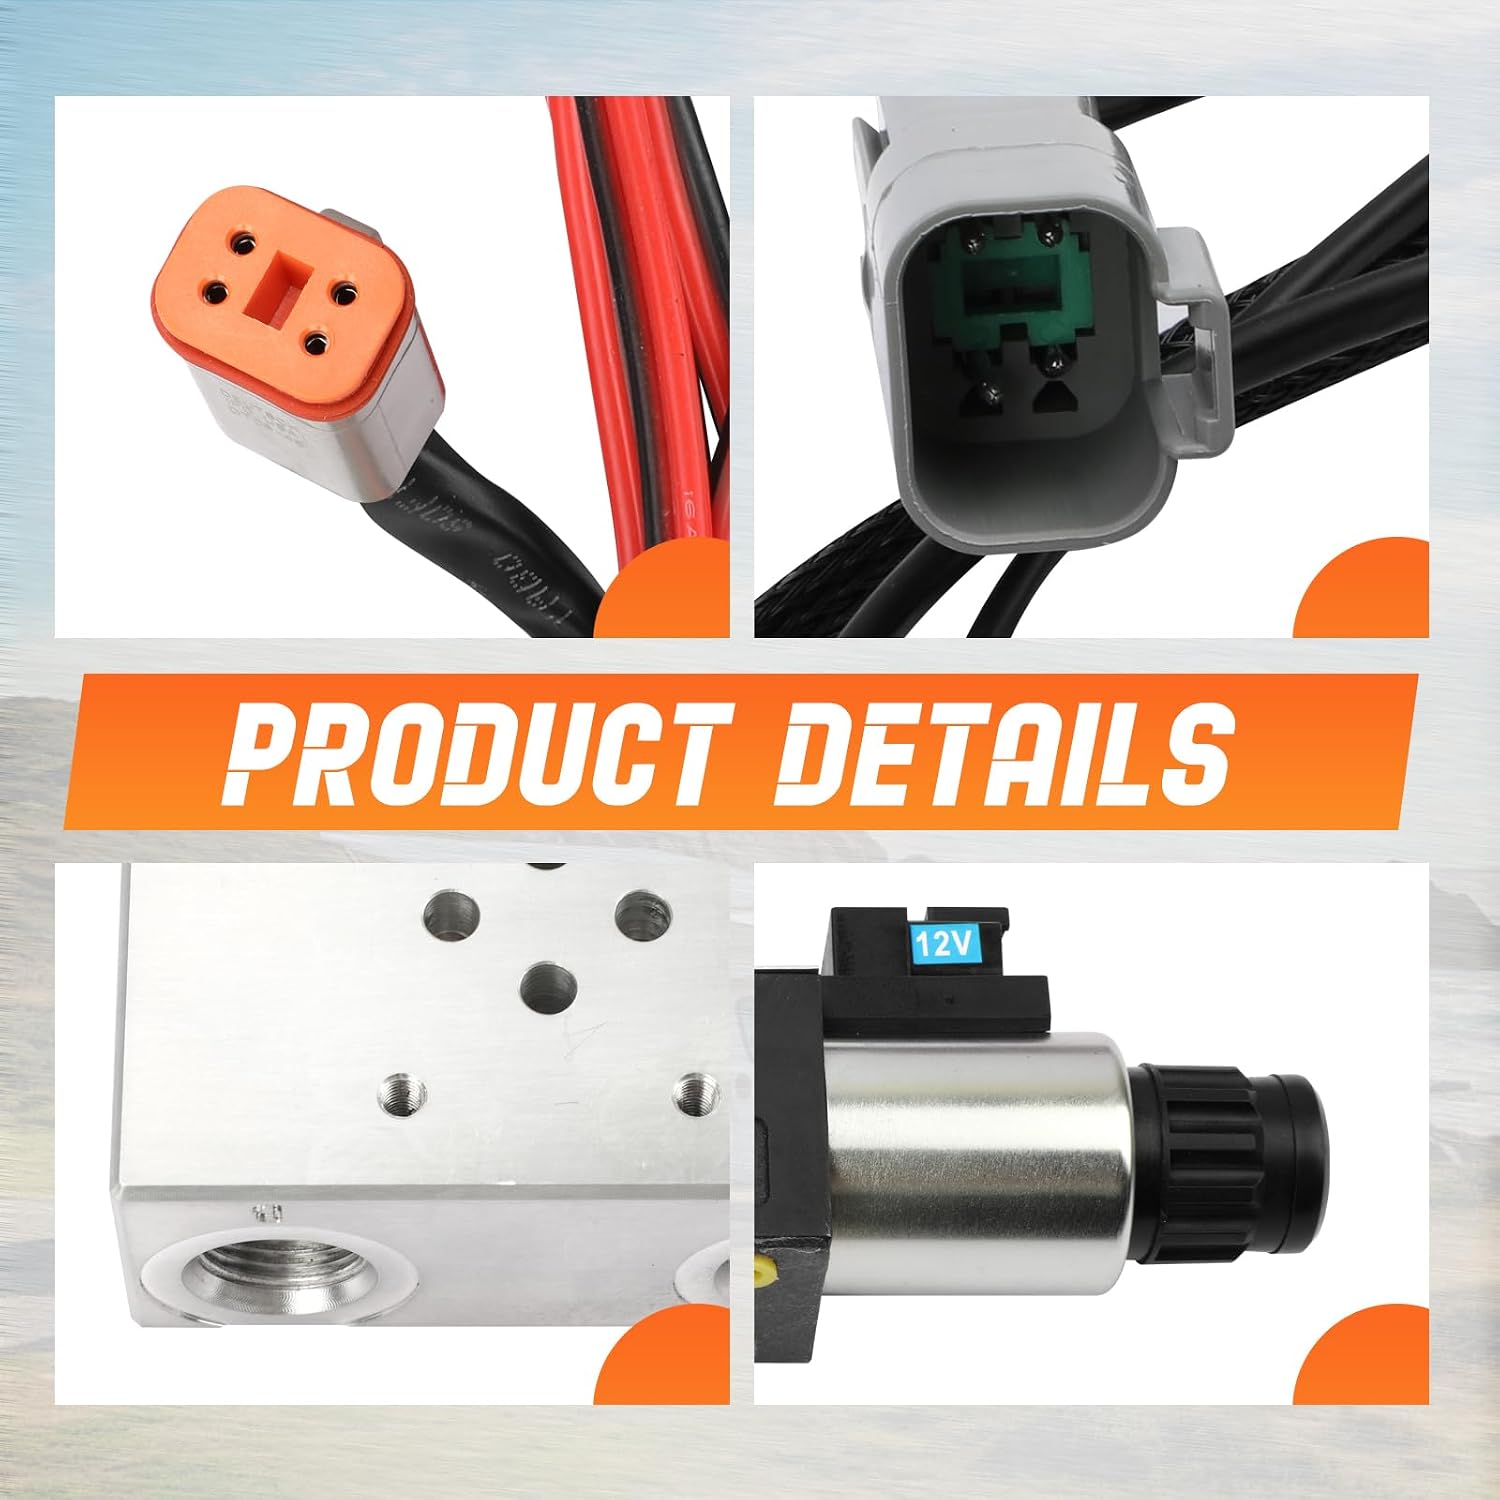
Figure 4.3: Detailed views of critical components: Deutsch connector, valve manifold, and 12V solenoid.
5. Setup and Installation
Installation of the Fexhull Third Function Valve Kit requires mechanical and hydraulic knowledge. It is recommended that installation be performed by a qualified technician or individuals with experience in hydraulic systems. Improper installation can lead to equipment damage or personal injury.
5.1 Safety Precautions
- Always ensure the tractor engine is off and the parking brake is engaged before beginning any work.
- Relieve all hydraulic pressure from the system before disconnecting any hydraulic lines.
- Wear appropriate personal protective equipment (PPE), including safety glasses and gloves.
- Keep the work area clean and free of obstructions.
- Refer to your tractor's owner's manual for specific safety guidelines.
5.2 General Installation Steps (Overview)
This kit is designed to integrate with the existing loader valve's power beyond port. The following steps provide a general overview; detailed instructions may vary based on specific tractor configurations. Consult online resources or a professional if unsure.
- Mount the Valve Manifold: Secure the valve manifold and mounting bracket to a suitable location on the tractor, typically near the loader's hydraulic lines.
- Install Quick Couplers: Attach the quick couplers to the designated mounting bracket in an accessible location.
- Connect Hydraulic Hoses:
- Connect the Pressure Line (P) from the tractor's power beyond port to the valve manifold.
- Connect the Tank Line (T) from the valve manifold back to the tractor's hydraulic tank return.
- Connect the A & B Work-Line Hoses from the valve manifold to the newly installed quick couplers.
- Electrical Connections:
- Install the joystick handle switch onto the existing loader joystick.
- Connect the harness Deutsch connector to the solenoid control valve.
- Route and secure all wiring, ensuring it is protected from moving parts, heat, and abrasion. Connect to a 12V power source, typically through a fused circuit.
- Test System: After installation, slowly start the tractor and carefully test the hydraulic functions. Check for leaks and proper operation of the third function valve.

Figure 5.1: Examples of hydraulic hose routing and electrical wiring during installation.
6. Operating Instructions
The Fexhull Third Function Valve Kit allows for the control of an additional hydraulic circuit using the integrated joystick handle switch.
6.1 Connecting an Attachment
- Ensure the tractor engine is off and hydraulic pressure is relieved.
- Connect the hydraulic lines from your attachment (e.g., grapple, auger) to the quick couplers installed with the third function kit. Ensure connections are secure and free of debris.
- Start the tractor and allow the hydraulic system to warm up.
6.2 Using the Joystick Switch
- The joystick handle switch features two momentary push-buttons.
- Pressing one button will activate one direction of the hydraulic flow (e.g., close grapple).
- Pressing the other button will activate the opposite direction of hydraulic flow (e.g., open grapple).
- Release the button to stop the hydraulic flow to that circuit.
- Familiarize yourself with the controls in a safe, open area before operating with an attachment.
Figure 6.1: Common applications for the third function valve, such as operating grapples, augers, snowplow tilts, and snow blowers.
7. Maintenance
Regular maintenance ensures the longevity and reliable operation of your Fexhull Third Function Valve Kit.
- Inspect Hoses and Connections: Periodically check all hydraulic hoses for signs of wear, cracks, or leaks. Ensure all connections are tight. Replace damaged hoses immediately.
- Clean Components: Keep the valve manifold, quick couplers, and electrical connections clean and free of dirt, debris, and moisture.
- Check Electrical Wiring: Inspect wiring for fraying, cuts, or loose connections. Ensure all connections are secure and protected.
- Hydraulic Fluid: Ensure your tractor's hydraulic fluid is at the correct level and is clean. Refer to your tractor's owner's manual for fluid specifications and change intervals.
- Storage: If the kit is removed for storage, clean all components thoroughly and store them in a dry, protected environment. Cap all open hydraulic ports to prevent contamination.
8. Troubleshooting
This section provides solutions to common issues you might encounter. For problems not listed here, or if solutions do not resolve the issue, contact Fexhull customer support.
| Problem | Possible Cause | Solution |
|---|---|---|
| No hydraulic function from the kit. |
|
|
| Slow or weak hydraulic response. |
|
|
| Hydraulic leaks. |
|
|
9. Warranty and Support
Fexhull products are manufactured to high standards and undergo rigorous testing to ensure quality and durability. For specific warranty information, please refer to the documentation included with your purchase or contact Fexhull customer support.
If you require assistance with installation, troubleshooting, or have questions about your Fexhull Third Function Valve Kit, please contact our customer support team. When contacting support, please have your product model number (TFK2) and purchase information available.
Fexhull Customer Support: Visit the Fexhull Store on Amazon
Ask a question about this manual
Ask about setup, troubleshooting, compatibility, parts, safety, or missing instructions. Manuals+ will review the question and use this page’s manual context to help answer it.