
1. Introduction
Welcome to the user manual for your Harvia Vega Compact electric sauna heater. The Harvia Vega Compact is a reliable and easy-to-use heater designed for smaller sauna rooms. Its durable stainless steel construction provides a modern aesthetic, while the ergonomic built-in controls ensure convenient operation. This manual provides essential information for the safe installation, operation, and maintenance of your sauna heater.
Please read these instructions carefully before installing or using the heater. Keep this manual in a safe place for future reference.

Image 1: The Harvia Vega Compact sauna heater. This image displays the heater's stainless steel exterior, the integrated control dials on the side, and the sauna stones placed in the top compartment, ready for use.
2. Important Safety Information
Failure to follow these safety instructions may result in fire, electric shock, serious injury, or property damage. Always prioritize safety when using your sauna heater.
2.1 General Safety Precautions
- Electrical Installation: All electrical connections must be performed by a qualified electrician in accordance with local and national electrical codes. Incorrect wiring can lead to fire or electric shock.
- Sauna Stones: Use only genuine Harvia sauna stones. Do not use ceramic stones or other materials, as they may damage the heater or pose a fire risk. Ensure stones are properly stacked to allow air circulation.
- Water: Only use clean tap water on the sauna stones. Do not pour excessive amounts of water at once. Never pour water over the heater's electrical components or controls.
- Ventilation: Ensure adequate ventilation in the sauna room as specified by sauna construction guidelines.
- Clearance Distances: Maintain minimum safe distances from combustible materials as specified in the installation instructions. Do not place any objects on or near the heater.
- Children and Pets: Keep children and pets away from the hot heater. The surface of the heater and stones can reach very high temperatures.
- Medical Conditions: Consult a physician before using a sauna if you have any medical conditions, are pregnant, or are under the influence of alcohol or medication.
- Maintenance: Disconnect power to the heater before performing any maintenance or cleaning.
3. Package Contents
Upon unpacking, please verify that all components are present and undamaged. If any items are missing or damaged, contact your retailer immediately.
- Harvia Vega Compact Sauna Heater unit
- Sauna Stones (quantity suitable for the heater model)
- User and Installation Manual
- Mounting hardware (screws, brackets)
4. Installation (Setup)
The Harvia Vega Compact heater is designed for wall-mounted installation. Proper installation is crucial for safety and optimal performance. It is highly recommended that a qualified electrician performs the electrical connection.
4.1 Heater Placement and Mounting
- The heater should be mounted on a sturdy wall structure within the sauna room.
- Ensure the heater is positioned to allow for proper air circulation and safe clearance from benches and other combustible materials. Refer to the detailed installation diagram in the separate installation guide for exact clearance distances.
- The heater can be mounted low on the sauna wall, which helps ensure that the lower benches also receive sufficient heat and steam.
- The operating switches are symmetrically designed and can be positioned on either the right or left side of the heater for convenient access.
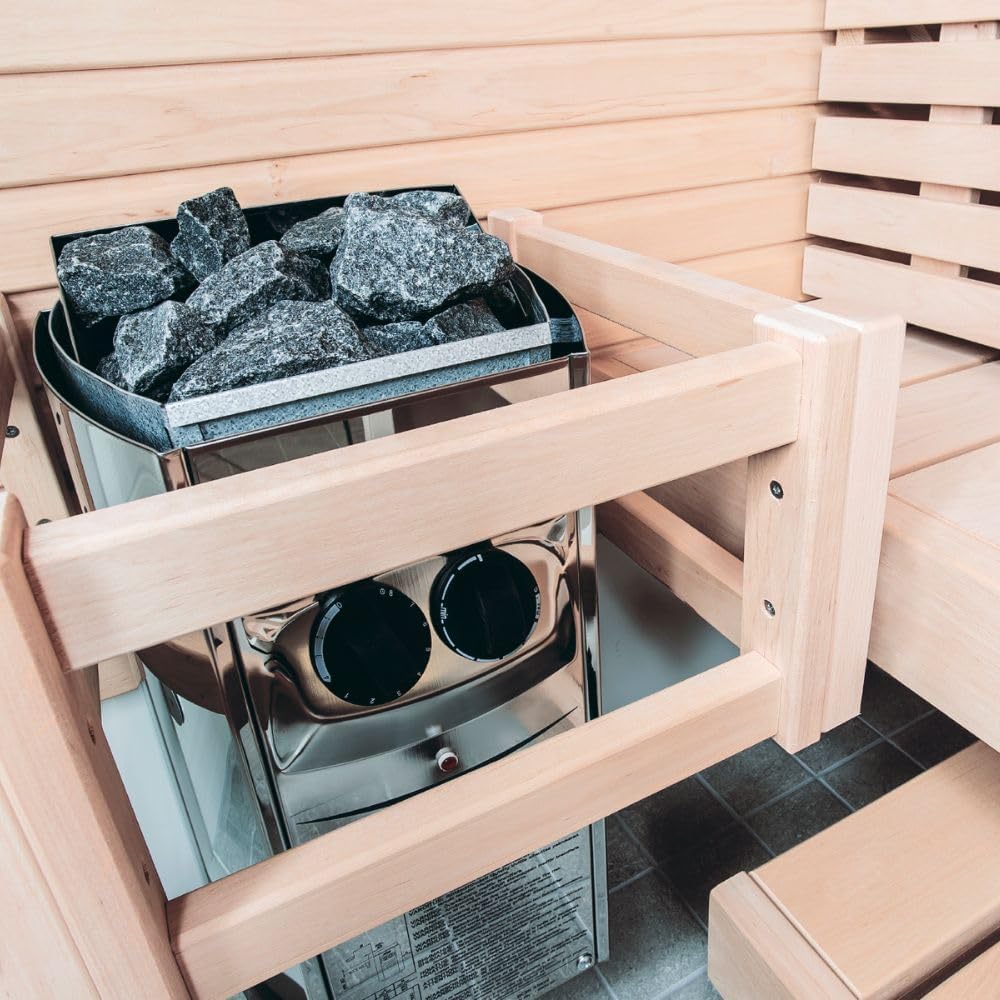
Image 2: Harvia Vega Compact heater installed in a sauna. This image illustrates the heater's placement within a wooden sauna room, highlighting its compact size and the accessibility of its built-in controls.
4.2 Electrical Connection
The electrical connection must be made by a certified electrician. Ensure the main power supply to the sauna is disconnected before any work begins.
- Verify the voltage and amperage requirements for your specific heater model (1.7kW, 1.9kW, or 3.5kW) match your electrical supply.
- Connect the heater to a dedicated circuit with appropriate overcurrent protection.
- Ensure proper grounding of the heater.
4.3 Stone Placement
Proper stone placement is essential for efficient heating and steam production. Arrange the sauna stones loosely in the stone compartment, ensuring good air circulation between them. Do not pack them too tightly. The heating elements should not be visible after the stones are placed.
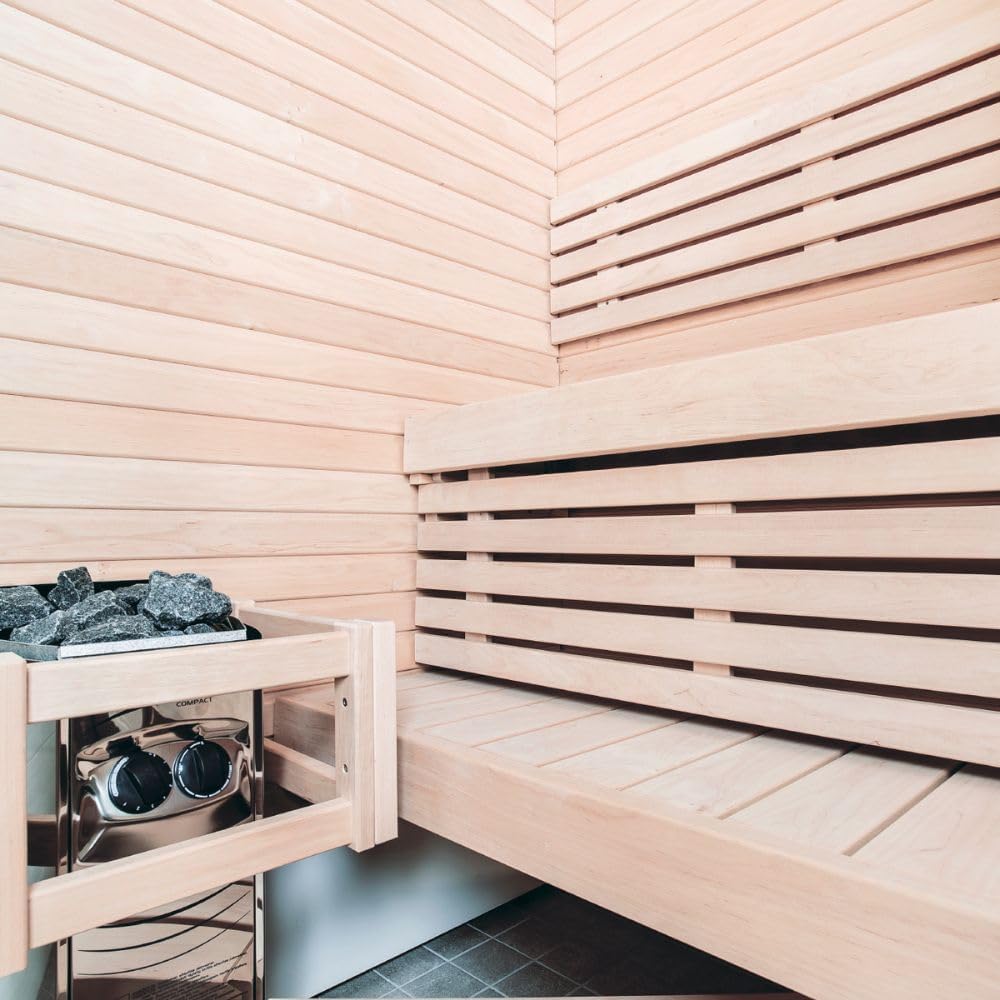
Image 3: Harvia Vega Compact heater in a sauna setting. This wider view shows the heater positioned beneath a lower bench, demonstrating how it integrates seamlessly into the sauna's design and ensures heat distribution to all levels.
5. Operation
The Harvia Vega Compact features user-friendly built-in controls for temperature and timer settings.
5.1 Initial Start-Up
- After installation, turn on the main power supply to the sauna.
- For the first use, heat the sauna for approximately one hour to burn off any manufacturing residues. Ensure good ventilation during this period.
5.2 Using the Controls
- Temperature Control: Use the thermostat dial to set the desired sauna temperature. The heater will cycle on and off to maintain this temperature.
- Timer Control: Use the timer dial to set the operating time. Some models may include a pre-set function, allowing the heater to turn on after a delay. Refer to the markings on your specific control dials.
5.3 Creating Steam
Once the sauna has reached the desired temperature, you can gently pour a small ladle of water onto the hot sauna stones to create steam (löyly). Do not pour too much water at once, as this can cool the stones excessively and potentially damage the heating elements. Never pour water directly onto the metal parts of the heater.
6. Maintenance
Regular maintenance ensures the longevity and safe operation of your Harvia Vega Compact heater.
- Cleaning: Periodically wipe down the exterior of the heater with a damp cloth. Do not use abrasive cleaners or solvents. Ensure the heater is cool and disconnected from power before cleaning.
- Sauna Stones: Inspect the sauna stones at least once a year, or more frequently with heavy use. Replace any cracked, crumbling, or discolored stones. Re-stack the stones to ensure good air circulation. Over time, stones can lose their ability to store heat efficiently.
- Heating Elements: Ensure the heating elements are free from debris and not bent or damaged. If damage is observed, contact a qualified service technician.
7. Troubleshooting
If you encounter issues with your Harvia Vega Compact heater, refer to the following common troubleshooting steps. For complex problems, always consult a qualified electrician or service technician.
| Problem | Possible Cause | Solution |
|---|---|---|
| Heater does not turn on. | No power supply; circuit breaker tripped; timer not set; faulty wiring. | Check main power and circuit breaker. Ensure timer is set correctly. Contact an electrician if wiring is suspected. |
| Heater does not heat sufficiently. | Thermostat set too low; sauna room too large for heater; poor stone placement; faulty heating element. | Increase thermostat setting. Verify heater kW matches room size (see specifications). Re-stack stones for better air flow. Contact service if heating element is suspected. |
| Heater overheats or shuts off prematurely. | Overheat protector activated; poor ventilation; stones packed too tightly. | Allow heater to cool and reset. Check sauna ventilation. Re-stack stones. If problem persists, contact service. |
8. Technical Specifications
The Harvia Vega Compact series is available in several power outputs to suit various sauna room sizes.
| Feature | 1.7kW Model | 1.9kW Model | 3.5kW Model |
|---|---|---|---|
| Power Output | 1.7 kW | 1.9 kW | 3.5 kW |
| Sauna Room Volume | 70 to 106 cu. ft. | 70 to 106 cu. ft. | 70 to 175 cu. ft. |
| Voltage | 120V | 120V | 240V |
| Phase | 1PH | 1PH | 1PH |
| Nominal Amps | 14.2 Amps | 15.9 Amps | 14.4 Amps |
| Product Dimensions (W x D x H) | 11" x 11" x 21" (279mm x 279mm x 533mm) | ||
| Construction Material | Stainless Steel | ||
| Origin | Designed, engineered, and made in Finland | ||
9. Warranty and Support
Harvia products are manufactured to high-quality standards. Specific warranty terms and conditions are typically provided with your product documentation or can be found on the official Harvia website. Please retain your proof of purchase for warranty claims.
For technical support, spare parts, or warranty inquiries, please contact your authorized Harvia dealer or visit the official Harvia website for contact information.
Manufacturer: Harvia


