1. Introduction
This manual provides instructions for the assembly, operation, maintenance, and troubleshooting of your Garvee 7 ft x12 ft Outdoor Portable Storage Shed. This shelter is designed to offer a versatile storage solution for items such as motorcycles, ATVs, bicycles, small cars, and gardening tools. It features a waterproof and UV-resistant cover, dual roll-up zipper doors, and a heavy-duty frame for stability.

Image 1.1: The Garvee Portable Storage Shelter Shed providing household storage.
2. Setup and Assembly
The Garvee 7 ft x12 ft storage shelter features a tool-free frame design for straightforward installation. It is recommended to have at least two people for assembly.
2.1 Unpacking and Component Identification
Carefully unpack all components and verify against the parts list provided in your packaging. Ensure all pipes, connectors, and the cover are present and undamaged.

Image 2.1: Key structural components including galvanized tee pipes for easy connection, triangular base structures for stability, thick connectors for improved efficiency, and ground nails for securing the shelter.
2.2 Frame Assembly
- Connect the galvanized steel pipes according to the assembly diagram. The tool-free design allows for quick connection.
- Assemble the base frame first, ensuring it is level and square.
- Attach the vertical support pipes and roof frame components.
- Secure all connections firmly.
2.3 Cover Installation
- Drape the waterproof and UV-resistant cover over the assembled frame.
- Ensure the cover is centered and evenly distributed.
- Use the elastic ball straps to securely fasten the canopy to the frame.
- Attach the front and back roll-up zipper doors.
2.4 Anchoring the Shelter
For stability, especially in windy conditions, the shelter must be properly anchored.
- Utilize the included ground stakes to secure the base of the shed to the ground.
- For concrete surfaces, expansion screws (not included) may be required to secure the base plates.

Image 2.2: Product dimensions and anchoring options for the storage shed.
2.5 Assembly Demonstration Video
Video 2.1: This video demonstrates the assembly process and key features of a Garvee portable storage shed, similar in design to the 7'x12' model. It shows component layout, frame construction, cover attachment, and anchoring.
3. Operating Instructions
3.1 Using the Roll-Up Zipper Doors
The front and back doors feature dual zippers and buckles. To open, unzip the doors completely and roll them upwards. Secure them in the rolled-up position using the integrated buckles or straps to allow for convenient entry, exit, and improved airflow. To close, unbuckle the rolled-up doors and zip them down completely.
3.2 Ventilation
The storage shed is equipped with dual vents on each door. These vents promote airflow within the shelter, which helps to reduce moisture buildup and prevent condensation caused by temperature changes or rain. Ensure these vents are not obstructed for optimal performance.

Image 3.1: The shed providing shelter for a motorcycle and lawnmower.
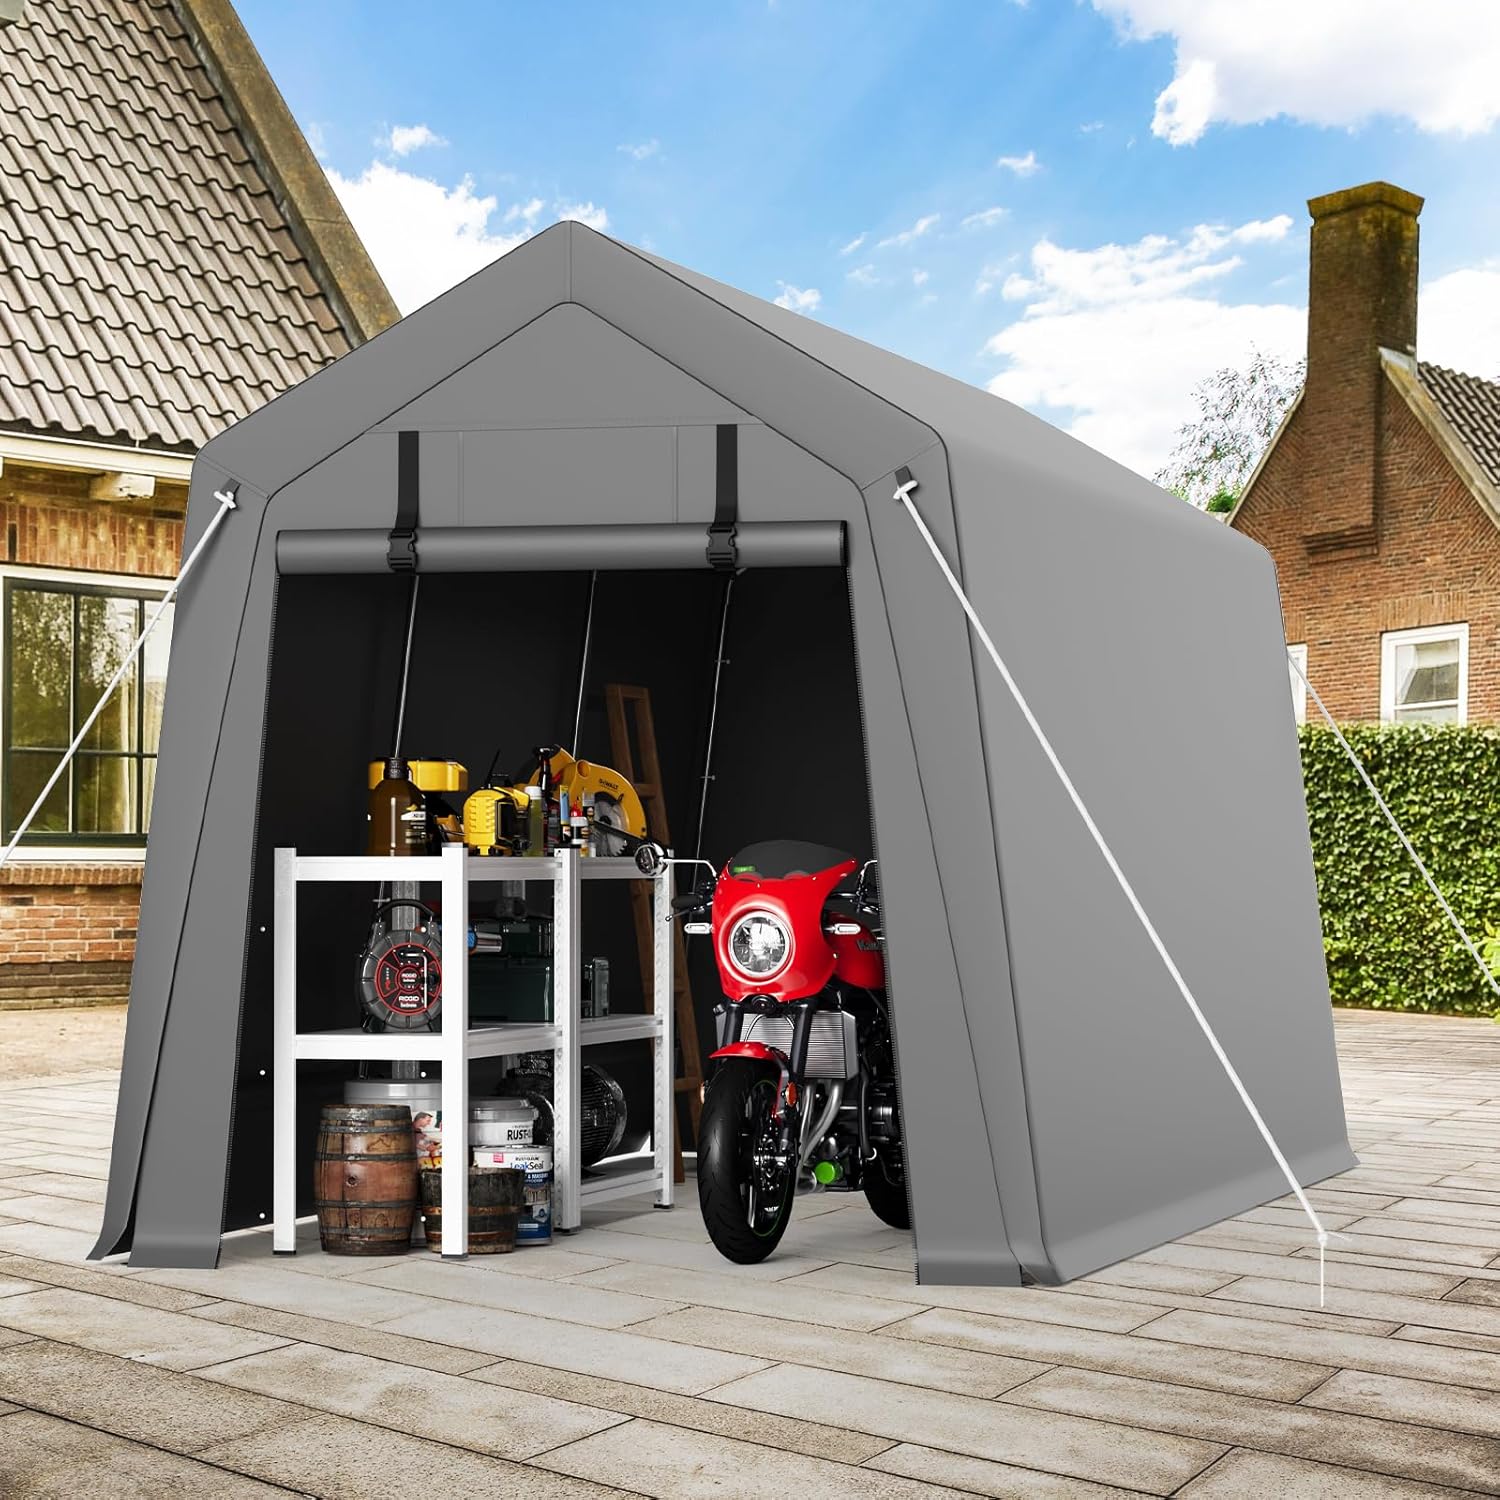
Image 3.2: The shed used for storing a motorcycle and shelving with tools.
4. Maintenance
4.1 General Care
- Regularly inspect the frame and cover for any signs of wear, damage, or loose connections.
- Clean the cover periodically with mild soap and water to remove dirt and debris. Avoid harsh chemicals that could damage the material.
- Ensure the shelter is properly anchored with ground stakes to prevent collapse, especially before anticipated strong winds or heavy weather.
4.2 Weather Considerations
- While the cover is UV-resistant, prolonged exposure to direct sunlight can degrade the material over time. Position the shed to minimize direct sun exposure if possible.
- In areas with heavy snowfall, regularly remove accumulated snow from the roof to prevent structural stress and potential collapse.
- Ensure all zippers are functioning smoothly and lubricate them if necessary to prevent sticking.

Image 4.1: The shed's resistance to sun, rain, snow, and wind.
5. Troubleshooting
5.1 Instability in Wind
- Issue: The shed feels unstable or shifts during windy conditions.
- Solution: Ensure all ground stakes are fully inserted and secure. For added stability, consider using heavier-duty anchors or sandbags around the base. Verify all frame connections are tight.
5.2 Water Accumulation / Leaks
- Issue: Water is pooling on the roof or leaking into the shed.
- Solution: Check that the cover is taut and evenly stretched over the frame to prevent water pooling. Inspect the cover for any tears or punctures and repair as necessary. Ensure zippers are fully closed.
5.3 Condensation Inside
- Issue: Moisture or condensation is forming on the inside of the cover.
- Solution: Ensure the dual vents on the doors are clear and unobstructed to allow for proper airflow. Increased ventilation helps reduce condensation.
6. Specifications
| Feature | Detail |
|---|---|
| Brand | Garvee |
| Model Number | deBMdnzSqeN0cuOqxRwTJwV9bw |
| Size | 7'x12' |
| Product Dimensions (L x W x H) | 53.82"L x 14.57"W x 9.53"H (Packaged) |
| Item Weight | 74.4 pounds |
| Material | Iron (Frame) |
| Frame Material | Iron |
| Pole Material Type | Iron |
| Color | Gray |
| Water Resistance Level | Waterproof |
| Ultraviolet Light Protection | Yes |
| Assembly Required | Yes |
| Recommended Uses | Motorcycle, Bike, Firewood, Garden Tools |
7. Warranty Information
For specific warranty details regarding your Garvee Portable Storage Shed, please refer to the warranty card included with your product or contact the manufacturer directly. Warranty terms typically cover manufacturing defects and material flaws under normal use conditions.
8. Customer Support
If you have any questions, require assistance with assembly, or need to report a missing or damaged part, please contact Garvee customer support. Refer to your product packaging or the official Garvee website for the most current contact information.


