
1. Introduction
Thank you for choosing the blskby Portable Cordless Pressure Washer, Model SC15-03. This manual provides essential information for the safe and efficient operation, maintenance, and troubleshooting of your new pressure washer. Please read this manual thoroughly before first use and retain it for future reference.
This cordless pressure washer is designed for various cleaning tasks, offering up to 1200 PSI of pressure and a water flow of 390 L/H. It features a 6-in-1 adjustable nozzle, an adjustable foam cannon, and is powered by two 20V 3.0Ah lithium batteries for portable use.
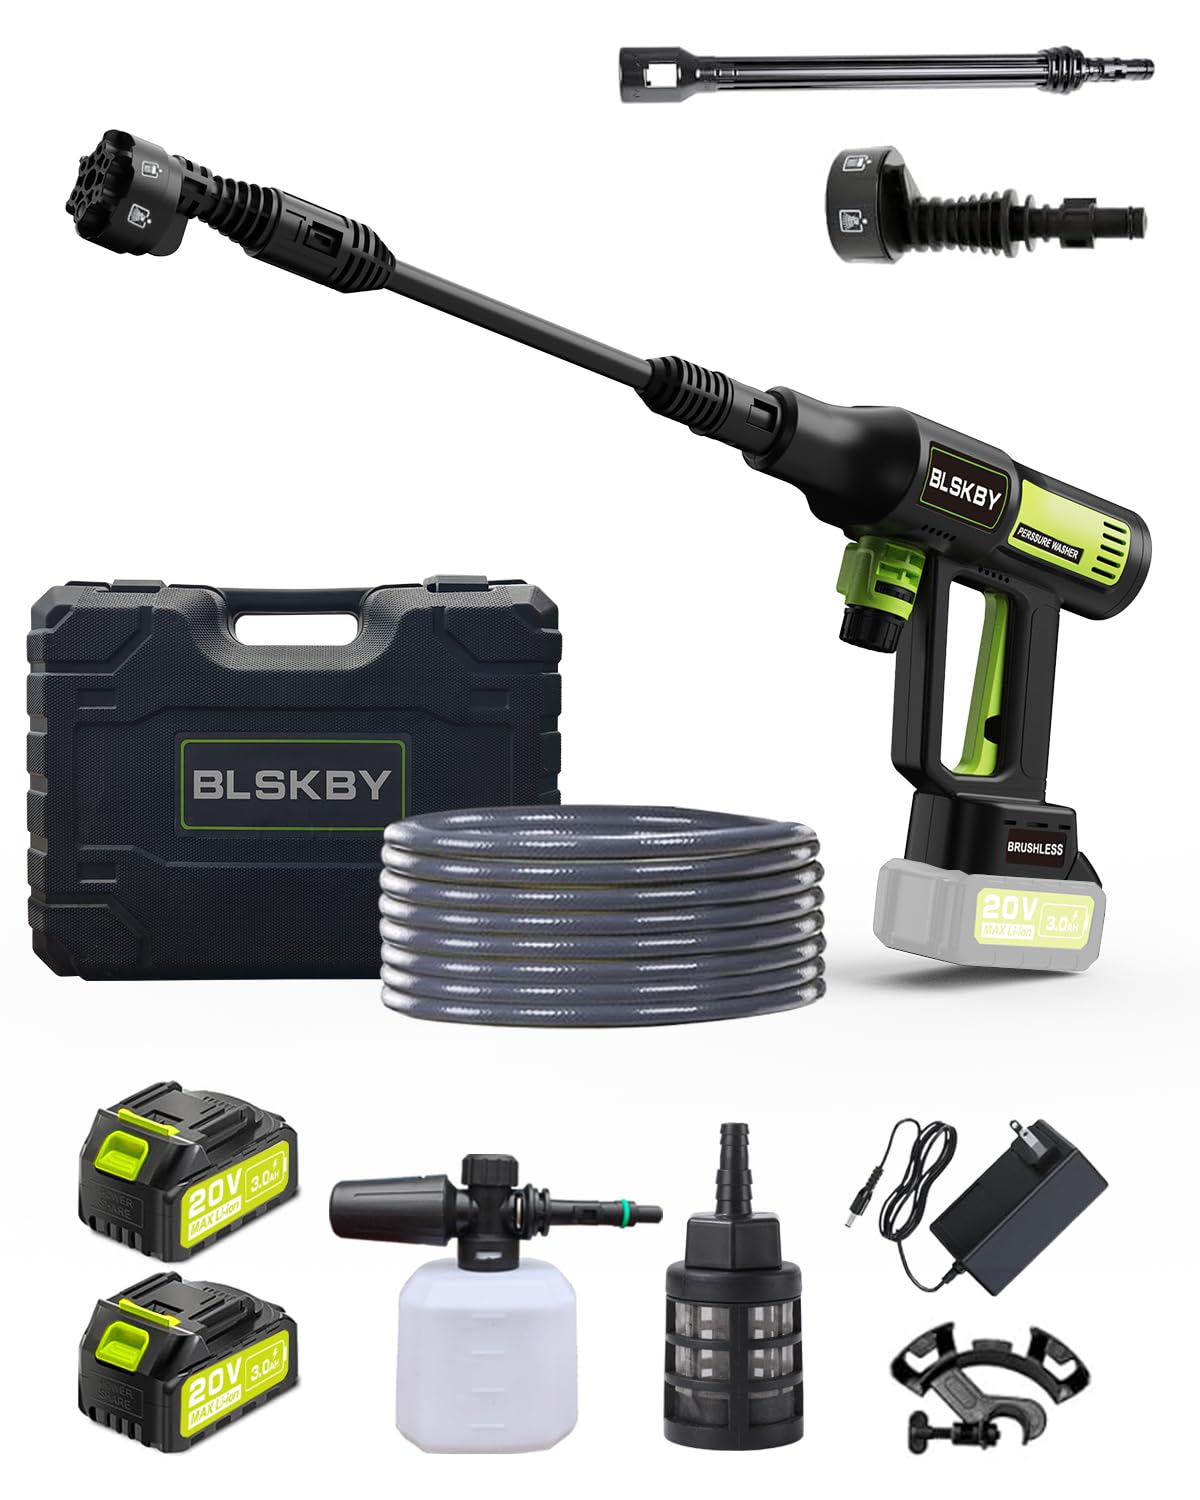
Image: The blskby Portable Cordless Pressure Washer in operation, demonstrating its high-efficiency cleaning capabilities with 1200 PSI, 1.72 GPM, and 3 adjustable speeds.
2. Safety Information
Always observe basic safety precautions when using this product to reduce the risk of injury, electric shock, or fire.
- Eye Protection: Always wear appropriate eye protection, such as safety goggles, to protect against high-pressure spray and debris.
- Hand Protection: Wear protective gloves to prevent skin irritation from cleaning solutions or prolonged water exposure.
- Footwear: Wear non-slip, closed-toe footwear to maintain stability and protect your feet.
- Electrical Safety: Ensure the battery charger is used in dry conditions. Do not expose the charger or batteries to water or moisture.
- Water Pressure: Never direct the water jet at people, pets, or electrical equipment. The high pressure can cause serious injury.
- Stable Surface: Operate the pressure washer on a stable, level surface to prevent tipping.
- Children and Bystanders: Keep children and bystanders at a safe distance from the operating area.
- Chemicals: Use only pressure washer safe cleaning detergents. Follow the detergent manufacturer's instructions for use and safety.
- Nozzle Adjustment: Always stop the machine before adjusting the spray mode on the 6-in-1 nozzle to prevent accidental discharge or leakage.
- Battery Handling: Use only the specified batteries and charger. Do not attempt to open or modify batteries.
3. Package Contents
Verify that all items listed below are included in your package. If any parts are missing or damaged, please contact customer support.
- 1x Cleaner Unit
- 2x 20V 3.0Ah Lithium Batteries
- 1x 2A Fast Charger
- 1x 400ml Adjustable Foam Cannon
- 1x 6-in-1 Nozzle
- 1x Extension Wand
- 1x 16.4ft (5m) Suction Hose
- 1x Suction Hose Connector (pre-attached to unit)
- 1x Weighted Filter
- Replaceable Sealing Rings
- 1x Hose Clamp
- Faucets Accessories (3/4" Faucet Adapter, 1/2" Faucet Adapter, Hose Connector)
- 1x User Manual

Image: A visual representation of all components included with the blskby Portable Cordless Pressure Washer, such as the cleaner unit, batteries, charger, nozzles, hoses, and accessories.
4. Setup
Follow these steps to assemble and prepare your pressure washer for use.
4.1 Assembly
- Connect Nozzle and Extension Wand: Attach the 6-in-1 nozzle to the extension spray wand. Ensure it clicks securely into place.
- Attach Extension Wand to Cleaner Unit: Connect the assembled extension wand to the main cleaner unit.
- Connect Hose: Attach the suction hose to the water inlet on the cleaner unit. The water hose connector is pre-attached to the unit. Ensure the shut-off valve (if present on your hose) is closed before connecting.
- Insert Battery: Slide a charged 20V 3.0Ah lithium battery into the battery slot on the cleaner unit until it locks into place.

Image: Step-by-step visual guide for assembling the pressure washer, including connecting the 6-in-1 nozzle, extension wand, hose, and battery.
4.2 Water Source Connection
Your pressure washer supports multiple water sources:
- Faucet Connection: Use the provided 3/4" or 1/2" faucet adapters and hose connector to attach the suction hose directly to a garden faucet. Wrap waterproof tape around threads if minor leaks occur.
- Bucket/Pool/River: Attach the weighted filter to the end of the suction hose. Place the weighted filter into a bucket, pool, or river. The weighted filter helps keep the hose submerged for consistent water flow. A hose holder for buckets is also included for convenience.

Image: Illustrations demonstrating how to connect the pressure washer to various water sources, including a faucet using adapters and drawing water from a bucket or pool with the weighted filter.
5. Operation
5.1 Battery Charging and Installation
- Charging: Connect the 2A fast charger to a power outlet and then to the battery. The battery fully charges in approximately 1.5 hours. The battery has multiple protection mechanisms for safe charging.
- Installation: Slide the charged battery into the cleaner unit until it clicks.
5.2 Using the 6-in-1 Nozzle
The 6-in-1 nozzle allows you to select different spray patterns for various cleaning tasks. Always stop the machine before adjusting the spray mode to avoid leakage.
- Rotate the nozzle head to select from the following spray patterns: 0° (pencil jet), 15° (narrow fan), 25° (medium fan), 40° (wide fan), straight jet, and shower.
- Choose the appropriate pattern based on the cleaning surface and desired intensity.

Image: Close-up view of the 6-in-1 adjustable nozzle, illustrating the different spray angles (0°, 15°, 25°, 40°, straight jet, and shower) available for various cleaning applications.
5.3 Using the Foam Cannon
The 400ml adjustable foam cannon is ideal for applying detergent for car washing or other tasks.
- Fill the foam cannon reservoir with appropriate pressure washer detergent.
- Attach the foam cannon to the cleaner unit.
- Adjust the knob on the foam cannon to control the foam output.
- Spray foam onto the desired surface, allow it to dwell, then rinse with a suitable nozzle setting.

Image: The pressure washer equipped with the foam cannon, actively applying a thick layer of foam to a car for effective cleaning.
5.4 LCD Display and Pressure Settings
The integrated LCD touch screen displays battery level and allows adjustment of pressure settings.
- Battery Level Indicator: Shows the remaining battery charge.
- Pressure Level Indicator: Displays the current pressure mode (1, 2, or 3).
- Mode Switch: Use the touch screen to cycle through the three pressure modes: 560 psi, 895 psi, and 1200 psi.

Image: A detailed view of the pressure washer's LCD display, showing battery level indicators, current pressure mode (1, 2, or 3), and the mode switch button.
5.5 Starting and Stopping
- Starting: Ensure the water source is active and the battery is inserted. Press the power button on the unit. Squeeze the trigger to begin spraying.
- Stopping: Release the trigger to stop the water flow. Press the power button to turn off the unit. Remove the battery when not in use.
6. Maintenance
Regular maintenance ensures optimal performance and extends the lifespan of your pressure washer.
- Clean the Filter: Regularly inspect and clean the weighted filter on the suction hose to prevent debris from entering the pump.
- Check Sealing Rings: Periodically inspect all sealing rings for wear or damage. Replace them as needed using the provided replaceable sealing rings to prevent leaks.
- Battery Care: Store batteries in a cool, dry place away from direct sunlight. Do not store fully discharged batteries for extended periods. Charge them periodically if not in use.
- Unit Cleaning: After each use, rinse the unit and accessories with clean water to remove any detergent residue or dirt.
- Winterization (for cold climates): If storing the pressure washer in an area where temperatures may drop below freezing, run a pressure washer pump protector or RV antifreeze through the unit to prevent damage from freezing water.
7. Troubleshooting
Refer to this section for common issues and their solutions.
| Problem | Possible Cause | Solution |
|---|---|---|
| Unit does not turn on | Battery not charged or improperly inserted. | Ensure battery is fully charged and securely inserted. |
| Low or no water pressure |
|
|
| Water leakage |
|
|
| Short battery life | Battery not fully charged or old battery. | Ensure battery is fully charged. Consider replacing old batteries if performance significantly degrades. |
8. Specifications
| Feature | Specification |
|---|---|
| Model Number | SC15-03 |
| Brand | blskby |
| Maximum Pressure | 1200 PSI |
| Maximum Flow Rate | 390 Liters Per Hour (approx. 1.72 GPM) |
| Power Source | Battery Powered |
| Battery Type | 2x 20V 3.0Ah Lithium Polymer |
| Battery Charge Time | 1.5 hours (per battery) |
| Approximate Working Time | 15-60 minutes (depending on speed/pressure setting) |
| Hose Length | 5 Meters (16.4 ft) |
| Wand Length | 0.8 Meters |
| Item Weight | 3 Kilograms |
| Color | Green |
9. Warranty and Support
blskby is committed to providing quality products and excellent customer service.
- Product Warranty: This product comes with a 2-year warranty against manufacturing defects.
- Quality Guarantee: We offer a 365-day quality guarantee.
- Returns: Enjoy 30-day free returns.
- Customer Support: We provide 24/7 fast customer support and lifetime technical support. Our team is available for 24-hour responsive service.
For any questions, technical assistance, or warranty claims, please contact our customer support team through the retailer's platform or refer to the contact information provided with your purchase.
Manufacturer Information:
Zhejiang Jiahui Industry and Trade Co., LTD
No.5, Xita San Road, Yongkang, Jinhua, Zhejiang, China

Image: A golden shield emblem signifying a 2-year product warranty.

Image: Customer support representatives ready to assist, highlighting the availability of support services.