1. Introduction
This manual provides detailed instructions for the setup, operation, and maintenance of your Ducky One 2 Mini Pro RGB Mechanical Keyboard. Designed for performance and durability, this keyboard features Ducky's Quack Mechanics, V2 stabilizers, and Double Shot PBT keycaps for an enhanced typing experience.

Image 1.1: The Ducky One 2 Mini Pro RGB Mechanical Keyboard, showcasing its compact 60% layout and vibrant RGB backlighting.
Key Features:
- True PBT Doubleshot Keycaps: Stain-resistant keycaps with seamless legends for durability.
- Solid Stance: Optimized weight distribution for enhanced stability and precision.
- Authentic Acoustics: Features V2 stabilizers and an EVA foam layer for improved sound absorption and genuine switch acoustics.
- Balance Tuning: Stabilizers are fine-tuned for a consistent and exceptional typing feel.
- Dual-layer PCB: Ensures longer life expectancy and signal stability, supporting N-key or 6-Key Rollover.
2. Package Contents
Please verify that all items are present in the package:
- Ducky One 2 Mini Pro RGB Mechanical Keyboard
- Detachable USB Type-C to USB-A Cable
- Keycap Puller
- Additional Colored Keycaps (for customization)
- User Manual

Image 2.1: The included detachable USB Type-C to USB-A cable, used for connecting the keyboard to a computer.
3. Setup
Follow these steps to set up your Ducky One 2 Mini Pro keyboard:
- Connect the USB Cable: Insert the USB Type-C end of the provided cable into the port on the back of the keyboard.
- Connect to Computer: Plug the USB-A end of the cable into an available USB port on your computer.
- Driver Installation: The keyboard is plug-and-play. Your operating system should automatically detect and install the necessary drivers. No additional software installation is typically required.
- Adjust Keyboard Angle: Utilize the adjustable feet on the underside of the keyboard to set your preferred typing angle.
4. Operating Instructions
The Ducky One 2 Mini Pro features a 60% layout, utilizing a Function (Fn) layer to access additional commands. The Fn key is located on the bottom right of the keyboard.
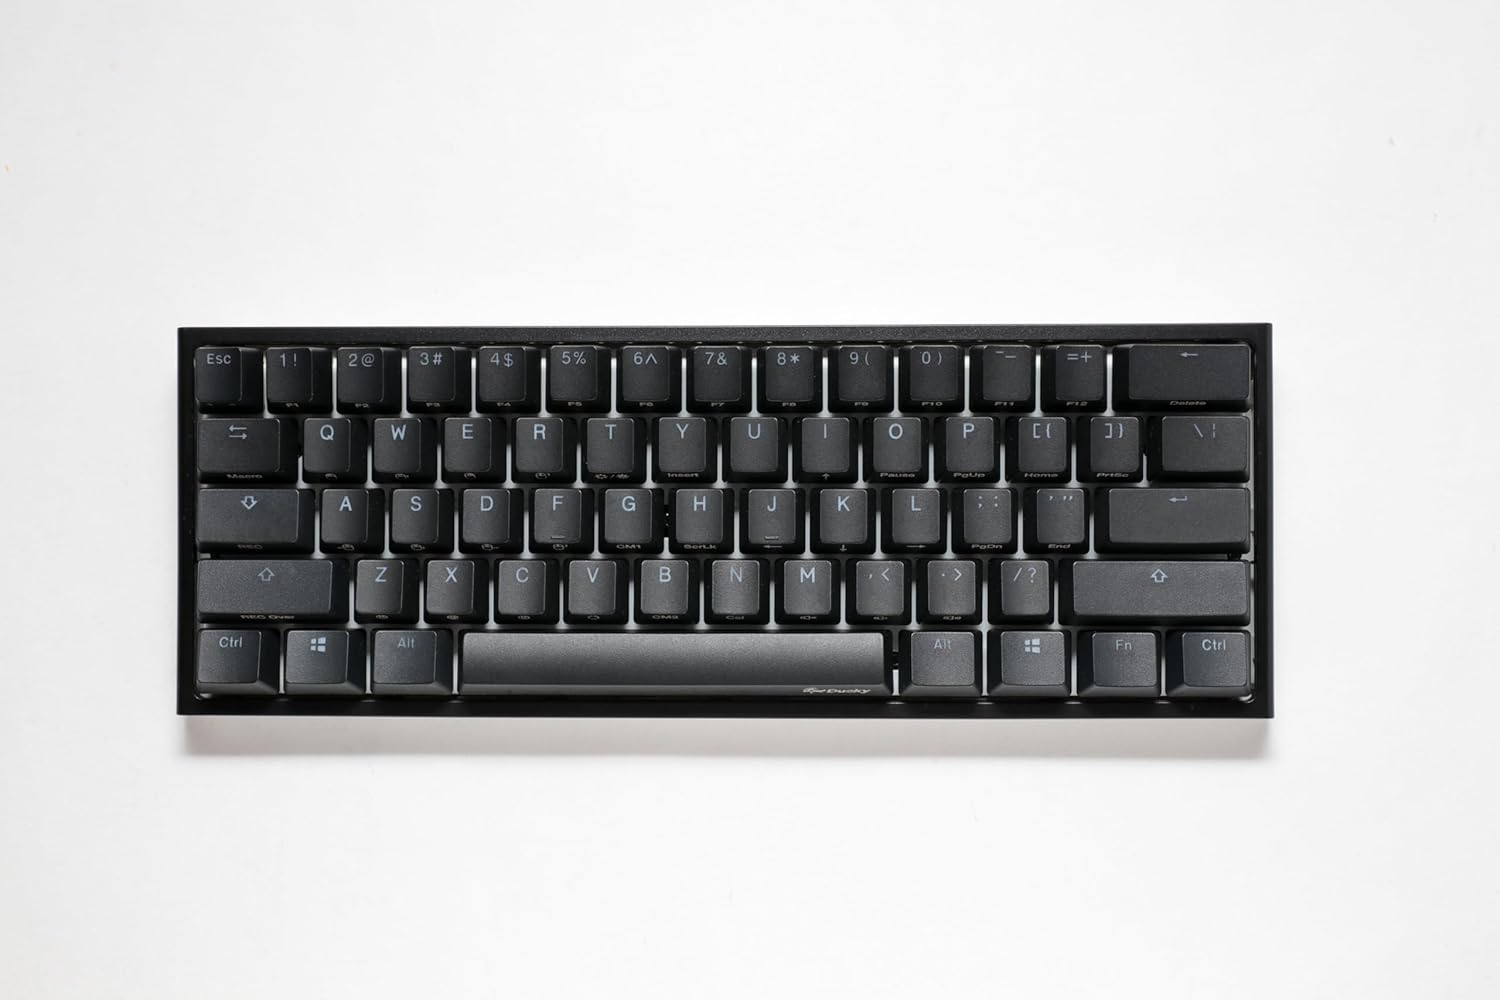
Image 4.1: Top-down view of the Ducky One 2 Mini Pro keyboard, illustrating the compact layout and secondary functions printed on keycaps.
4.1. Basic Functions
- Typing: Standard QWERTY layout for general input.
- Arrow Keys: Press Fn + I, J, K, L for Up, Left, Down, Right arrow functions, respectively.
- Delete: Press Fn + Backspace.
- Home/End/Page Up/Page Down: Accessed via Fn combinations, typically marked on the keycaps.
4.2. Multimedia Controls
Access multimedia functions by holding the Fn key and pressing the corresponding keys:
- Fn + R: Play/Pause
- Fn + T: Stop
- Fn + Y: Previous Track
- Fn + U: Next Track
- Fn + I: Volume Down
- Fn + O: Volume Up
- Fn + P: Mute
4.3. RGB Lighting Control
Customize your keyboard's backlighting using the following Fn key combinations:
- Fn + F10: Cycle through various RGB lighting modes.
- Fn + F11: Decrease brightness.
- Fn + F12: Increase brightness.
- Fn + Left Arrow: Adjust lighting effect speed or direction.
- Fn + Right Arrow: Adjust lighting effect speed or direction.
- Fn + Z / X / C: Adjust Red / Green / Blue color intensity in certain modes.
4.4. DIP Switches
The Ducky One 2 Mini Pro features DIP switches on the underside of the keyboard. These switches allow for hardware-level configuration changes, such as swapping the positions of certain keys (e.g., Fn, Alt, Ctrl, Windows key). Refer to the markings near the DIP switches for specific functions.
4.5. Macro Recording
The keyboard supports on-the-fly macro recording. Consult the full Ducky manual (often available online) for detailed instructions on how to record and assign macros to specific keys or key combinations.
5. Maintenance
Proper maintenance ensures the longevity and performance of your keyboard.
5.1. Cleaning the Keyboard
- Dust: Use compressed air to remove dust and debris from between keycaps.
- Keycaps: For deeper cleaning, use the provided keycap puller to carefully remove keycaps. Clean them with a mild soap solution and a soft cloth, then ensure they are completely dry before reattaching.
- Chassis: Wipe the keyboard chassis with a slightly damp, soft cloth. Avoid excessive moisture.

Image 5.1: A keycap removed from the Ducky One 2 Mini Pro, revealing the Gateron Red mechanical switch underneath.
5.2. Keycap Removal and Replacement
Use the included keycap puller to gently grasp and lift keycaps straight up. When replacing, align the keycap with the switch stem and press down firmly until it clicks into place. Avoid excessive force to prevent damage to the switch.
6. Troubleshooting
If you encounter issues with your Ducky One 2 Mini Pro keyboard, try the following solutions:
- Keyboard Not Responding:
- Ensure the USB cable is securely connected to both the keyboard and the computer.
- Try connecting the keyboard to a different USB port on your computer.
- Test the keyboard on another computer to rule out system-specific issues.
- Specific Keys Not Working:
- Remove the affected keycap and check for any debris or obstructions around the switch. Clean if necessary.
- Ensure the keycap is properly seated on the switch stem.
- RGB Lighting Issues:
- Cycle through lighting modes using Fn + F10.
- Adjust brightness using Fn + F11/F12.
- Perform a factory reset (see below).
- Factory Reset: To reset the keyboard to its default settings, hold Fn + Left Alt + Right Alt for approximately 3 seconds. The keyboard lights will flash to indicate a successful reset.
7. Specifications
| Feature | Specification |
|---|---|
| Brand | Ducky |
| Model | One 2 Mini Pro |
| Keyboard Description | Mechanical |
| Switch Type | Linear (Gateron Red) |
| Connectivity Technology | USB-C |
| Compatible Devices | PC |
| Keyboard Layout | QWERTY |
| Special Features | QUACK Mechanics, Hot-Swappable, Detachable USB Type-C, Three keyboard angles, Independent keyboard indicator lights |
| Material | Plastic |
| Power Source | USB power |
| Hand Orientation | Ambidextrous |
| Item Weight | 2.1 pounds |
| Package Dimensions | 13.2 x 6.1 x 2 inches |
| ASIN | B0DZ2553L4 |
| Manufacturer | Ducky |
| Date First Available | March 3, 2025 |
8. Warranty and Support
Ducky products are manufactured to high-quality standards and are covered by a limited warranty against defects in materials and workmanship. The specific terms and duration of the warranty may vary by region and retailer.
For detailed warranty information, technical support, or to access additional resources, please visit the official Ducky website or contact your local retailer.
You can also find more information and support on the Ducky Brand Store on Amazon.


