1. Introduction
Thank you for choosing the DEWENWILS ITE-05 24 Hour Programmable Digital Timer Outlet. This device is designed to automate the control of your indoor electrical appliances, providing convenience and energy efficiency. Please read this manual thoroughly before use to ensure proper operation and to maximize the benefits of your new timer.
2. Key Features
- 3 Group Daily Repeat Program: Program up to 3 sets of daily ON/OFF schedules.
- Flexible Control Modes: Easily switch between Always On, Auto, and Always Off modes using the side switch.
- Compact Design: Sleek matte finish and compact size ensure it does not block other outlets.
- Large Digital Display: Clear screen shows current time and timer status for easy management.
- Memory Function: Retains settings for up to 6 months during power outages or when unplugged.
- Silent Operation: Operates quietly, making it suitable for bedrooms and offices.
- Random Mode (RND): Simulates home occupancy by turning devices on/off at random intervals to deter intruders.
- Dual Grounded Outlets: Features two 3-prong grounded outlets for versatile use.
3. Product Overview
The DEWENWILS ITE-05 timer features an intuitive interface with a clear digital display and easy-to-access buttons for programming. A side switch allows for quick mode selection.
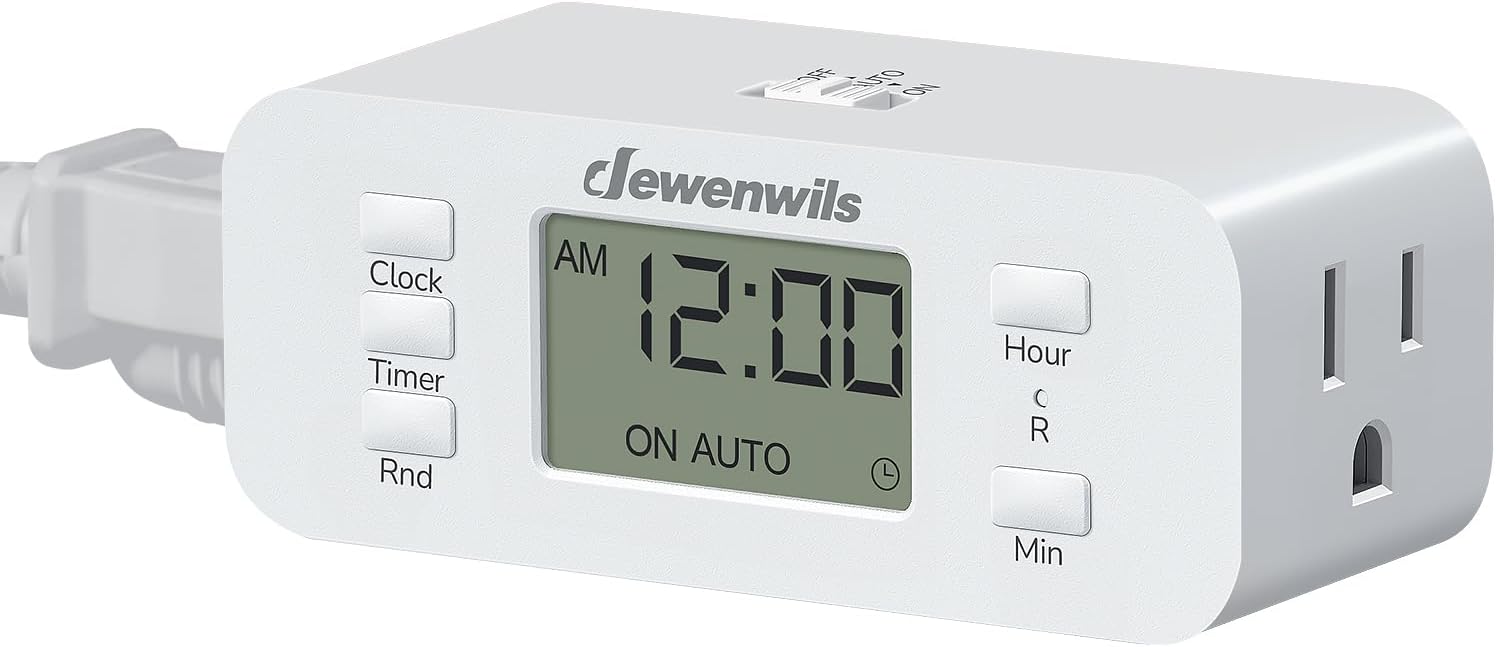
Figure 1: Front view of the DEWENWILS ITE-05 Digital Timer Outlet, showing the display and control buttons.

Figure 2: Side view illustrating the OFF/AUTO/ON mode selection switch.
Controls and Display:
- Clock Button: Used to set the current time.
- Timer Button: Used to program ON/OFF schedules.
- Rnd Button: Activates/deactivates Random Mode.
- Hour/Min Buttons: Adjust hour and minute settings during programming.
- Side Switch (OFF/AUTO/ON): Selects the operating mode.
- Digital Display: Shows current time, program status, and mode.
4. Setup
4.1 Initial Time Setting
- Plug the timer into a standard 3-prong grounded wall outlet. The display should light up.
- Press and hold the CLOCK button until the hour digits begin to flash.
- Use the HOUR and MIN buttons to set the current hour and minute. Pay attention to AM/PM indicators.
- Press the CLOCK button again to confirm and exit time setting mode.
4.2 Programming ON/OFF Schedules (3 Groups)
The timer allows for up to 3 distinct ON/OFF programs per day. Each program can be set for specific times.

Figure 3: Example of setting three daily ON/OFF programs.
- Press the TIMER button once. The display will show "1 ON" and the hour digits will flash.
- Use the HOUR and MIN buttons to set the desired ON time for Program 1.
- Press the TIMER button again. The display will show "1 OFF" and the hour digits will flash.
- Use the HOUR and MIN buttons to set the desired OFF time for Program 1.
- Repeat steps 1-4 for Program 2 ("2 ON" / "2 OFF") and Program 3 ("3 ON" / "3 OFF") if additional schedules are needed.
- After setting all desired programs, press the TIMER button repeatedly until the current time is displayed, or wait for 10 seconds for the timer to automatically return to normal display.
4.3 Random Mode (RND) Setup
The Random Mode is designed to enhance home security by varying the ON/OFF times of your programmed schedules by 0-30 minutes, making it appear as if someone is home.

Figure 4: Random Mode (RND) in action, simulating occupancy for security.
- Ensure you have at least one ON/OFF program set.
- Press the RND button once. "RND" will appear on the display, indicating that Random Mode is active.
- To deactivate, press the RND button again. "RND" will disappear from the display.
5. Operating Instructions
5.1 Selecting Operating Mode
Use the side switch to select the desired operating mode:
- OFF: The connected appliance will remain off.
- AUTO: The connected appliance will operate according to your programmed ON/OFF schedules. If Random Mode is active, it will also apply.
- ON: The connected appliance will remain on.
Figure 5: The side switch allows for easy selection between OFF, AUTO, and ON modes.
5.2 Connecting Appliances
Plug your appliance(s) into the grounded outlets on the front of the timer. Ensure the appliance's power switch is in the ON position if you intend for the timer to control its operation.

Figure 6: The compact design ensures the timer does not obstruct the second wall outlet.
6. Maintenance
- Keep the timer clean by wiping it with a dry, soft cloth.
- Do not immerse the timer in water or any other liquid.
- Avoid using harsh chemicals or abrasive cleaners.
- Ensure the timer is unplugged from the wall outlet before cleaning.
7. Troubleshooting
- Timer not turning ON/OFF at programmed times:
- Ensure the side switch is set to AUTO mode.
- Verify that the current time is set correctly, including AM/PM.
- Check that the ON/OFF programs are set correctly and are not conflicting.
- Ensure the connected appliance's power switch is in the ON position.
- Display is blank:
- The timer has a memory function that retains settings for up to 6 months without power. If the display is blank, it may indicate the internal battery is depleted. Plug the timer into an outlet for at least 30 minutes to recharge.
- Time inaccuracy over time:
- Digital timers may experience slight time drift over extended periods. Periodically check and reset the current time if necessary to maintain accuracy.
8. Specifications
| Model Number | ITE-05 |
| Brand | DEWENWILS |
| Color | White |
| Material | Plastic |
| Voltage | 125V AC, 60Hz |
| Rating | 15A Resistive, 1000W Tungsten |
| Number of Settings | 3 ON/OFF Programs (24 settings) |
| Product Dimensions | 1.57"D x 3.66"W x 1.42"H |
| Item Weight | 4.6 ounces |
9. Official Product Videos
DEWENWILS Digital Timer Outlet Series Overview
This video provides a general overview of the DEWENWILS Digital Timer Outlet series, demonstrating its features and various applications.
10. Warranty & Support
For warranty information, technical support, or any questions regarding your DEWENWILS ITE-05 Digital Timer Outlet, please contact DEWENWILS customer service. Refer to the product packaging or the official DEWENWILS website for contact details.


