1. Introduction
Thank you for choosing the EvoFox Deathray v2 Pro Gaming Keyboard. This manual provides detailed instructions for setting up, operating, and maintaining your new gaming keyboard. Please read this manual carefully to ensure optimal performance and longevity of your device.
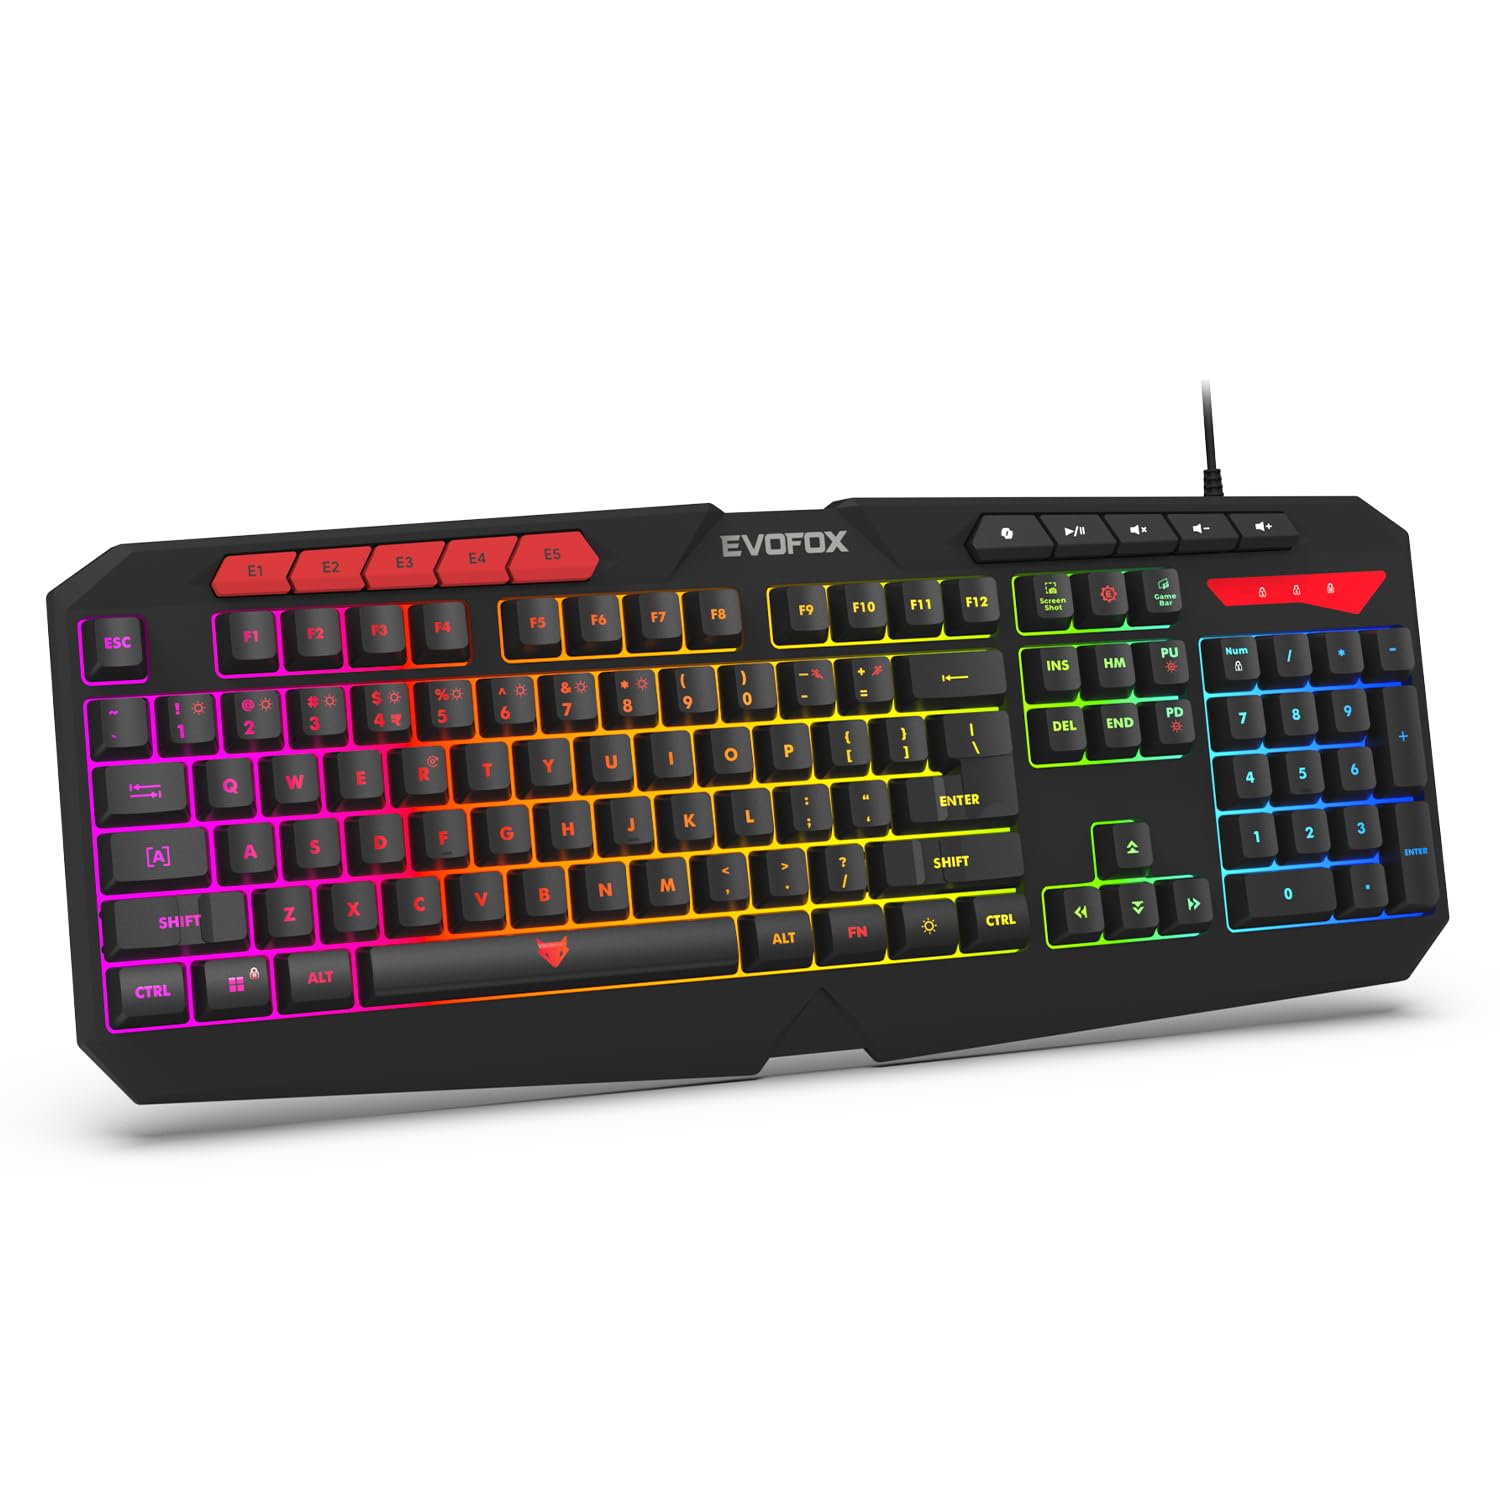
Image 1.1: EvoFox Deathray v2 Pro Gaming Keyboard overview.
2. Package Contents
- EvoFox Deathray v2 Pro Gaming Keyboard
- User Manual
3. Setup Instructions
3.1 Connecting the Keyboard
- Unpack the EvoFox Deathray v2 Pro Gaming Keyboard from its packaging.
- Locate an available USB port on your computer (PC or Laptop).
- Plug the USB connector of the keyboard into the USB port.
- The keyboard will automatically install the necessary drivers. This process may take a few moments.
- Once installed, the RGB backlighting will illuminate, indicating the keyboard is ready for use.
The keyboard features a durable 1.8m braided cable for reliable connectivity.

Image 3.1: Keyboard with durable braided cable and soft membrane keys.
4. Operating Instructions
4.1 RGB Backlighting Customization
The EvoFox Deathray v2 Pro features 6-zone customizable RGB backlighting with 8 dynamic lighting modes. You can personalize your gaming setup for an immersive experience.
- Changing Lighting Modes: Use the dedicated lighting control keys (often indicated by a sun or lightbulb icon, or through a combination with the Fn key) to cycle through the 8 available dynamic lighting modes.
- Custom Lighting: Refer to the keyboard's software (if available, check the official EvoFox website) for advanced custom lighting profiles and per-key RGB customization.

Image 4.1: Keyboard showcasing 6-zone RGB backlighting with 7 lighting presets and 1 custom lighting option.

Image 4.2: Comparison illustrating the difference between RGB lighting with full color customization per zone and standard rainbow lighting with fixed color zones.
4.2 Programmable Macro Keys
The keyboard includes 5 programmable macro keys (E1-E5) to streamline your gameplay with customizable macros for lightning-fast responses. These keys allow you to record and assign complex sequences of commands to a single key press.
- Macro Recording: Typically, macro recording is initiated by a dedicated macro recording key (often labeled 'MR' or similar, or accessed via Fn key combination). Follow the on-screen prompts or software instructions to record your desired key sequence.
- Assigning Macros: Once recorded, assign the macro to one of the programmable macro keys (E1-E5) using the keyboard's software.

Image 4.3: Highlight of the 5 programmable macro keys (E1-E5) for executing complex commands.
4.3 Special Function Keys
Access essential tools quickly with dedicated shortcuts for Screenshot, Macro Recording, and Xbox Game Bar. These functions are typically accessed via specific keys or Fn key combinations.
- Screenshot Key: Captures a screenshot of your display.
- Macro Recording Key: Initiates macro recording.
- Xbox Game Bar Key: Opens the Xbox Game Bar interface for gaming features.
- Copilot Key: Activates the Copilot feature (if supported by your operating system).

Image 4.4: Illustration of special function keys for Screenshot, Macro Recording, Xbox Game Bar, and Copilot.
4.4 Anti-Ghosting Keys
The keyboard features 19 anti-ghosting keys, ensuring flawless input during high-stakes moments. This technology allows multiple key presses to be registered simultaneously and accurately, preventing missed commands.

Image 4.5: Keyboard layout highlighting the 19 anti-ghosting keys for precise, uninterrupted gameplay.
4.5 Ergonomic Full-Size Layout
Designed for comfort during extended gaming sessions, the keyboard features an ergonomic full-size layout with soft and silent membrane keys. This design aims to provide precision without sacrificing ease of use.
5. Maintenance
5.1 Cleaning the Keyboard
- Disconnect the keyboard from your computer before cleaning.
- Use a soft, lint-free cloth slightly dampened with water or a mild cleaning solution to wipe the surface of the keyboard.
- For dust and debris between keys, use compressed air.
- Avoid using harsh chemicals, abrasive cleaners, or solvents, as these can damage the keyboard's finish and key legends.
- Ensure the keyboard is completely dry before reconnecting it to your computer.
6. Troubleshooting
6.1 Keyboard Not Responding
- Check USB Connection: Ensure the USB cable is securely plugged into a working USB port on your computer. Try a different USB port.
- Restart Computer: Sometimes a simple restart can resolve connectivity issues.
- Driver Reinstallation: If the issue persists, try uninstalling the keyboard drivers from your computer's Device Manager and then reconnecting the keyboard to allow for automatic reinstallation.
6.2 RGB Backlighting Not Working
- Check Brightness Settings: Ensure the brightness level is not set to minimum or off. Use the dedicated lighting control keys to adjust brightness.
- Cycle Modes: Cycle through different RGB modes to see if any mode activates.
- Software Check: If using custom profiles, ensure the keyboard software is running and configured correctly.
6.3 Macro Keys Not Functioning
- Software Configuration: Verify that macros are correctly recorded and assigned to the desired keys within the keyboard's software.
- Software Running: Ensure the keyboard's macro software (if applicable) is running in the background.
7. Specifications
| Feature | Specification |
|---|---|
| Brand | EvoFox |
| Model | 498 |
| Product Dimensions | 44.7 x 17.2 x 2.6 cm |
| Item Weight | 565 g |
| Hardware Platform | Windows |
| Compatible Devices | Laptop, PC |
| Special Features | Compact Design, Silent Membrane Keyboard, True Prims RGB |
| Keyboard Description | Gaming |
| Connector Type | USB |
| Material | ABS Plastic |
| Country of Origin | China |
8. Warranty and Support
8.1 Warranty Information
The EvoFox Deathray v2 Pro Gaming Keyboard typically comes with a 1-year limited warranty from the date of purchase. This warranty covers manufacturing defects and ensures the product functions as intended under normal use. Please retain your proof of purchase for warranty claims.
8.2 Customer Support
For technical assistance, warranty claims, or any product-related inquiries, please contact EvoFox customer support through their official website or the contact information provided with your product packaging. You may also refer to the Amkette helpline mentioned in some product documentation.