ROJECO PTM-30A3
ROJECO PTM-30A3 Automatic Pet Feeder and Water Dispenser User Manual
Model: PTM-30A3
1. Introduction
Thank you for purchasing the ROJECO PTM-30A3 Automatic Pet Feeder and Water Dispenser. This integrated device is designed to provide your pets with fresh food and water on a scheduled basis, ensuring their well-being even when you are away. It features a 5L food capacity and a 3.5L gravity-fed water dispenser, suitable for multi-pet households.
Please read this manual thoroughly before use to ensure proper operation and maintenance.
2. Product Features
- Integrated Design: Combines a 5L automatic feeder and a 3.5L gravity water dispenser into one unit.
- Dry and Wet Separation: Food and water are kept separate to prevent food from getting wet, promoting healthier eating habits.
- Precise Automatic Feeding: Schedule up to 6 meals per day, with 1 to 36 portions per meal (each portion 5-10g).
- Anti-Clogging Mechanism: Upgraded wide feeding port design accommodates food sizes from 2-18mm, preventing jams.
- Alert System: Features low battery alerts and clogging detection for reliable operation.
- Stable and Anti-Tip Design: Wide base with anti-slip pads ensures stability, preventing accidental tipping by pets.
- Easy to Clean: Bowls and water bottle are detachable for simple disassembly and washing.
- 2-Way Power Supply: Operates via AC adapter (included) or 4x AAA batteries (sold separately) for backup during power outages.
- Transparent Tanks: Clear food and water tanks allow for easy monitoring of levels.
- LED Display: Intuitive LED screen for setting time, feeding plans, and monitoring status.
3. Package Contents
- ROJECO PTM-30A3 Automatic Pet Feeder and Water Dispenser Unit
- AC Power Adapter
- 1.5M USB Type-C Cable
- Stainless Steel Food Bowl
- Cleaning Brush
- User Manual (this document)

Image: Overview of the ROJECO PTM-30A3 unit and its included accessories.
4. Component Identification
Familiarize yourself with the different parts of your pet feeder.
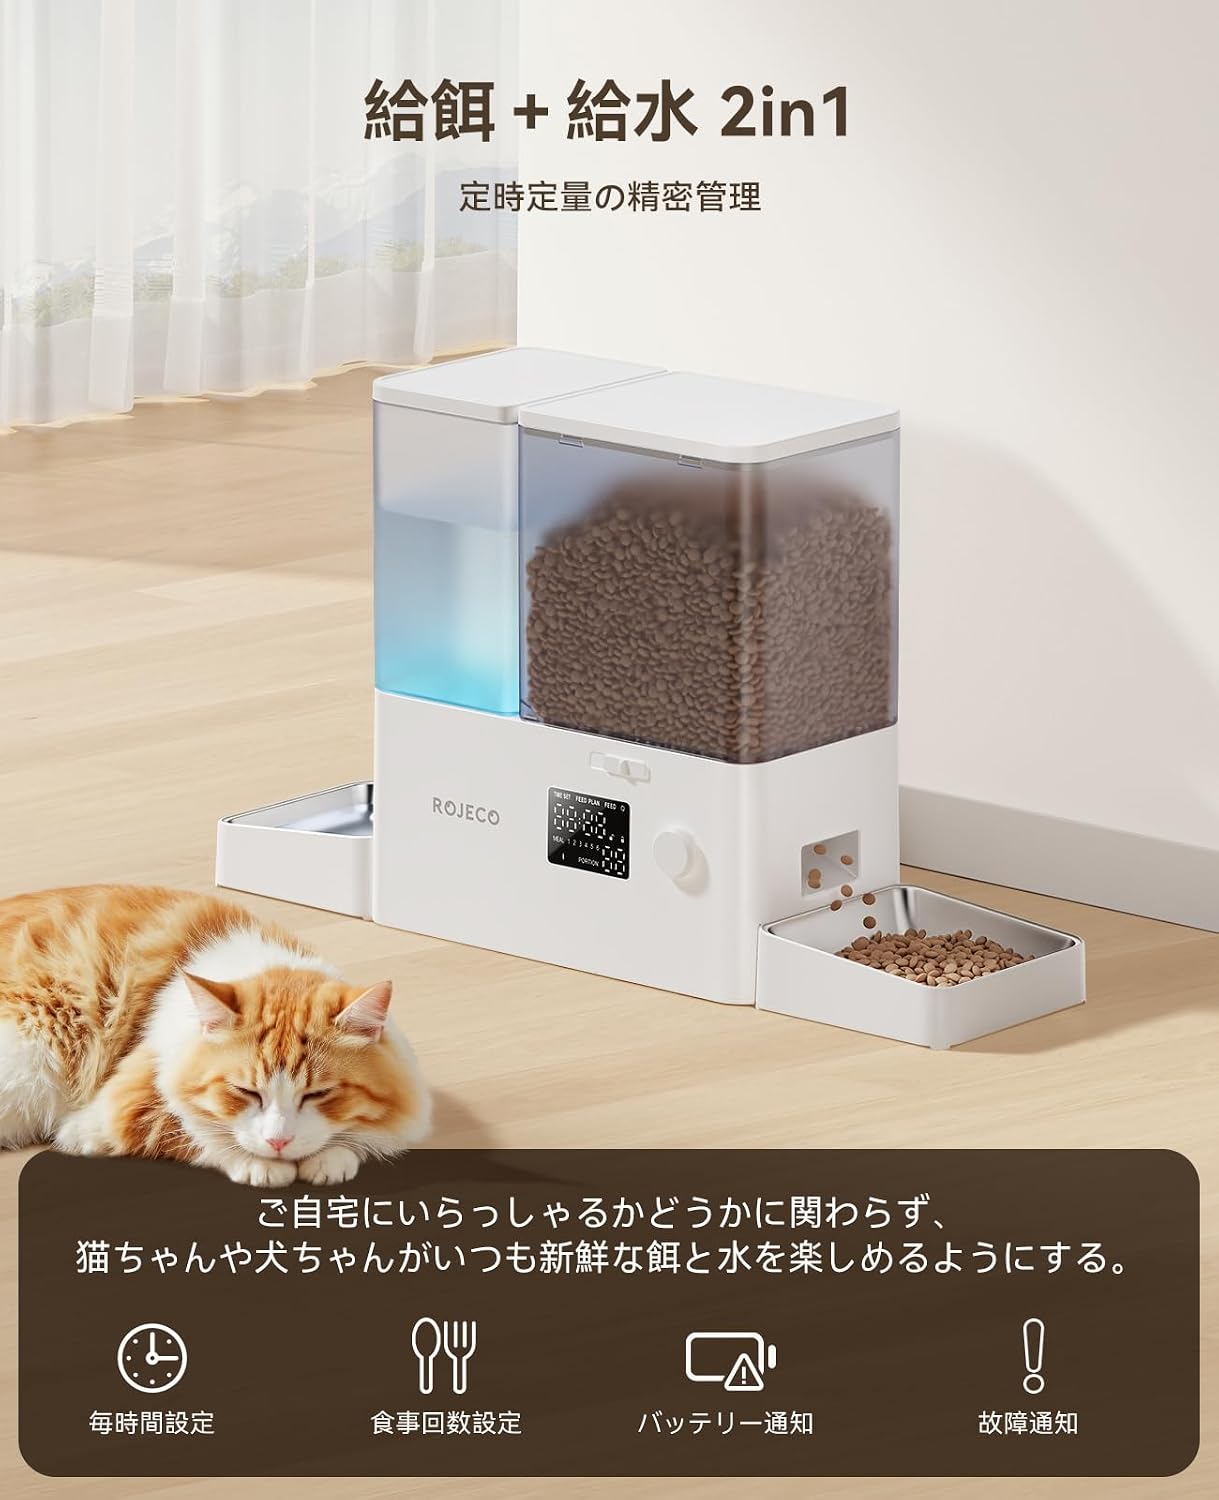
Image: Detailed view of the feeder components, highlighting the 5L food capacity and 3.5L water capacity.
- Food Tank (5L): Transparent container for dry pet food.
- Water Tank (3.5L): Transparent container for water, utilizing gravity feed.
- Control Panel: LED display and rotary knob for settings.
- Food Dispenser Outlet: Where food is dispensed into the bowl.
- Stainless Steel Food Bowl: Removable bowl for pet food.
- Water Bowl: Area where water collects for pets to drink.
- Power Port: For connecting the AC adapter.
- Battery Compartment: For backup AAA batteries.
5. Setup Instructions
5.1 Assembly
- Unpack all components from the box.
- Place the main feeder unit on a flat, stable surface.
- Attach the stainless steel food bowl to the designated slot on the right side of the unit.
- Ensure the water bowl is correctly positioned on the left side.
- Remove the food tank lid and fill with dry pet food (2-18mm kibble size recommended). Replace the lid securely.
- Remove the water tank lid and fill with clean water. Replace the lid securely.

Image: The assembled feeder with food and water tanks filled, demonstrating its readiness for operation.
5.2 Power Connection
- Connect the AC adapter to the power port on the back of the unit and plug it into a wall outlet.
- For backup power, open the battery compartment and insert 4x AAA batteries (not included). This ensures continuous operation during power outages.

Image: Visual representation of the dual power supply options, including the battery compartment and Type-C power input.
6. Operating Instructions
6.1 Control Panel Overview
The device is controlled via an LED display and a rotary knob.

Image: Exploded view of the control panel, detailing the LED display and rotary knob functions.
- Rotary Knob: Rotate to select options or adjust values. Press to confirm.
- Lock/Unlock: Long press the knob for 3 seconds to lock or unlock the controls.
- Reset: Long press the knob for approximately 7 seconds while "O" is selected to restore factory settings.
- LED Light: Indicates status. A steady light means sufficient battery, a flashing light indicates low battery.
6.2 Setting the Current Time
- Ensure the controls are unlocked (long press knob for 3 seconds if locked).
- Rotate the knob to select "TIME SET".
- Press the knob to enter time setting mode.
- Rotate the knob to adjust the hour, then press to confirm.
- Rotate the knob to adjust the minute, then press to confirm.
- The current time is now set.
6.3 Setting the Feeding Plan
- Ensure the controls are unlocked.
- Rotate the knob to select "FEED PLAN".
- Press the knob to enter feeding plan setting mode.
- You can set up to 6 meals (MEAL 1-6). Rotate the knob to select a meal number, then press to confirm.
- Set Feeding Time: Rotate the knob to adjust the hour, then press to confirm. Repeat for minutes.
- Set Portions: Rotate the knob to adjust the number of portions (1-36) for this meal, then press to confirm. Each portion is approximately 5-10g.
- Repeat for other meals as desired.

Image: Step-by-step guide for setting the feeding schedule and time.
6.4 Manual Feeding
To dispense food manually:
- Ensure the controls are unlocked.
- Rotate the knob to select "FEED".
- Press the knob once to dispense one portion of food.

Image: Close-up of food being dispensed into the pet bowl, demonstrating the anti-clogging design.
7. Maintenance and Cleaning
Regular cleaning ensures hygiene and extends the product's lifespan.
- Disconnect the power adapter and remove any backup batteries before cleaning.
- Remove the food tank, water tank, and stainless steel bowls.
- Wash the food tank, water tank, and bowls with mild soap and water. Rinse thoroughly.
- Use the provided cleaning brush to clean hard-to-reach areas.
- Wipe the main unit with a damp cloth. Do not immerse the main unit in water.
- Ensure all parts are completely dry before reassembling.
- Reassemble the components and reconnect power.
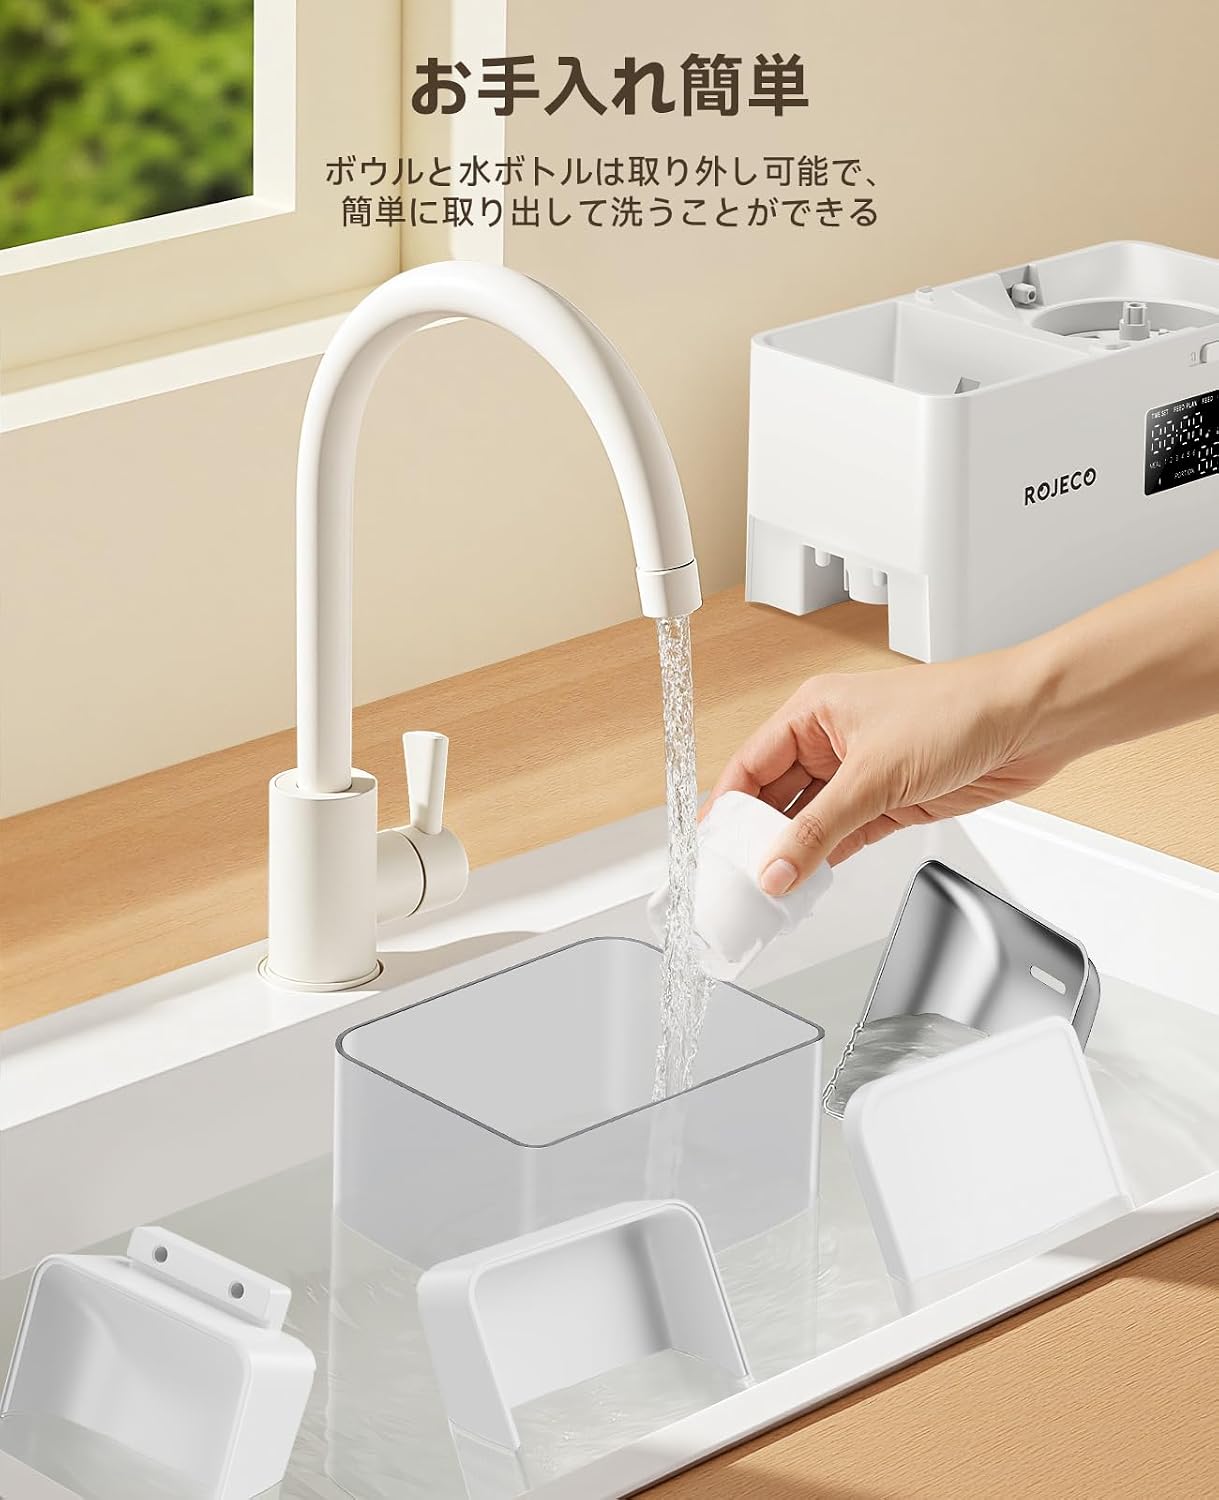
Image: Detachable components of the feeder being cleaned under running water, highlighting ease of maintenance.
8. Troubleshooting
| Problem | Possible Cause | Solution |
|---|---|---|
| Feeder not dispensing food. | Food tank empty, food clogged, power issue. | Refill food tank. Check for clogs in the dispenser mechanism and clear. Ensure power adapter is connected or batteries are installed and charged. |
| Water not dispensing. | Water tank empty, airlock in gravity system. | Refill water tank. Gently shake the unit or briefly remove and reinsert the water tank to release any airlock. |
| LED display not working. | No power, device off. | Check power connection. Ensure batteries are correctly installed if using backup power. |
| Controls are unresponsive. | Controls are locked. | Long press the rotary knob for 3 seconds to unlock the controls. |
| Low battery alert (flashing LED). | Batteries are low. | Replace the AAA batteries in the battery compartment. |
9. Specifications
| Feature | Detail |
|---|---|
| Model | PTM-30A3 |
| Food Capacity | 5 Liters |
| Water Capacity | 3.5 Liters |
| Dimensions (L x W x H) | 57.4 x 33.1 x 16.4 cm (22.59 x 13.03 x 6.06 inches) |
| Weight | 2.68 kg |
| Material | ABS, Stainless Steel, Resin |
| Power Supply | AC Adapter (included), 4x AAA Batteries (not included) |
| Feeding Schedule | 1-6 meals/day |
| Portion Size | 1-36 portions per meal (approx. 5-10g per portion) |
| Recommended Food Size | 2-18mm dry kibble |
| Target Animals | Cats, Dogs (all sizes) |
| Care Instructions | Hand wash detachable parts only |

Image: Product dimensions of the ROJECO PTM-30A3 feeder.
10. Warranty and Support
This product comes with a 1-year warranty from the date of purchase. For warranty claims or technical support, please contact ROJECO customer service through your retailer or the official ROJECO website. Please retain your proof of purchase.
Manufacturer: Shenzhen Ipetmon Creative Technology Co., Ltd.
11. Important Safety Information
- This appliance is for indoor use only.
- Do not use with wet food or food larger than 18mm in diameter.
- Keep out of reach of children and pets when not in use or during maintenance.
- Do not immerse the main unit in water.
- Ensure the power cord is not chewed by pets.
- Dispose of batteries responsibly according to local regulations.
12. Product Video
Watch the official product video for a visual guide on setup and features.
Video: An official product video demonstrating the ROJECO PTM-30A3 automatic pet feeder and water dispenser, showcasing its features and ease of use.
Ask a question about this manual
Ask about setup, troubleshooting, compatibility, parts, safety, or missing instructions. Manuals+ will review the question and use this page’s manual context to help answer it.