
1. Introduction
This manual provides detailed instructions for the installation, operation, and maintenance of your Hi-Focus HD-NVR-5108Q 8-Channel Network Video Recorder. The NVR is designed to record and manage video streams from IP cameras, offering advanced surveillance capabilities for various applications. Please read this manual thoroughly before using the product to ensure proper setup and safe operation.
2. Safety Information
Observe the following safety precautions to prevent injury and damage to the device:
- Power Supply: Use only the specified power adapter. Ensure the power voltage is stable and meets the NVR's requirements.
- Ventilation: Do not block ventilation openings. Ensure adequate airflow around the device to prevent overheating.
- Environment: Avoid exposing the NVR to extreme temperatures, humidity, dust, or corrosive environments. Keep it away from direct sunlight and heat sources.
- Handling: Handle the device with care. Do not drop or subject it to strong vibrations.
- Servicing: Do not attempt to disassemble or repair the NVR yourself. Refer all servicing to qualified personnel.
- Water: Keep the device away from water and liquids.
3. Package Contents
Verify that all items are present and in good condition upon unpacking. If any items are missing or damaged, contact your vendor.
- Hi-Focus HD-NVR-5108Q Network Video Recorder
- Power Adapter
- USB Mouse
- SATA Cable (for HDD connection)
- Screws (for HDD mounting)
- Quick Start Guide
- Resource CD (optional, may contain software/manual)
4. Product Overview
The Hi-Focus HD-NVR-5108Q is an 8-channel NVR supporting Ultra 265/H.265/H.264 video formats and up to 4K resolution recording. It features various ports for connectivity and system management.
4.1 Front Panel
The front panel typically includes status indicators and a USB port for mouse or USB drive connection.
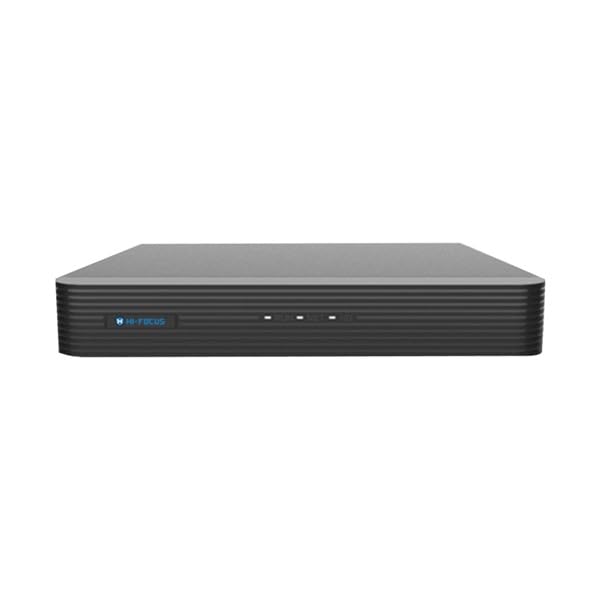
Image: Front view of the Hi-Focus HD-NVR-5108Q NVR, showing LED indicators and a USB port.
4.2 Rear Panel
The rear panel provides all necessary connection ports for power, network, video output, and peripheral devices.

Image: Rear view of the Hi-Focus HD-NVR-5108Q NVR, displaying various ports including HDMI, VGA, Ethernet, USB, and power input.
- HDMI Output: Connects to a monitor or TV for high-definition video output (up to 4K).
- VGA Output: Connects to a monitor for standard video output (up to 1920x1080).
- LAN Port (Ethernet): Connects to your network router or switch for IP camera and internet connectivity.
- USB Ports: For connecting a mouse, keyboard, or USB storage devices for backup.
- Power Input: Connects the power adapter.
5. Setup
5.1 Hardware Installation
Follow these steps to install the hard disk drive (HDD) and connect the NVR.
- Install HDD:
- Unscrew and remove the top cover of the NVR.
- Connect the SATA data and power cables to the HDD.
- Align the HDD with the mounting holes in the NVR chassis and secure it with the provided screws.
- Replace the top cover and secure it with screws.

Image: Internal view of the NVR showing the process of connecting SATA cables and mounting a hard disk drive.
- Connect Peripherals:
- Connect a monitor to the NVR's HDMI or VGA port.
- Connect the USB mouse to a USB port on the NVR.
- Connect an Ethernet cable from the NVR's LAN port to your network router or switch.
- Power On: Connect the power adapter to the NVR's power input and then plug it into a power outlet. The NVR will power on automatically.
5.2 Initial Configuration
Upon first boot, the NVR will guide you through an initial setup wizard.
- Password Setup: Create a strong password for the administrator account.
- Network Settings: Configure network parameters. It is recommended to use DHCP for automatic IP assignment initially, then switch to a static IP if required for consistent remote access.
- Date and Time: Set the correct date, time, and time zone.
- HDD Formatting: The NVR will prompt you to format the newly installed HDD. This is essential for recording.
- Camera Search: The NVR will automatically search for compatible IP cameras on the network.
6. Operating the NVR
6.1 Connecting IP Cameras
The NVR supports mainstream cameras with ONVIF (Profile S, G, T) and RTSP protocols.
- Ensure cameras are powered on and connected to the same network as the NVR.
- Access the NVR's main menu, navigate to Camera Management or IP Camera.
- Click Add or Search to find available cameras.
- Select the cameras and enter their credentials (username/password) if prompted.
- Verify the camera status shows "Online" or "Connected".
6.2 Recording Management
Configure recording schedules and modes for each camera.
- Continuous Recording: Records 24/7.
- Motion Detection Recording: Records only when motion is detected.
- Scheduled Recording: Records during specific time periods.
- Access Record Settings from the main menu to configure these options.
6.3 Video Playback
Review recorded footage from your cameras.
- From the main menu, select Playback.
- Choose the camera(s) and the date/time range you wish to review.
- Use the timeline to navigate through recorded events.
- Options for fast forward, rewind, and frame-by-frame playback are available.
6.4 Remote Access
Access your NVR remotely via a web browser or mobile application.
- Web Interface: Enter the NVR's IP address into a web browser on a computer connected to the same network. Log in with your credentials.
- Mobile App: Download the official Hi-Focus mobile application (check your Quick Start Guide or manufacturer's website for the correct app). Register your NVR using its serial number or QR code for cloud access.
7. Maintenance
7.1 Firmware Updates
Regularly check for and install firmware updates to ensure optimal performance, security, and access to new features.
- Download the latest firmware from the official Hi-Focus website.
- Transfer the firmware file to a USB drive.
- Connect the USB drive to the NVR and navigate to System > Upgrade in the NVR menu.
- Follow the on-screen instructions to complete the update. Do not power off the NVR during the update process.
7.2 Cleaning
Keep the NVR clean to ensure proper ventilation and longevity.
- Power off and unplug the NVR before cleaning.
- Use a soft, dry cloth to wipe the exterior.
- Use compressed air to gently clear dust from ventilation openings.
- Do not use liquid cleaners or aerosols.
7.3 Data Backup
Regularly back up important video footage to an external USB drive or network storage.
- Connect a USB storage device to the NVR.
- Navigate to Backup or Export in the NVR menu.
- Select the desired camera, date, and time range for the footage you wish to back up.
- Follow the prompts to initiate the backup process.
8. Troubleshooting
This section addresses common issues you might encounter with your NVR.
| Problem | Possible Cause | Solution |
|---|---|---|
| No video output on monitor | Loose cable connection, incorrect input source on monitor, NVR not powered on. | Check HDMI/VGA cable connections. Ensure monitor is set to the correct input. Verify NVR power. |
| Cannot find IP cameras | Cameras not powered, network issue, incorrect camera IP/credentials, firewall blocking. | Ensure cameras are powered and connected to the network. Check network cables. Verify camera IP addresses and credentials. Disable firewall temporarily for testing. |
| No recording | HDD not installed/formatted, recording schedule not set, HDD full, camera offline. | Check HDD status (format if new). Configure recording schedules. Check camera connection. Manage HDD space. |
| Remote access not working | Network configuration issues (port forwarding, DDNS), NVR not connected to internet, incorrect app settings. | Verify NVR has internet access. Check router settings for port forwarding. Ensure correct NVR ID/serial in app. |
9. Specifications
Technical specifications for the Hi-Focus HD-NVR-5108Q Network Video Recorder.
| Feature | Detail |
|---|---|
| Model | HD-NVR-5108Q |
| Video Input | 8-Channel IP Camera Input |
| Video Formats | Ultra 265/H.265/H.264 |
| Video Output | 1-ch HDMI (up to 4K), 1-ch VGA (up to 1920x1080) |
| Recording Resolution | Up to 4K (3840x2160) |
| HDD Support | 1 SATA HDD, up to 8TB |
| Network Interface | 1x RJ45 Ethernet port |
| USB Interface | Multiple USB ports (for mouse, backup) |
| Compatible Protocols | ONVIF (Profile S, G, T), RTSP |
| Dimensions (LxWxH) | 20 x 20 x 30 Centimeters |
| Weight | 250 g |
| Connectivity Technology | Ethernet, HDMI, VGA |
| Cloud Upgrade | Supported |
10. Warranty and Support
The Hi-Focus HD-NVR-5108Q comes with a 3-Year Warranty from the date of purchase, covering manufacturing defects. This warranty does not cover damage caused by misuse, accidents, unauthorized modifications, or improper installation.
For technical support, warranty claims, or service inquiries, please contact your authorized Hi-Focus dealer or visit the official Hi-Focus website for contact information and support resources. Please have your product model number (HD-NVR-5108Q) and purchase details ready when contacting support.
Online Resources: For the latest drivers, firmware, and FAQs, please visit the official Hi-Focus support portal.

