
1. Introduction
Thank you for choosing the BXLIYER Android 15 Car Radio. This manual provides detailed instructions for the installation, operation, and maintenance of your new car radio. Please read this manual thoroughly before use to ensure proper functionality and to maximize your user experience. Keep this manual for future reference.
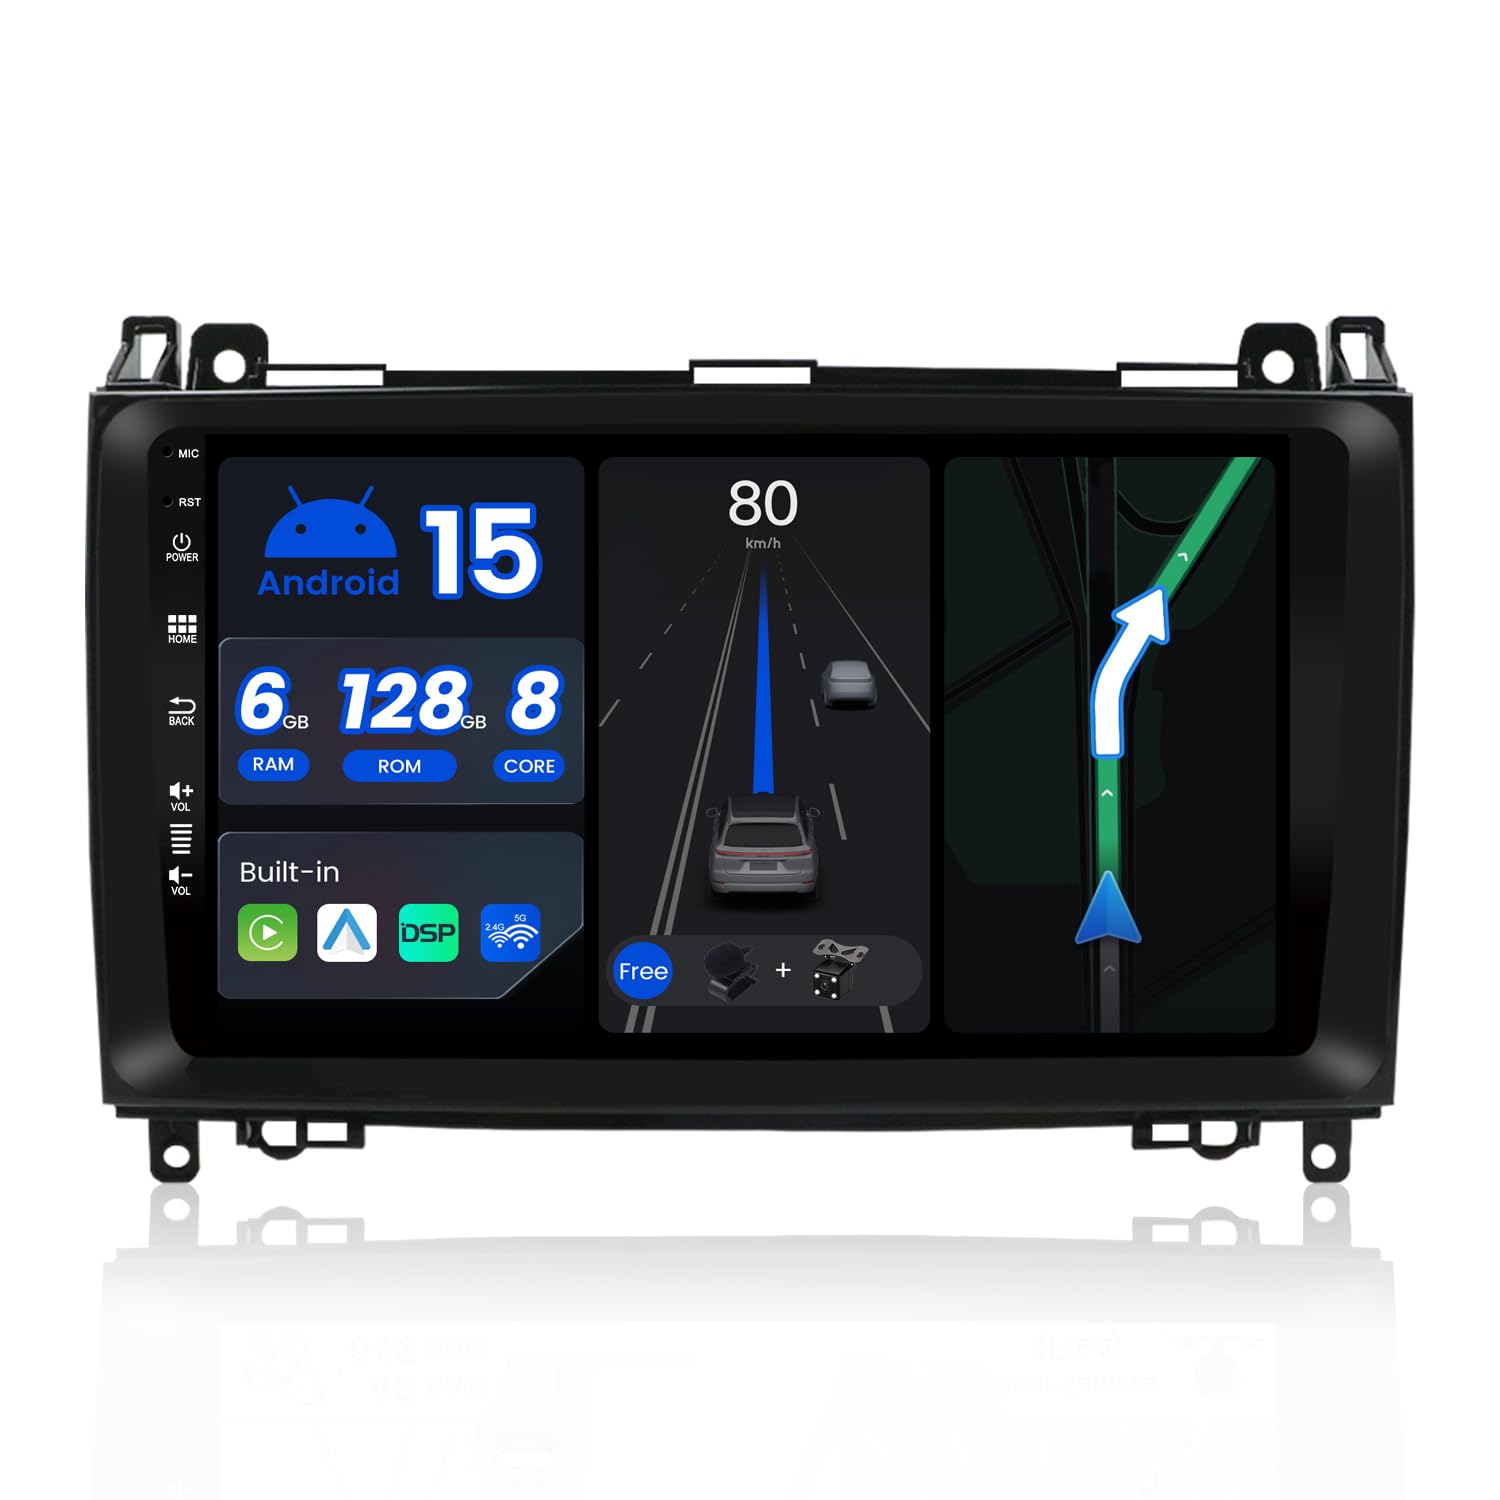
Image 1.1: BXLIYER Android 15 Car Radio main unit.
2. Product Overview
2.1 Key Features
- Operating System: Android 15
- Processor: Octa-Core Rockchip AC8257, 64-bit, 2.0 GHz
- Memory: 6GB RAM + 128GB ROM
- Display: 9-inch IPS screen
- Audio: Built-in DSP (Digital Sound Processor), TDA7851 Amplifier IC
- Connectivity: Bluetooth 5.0, Dual Band WiFi (2.4G/5G), 4G support (requires external modem)
- Navigation: GPS with online and offline map support, 3D maps, voice guidance
- Integration: Wireless CarPlay, Wireless Android Auto, MirrorLink (iOS/Android)
- Radio: AM/FM Radio with RDS, DAB+ support (optional adapter required)
- Video: 4K (3840 × 2160 pixels) and 1080P HD video playback
- Additional Functions: Fast Boot (under 2 seconds), 360° Camera support (optional cameras required), Steering Wheel Control, Split-Screen, Multi-color illumination.

Image 2.1: Hardware overview of the car radio's key features.
2.2 Vehicle Compatibility
This car radio is compatible with the following vehicle models:
- Mercedes-Benz A-Class W169 (A150/A160/A170/A180/A200) (2004-2012)
- Mercedes-Benz B-Class W245 (B160/B170/B180/B200) (2004-2012)
- Mercedes-Benz V-Class W639 / Vito / Viano (2006-2014)
- Mercedes-Benz W906 Sprinter / Sprinter 2500 / Sprinter 3000 (2006-2012)
- Volkswagen Crafter (from 2006)
For dashboard image assistance or specific compatibility questions, please contact technical support.
3. What's in the Box
The package includes the following items:
- BXLIYER Android Car Radio Unit
- Accessories (various cables and connectors)
- User Manual (this document)
- Frame Kit (for installation)
- Power Cable
- 4LED Rear Camera (gift)
- External Microphone (gift)
4. Setup and Installation
4.1 Safety Precautions
- Ensure the vehicle's ignition is off and the battery is disconnected before starting installation.
- Consult a professional if you are unsure about any installation steps.
- Do not modify the wiring harness unless specifically instructed.
4.2 Installation Steps
- Remove Original Radio: Carefully remove your vehicle's existing car radio and dashboard trim. Refer to your vehicle's service manual for specific instructions.
- Connect Wiring: Connect the provided power cable, GPS antenna, USB cables, and other accessory cables to the corresponding ports on the BXLIYER unit. Ensure all connections are secure.
- Install Rear Camera (Optional): If installing the included rear camera, route the video cable from the camera to the car radio's 'CAM IN' port and connect the power cable to the reverse light circuit.
- Install External Microphone: Connect the external microphone to the designated port for improved call quality.
- Test Connections: Before fully reassembling the dashboard, temporarily reconnect the vehicle battery and turn on the ignition to test the basic functions of the car radio (power, audio, display).
- Mount the Unit: Secure the car radio into the dashboard using the provided frame kit and mounting brackets.
- Reassemble Dashboard: Carefully reassemble the dashboard trim.

Image 4.1: Example of the car radio installed in a vehicle dashboard.
5. Operating Instructions
5.1 Power On/Off and Basic Navigation
- Power On: The unit will power on automatically with the vehicle's ignition. For Fast Boot, the system will resume in less than 2 seconds.
- Power Off: The unit will power off automatically with the vehicle's ignition.
- Touchscreen: Navigate the Android interface by tapping, swiping, and pinching on the touchscreen.
- Home Button: Returns to the main Android home screen.
- Volume Control: Adjust volume using the on-screen controls or steering wheel controls.

Image 5.1: Fast Boot feature for quick system startup.
5.2 Wireless CarPlay and Android Auto
Connect your iPhone or Android smartphone wirelessly to access navigation, music, calls, and messages directly on the car radio display.
- Ensure Bluetooth and Wi-Fi are enabled on your smartphone.
- On the car radio, open the CarPlay or Android Auto application.
- Follow the on-screen prompts to pair your device.
Image 5.2: Wireless CarPlay and Android Auto interface.
5.3 GPS Navigation
The unit supports both online and offline navigation applications. Pre-installed maps may be available, or you can download your preferred navigation apps from the Google Play Store.
- Ensure the GPS antenna is properly connected and positioned for optimal signal reception.
- Open your chosen navigation application from the app drawer.
- Enter your destination and follow the voice-guided directions.

Image 5.3: GPS Navigation feature.
5.4 Digital Sound Processor (DSP)
The built-in DSP chip provides advanced audio customization options, including a 64-bit precision mode. Access the DSP settings to adjust equalizer, sound field, and time delay for an optimized listening experience.

Image 5.4: DSP feature for enhanced audio control.
5.5 Radio (AM/FM/DAB+)
Tune into your favorite AM/FM stations. The unit also supports DAB+ digital radio with an optional adapter (B083Q7YG4F).
- Open the 'Radio' app to access AM/FM tuning.
- If a DAB+ adapter is connected, open the 'DAB+' app for digital radio.

Image 5.5: DAB+ radio interface (optional adapter required).
5.6 Bluetooth 5.0
Pair your smartphone via Bluetooth for hands-free calling and audio streaming.
- Go to 'Settings' > 'Bluetooth' on the car radio.
- Enable Bluetooth on your smartphone and search for available devices.
- Select the car radio from the list and confirm pairing.

Image 5.6: Bluetooth 5.0 connectivity.
5.7 Steering Wheel Control (SWC)
The unit supports your vehicle's original steering wheel controls. Configuration may be required in the settings menu to map functions like volume, track skip, and call answer/end.

Image 5.7: Steering Wheel Control feature.
5.8 Split-Screen Functionality
Run two applications simultaneously on the screen, such as navigation and music, for enhanced multitasking.
- Open the first application.
- Press and hold the 'Recent Apps' button or swipe up from the bottom (depending on Android gesture settings) to enter split-screen mode.
- Select the second application to display alongside the first.

Image 5.8: Split-Screen feature.
5.9 360° Camera Support
The unit supports 360° panoramic parking view with optional AHD cameras (4 pieces required, sold separately). This feature provides a comprehensive view around your vehicle for safer parking and maneuvering.

Image 5.9: 360° Camera support feature.
6. Maintenance
6.1 Cleaning
- Use a soft, dry cloth to clean the screen and unit exterior.
- For stubborn marks, slightly dampen the cloth with water or a screen-safe cleaner.
- Avoid abrasive cleaners or solvents that may damage the display or finish.
6.2 Software Updates
Periodically check for software updates to ensure optimal performance and access to new features. Updates can typically be found in the system settings under 'About device' or 'System updates'.
7. Troubleshooting
If you encounter issues with your car radio, refer to the following common problems and solutions:
| Problem | Possible Cause | Solution |
|---|---|---|
| Unit does not power on. | Loose power connection, blown fuse, vehicle battery issue. | Check power cable connections. Inspect vehicle fuses. Ensure vehicle battery is charged. |
| No sound or poor audio quality. | Speaker wiring issues, incorrect audio settings, low volume. | Verify speaker connections. Adjust volume. Check DSP settings and equalizer. |
| GPS signal is weak or inaccurate. | GPS antenna improperly installed or obstructed. | Ensure GPS antenna is securely connected and has a clear view of the sky. |
| Bluetooth pairing fails. | Bluetooth not enabled, device not discoverable, interference. | Ensure Bluetooth is on for both devices. Restart both devices. Try pairing in a different location. |
| Steering Wheel Controls not working. | CAN Bus decoder issue, incorrect programming. | Check CAN Bus decoder connection. Access SWC settings in the unit to program buttons. If issues persist, contact support. |
| Mounting frame does not fit precisely. | Incompatibility with specific vehicle trim. | Ensure correct frame kit for your specific vehicle model and year. Minor adjustments may be needed, or consult a professional installer. |
8. Specifications
| Feature | Specification |
|---|---|
| Brand | BXLIYER |
| Model Number | BXLIYER-5Z02-D04-6128-J |
| Operating System | Android 15 |
| CPU | Octa-Core Rockchip AC8257, 2.0 GHz |
| RAM | 6 GB |
| ROM | 128 GB |
| Display Size | 9 Inch |
| Display Type | IPS |
| Connectivity | Bluetooth 5.0, Wi-Fi 4G |
| Audio Output Mode | Stereo |
| Surround Sound Channels | 2.1 |
| Output Power | 50 Watts per channel (4 channels) |
| Total Wattage Output | 200 Watts |
| Video Encoding | H.264, H.265/HEVC |
| Digital Media Format | 4K |
| Compatible Devices | Smartphone |
| Connector Type | RCA, USB |
| Total HDMI Ports | 4 |
| Internet Applications | YouTube, Browser, Netflix |
| Item Weight | 2.3 Kilograms |
| Country of Origin | China |
9. Warranty and Support
For technical assistance, warranty inquiries, or any questions not covered in this manual, please contact BXLIYER customer support.
- Email Support: joyx_techsupport@163.com
Please provide your product model number (BXLIYER-5Z02-D04-6128-J) and a detailed description of your issue when contacting support.


