
1. Introduction
This manual provides detailed instructions for the Warmdance 180W LED Stage Light Bar, Model ZQ06199. This device is designed for various lighting applications, offering versatile control options and dynamic lighting effects. Please read this manual thoroughly before operation to ensure proper use and longevity of the product.
2. Safety Information
- Electrical Safety: Ensure the product is connected to a power source with the correct voltage as specified on the device. Avoid exposing the unit to water or high humidity. Disconnect power before cleaning or servicing.
- Placement: Operate the light bar in a well-ventilated area to prevent overheating. Avoid direct sunlight or heat sources. Place the unit on a stable, flat surface or securely mount it using the provided bracket.
- Handling: Do not attempt to open the casing or modify the device. Avoid direct eye exposure to the light source, as it can be very bright.
- Children: Keep the device and its accessories out of reach of children.
3. Package Contents
Please check that all items are present and in good condition:
- Warmdance 180W LED Stage Light Bar (1 unit)
- Power Cord (1 unit)
- Remote Control (1 unit)
- Instruction Manual (1 unit)
4. Product Overview

Figure 4.1: Overall view of the Warmdance 180W LED Stage Light Bar and its remote control.
The Warmdance 180W LED Stage Light Bar is a versatile lighting fixture designed for various event and stage applications. It features a robust enclosure and a powerful array of LEDs capable of producing a wide range of colors and effects.
4.1. LED Configuration
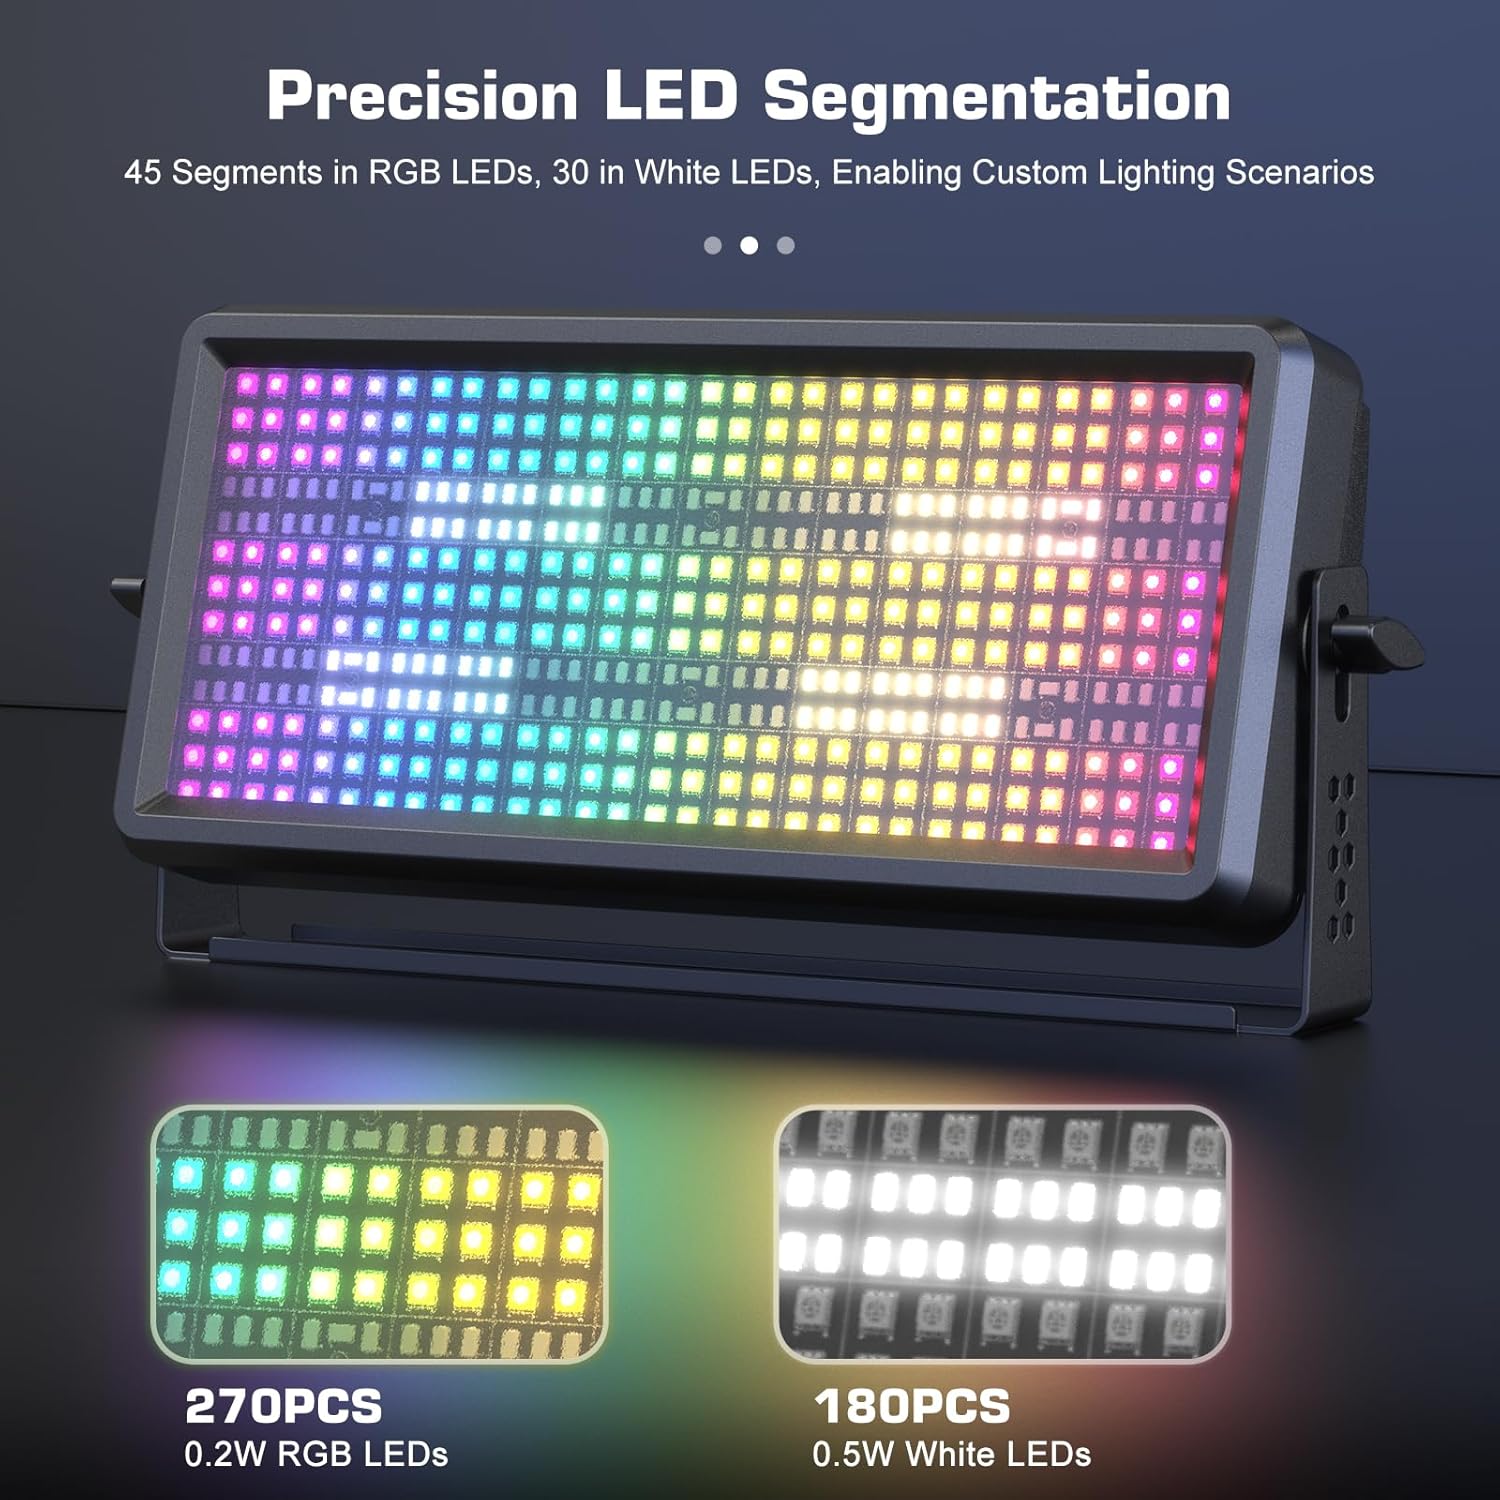
Figure 4.2: Detailed view of the LED segmentation.
The light bar is equipped with 270 full-color RGB LEDs (0.2W each) and 180 0.5W white LEDs. These are arranged into 45 segments for RGB and 30 segments for white, enabling independent point control for intricate lighting designs and uniform color mixing.
4.2. Physical Features and Connections

Figure 4.3: Physical dimensions and connection ports.
- Dimensions: Approximately 15.75"L x 3.93"W x 7.09"H (40cm x 10cm x 18cm).
- Weight: Approximately 3.96 lbs (1.8 kg).
- Rotatable Bracket: A 360-degree rotatable bracket allows for flexible positioning and mounting.
- DMX Connections: Standard DMX IN and DMX OUT ports for control via DMX512 protocol.
- LCD Display: A 4-button LCD display (MENU, UP, DOWN, ENTER) for navigating settings and modes.
- Power Connection: IEC power input and power output for daisy-chaining multiple units.
5. Setup
- Unpacking: Carefully remove the light bar and all accessories from the packaging. Retain packaging for future storage or transport.
- Mounting:
- For floor placement, ensure the bracket is adjusted to a stable position.
- For wall or truss mounting, use appropriate clamps and hardware (not included) to secure the bracket. Ensure the mounting surface can support the weight of the fixture. Adjust the rotatable bracket to achieve the desired light angle.
- Power Connection: Connect the provided power cord to the light bar's power input port and then to a compatible electrical outlet (AC 100-240V, 50/60Hz). If daisy-chaining power, connect the power output of the first unit to the power input of the next.
- DMX Connection (Optional): If using DMX control, connect a DMX cable from your DMX controller's output to the DMX IN port of the light bar. For multiple units, connect the DMX OUT of the first unit to the DMX IN of the second, and so on.
6. Operating Modes
The Warmdance LED Stage Light Bar offers multiple control options:
6.1. LCD Display Navigation
Use the 4-button LCD display on the rear of the unit to access and adjust settings:
- MENU: Cycles through main menu options.
- UP/DOWN: Navigates through options or adjusts parameter values.
- ENTER: Confirms selection or saves changes.
6.2. Remote Control Operation
The included remote control provides convenient access to various functions:
- Power Button: Turns the light on or off.
- DMX Button: Activates DMX Console Mode.
- R, G, B, W Buttons: Selects Red, Green, Blue, or White static colors.
- RG, RB, GB Buttons: Selects mixed colors (Red-Green, Red-Blue, Green-Blue).
- FH (Strobe Mode): Activates strobe effects.
- Microphone Icon (Voiced Control Mode): Activates sound-activated mode.
- CC (Jump Mode): Activates color jump effects.
- DE (White LED Auto Mode): Activates automatic white LED patterns.
- CP (RGBW Mixed Mode): Activates mixed RGBW color patterns.
- +/- Buttons: Adjusts strobe speed, DMX address, or effect show parameters.
- Arrow Buttons (Menu Jump): Navigates menu options.
- E Button: Toggles white light on/off.
6.3. DMX Control
The light bar supports DMX512 and RDM protocols with 4, 11, or 165 channel modes. The DMX address and channel mode can be set via the LCD display. Refer to the DMX chart in the specifications section for detailed channel functions.
6.4. Sound Activated Mode
In this mode, the light bar responds to ambient sound via its built-in microphone. The sensitivity of the microphone can be adjusted through the menu settings or remote control.
6.5. Auto Mode (Self-Propelled)
The unit features several pre-programmed lighting effects, including gradient, jump, flash, and horse show patterns. The speed of these effects is adjustable.

Figure 6.1: Examples of built-in lighting effects.
6.6. Master-Slave Mode
Multiple light bars can be linked together using DMX cables to operate in a synchronized manner. Set one unit as the "Master" and the others as "Slave" units via the LCD menu. The slave units will then mimic the master unit's operations.
7. Maintenance
- Cleaning: Regularly clean the exterior of the light bar with a soft, dry, lint-free cloth. Do not use abrasive cleaners, solvents, or harsh chemicals, as these can damage the finish or internal components. Ensure the unit is unplugged before cleaning.
- Storage: When not in use for extended periods, store the light bar in its original packaging or a protective case in a cool, dry environment, away from extreme temperatures and humidity.
- Inspection: Periodically inspect the power cord, DMX cables, and mounting hardware for any signs of wear, damage, or loose connections. Replace damaged components immediately.
8. Troubleshooting
| Problem | Possible Cause | Solution |
|---|---|---|
| Light bar does not power on. | No power to the unit; faulty power cord; power switch off. | Check power connection to outlet and light bar. Ensure the power outlet is functional. Replace power cord if damaged. |
| No light output. | Incorrect mode selected; brightness set to zero; DMX signal issue. | Verify operating mode (Auto, Sound, DMX). Increase brightness setting. Check DMX connections and address if in DMX mode. |
| DMX control not working correctly. | Incorrect DMX address; wrong channel mode; faulty DMX cable; DMX controller issue. | Ensure DMX address matches controller. Verify channel mode (4/11/165Ch). Check DMX cable integrity. Test with a different DMX controller if possible. |
| Fan noise is noticeable. | Normal operation for cooling. | A certain level of fan noise is expected for cooling the LEDs. This is typically less noticeable in environments with ambient sound or music. |
| Remote control is unresponsive. | Dead battery; obstruction; out of range. | Replace the remote control battery. Ensure a clear line of sight to the light bar's IR receiver. Operate within the specified range. |
9. Specifications
| Feature | Detail |
|---|---|
| Brand | Warmdance |
| Model Number | ZQ06199 |
| Power Source | Corded Electric |
| Wattage | 180 Watts |
| Light Source Type | RGBW LEDs (270x 0.2W RGB, 180x 0.5W White) |
| LED Segmentation | 45 RGB segments, 30 White segments |
| Beam Angle | 30 Degrees |
| Control Modes | DMX512 (4/11/165Ch), RDM, Sound Activated, Auto, Master-Slave, Remote Control |
| Material | Aluminum |
| Color | Black |
| Product Dimensions | 15.75"L x 3.93"W x 7.09"H (40cm x 10cm x 18cm) |
| Item Weight | 3.96 pounds (1.8 kg) |
| Mounting Type | Wall Mount, Floor Stand |
| Manufacturer | Shenzhen Zhuoqiong Technology Co., Ltd. |
10. Warranty and Support
This product is covered by a standard manufacturer's warranty against defects in materials and workmanship. The duration and terms of the warranty may vary by region and retailer. For warranty claims, technical assistance, or customer support, please contact the authorized retailer from whom you purchased the product or refer to the manufacturer's official website for contact information. Please retain your proof of purchase for warranty validation.