1. Introduction
Thank you for choosing the OlarHike Portable Tire Inflator Air Compressor, Model TIC3V330. This device is designed for convenient and efficient inflation of various items, including car tires, motorcycle tires, bicycle tires, and sports balls. Featuring a powerful 9000mAh battery, dual operating modes (cordless and wired), a precise digital display with automatic shut-off, and an integrated LED light, it offers a reliable solution for your inflation needs. Please read this manual thoroughly before use to ensure proper operation and to maximize the product's lifespan.

This image displays the OlarHike portable tire inflator, showcasing its digital screen, control buttons, and the various inflation accessories included, such as different nozzles and a charging cable. A tire is shown in the background, indicating its primary use.
2. Safety Information
- Always keep the device away from children.
- Do not operate the inflator in wet conditions or near flammable liquids or gases.
- Ensure the inflation hose is securely connected to the valve stem before starting inflation.
- Do not over-inflate items. Always refer to the manufacturer's recommended pressure. The automatic shut-off feature helps prevent over-inflation.
- The device may become warm during prolonged use. Allow it to cool down between inflation cycles if it feels excessively hot.
- Use only the provided charging cables and accessories.
- Do not disassemble or attempt to repair the device yourself. Contact customer support for assistance.
3. Package Contents
Please check the package contents upon receipt to ensure all items are present:
- 1 x OlarHike Tire Inflator (Model TIC3V330)
- 1 x Long Inflation Cable (for car tires)
- 1 x DC Power Cord (for 12V wired mode)
- 1 x Type-C Charging Cable
- 1 x Long Nozzle
- 1 x Ball Needle
- 1 x Presta Valve Adapter
- 1 x Storage Bag
- 1 x Spare 12V Outlet Fuse
4. Product Features
- Fast and Efficient Inflation: Equipped with an advanced motor, this inflator can rapidly pump air, inflating a standard car tire (195/65 R15) from 29psi to 35psi in approximately 56 seconds.
- 9000mAh Battery Capacity: The upgraded 9000mAh battery allows for extended use, providing approximately 28 inflation cycles for car tires (195/65 R15 from 30psi to 35psi) on a single charge.
- Dual Operating Modes: Offers both cordless battery mode for portability and a 12V DC wired mode for continuous operation or emergencies.
- Precision Digital Display & Automatic Shut-Off: Features a high-precision pressure sensor and an LED display for accurate monitoring. The device automatically stops inflation once the preset pressure is reached, preventing over-inflation.
- User-Friendly Interface: Four preset modes simplify operation. Easily switch between pressure units (PSI, BAR, KPA, kg/cm²) with a single button. Includes a tire pressure memory feature.
- Portable Design: Compact and wireless, making it easy to store and transport in the included storage bag.
- Built-in LED Light: Provides illumination for use in dark conditions or as an emergency light.
- Emergency Backup Power Bank: The device can also serve as a power bank to charge phones and other electronics via its USB port.
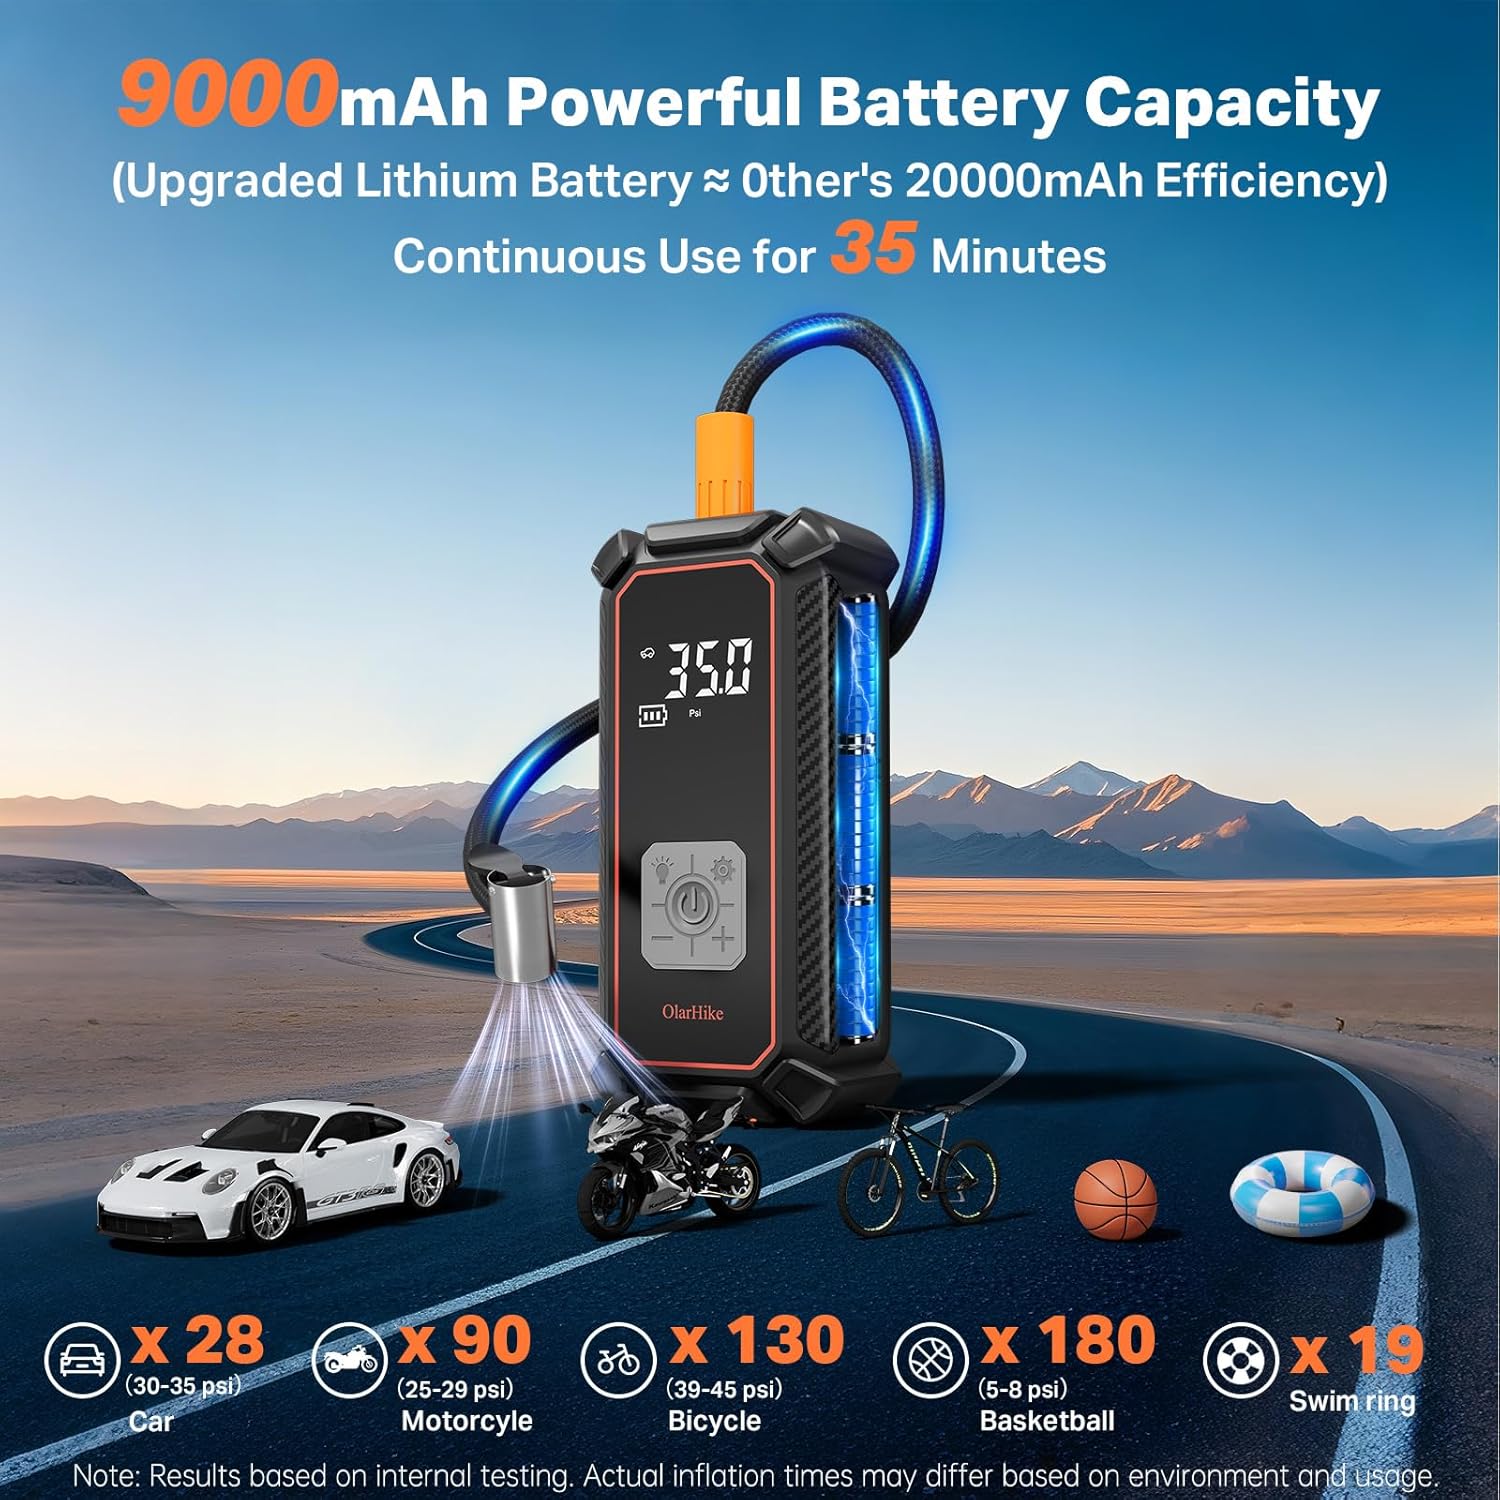
This image illustrates the 9000mAh battery capacity of the OlarHike inflator, showing its ability to inflate multiple items on a single charge. It provides examples of inflation cycles for cars, motorcycles, bicycles, basketballs, and swim rings.

The image demonstrates the dual operating modes of the OlarHike tire inflator: cordless battery mode for portability and a wired 12V DC mode for continuous use or emergencies, connected via a car's cigarette lighter.

This image emphasizes the inflator's precision display and automatic shut-off feature, which prevents over-inflation by stopping automatically once the preset pressure is reached. The display shows current tire pressure, inflation mode, and operation buttons.

The OlarHike tire inflator is shown being used as an emergency backup power bank, charging a smartphone via its USB port. This feature provides utility beyond inflation, especially in outdoor or emergency situations.
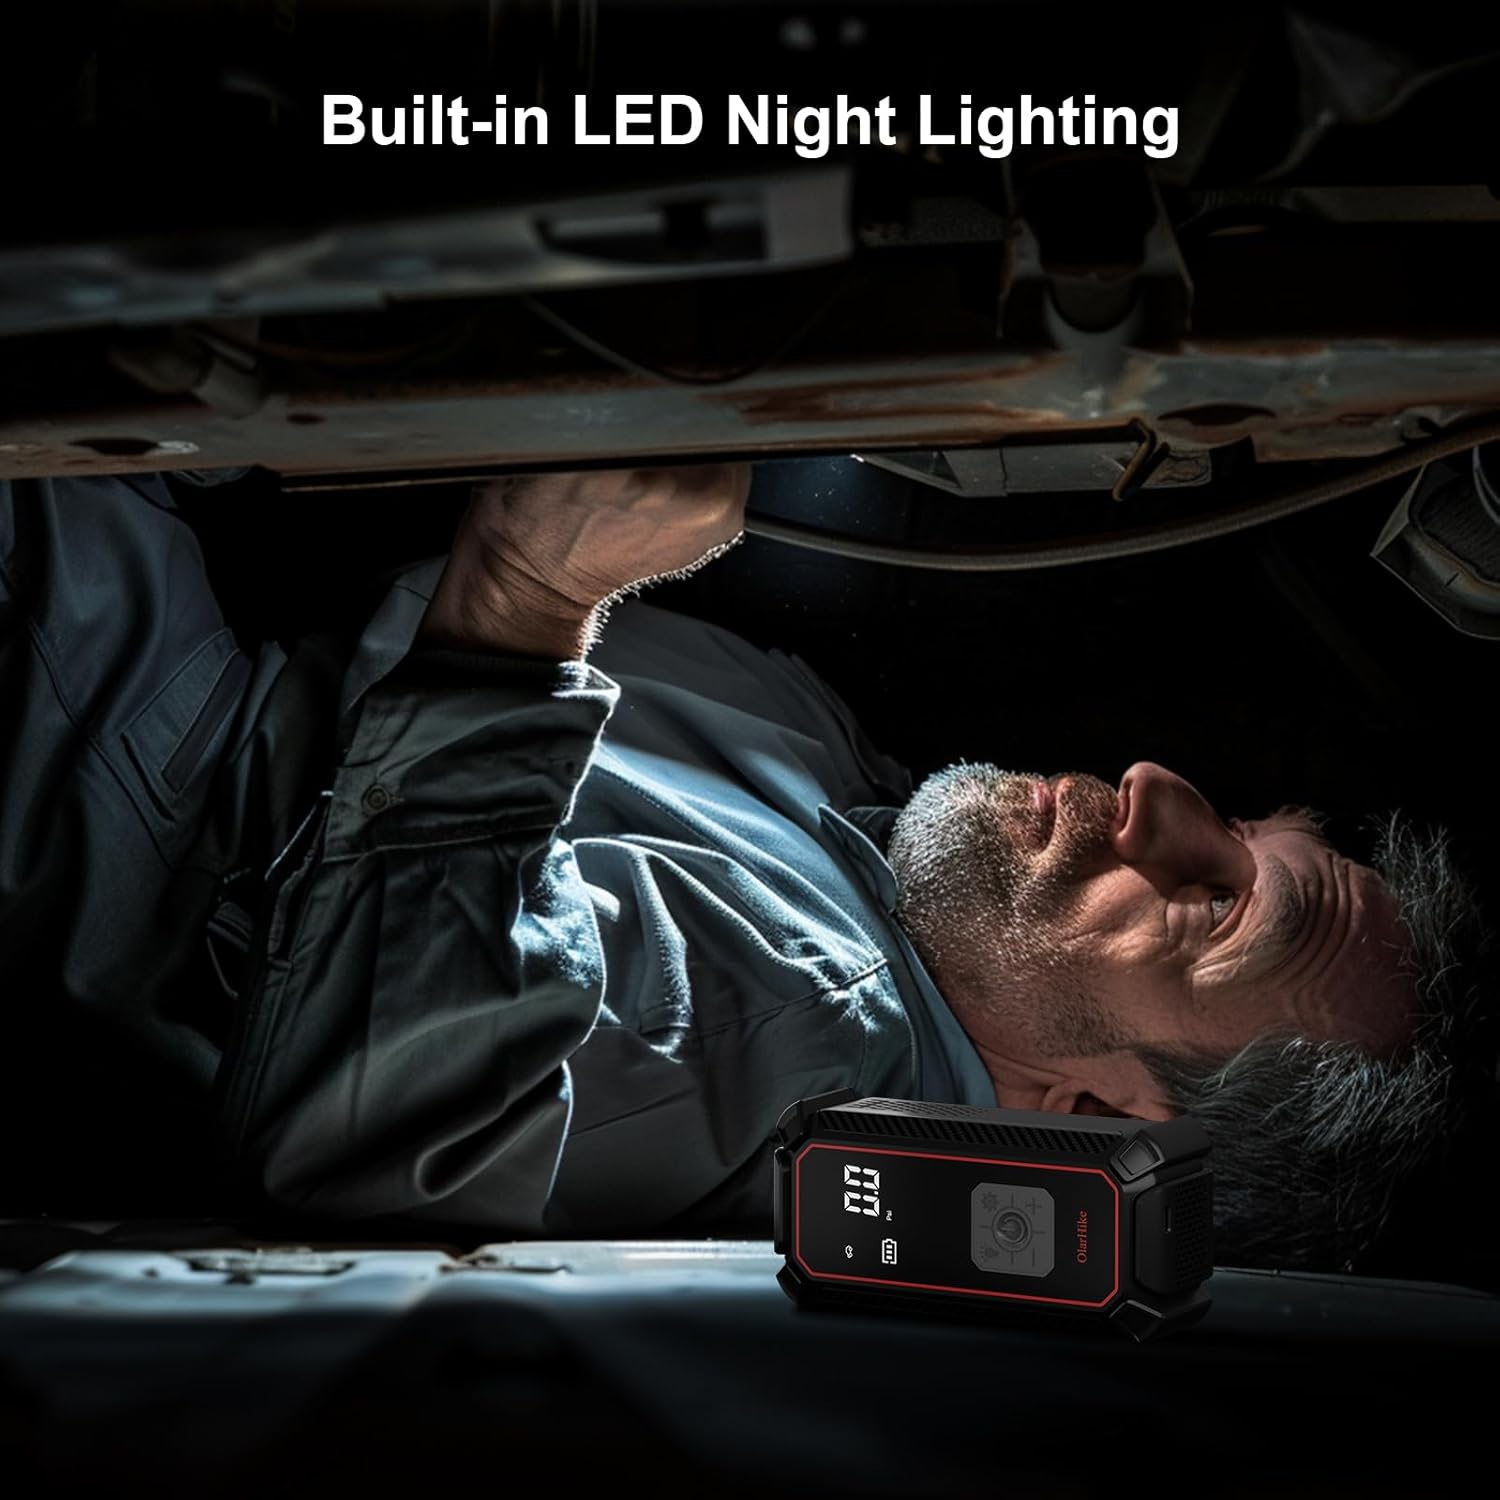
An individual is shown using the built-in LED light of the OlarHike tire inflator to illuminate a dark area, such as under a vehicle, highlighting its utility for nighttime or low-light conditions.
5. Setup
5.1 Initial Charging
Before first use, fully charge the tire inflator using the provided Type-C charging cable. Connect the Type-C end to the inflator's charging port and the USB-A end to a compatible USB power adapter (not included) or a computer USB port. The battery indicator on the digital display will show charging progress.
5.2 Attaching the Inflation Hose
Screw the inflation hose securely onto the inflator's air outlet port. Ensure it is tightened to prevent air leakage during operation.
6. Operating Instructions
6.1 Basic Inflation Steps
- Turn on the Device: Press and hold the power button for 2 seconds to turn on the inflator. The digital display will illuminate.
- Select Desired Pressure Unit: Press the 'Unit' button (usually labeled 'R' or 'M') to cycle through available pressure units: PSI, BAR, KPA, and kg/cm². Select your preferred unit.
- Set Desired Pressure: Use the '+' and '-' buttons to adjust the target pressure. Refer to your item's manufacturer recommendations for the correct pressure.
- Select Inflation Mode (Optional): The device may have preset modes for different items (e.g., car, motorcycle, bicycle, ball). Press the 'Mode' button to cycle through these if available. This will set a default target pressure for the selected item, which can then be fine-tuned with '+' and '-'.
- Connect Hose to Valve: Securely attach the inflation hose to the valve stem of the item you wish to inflate. For different items, use the appropriate nozzle adapter. Ensure a tight connection to prevent air leakage.
- Start Inflation: Press the power button (often labeled with a play/pause icon) to begin inflation. The inflator will automatically stop once the preset pressure is reached.
- Disconnect: Once inflation is complete and the device has stopped, quickly disconnect the hose from the valve stem. A small amount of air may escape, which is normal.

A visual guide demonstrating the four simple steps to operate the inflator: 1. Turn on the device. 2. Set the desired pressure. 3. Connect the hose to the valve. 4. Press the power button to start inflation, which automatically stops at the set pressure.
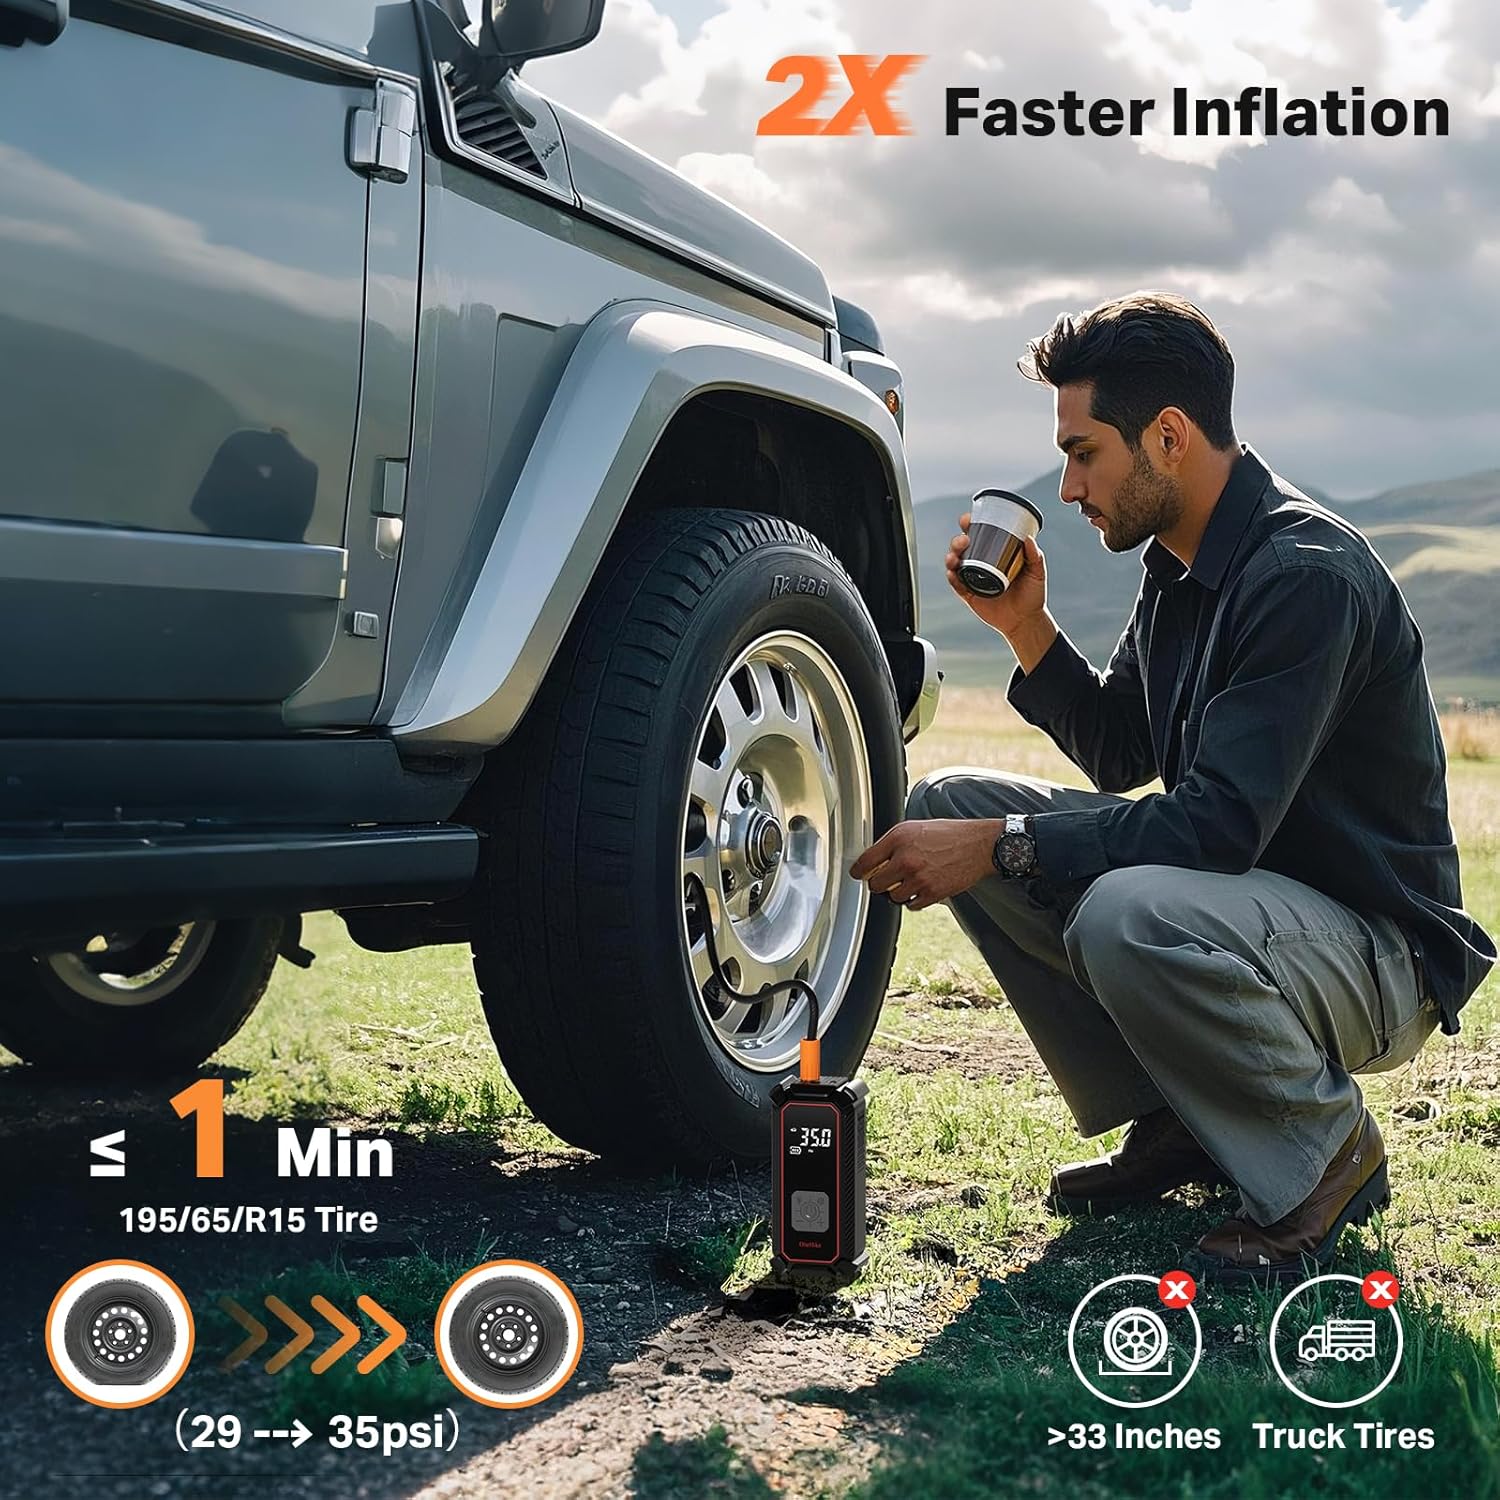
A man is shown using the OlarHike tire inflator to quickly inflate a car tire. The image highlights the device's fast inflation capability, indicating it can inflate a standard car tire (195/65 R15) from 29psi to 35psi in approximately 1 minute.
6.2 Using the LED Light
Press the 'Light' button (often indicated by a light bulb icon) to turn on the LED light. Press again to cycle through different light modes (e.g., steady on, flashing, SOS) or to turn it off.
6.3 Using as a Power Bank
To use the inflator as an emergency power bank, connect your electronic device (e.g., smartphone) to the USB output port on the inflator using your device's charging cable. The inflator will begin charging your device.
6.4 Wired Operation (12V DC)
If the internal battery is low or for continuous use, connect the provided DC power cord to the inflator's 12V input port and plug the other end into your vehicle's 12V cigarette lighter socket. The inflator can then be operated as described in the basic inflation steps.
7. Maintenance
- Cleaning: Wipe the exterior of the inflator with a soft, damp cloth. Do not use harsh chemicals or abrasive cleaners. Ensure the device is off and disconnected from any power source before cleaning.
- Storage: Store the inflator and its accessories in the provided storage bag in a cool, dry place, away from direct sunlight and extreme temperatures.
- Battery Care: For optimal battery life, charge the device fully at least once every three months, even if not in use.
- Hose and Nozzles: Regularly inspect the inflation hose and nozzles for any signs of wear, cracks, or damage. Replace if necessary to ensure efficient and safe operation.
8. Troubleshooting
- Device does not turn on: Ensure the battery is charged. If using 12V DC mode, check the vehicle's cigarette lighter fuse and the inflator's spare fuse.
- Inflator runs but no air comes out: Check if the inflation hose is securely connected to both the inflator and the item's valve. Ensure the valve stem is not blocked.
- Inflation is slow: Ensure the battery is fully charged or use the 12V DC wired mode. Check for any leaks in the hose connections.
- Device gets hot during use: This is normal during prolonged operation. Allow the device to cool down for 10-15 minutes between uses if it becomes excessively hot.
- Inaccurate pressure reading: Ensure the hose is tightly connected. If issues persist, compare the reading with a known accurate pressure gauge.
9. Specifications
| Feature | Specification |
|---|---|
| Brand | OlarHike |
| Model Name | TIC3V330 |
| Power Source | Battery Powered / 12V DC |
| Battery Capacity | 9000mAh Lithium Ion |
| Maximum Operating Pressure | 160 PSI |
| Air Flow Capacity | 24 Liters Per Minute |
| Voltage | 12 Volts |
| Maximum Power | 96 Watts |
| Noise Level | 80 dB |
| Hose Length | 23.6 Inches |
| Product Dimensions | 6.5"L x 2.8"W x 2.2"H |
| Item Weight | 2.14 pounds |

This table provides detailed inflation performance data for the OlarHike tire inflator, differentiating between the 9000mAh and 5400mAh models. It lists typical inflation times and cycles for various items like cars, bicycles, motorcycles, basketballs, and pickups, based on internal testing.
10. Warranty and Support
The OlarHike Portable Tire Inflator Air Compressor comes with a 2-Year After-Sales Support. For any questions, concerns, or technical assistance, please contact OlarHike customer service. Please retain your proof of purchase for warranty claims.


