Introduction
This manual provides detailed instructions for the installation, operation, and maintenance of your VENUS AQUA 4-in-1 Multi-Function Internal Aquarium Filter, model VS-WP3000FA. This filter is designed to provide comprehensive water purification and aeration for both freshwater and marine aquariums, ensuring a healthy environment for your aquatic life.
Product Features
- 4-in-1 Filtration System: Combines mechanical, biological, and chemical filtration with aeration for superior water quality.
- High Flow Rate: Provides 2000 liters per hour (L/H) water circulation, contributing to crystal clear and healthy aquarium water.
- Submersible Oxygen Pump: Delivers strong aeration and efficient oxygen supply, vital for fish, shrimp, and aquatic plants.
- Silent & Energy Efficient: Engineered for ultra-quiet operation with a power consumption of only 25W.
- Versatile Use: Suitable for medium to large freshwater and saltwater aquariums.
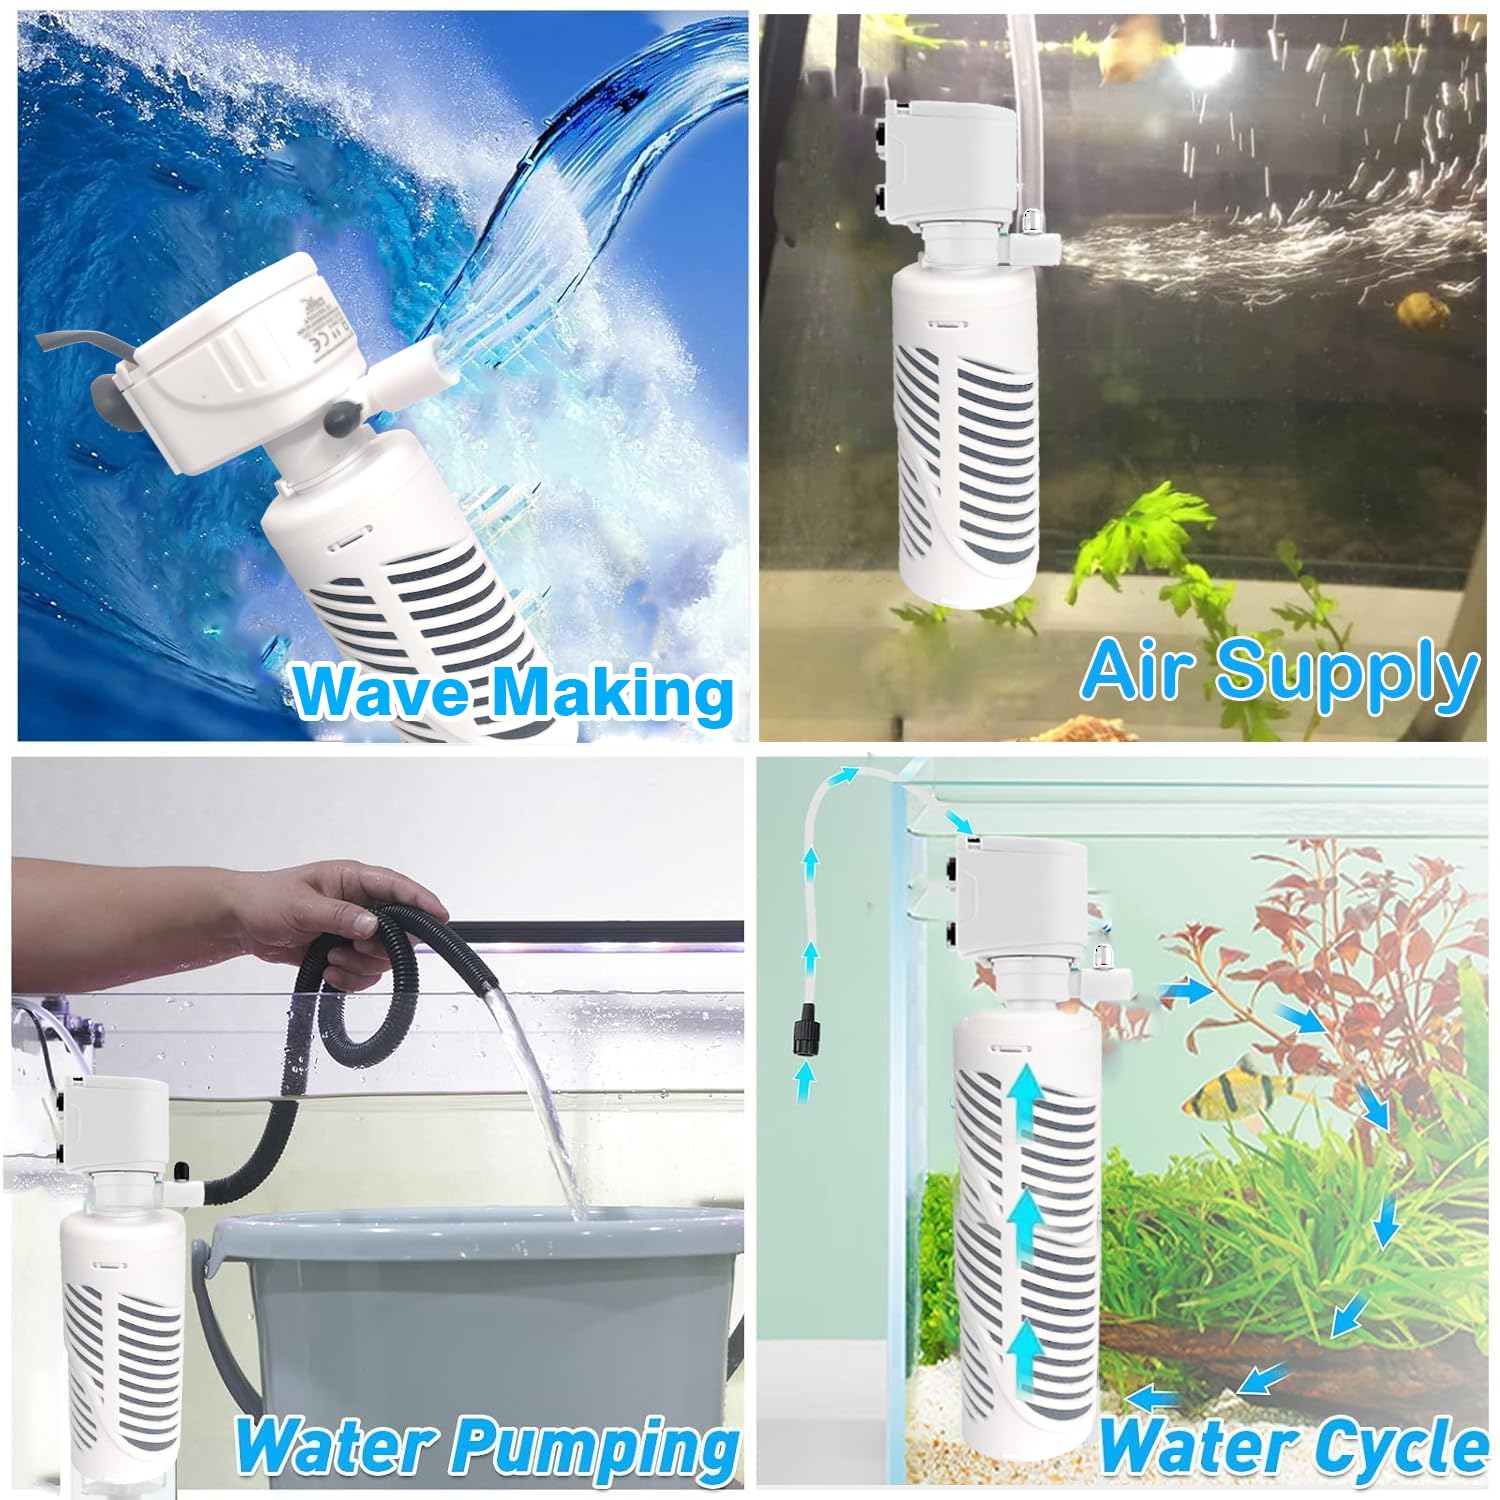
Figure 1: Illustration of the filter's four primary functions: wave-making, water pumping, air supply, and water circulation.
Package Contents
Please check the package for the following items:
- 1 x VENUS AQUA 4-in-1 Multi-Function Filtration Submersible Internal Aquarium Filter (Model VS-WP3000FA)
Specifications
| Model Number | VS-WP3000FA |
| Power Consumption | 25W |
| Maximum Flow Rate | 2000 L/H |
| Voltage | 220-240V |
| Product Dimensions | 10L x 6W x 30H Centimeters |
| Material | Acrylonitrile Butadiene Styrene (ABS) |
| Item Weight | 230 Grams |
| Specific Uses | Aquarium Fish Tank Filter |

Figure 2: Product dimensions and key specifications for model VS-WP3000FA.
Setup Instructions
- Unpack the Filter: Carefully remove all components from the packaging. Inspect for any damage.
- Assemble Filter Components: Attach the filter head to the filter body. Ensure the sponge filtration media is correctly placed inside the filter housing.
- Attach Air Pipe (Optional): If using the oxygen pump function, connect the air pipe to the designated outlet on the filter head. Position the other end of the air pipe out of the fish tank or above the water level to draw in air.
- Mount the Filter: Submerge the filter completely in your aquarium water. Use the suction cups provided to securely attach the filter to the inside wall of the aquarium. Ensure the filter is fully submerged before plugging it in.
- Connect to Power: Plug the power cord into a suitable electrical outlet. Ensure your hands are dry before handling the plug.

Figure 3: Assembly steps and proper placement of the oxygen pipe.
Operating Instructions
- Initial Start-up: After setup, plug in the filter. The pump will begin circulating water and, if the air pipe is connected, providing aeration.
- Adjust Flow Rate (if applicable): Some models may have an adjustable flow rate. Refer to the specific product design for adjustment mechanisms.
- Continuous Operation: For optimal water quality, the filter should operate continuously.
Maintenance
Regular maintenance is crucial for the longevity and efficiency of your filter.
- Weekly: Check the filter's output for reduced flow.
- Bi-weekly/Monthly (or as needed):
- Unplug the Filter: Always disconnect power before performing any maintenance.
- Remove from Aquarium: Carefully detach the filter from the aquarium wall.
- Disassemble: Separate the filter head from the body and remove the sponge media.
- Clean Filter Media: Rinse the sponge filter media in old aquarium water (from a water change) to preserve beneficial bacteria. Do not use tap water directly, as chlorine can kill these bacteria. If the sponge is heavily clogged or deteriorating, replace it.
- Clean Impeller: Remove the impeller cover and clean the impeller and its housing. Hair, debris, or mineral deposits can reduce performance.
- Reassemble and Reinstall: Put all components back together, ensuring a secure fit. Reinstall the filter in the aquarium and plug it back in.
Troubleshooting
| Problem | Possible Cause | Solution |
|---|---|---|
| Filter not running / No water flow |
|
|
| Reduced water flow |
|
|
| No air bubbles / Poor aeration |
|
|
| Excessive noise |
|
|

Figure 4: Troubleshooting guide for aeration issues.
Safety Information
- Always disconnect the power supply before performing any maintenance or handling the filter.
- Ensure the filter is fully submerged in water during operation. Running dry can damage the motor.
- Do not operate if the power cord or plug is damaged.
- This appliance is for indoor aquarium use only.
- Keep out of reach of children.
Warranty and Support
This product comes with a standard manufacturer's warranty. For warranty claims, technical support, or replacement parts, please contact Jainsons Pet Products, the manufacturer, directly.
- Manufacturer: Jainsons Pet Products
- Address: E-62, SECTOR-7, NOIDA-201301
- Helpline Number: 9650229789
- Extended Warranty: An optional 1-year extended warranty by Onsitego may be available for purchase. Please refer to your purchase details for more information.