
1. Introduction
This manual provides detailed instructions for the assembly, operation, and maintenance of your VIWAT Aluminum 10x12 FT Louvered Pergola. Please read this manual thoroughly before beginning assembly or operation to ensure safe and correct usage. Keep this manual for future reference.
2. Safety Information
Important Safety Precautions:
- Always follow the installation manual for proper assembly and secure the shelter to a stable foundation to prevent movement in harsh weather conditions.
- Be cautious during assembly and disassembly, as it may require multiple people and could involve potential hazards.
- Always operate the shelter in accordance with the manufacturer's guidelines to ensure safety.
- Ensure all bolts and connections are tightened securely before and after each use.
- Do not hang heavy objects from the pergola frame.
- In case of strong winds or heavy snow, it is recommended to open the louvers to prevent damage to the structure.
3. Product Features
- Adjustable Louvered Roof: Allows precise sunlight and ventilation control with 0°-90° angle adjustment, adapting to various weather conditions.
- Premium Aluminum Frame: Heavy-duty, rustproof, and powder-coated metal designed to withstand extreme weather (snow/wind/UV).
- All-Weather Protection: Features concealed gutters for efficient rainwater drainage and a 100% waterproof canopy that blocks 99% UV rays.
- Durable Construction: Built for longevity and stability in outdoor environments.

Figure 1: Adjustable aluminum alloy louvers allow tuning of shade and light.

Figure 2: Concealed drainage system ensures rainwater drains down the poles, maintaining aesthetic appeal.

Figure 3: The pergola's robust construction ensures durability against various weather conditions, including snow and wind.
4. Components Overview
Before assembly, ensure all parts listed in your packaging are present and undamaged. Refer to the installation video for visual identification of each component.
Key components typically include:
- Main Support Posts (A)
- Horizontal Beams (B, B1, B2, B3)
- Louvered Roof Panels (C, C1, C2, C3, D, D1, E)
- Corner Brackets (G, X1)
- Base Plates (H)
- Drainage Components (W)
- Connecting Plates/Bars (F, F1, F2, Y)
- Louver Operating Rods (I)
- Curtains/Nettings (U1, U2)
- Various Screws, Bolts, Nuts, and Washers (K, J, M, N, T, T1, S)
5. Setup and Installation
The assembly process requires 3-4 people and typically takes 2-3 hours. Follow the steps carefully. A detailed installation video is provided below for visual guidance.
Video 1: Louvered Pergola Installation Guide. This video demonstrates the step-by-step assembly process for the pergola structure.
5.1. Prepare the Area
- Choose a flat, level surface for installation.
- Clear the area of any debris or obstacles.
- Unpack all components and lay them out, verifying against the parts list.
5.2. Assemble the Main Frame
- Attach base plates (H) to the bottom of each main support post (A) using screws (K). (Refer to video 0:03 - 0:11)
- Connect the horizontal beams (B, B1) using connecting plates (F1) and screws (K). Insert drainage components (W) and secure with screws (K). (Refer to video 0:13 - 0:32)
- Repeat the process for the remaining horizontal beams (B2, B3) and connecting plates (F). (Refer to video 0:34 - 0:53)
- Attach the louver support rails (C, C1) to the posts (A) using screws (K) and connecting pins (N). (Refer to video 0:55 - 2:33)
- Connect the remaining louver support rails (C2, C3) to the posts (A) using screws (K) and connecting pins (N). (Refer to video 2:35 - 2:46)
- Install the corner brackets (X1) to the top frame corners using screws (K). (Refer to video 2:48 - 3:33)
5.3. Install Louvered Roof Panels
- Insert the louver operating rods (I) into the designated slots on the frame. (Refer to video 3:34 - 4:18)
- Carefully slide each louver panel (E) into the designated tracks on the louver support rails. Ensure they are properly aligned and secured with screws (K) and caps (S). (Refer to video 4:19 - 4:45)
5.4. Secure to Ground
- Once the main structure is assembled, use the provided anchor bolts (L) to secure the pergola's base plates to the ground. This is crucial for stability and safety. (Refer to video 4:47 - 4:53)
5.5. Attach Curtains/Nettings (Optional)
- Hang the privacy curtains (U1) and netting (U2) onto the curtain hooks (U) along the perimeter of the pergola. Secure the hooks with caps (T1). (Refer to video 4:54 - 5:25)
6. Operating Instructions
The louvered roof can be adjusted to control sunlight and ventilation. Use the provided operating rod (I) to rotate the louvers from 0° (fully closed) to 90° (fully open). This allows you to adapt to rain, sun, or wind as needed.

Figure 4: The hand crank mechanism for effortless adjustment of louver angle.
7. Maintenance
- Cleaning: Regularly clean the aluminum frame and louvers with a mild soap and water solution. Rinse thoroughly with clean water. Avoid abrasive cleaners or harsh chemicals.
- Drainage System: Periodically check the concealed gutters and drainage channels for blockages (leaves, debris) and clear them to ensure proper water flow.
- Fasteners: Inspect all bolts, screws, and connections periodically to ensure they remain tight. Re-tighten as necessary.
- Fabric Components: If equipped with curtains or netting, clean them according to their specific care instructions. Store them indoors during harsh weather or off-season to prolong their lifespan.
- Winterization: In areas with heavy snowfall, it is advisable to keep the louvers open to prevent snow accumulation and potential damage to the roof structure.
8. Troubleshooting
- Louvers not opening/closing smoothly: Check for any obstructions in the tracks or debris on the louver panels. Ensure the operating mechanism is free of dirt and lubricated if necessary.
- Water pooling on roof: Verify that the louvers are fully closed when intended to be waterproof. Check the drainage system for blockages and ensure the pergola is level.
- Pergola feels unstable: Re-check all bolted connections and ensure the anchor bolts are securely fastened to the ground. Ensure the ground surface is firm and level.
- Missing or damaged parts: Contact VIWAT customer service immediately for assistance.
9. Specifications
| Brand | VIWAT |
| Model Number | VBY1012GY |
| Material | Aluminum |
| Color | Gray |
| Product Dimensions | 141.1"L x 116.2"W x 87.4"H |
| Item Weight | 120.3 pounds |
| Water Resistance Level | Waterproof |
| UV Protection | Yes |
| Assembly Required | Yes |
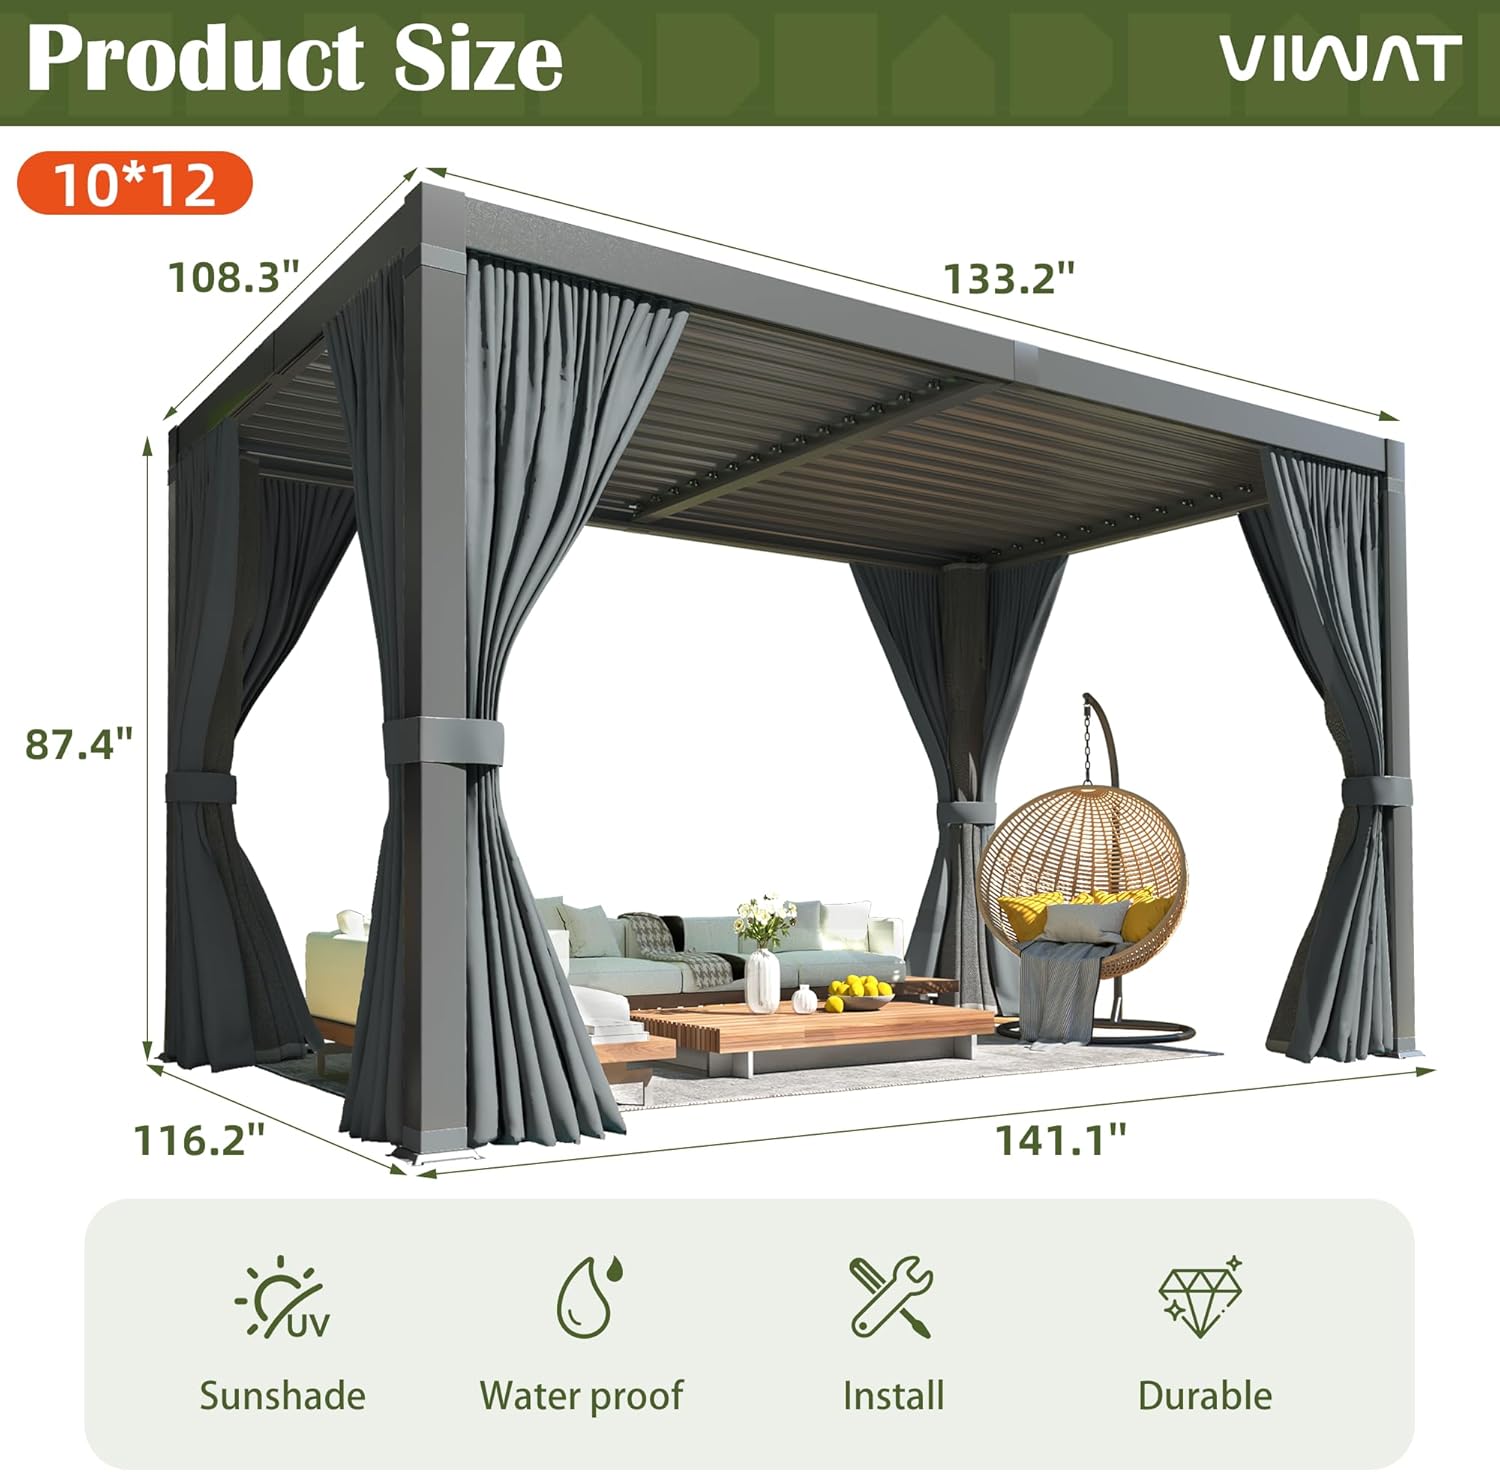
Figure 5: Detailed product dimensions for planning and installation.
10. Warranty and Customer Support
VIWAT is committed to high-quality products that enhance your outdoor living experience. Our excellent customer service ensures that you don't have to worry about missing or damaged parts. If you have any questions, feel free to reach out to us.
For support, please visit the VIWAT Store on Amazon or contact customer service through your purchase platform.