1. Introduction
This manual provides essential information for the proper installation, operation, and maintenance of the Diamond S400S073 Turbocharger. Adhering to these guidelines will ensure optimal performance and longevity of the unit. This turbocharger is designed for specific Mack Truck models, enhancing engine power and efficiency.

Figure 1: Main view of the Diamond S400S073 Turbocharger, showcasing its robust construction and primary components.
2. Safety Information
Always prioritize safety when working with automotive components. Failure to follow safety precautions can result in serious injury or damage to equipment.
- Ensure the engine is cool and the vehicle is off before beginning any work.
- Wear appropriate personal protective equipment (PPE), including safety glasses and gloves.
- Refer to the vehicle's service manual for specific procedures and torque specifications.
- Handle the turbocharger with care to avoid damage to delicate components.
- Dispose of old parts and fluids responsibly according to local regulations.
3. Product Specifications
| Attribute | Detail |
|---|---|
| Brand | Diamond |
| Model | S400S073 |
| OEM Part Numbers | 1080021R, 1080049R, 168089, 168089R, 171177, 171177R, 171206, 171206R, 173531, 173531R, 174828, 174828R, 468089, 471177, 471206, 473531, 474828, 631GC5145AM, 631GC5145M, 631GC5145MX, 631GC5153M, 631GC5153MX, 631GC5173AM, 631GC5173AMX, 631GC5173M, 631GC5173MX |
| Application | Compatible with 1999-2006 Mack Truck with E7-460(XT) Engine, 2002-2006 Mack Truck with E7 12L Engine, and Mack Truck with E7 427/454 HP, E7-427/460, E7-427/460 Vision Engine. |
| Item Weight | 45 pounds |
| Package Dimensions | 14 x 14 x 14 inches |
| Country of Origin | China |
| Exterior Finish | Painted |
| Contents | Turbocharger, Gasket |
4. Setup and Installation
Proper installation is crucial for the performance and longevity of your new turbocharger. It is recommended that installation be performed by a qualified technician.
4.1 Pre-Installation Checks
- Inspect the new turbocharger for any signs of shipping damage.
- Ensure all necessary gaskets and seals are present and in good condition.
- Verify that the oil supply and drain lines are clean and free of obstructions.
- Check the air intake and exhaust systems for any debris or blockages.
4.2 Installation Steps
- Disconnect the vehicle's battery.
- Remove the old turbocharger, carefully detaching all connections (oil, coolant, air, exhaust).
- Clean the mounting surfaces on the engine block and exhaust manifold thoroughly.
- Install the new gaskets.
- Position the new turbocharger and secure it with appropriate fasteners, tightening to the manufacturer's specified torque.
- Reconnect the oil supply line, ensuring it is primed with fresh engine oil before final connection.
- Reconnect the oil drain line, coolant lines (if applicable), air intake, and exhaust connections.
- Double-check all connections for tightness and proper routing.
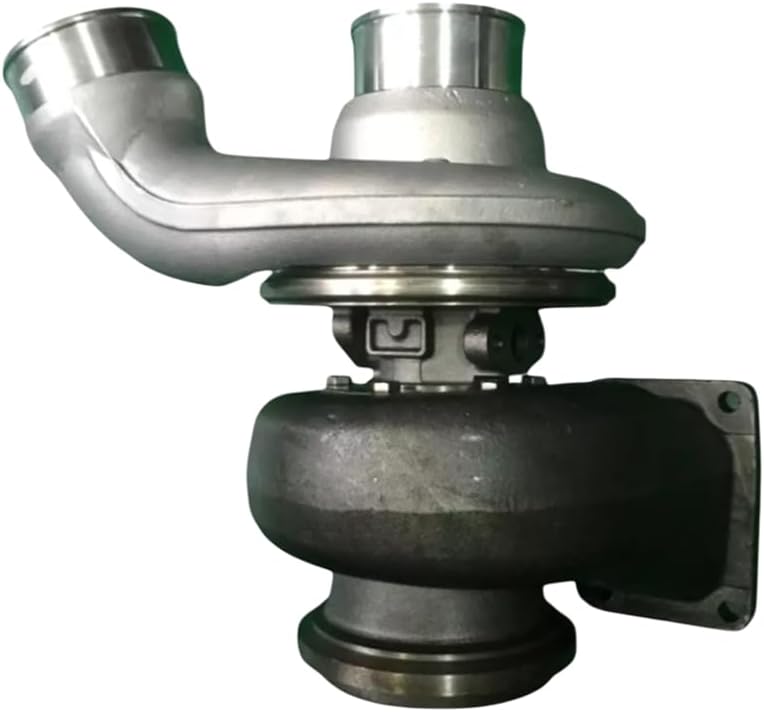
Figure 2: Side view of the turbocharger, showing the exhaust housing and mounting flange.
5. Operating Guidelines
Once installed, proper operating practices will contribute to the longevity and efficiency of the turbocharger.
- Engine Warm-up: Allow the engine to reach operating temperature before applying full load or high RPMs. This ensures proper oil flow and lubrication to the turbocharger bearings.
- Engine Cool-down: After periods of high load or extended driving, allow the engine to idle for a few minutes before shutting it off. This allows the turbocharger to cool down and prevents oil coking in the bearing housing.
- Oil Quality: Use only the recommended engine oil and adhere to the vehicle manufacturer's oil change intervals. Clean, high-quality oil is vital for turbocharger health.
- Air Filter: Ensure the engine's air filter is clean and replaced regularly. A clogged air filter can restrict airflow, leading to turbocharger strain.
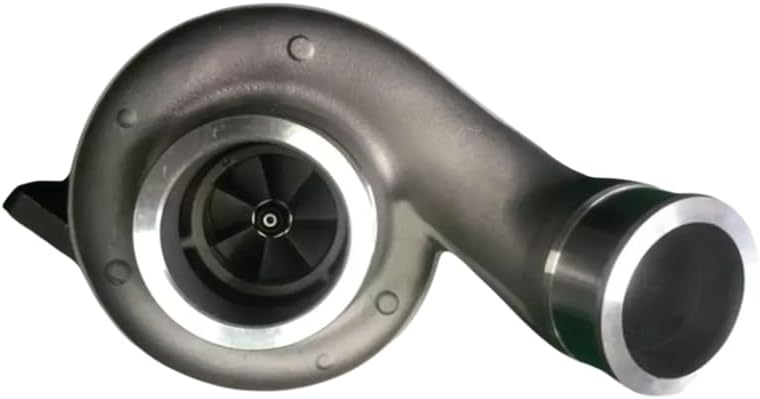
Figure 3: Rear view of the turbocharger, highlighting the compressor housing outlet.
6. Maintenance
Regular maintenance is key to extending the life of your turbocharger and ensuring consistent performance.
- Oil Changes: Follow the vehicle manufacturer's recommended oil change schedule. Use high-quality synthetic or semi-synthetic oil as specified.
- Oil Filter Replacement: Always replace the oil filter with each oil change.
- Air Filter Inspection/Replacement: Inspect the air filter regularly and replace it as per the vehicle's maintenance schedule or if it appears dirty.
- Check for Leaks: Periodically inspect all oil, coolant, and air connections around the turbocharger for any signs of leaks. Address any leaks immediately.
- Inspect Hoses and Clamps: Ensure all hoses are in good condition and clamps are tight to prevent boost leaks or oil/coolant loss.

Figure 4: Front view of the turbocharger, showing the compressor wheel and inlet.
7. Troubleshooting
This section provides common issues and potential solutions. For complex problems, consult a qualified mechanic.
| Problem | Possible Cause | Solution |
|---|---|---|
| Reduced Engine Power / Lack of Boost | Boost leak, clogged air filter, faulty wastegate, damaged compressor wheel. | Check all intake and intercooler hoses for leaks. Replace air filter. Inspect wastegate actuator. Check compressor wheel for damage. |
| Excessive Smoke from Exhaust | Oil leak into exhaust/intake, worn turbocharger seals/bearings. | Check oil lines for leaks. Inspect turbocharger for excessive shaft play. |
| Whining/Screeching Noise | Bearing wear, foreign object ingestion, loose connections. | Inspect compressor and turbine wheels for contact with housings. Check for foreign objects in intake/exhaust. |
| Oil Leaks from Turbocharger | Clogged oil drain, excessive crankcase pressure, worn seals. | Ensure oil drain line is clear. Check PCV system. Inspect turbocharger seals. |
8. Warranty and Support
The Diamond S400S073 Turbocharger comes with a 12-month warranty from the date of purchase, covering manufacturing defects. This warranty ensures peace of mind regarding the quality and reliability of your product.
For technical assistance, warranty claims, or product inquiries, please contact our expert technical support team. We are committed to providing comprehensive support to ensure your satisfaction.
- Warranty Period: 12 months from purchase date.
- Return Policy: 30-day free returns from the date of delivery.
- Support: Expert technical support team available for assistance.
Please retain your proof of purchase for all warranty claims.


