1. Introduction
This manual provides detailed instructions for the Proster Hiking Compass (Model PST933) and the Proster RD650 Nuclear Radiation Detector. These two devices are designed to assist users in outdoor navigation and environmental radiation monitoring, respectively. Please read this manual thoroughly before using either product to ensure proper operation and safety.

Figure 1: Proster Hiking Compass and RD650 Nuclear Radiation Detector.
2. Proster Hiking Compass (Model PST933)
The Proster Hiking Compass is a professional metal compass designed for outdoor navigation, hiking, and survival. It features a durable construction and various functions to aid in orientation and measurement.
2.1. Features
- Durable Metal Construction: Weighs 330 grams, providing a robust feel.
- High Accuracy: Vertical Lubber line on the sighting optic improves accuracy.
- Fluorescent Display: Luminous magnet arrow and compass card allow for reading in dark environments after sufficient light exposure.
- IP65 Waterproof Rating: Can be used in rainy conditions; however, it is not designed for submersion in water.
- Integrated Clinometer: For measuring angles of inclination or declination.
- Sighting Optic: For precise bearing measurements.
2.2. Components

Figure 2: Proster Hiking Compass packaging contents, including the compass, user manual, and lanyard.
The compass typically includes:
- Compass Base: The main body of the compass.
- Compass Dial: Rotatable dial with cardinal directions and degree markings.
- Sighting Mirror: Used for taking precise bearings.
- Sighting Wire/Line: For aligning with distant objects.
- Clinometer Scale: For measuring angles.
- Ruler/Scale: Often integrated for map reading.
- Lanyard Attachment: For securing the compass.
2.3. Setup and Calibration
- Lanyard Attachment: Attach the provided lanyard to the compass for secure carrying.
- Leveling: For accurate readings, ensure the compass is held level. The built-in bubble level (if present) can assist with this.
- Magnetic Declination: If your area requires magnetic declination adjustment, consult a local map or resource. This compass may not have an adjustable declination feature, so you would need to account for it manually during navigation.
2.4. Operation
2.4.1. Basic Navigation
- Orienting Yourself: Hold the compass level. The magnetic needle will point north. Rotate the compass housing until the 'N' (North) on the dial aligns with the magnetic needle. You are now oriented.
- Taking a Bearing to an Object: Point the sighting wire/line towards the object. Read the degree marking on the compass dial that aligns with the sighting line. This is the bearing to the object.
- Following a Bearing: If you have a bearing to follow, rotate the compass dial until that bearing aligns with the sighting line. Then, rotate your body until the magnetic needle aligns with the 'N' on the dial. The sighting line now points in the direction you need to travel.
2.4.2. Using the Clinometer

Figure 3: Illustration of the clinometer function, measuring an angle of 30.5 degrees.
The clinometer measures angles of slope or elevation. To use it:
- Open the compass fully.
- Align the base of the compass with the surface whose angle you wish to measure, or sight through the compass to the top/bottom of an object.
- Read the angle indicated by the clinometer needle on the internal scale.
2.4.3. Fluorescent Light Design

Figure 4: The compass dial illuminated by its fluorescent light design, visible in low-light conditions.
The compass features a luminous magnet arrow and compass card. To activate the fluorescent effect, expose the compass to sufficient natural or artificial light for a period of time. The stored light energy will allow the markings to glow in dark environments, making it convenient for night use.
2.5. Maintenance
- Cleaning: Wipe the compass with a soft, dry cloth. Avoid abrasive cleaners or solvents.
- Storage: Store in a cool, dry place away from strong magnetic fields to prevent demagnetization.
- Water Exposure: While IP65 rated, avoid prolonged submersion. If wet, dry thoroughly before storage.
2.6. Specifications (Compass)
| Feature | Description |
|---|---|
| Material | Metal |
| Weight | Approximately 330 grams |
| Special Features | Waterproof (IP65), Luminous, Sighting Optic, Clinometer |
3. Proster RD650 Nuclear Radiation Detector
The Proster RD650 is a portable Geiger counter designed for detecting Beta (β), Gamma (γ), and X-ray radiation in various environments. It provides real-time monitoring with visual and audible alerts.
3.1. Features
- High-Precision Detection: Detects β-rays, γ-rays, and X-rays.
- Wide Measurement Range: Cumulative dose equivalent: 0.00μSv~500mSv; Dose current rate: 0.00~9999μSv/h.
- Energy Range: 48keV~1.5MeV ≤+30% (for Cs-137).
- High Sensitivity: 80 CPM/μSv (for Co-60).
- Alert System: Automatic alarms (indicator light and buzzer) when radiation levels exceed preset thresholds.
- 2.4" HD LCD Screen: Large screen for real-time display of instantaneous, average, and accumulated values.
- Portable Design: Compact for easy carrying.
- Functions: Data hold, unit switching, MAX/AVG/ACC value display, low voltage prompt, automatic shutdown.
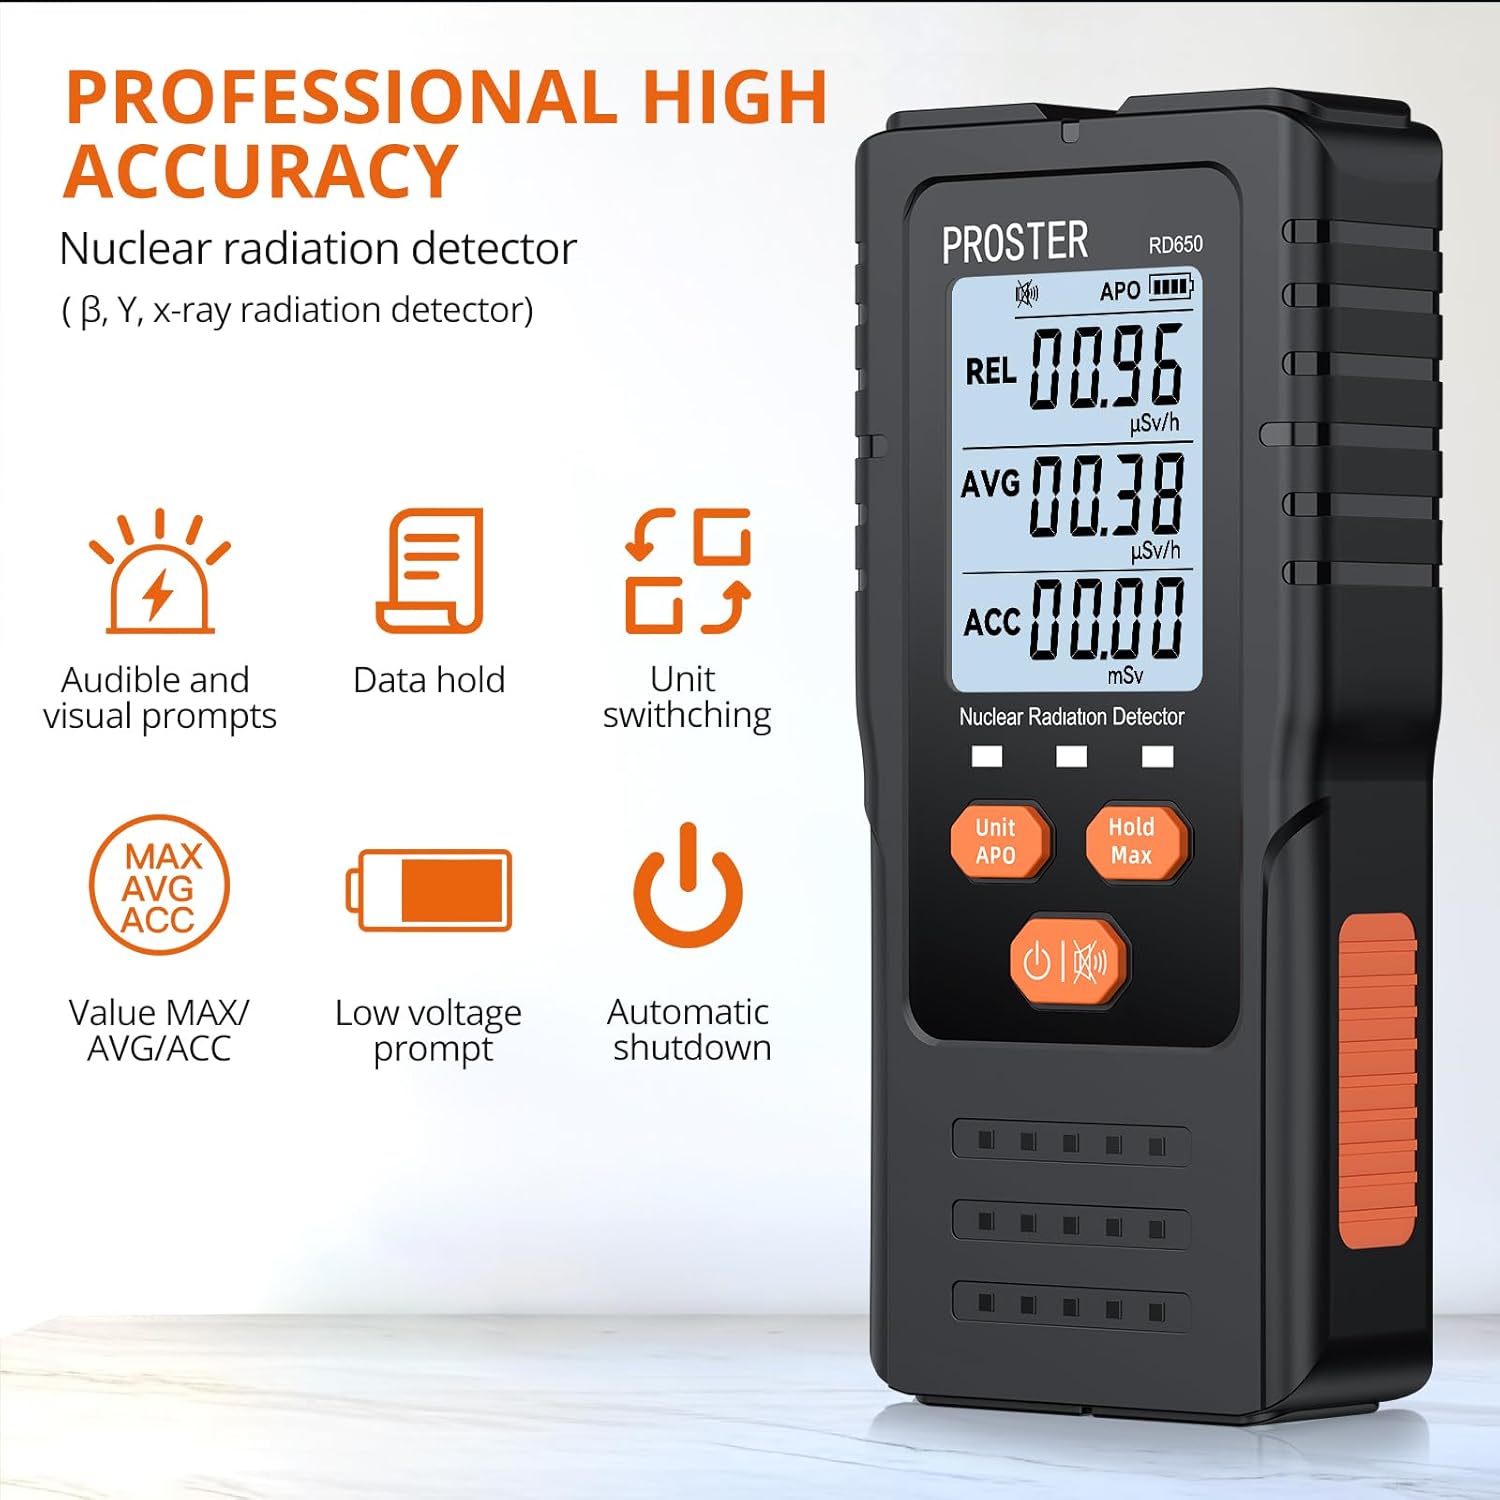
Figure 5: Key features of the Proster RD650 Nuclear Radiation Detector.
3.2. Components

Figure 6: The 2.4" HD LCD screen of the RD650, showing dose current rate, cumulative dose equivalent, and energy range.
The RD650 detector typically includes:
- LCD Display: Shows radiation values, units, battery status, and other indicators.
- Unit/APO Button: For switching measurement units and activating/deactivating Automatic Power Off.
- Hold/Max Button: For holding the current reading or displaying maximum values.
- Power/Mute Button: For turning the device on/off and muting the alarm.
- Radiation Sensor: Internal component for detecting radiation.
- Battery Compartment: For installing the 9V battery.
3.3. Setup and Battery Installation
- Battery Installation: Open the battery compartment cover on the back of the device. Insert a 9V battery, ensuring correct polarity. Close the cover securely.
- Initial Power On: Press and hold the Power button to turn on the device.
3.4. Operation
3.4.1. Power On/Off
- Power On: Press and hold the Power button until the screen illuminates.
- Power Off: Press and hold the Power button until the screen turns off. The device also features an automatic shutdown function.
3.4.2. Reading the Display
The 2.4" HD LCD screen displays various radiation values:
- REL (Relative Value): Instantaneous radiation dose rate.
- AVG (Average Value): Average radiation dose rate over a period.
- ACC (Accumulated Value): Total accumulated radiation dose.
- Units: Displays measurement units (e.g., μSv/h, mSv).
- Battery Indicator: Shows remaining battery life.
3.4.3. Unit Switching
Press the Unit/APO button to cycle through available measurement units (e.g., μSv/h, mSv) for the displayed values.
3.4.4. Hold/Max Function
Press the Hold/Max button to:
- Hold: Freeze the current reading on the display.
- Max: Display the maximum radiation value recorded during the current measurement session.
3.4.5. Alarm Settings
The device features dual alarms (indicator light and buzzer) that activate when radiation levels exceed a preset threshold. Refer to the full product manual for instructions on how to adjust alarm thresholds. The Power/Mute button can be used to mute the audible alarm.
3.4.6. Automatic Power Off (APO)
The device has an automatic power-off function to conserve battery. Press the Unit/APO button to activate or deactivate this feature. The APO status is typically indicated on the LCD screen.

Figure 7: Application areas for the Proster RD650 Nuclear Radiation Detector.
3.5. Maintenance
- Cleaning: Use a soft, dry cloth to clean the device. Do not use liquids or abrasive cleaners.
- Battery Replacement: Replace the 9V battery when the low voltage prompt appears on the screen to ensure accurate readings.
- Storage: Store the detector in a dry, dust-free environment away from extreme temperatures.
3.6. Specifications (Radiation Detector)
| Parameter | Value |
|---|---|
| Detection Types | β-rays, γ-rays, X-rays |
| Cumulative Dose Equivalent | 0.00μSv~500mSv |
| Dose Current Rate | 0.00~9999μSv/h |
| Energy Range | 48keV~1.5MeV ≤+30% (for Cs-137) |
| Sensitivity | 80 CPM/μSv (for Co-60) |
| Display | 2.4" HD LCD Screen |
| Power Source | 9V Battery |
| Alarms | Visual and Audible |

Figure 8: Overview of the RD650 Radiation Detector's features and power source.
4. Troubleshooting
4.1. Proster Hiking Compass
- Inaccurate Readings: Ensure the compass is held level and away from strong magnetic fields (e.g., metal objects, electronics).
- Faint Luminous Dial: Expose the compass to bright light for a longer period to charge the fluorescent material.
4.2. Proster RD650 Nuclear Radiation Detector
- Device Not Turning On: Check if the 9V battery is installed correctly and has sufficient charge. Replace the battery if necessary.
- No Readings/Erratic Readings: Ensure the device is in an environment where radiation is expected. If in a known radiation-free area, readings should be near zero. If issues persist, the sensor may be faulty.
- Alarm Not Sounding: Check if the alarm has been muted. Press the Power/Mute button to toggle the alarm sound. Verify alarm thresholds are set appropriately.
- Low Battery Indicator: Replace the 9V battery promptly to maintain accurate operation.
5. Safety Information
- General: Keep both devices out of reach of children. Do not attempt to disassemble or modify the products, as this may void the warranty and cause damage or injury.
- Compass: Avoid exposing the compass to extreme temperatures or direct sunlight for prolonged periods. Keep away from strong magnets.
- Radiation Detector: The RD650 is a measuring device and should not be used as a substitute for professional safety equipment or expert advice in high-risk radiation environments. Always follow local safety guidelines regarding radiation exposure.
6. Warranty and Support
Proster products are typically covered by a limited warranty. Please refer to the warranty card included with your purchase or visit the official Proster website for detailed warranty terms and conditions. For technical support, product inquiries, or service, please contact Proster customer service through their official channels.


