
1. Important Safety Warnings
For your own safety, please read this manual carefully before using the Prostormer 2000W Heat Gun and strictly comply with all stated precautions. Correct usage and proper maintenance methods are essential to increase the lifespan of the tool and ensure user safety.
- Always wear appropriate personal protective equipment, including safety glasses and gloves.
- Ensure the work area is well-ventilated to prevent the accumulation of fumes, especially when working with paint, plastics, or adhesives.
- Do not direct the heat gun at people or animals.
- Avoid touching the hot nozzle or accessories during or immediately after use. Allow the tool to cool down completely.
- Do not use the heat gun near flammable materials or gases.
- Always unplug the heat gun when not in use or before performing any maintenance.
2. Product Overview
The Prostormer 2000W Heat Gun is designed for a variety of tasks requiring controlled heat application. It features a high-efficiency ceramic heating element for rapid and stable performance, along with built-in overheat protection for enhanced safety.
Package Contents:
- 1 x Prostormer 2000W Heat Gun
- 4 x Nozzle Attachments
- 1 x User Manual (this document)
Key Features:
- 2000W Power: Provides strong and consistent heat output.
- Variable Temperature Control: Adjustable temperature range from 140°F (60°C) to 1022°F (550°C).
- Three Speed Settings: Allows for precise control over airflow.
- Overheat Protection: Safeguards the tool and circuits during extended use.
- Stainless Steel Air Outlet: Durable and resistant to high temperatures.

Image 2.1: The Prostormer 2000W Heat Gun shown with its included nozzle attachments.
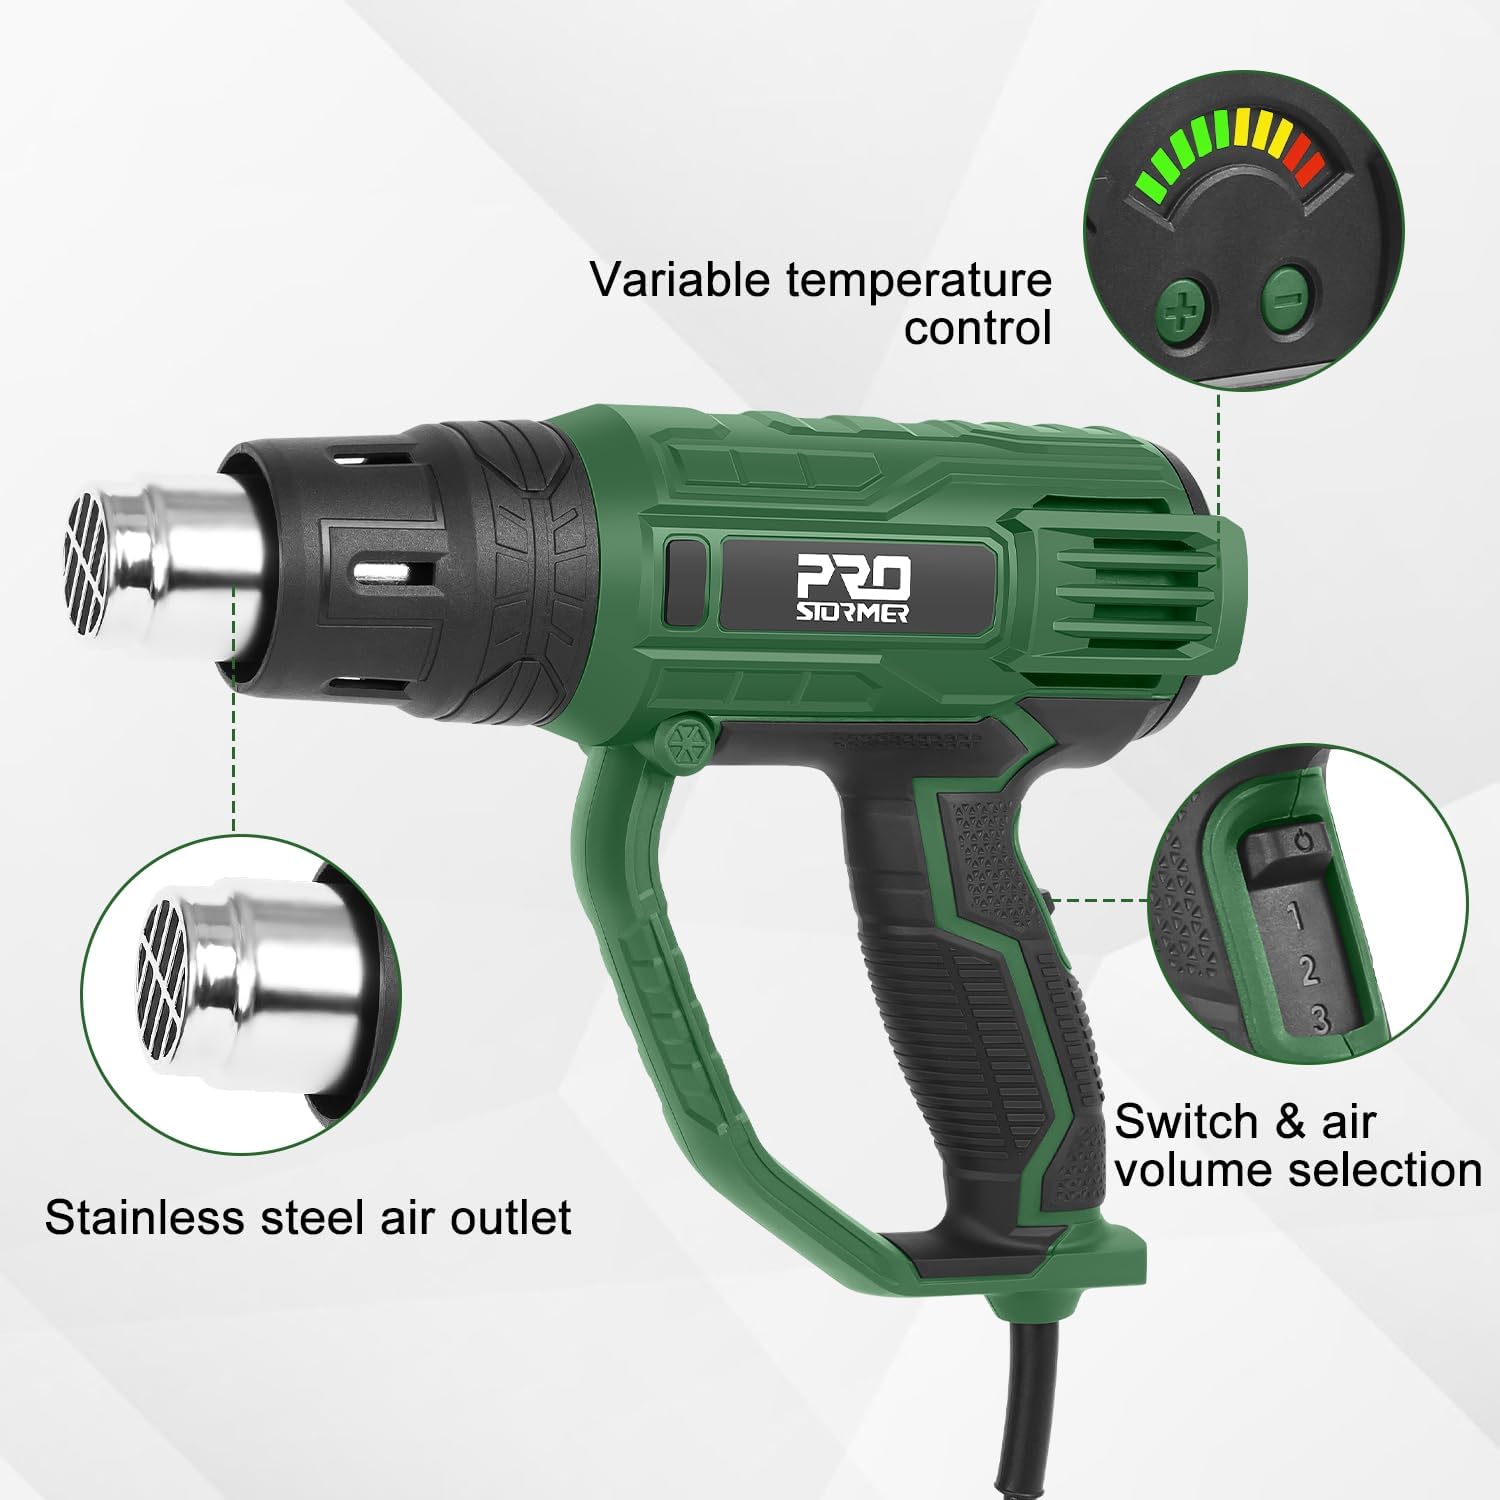
Image 2.2: Detailed view highlighting the heat gun's variable temperature control, three-speed switch, and stainless steel air outlet.
3. Setup
The Prostormer 2000W Heat Gun is ready for use out of the box. Before plugging in the device, ensure you have selected the appropriate nozzle for your task.
Attaching Nozzles:
- Ensure the heat gun is unplugged and completely cool.
- Select the desired nozzle attachment. The kit includes 4 different nozzles for various applications.
- Gently push the nozzle onto the stainless steel air outlet until it is securely seated. Do not force it.
- To remove, allow the heat gun and nozzle to cool completely, then pull the nozzle off.

Image 3.1: Product dimensions and the four types of nozzle attachments included.
4. Operating Instructions
The heat gun offers three operational modes, combining different temperature ranges and airflow volumes to suit various applications.
Operating Modes:
- Mode I: 140°F (60°C), 500 L/min airflow. Suitable for gentle heating tasks.
- Mode II: 140°F - 662°F (60°C - 350°C), 300 L/min airflow. Ideal for medium-heat applications with controlled airflow.
- Mode III: 140°F - 1022°F (60°C - 550°C), 500 L/min airflow. For high-heat tasks requiring maximum temperature and airflow.
Temperature and Airflow Control:
- Plug the heat gun into a standard 120V power outlet.
- Use the three-position switch (0-1-2-3) on the handle to select the desired airflow mode (0 for OFF, 1 for Mode I, 2 for Mode II, 3 for Mode III).
- For Modes II and III, use the '+' and '-' buttons on the rear dial to adjust the temperature within the specified range. The LED indicator will show the current temperature level.
- Always start with a lower temperature setting and gradually increase it as needed for your application.

Image 4.1: Detailed view of the temperature control dial and mode switch, illustrating the three operational modes.
Common Applications:
- Heat Shrink Tubing: Apply heat evenly around the tubing until it shrinks tightly.
- Bending PVC Pipes: Heat the desired section of the PVC pipe evenly until it becomes pliable, then bend it to shape.
- Paint Stripping: Direct heat onto the painted surface until the paint softens and bubbles, then scrape it off with a suitable tool.
- Shrink Wrapping: Apply heat to shrink film around objects for packaging or protection.
- Electronics and Cell Phone Repair: Use for desoldering, heating components, or applying heat-sensitive adhesives.
- Vinyl Wrapping: Assist in stretching and adhering vinyl films.

Image 4.2: Examples of the heat gun's wide range of applications.
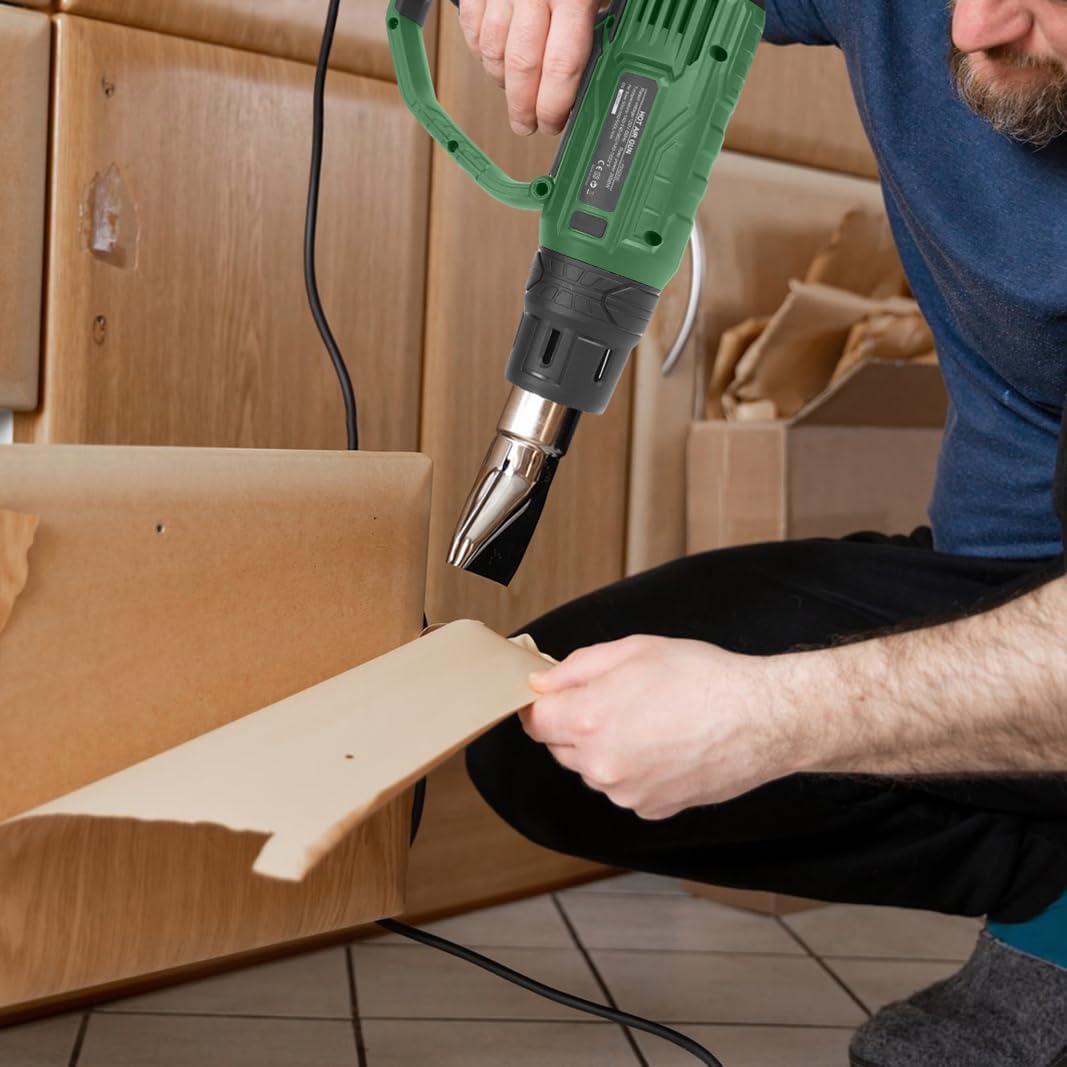
Image 4.3: Demonstrating the heat gun's use for paint stripping.
5. Maintenance
Regular maintenance ensures the longevity and safe operation of your heat gun.
- Cleaning: After each use, ensure the heat gun is unplugged and completely cool. Wipe the exterior with a clean, damp cloth. Do not use harsh chemicals or abrasive cleaners.
- Air Vents: Keep the air intake and exhaust vents clear of dust and debris to prevent overheating. Use a soft brush or compressed air if necessary.
- Cord Inspection: Regularly inspect the power cord for any signs of damage, cuts, or fraying. If damaged, have it replaced by a qualified technician.
- Storage: Store the heat gun in a dry, safe place, out of reach of children, when not in use.
No specific maintenance schedule or advanced procedures are provided in the product information. For any complex issues, consult a qualified service professional.
6. Troubleshooting
This section addresses common issues you might encounter with your heat gun.
- Heat Gun Does Not Turn On:
- Check if the power cord is securely plugged into a working outlet.
- Ensure the mode switch is set to Mode I, II, or III (not OFF).
- Check the circuit breaker or fuse for the outlet.
- Insufficient Heat Output:
- Verify that the temperature setting is appropriate for your task. Increase the temperature using the '+' button if needed.
- Ensure the air vents are not obstructed.
- Overheating/Automatic Shut-off:
- The heat gun has built-in overheat protection. If it shuts off, unplug it and allow it to cool down for at least 15-20 minutes.
- Check for blocked air vents and clear any obstructions.
- Avoid continuous use at maximum settings for extended periods.
If the problem persists after attempting these troubleshooting steps, please contact customer support. Specific troubleshooting details beyond these general points are not available in the provided product information.
7. Specifications
| Specification | Value |
|---|---|
| Brand | Prostormer |
| Model Number | PSHG003D |
| Power Source | Corded Electric |
| Wattage | 2000 watts |
| Voltage | 120 Volts |
| Temperature Range | 140°F - 1022°F (60°C - 550°C) |
| Airflow (Mode I) | 500 L/min |
| Airflow (Mode II) | 300 L/min |
| Airflow (Mode III) | 500 L/min |
| Burner Type | Ceramic |
| Item Weight | 2.14 pounds |
| Package Dimensions | 12.01 x 11.85 x 3.86 inches |
| Included Components | Heat Gun, 4 Nozzles, User Manual |
| Special Feature | Lightweight |
8. Warranty Information
Specific warranty details are not provided in the available product information. Please refer to the packaging, any included warranty cards, or the official Prostormer website for comprehensive warranty terms and conditions.
9. Support
For further assistance, technical support, or inquiries regarding your Prostormer 2000W Heat Gun, please consult the following resources:
- Official Website: Check the Prostormer official website for FAQs, support contact information, and additional product resources.
- Retailer Support: Contact the retailer from whom you purchased the product for assistance.
- Included Documentation: Refer to any additional documentation or inserts that came with your product for specific contact details.
No direct contact information (phone number, email) for support was available in the provided data.