Introduction
The cheero Wireless Open Earphones Smart NEO provide an innovative open-ear listening experience, allowing you to enjoy audio while remaining aware of your surroundings. Designed for comfort and extended use, these earphones feature a secure fit and enhanced sound quality. This manual provides essential information for the proper use and maintenance of your device.
Product Overview
Familiarize yourself with the components of your cheero Smart NEO earphones and charging case.
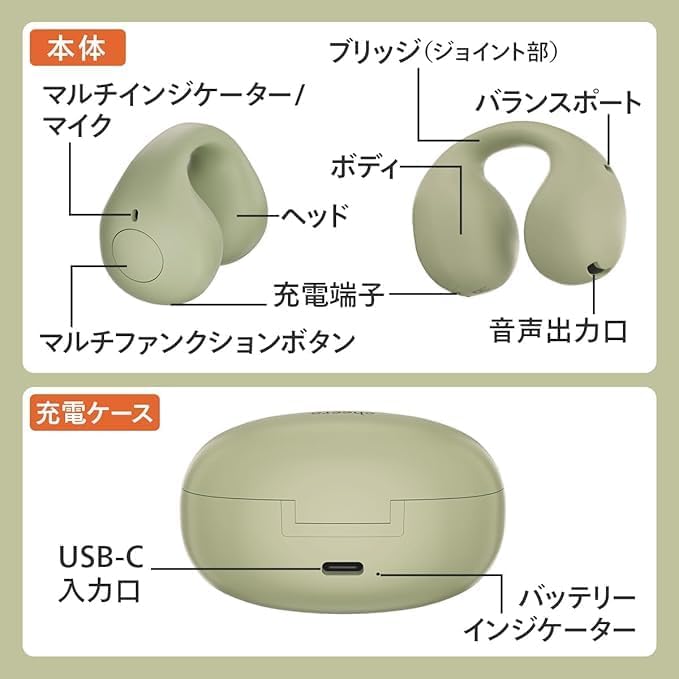
Image: Detailed diagram illustrating the main unit components (Multi-indicator/Mic, Head, Charging Terminal, Multifunction Button, Bridge (Joint part), Body, Balance Port, Sound Output Port) and charging case components (USB-C Input Port, Battery Indicator).
Earphone Components:
- Multi-indicator/Mic: Displays status and captures voice.
- Head: The main body of the earphone.
- Charging Terminal: Connects to the charging case for power.
- Multifunction Button: Controls various operations (playback, calls, voice assistant).
- Bridge (Joint part): Connects the earphone sections.
- Body: The main structure of the earphone.
- Balance Port: Helps with sound balance.
- Sound Output Port: Where audio is emitted.
Charging Case Components:
- USB-C Input Port: For connecting the charging cable.
- Battery Indicator: Shows the charging status of the case.
Setup
1. Charging the Earphones and Case
Before first use, fully charge the earphones and the charging case.
- Place the earphones into the charging case. Ensure they are correctly seated.
- Connect the provided USB-C cable to the charging case's USB-C input port and the other end to a USB power adapter (not included) or a computer's USB port.
- The battery indicator on the charging case will show the charging status. Once fully charged, the indicator will change or turn off depending on the model.

Image: The cheero Smart NEO earphones resting in their charging case, ready for charging or storage.
2. Bluetooth Pairing
Pair your earphones with your Bluetooth-enabled device (smartphone, tablet, etc.).
- Open the charging case. The earphones will automatically enter pairing mode, and the multi-indicator on the earphones will flash.
- On your device, go to Bluetooth settings and turn Bluetooth on.
- Select "cheero Smart NEO" from the list of available devices.
- Once connected, the multi-indicator on the earphones will stop flashing and remain steadily lit or turn off, indicating successful pairing.
- If pairing fails, place the earphones back in the case, close it, and then reopen to re-enter pairing mode.
3. Wearing the Earphones
The cheero Smart NEO earphones are designed for an open-ear fit, similar to an ear cuff, ensuring comfort and awareness of your surroundings.
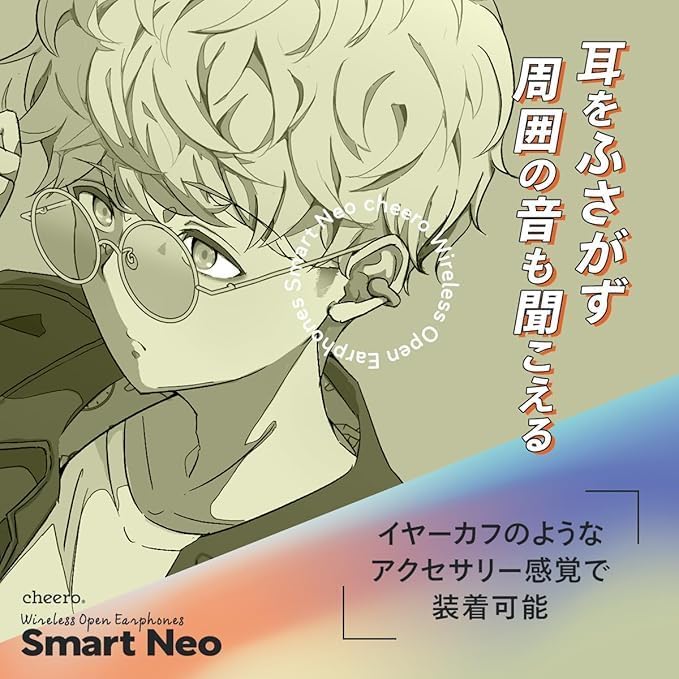
Image: A visual representation of the open-ear design, highlighting how the earphones allow users to hear ambient sounds.
- Gently clip the earphones onto your ears, ensuring the sound output port is positioned correctly near your ear canal without blocking it.
- Adjust the earphones for a secure and comfortable fit. The flexible design adapts to various ear shapes.

Image: A comparison illustrating the ergonomic improvements in the new cheero Smart NEO model for a more comfortable and less fatiguing fit compared to previous designs.
Operating Instructions
The cheero Smart NEO earphones feature a multifunction button on each earbud for easy control.
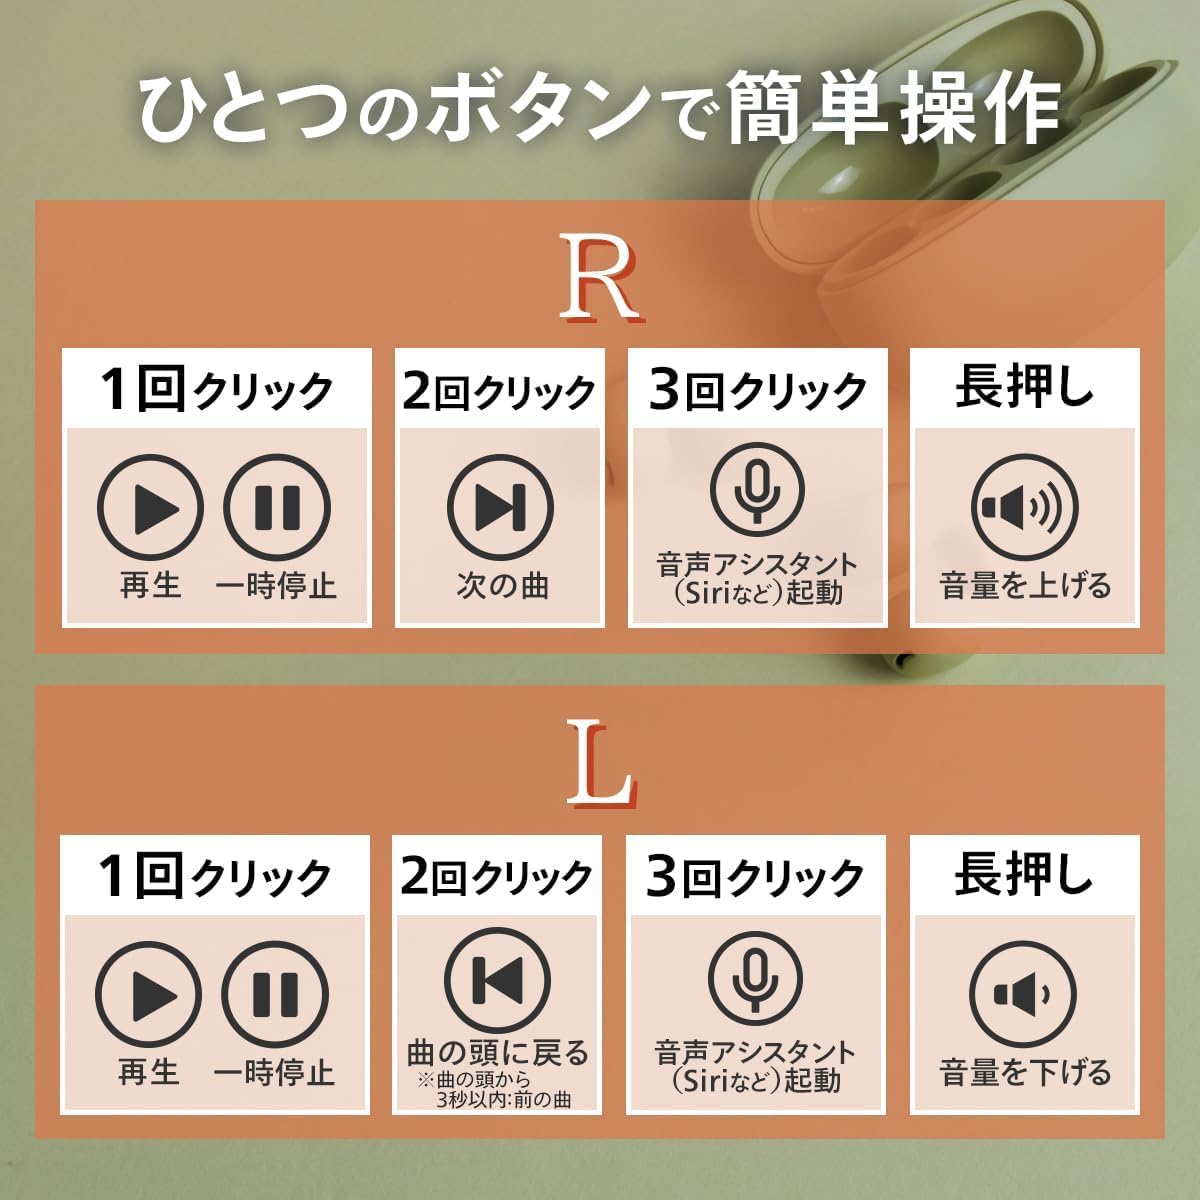
Image: A clear guide to the button controls for both the Right (R) and Left (L) earphones, detailing actions for single click, double click, triple click, and long press.
Right Earphone (R) Controls:
- 1 Click: Play / Pause audio.
- 2 Clicks: Next track.
- 3 Clicks: Activate voice assistant (Siri, Google Assistant, etc.).
- Long Press: Increase volume.
Left Earphone (L) Controls:
- 1 Click: Play / Pause audio.
- 2 Clicks: Return to the beginning of the current track (or previous track if within 3 seconds of current track start).
- 3 Clicks: Activate voice assistant (Siri, Google Assistant, etc.).
- Long Press: Decrease volume.
Call Management:
- Answer/End Call: Single click either earphone's multifunction button.
- Reject Call: Long press either earphone's multifunction button.
Maintenance
Proper care ensures the longevity and optimal performance of your earphones.
Cleaning:
- Wipe the earphones and charging case with a soft, dry, lint-free cloth.
- Do not use abrasive cleaners, alcohol, or chemical solvents.
- Ensure the charging terminals are clean and free of debris to maintain good connection.
Storage:
- When not in use, store the earphones in their charging case to protect them and keep them charged.
- Store in a cool, dry place away from direct sunlight and extreme temperatures.
Water Resistance:

Image: Visual confirmation of the IPX5 water resistance rating for the cheero Smart NEO earphones.
- The earphones are rated IPX5 for water resistance, meaning they can withstand splashes and sweat.
- Do not submerge the earphones in water. Water resistance is not permanent and may decrease over time with normal use.
- The charging case is not water resistant.
Troubleshooting
If you encounter issues, try the following solutions:
| Problem | Solution |
|---|---|
| Earphones do not power on. | Ensure the earphones are charged. Place them in the charging case and connect the case to power. |
| Cannot pair with device. |
|
| No sound or low volume. |
|
| Charging case not charging. |
|
Specifications
| Feature | Detail |
|---|---|
| Model Name | cheero Wireless Open Earphones Smart Neo |
| Model Number | CHE-646 |
| Connectivity | Bluetooth |
| Ear Placement | Open Ear |
| Speaker Size | 13mm (large-diameter) |
| Continuous Playback Time | Up to approximately 6 hours |
| Water Resistance | IPX5 (earphones only) |
| Included Components | Cable, User Manual |
| Battery | 1 Nonstandard Battery (included) |
Warranty and Support
For detailed warranty information, please refer to the product packaging or the official cheero website. If you require technical assistance or have questions not covered in this manual, please contact cheero customer support through their official channels.
Please retain your proof of purchase for warranty claims.


