1. Important Safety Instructions
Please read all instructions carefully before operating the appliance and retain them for future reference. Always follow basic safety precautions to reduce the risk of fire, electric shock, and injury.
- Do not operate the appliance with a damaged cord or plug.
- Ensure the voltage specified on the product label matches your local power supply.
- Keep the appliance away from heat sources, direct sunlight, and moisture.
- Do not immerse the appliance in water or other liquids.
- Unplug the appliance before cleaning or performing any maintenance.
- This appliance is for indoor use only.
- Keep out of reach of children.
2. Product Overview
The Afloia Miro Pro is a 2-in-1 appliance designed to purify the air and humidify your environment. It features a detachable humidifier module, a 3-stage filtration system, and ambient LED lighting.

Image: The Afloia Miro Pro unit operating in a living room, illustrating air purification and humidification benefits.
Components:
- Main Air Purifier Unit
- Humidifier Module (detachable)
- 3-in-1 Air Filter (Pre-filter, Activated Carbon, High-efficiency filter)
- Humidifier Filter
- Power Adapter

Image: Front view of the Afloia Miro Pro unit, showing its compact design.
3. Setup
3.1 Unpacking
Carefully remove all components from the packaging. Ensure all packing materials are removed from the unit before use.
3.2 Filter Installation
The 3-in-1 air filter and humidifier filter may come pre-installed or require installation. Follow these steps:
- Place the main air purifier unit on a flat, stable surface.
- Twist the base of the air purifier unit counter-clockwise to unlock and remove the bottom cover.
- Insert the 3-in-1 air filter into the main unit, ensuring it is seated correctly.
- Replace the bottom cover and twist clockwise to lock it securely.
- If using the humidifier module, ensure the humidifier filter is correctly placed inside it.

Image: Illustration of the 3-in-1 high-efficiency filter layers.

Image: The 3-in-1 air filter for the Afloia Miro Pro.

Image: The humidifier filter for the Afloia Miro Pro.
3.3 Attaching the Humidifier Module
The humidifier module attaches securely to the top of the air purifier unit via a precision-engineered bottom serration design. Align the module with the top of the purifier and gently twist until it locks into place. The humidifier module is designed to work in conjunction with the purifier and cannot function independently.

Image: Detailed view of the humidifier module's internal structure and top-filling feature.
3.4 Filling the Water Tank
The humidifier features a top-filling design for convenience.
- Remove the top cover of the humidifier module.
- Pour clean tap water directly into the water tank. Do not exceed the maximum fill line. The tank capacity is 64 oz.
- Replace the top cover securely.

Image: Demonstrates the easy top-filling method for the humidifier's water tank.
3.5 Power Connection
Connect the power adapter to the unit and then plug it into a suitable electrical outlet.
4. Operating Instructions
The Afloia Miro Pro features intuitive button controls.
4.1 Power On/Off
- Press the Power button once to turn the unit on.
- Press the Power button again to turn the unit off.
4.2 Mode Selection
The unit can operate as an air purifier only or as an air purifier with humidification.
- When the humidifier module is attached and filled with water, the unit will operate in 2-in-1 mode (purification + humidification).
- To use as an air purifier only, detach the humidifier module. The main unit will function independently.
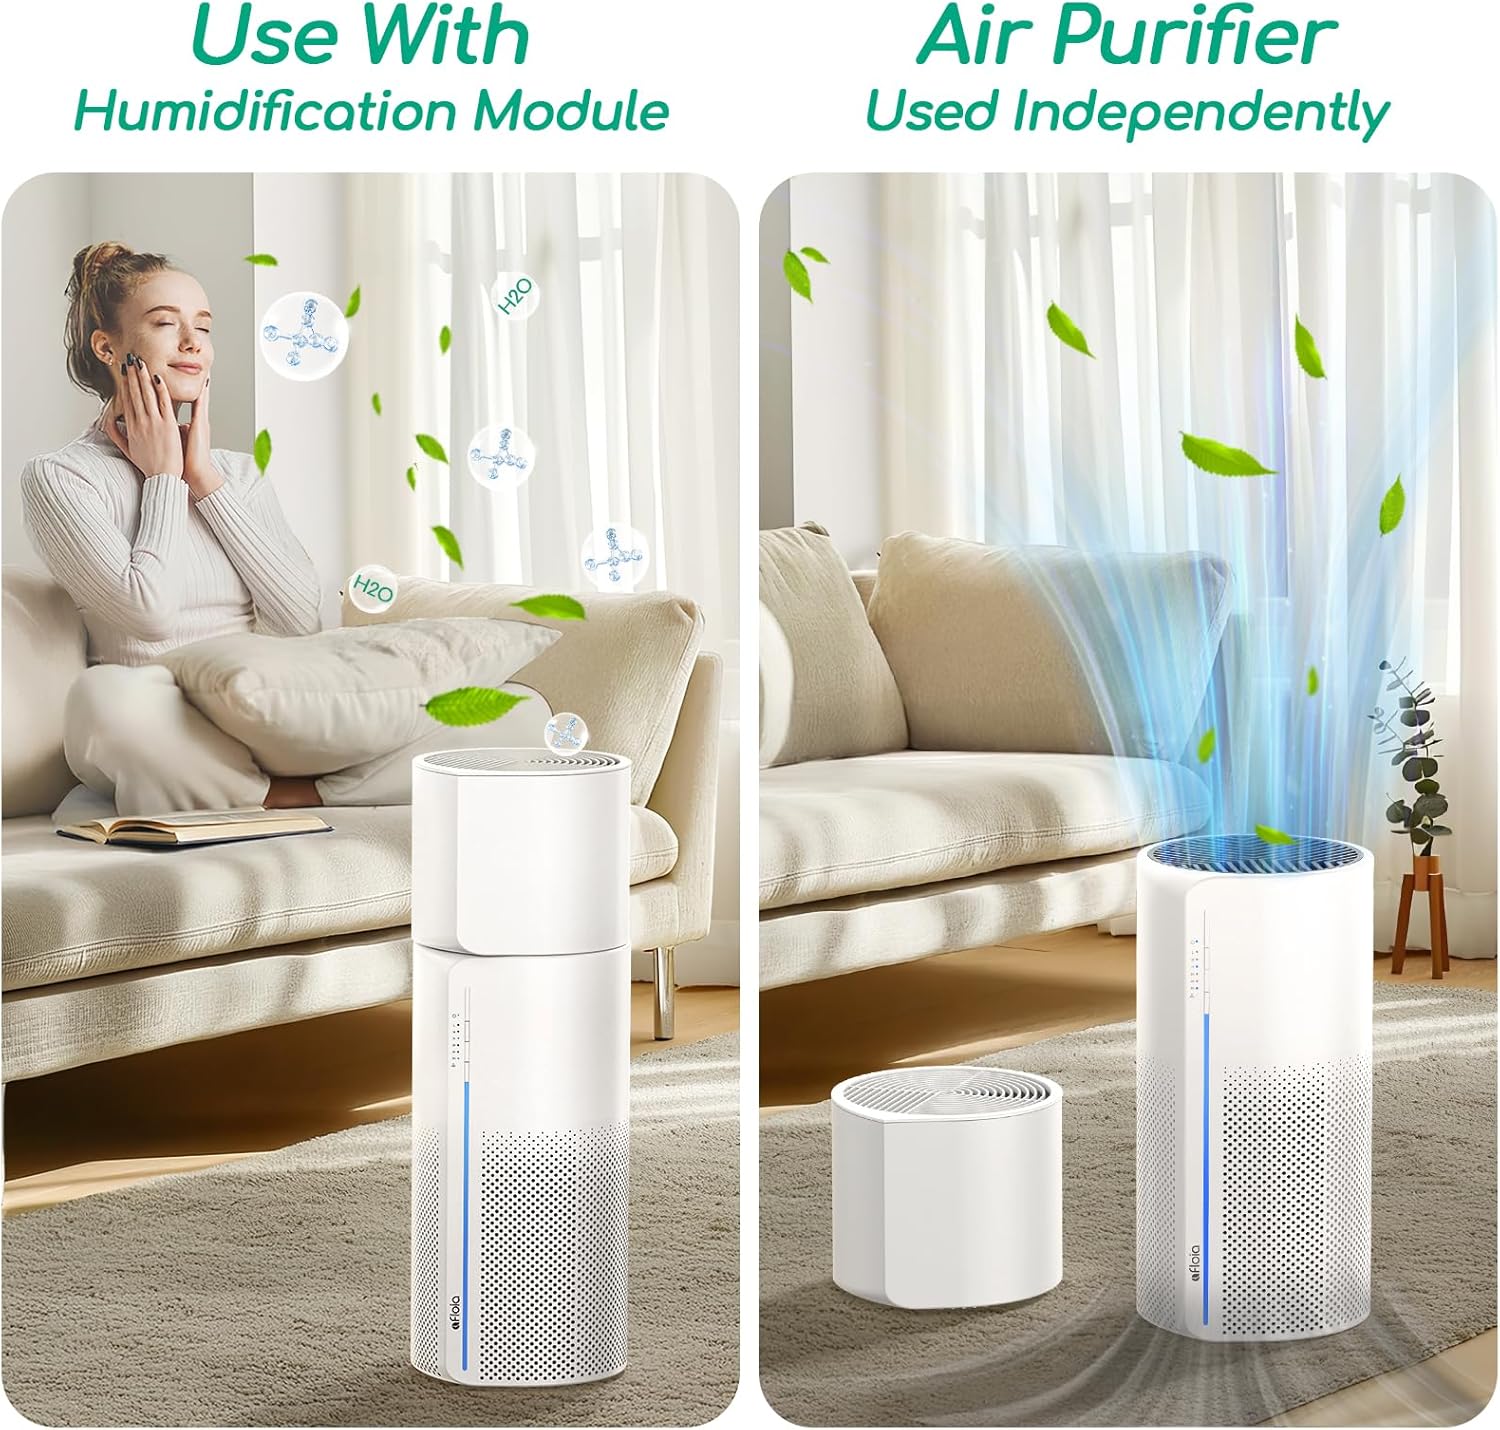
Image: Illustrates the flexibility of using the unit with or without the humidification module.
4.3 Fan Speed Control
Adjust the fan speed to your preference using the dedicated button (if available, refer to control panel icons). The unit typically offers multiple fan speeds, including a quiet Sleep Mode.

Image: The unit in a bedroom, highlighting its quiet operation at 24dB in Sleep Mode.
4.4 Ambient LED Lighting
The unit features seven vibrant LED light modes. Press the Light button to cycle through colors or select a fixed color. To turn off the lights for an undisturbed night's rest, press the button until the lights are off.
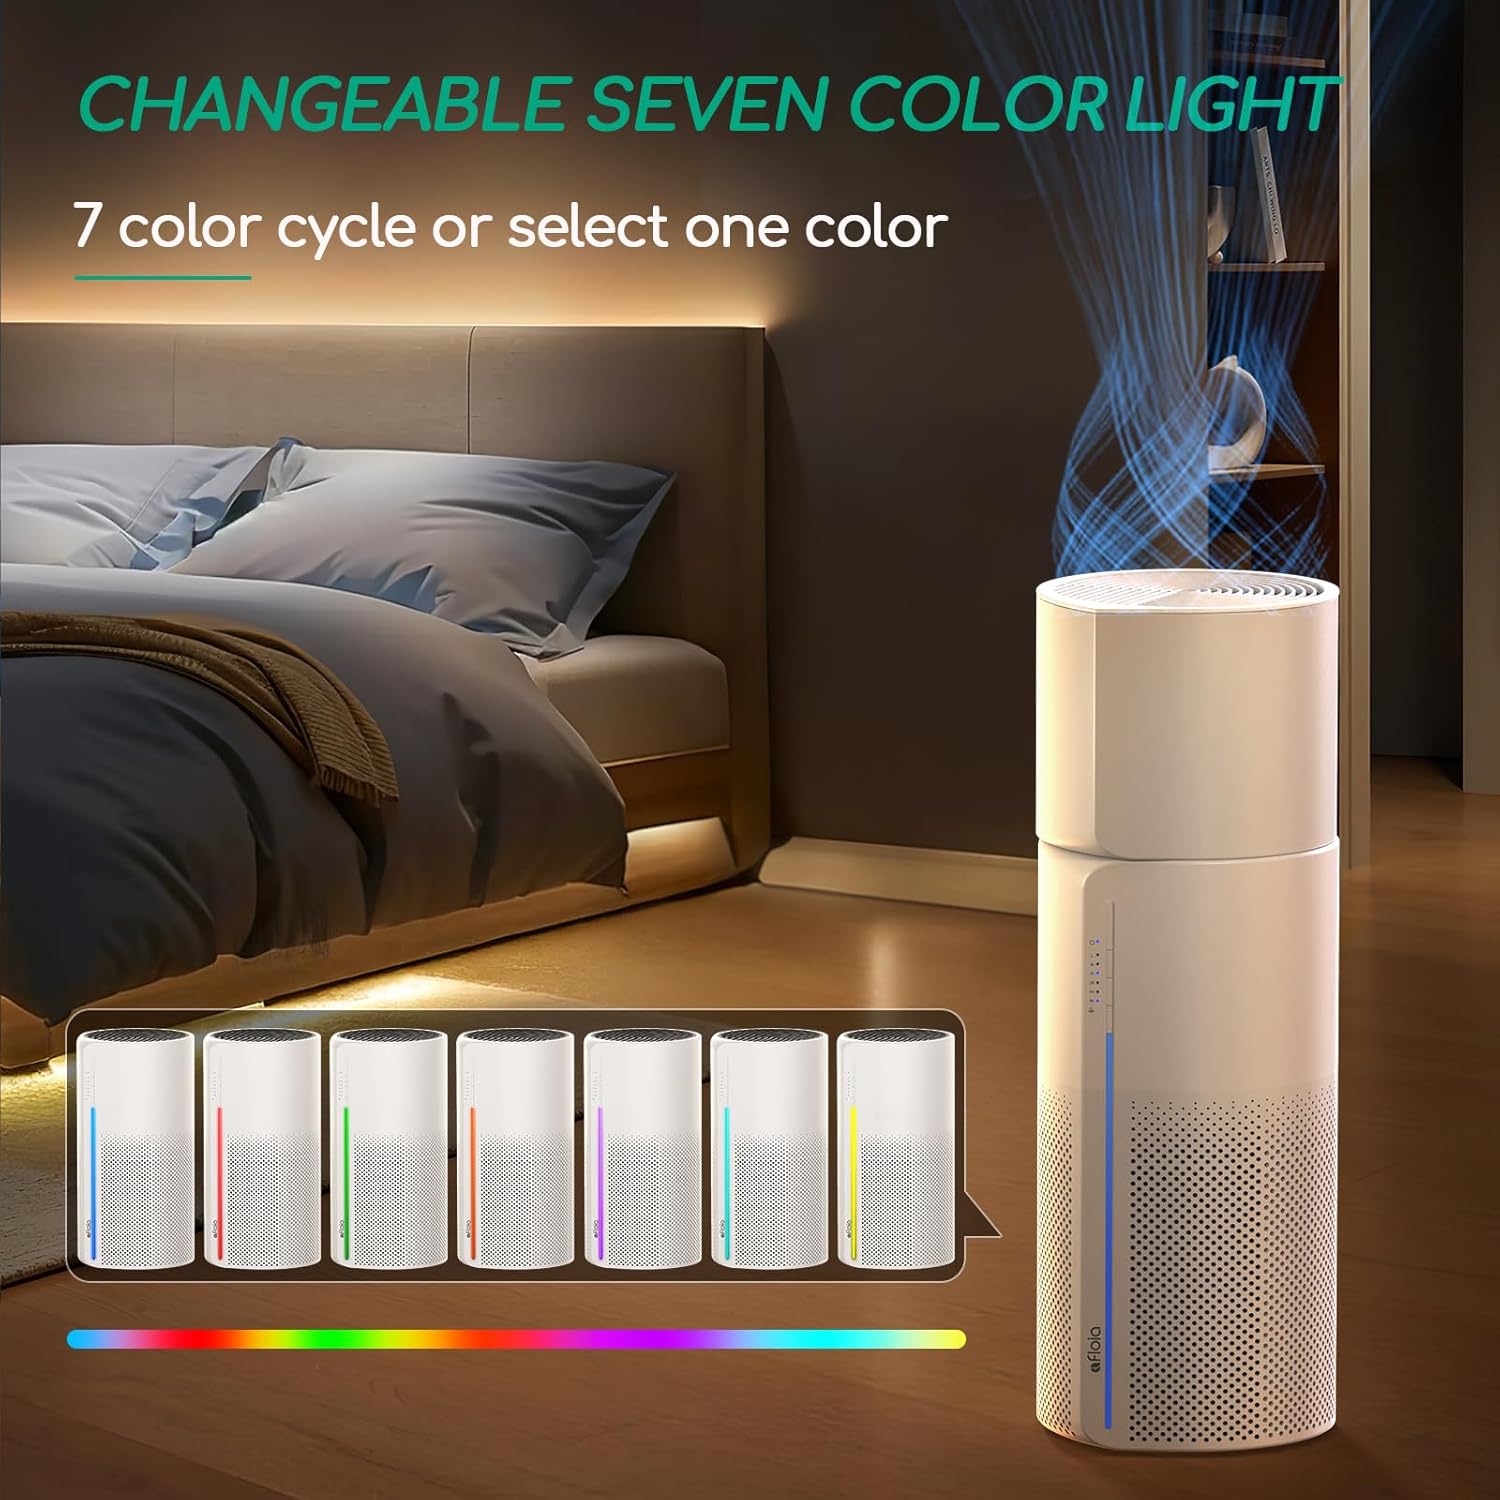
Image: The unit showcasing its changeable seven-color LED light feature.
4.5 Timer Control
The unit may include a timer function to set specific operating durations. Refer to the control panel for the timer button and available settings.
5. Maintenance
5.1 Filter Replacement
The unit is equipped with an intelligent filter replacement alert. A red LED will flash continuously when the filter reaches its saturation point, typically every 3-6 months, depending on usage and air quality.
- When the machine blinks red light, unplug the unit.
- Twist the base counter-clockwise to open and take out the used filter.
- Install the new Afloia 3-in-1 filter (B08CVFXPMC).
- Replace the bottom cover and twist clockwise to lock.
- Plug in the machine and turn it on.
- Keep pressing the power button for 15 seconds until the red light resets successfully.

Image: Visual instructions for replacing the air filter.
5.2 Cleaning the Humidifier Module and Filter
Regular cleaning of the humidifier module and filter is essential to prevent mineral buildup and maintain healthy moisture output. The humidifier filter (B08L98WGCH) is washable.
- Unplug the unit and detach the humidifier module.
- Remove the humidifier filter from the module.
- For the humidifier filter: Soak it in a solution of vinegar and water. Gently clean the filter with a soft brush. Rinse thoroughly under running water to remove any residue.
- For the water tank: Wipe the interior with a soft cloth. Ensure all parts are dry before reassembly.

Image: Demonstrates how to easily clean the water tank and humidifier filter.

Image: Close-up of the humidifier filter with washing instructions.
6. Troubleshooting
If you encounter issues with your Afloia Miro Pro, please refer to the following common problems and solutions:
| Problem | Possible Cause | Solution |
|---|---|---|
| Unit does not turn on | No power supply; Power cord not properly connected | Ensure the power cord is securely plugged into the unit and a working electrical outlet. Check the power source. |
| No humidification/mist | Water tank empty; Humidifier module not properly attached; Humidifier filter clogged | Refill the water tank. Ensure the humidifier module is securely attached. Clean or replace the humidifier filter. |
| Filter replacement indicator (red LED) remains on after filter change | Filter reset procedure not completed | After replacing the filter, press and hold the power button for 15 seconds to reset the indicator. |
| Reduced air purification performance | Air filter is dirty or expired | Check the air filter and replace it if necessary. |
| Unusual noise | Obstruction in fan; Unit not on a stable surface | Unplug the unit and check for any foreign objects. Ensure the unit is placed on a flat, stable surface. |
7. Specifications
| Feature | Specification |
|---|---|
| Model Number | Miro Pro |
| Brand | Afloia |
| Color | White |
| Product Dimensions | 7.6"D x 7.6"W x 21.79"H |
| Item Weight | 7 Pounds |
| Power Source | DC |
| Wattage | 26 watts |
| Noise Level | 24 Decibels (Sleep Mode) |
| Controller Type | Button Control |
| Filter Class | HEPA (3-in-1 Filtration) |
| CADR (Clean Air Delivery Rate) | 150 m³/h |
| Coverage Area | Purifies air 5 times/hour in rooms up to 438 ft² |
| Humidification Output | 5 oz/h (Mist-Free) |
| Water Tank Capacity | 64 oz |
| Continuous Operation | Up to 12.5 hours |
| Certifications | CE Certified, EPA Certified, FCC Certified |
8. Warranty and Support
Afloia products are designed for reliability and performance. For specific warranty details, please refer to the warranty card included with your purchase or visit the official Afloia website.
Customer Support:
If you have any questions, require technical assistance, or need to report an issue, please contact Afloia customer support through the following channels:
- Website: Visit the official Afloia website for FAQs and support contact information.
- Email: Refer to your product packaging or warranty card for customer service email.