Acbaeta X8 Pro
Acbaeta 4K Digital Camera X8 Pro Instruction Manual
Model: X8 Pro
Introduction
This manual provides detailed instructions for the safe and effective use of your Acbaeta 4K Digital Camera X8 Pro. Please read this manual thoroughly before using the camera and keep it for future reference.
Package Contents
Verify that all items listed below are included in your package:
- Acbaeta 4K Digital Camera X8 Pro
- 32GB High-speed SD Card
- Lithium Ion Battery
- USB Charging Cable
- Wrist Strap
- Camera Pouch
- User Manual (this document)
Camera Overview
Familiarize yourself with the camera's components.

Figure 1: Front view of the Acbaeta 4K Digital Camera X8 Pro.

Figure 2: Side view of the camera, showing the 2.83-inch LED screen and control buttons.
Setup
1. Battery Installation
- Open the battery compartment cover located on the bottom of the camera.
- Insert the Lithium Ion battery, ensuring the correct polarity as indicated inside the compartment.
- Close the battery compartment cover securely.

Figure 3: Illustration of battery and SD card insertion.
2. SD Card Installation
- Locate the SD card slot, usually near the battery compartment or on the side.
- Insert the provided 32GB High-speed SD card with the metal contacts facing the correct direction until it clicks into place.
- To remove, gently press the card until it pops out.
3. Charging the Battery
- Connect the camera to a power source using the supplied USB charging cable.
- The charging indicator light will illuminate. It will turn off or change color when fully charged.
- A full charge is recommended before first use.

Figure 4: Connecting the camera for charging via USB-C.
4. Powering On/Off
Press and hold the power button (usually marked with a power symbol) to turn the camera on or off.
Operating Instructions
1. Basic Controls and Navigation
The camera features a 2.83-inch LED screen for viewing and menu navigation. Use the directional buttons and 'OK' button to navigate through menus and select options.
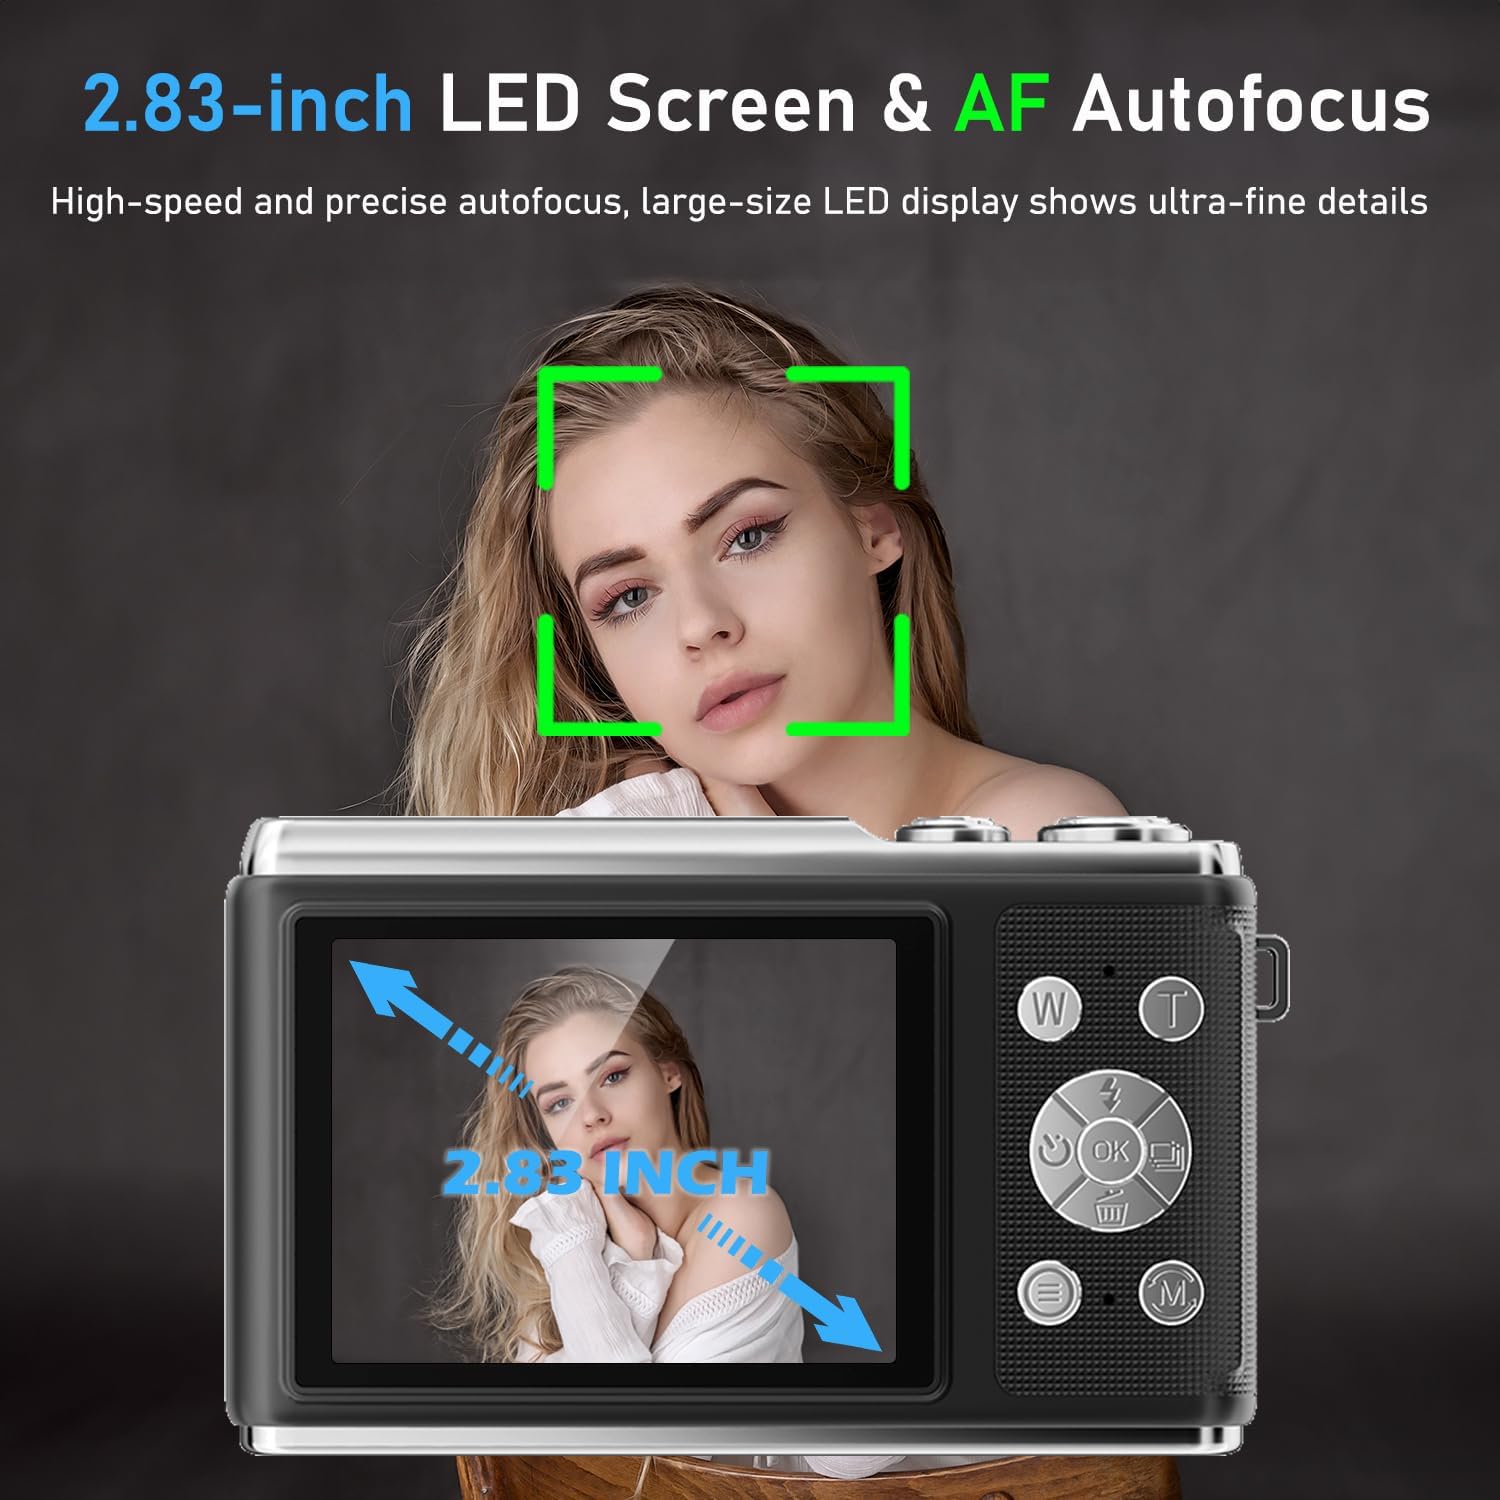
Figure 5: The 2.83-inch LED screen displaying autofocus in action.
2. Taking Photos
- Turn on the camera.
- Frame your shot using the LED screen.
- Press the shutter button halfway down to activate autofocus (AF). A green box will appear when focus is achieved.
- Press the shutter button fully to capture a 50MP photograph.

Figure 6: Example of 4K video and 50MP photo capability.
3. Recording Videos
- Switch the camera to video mode (refer to your camera's mode dial or menu).
- Press the shutter button to start recording 4K video.
- Press the shutter button again to stop recording.
4. Zoom Function
The camera features 16x digital zoom. Use the 'W' (Wide) and 'T' (Telephoto) buttons to zoom in and out. Note that digital zoom may reduce image quality at higher magnifications.

Figure 7: Demonstrating 16x digital zoom and anti-shake feature.
5. Anti-Shake Feature
Activate the anti-shake function in the camera settings to reduce blur caused by camera movement, especially useful during video recording or in low light conditions.
6. Flash Usage
The built-in flash can be enabled or disabled via the camera's menu or a dedicated flash button. Use it to illuminate subjects in low-light environments.
7. Creative Features
- Multiple Filters: Apply various filters to your photos for different artistic effects.
- Continuous Shooting: Capture a rapid sequence of photos by holding down the shutter button.
- Self-Timer: Set a delay before the photo is taken, allowing you to be in the shot.
- Time Stamp: Add the date and time to your photos.
- Video Pause: Pause and resume video recording within a single file.
- Loop Recording: Continuously record video, overwriting the oldest footage when the memory card is full.
- Webcam Function: Connect the camera to a computer via USB to use it as a webcam for live streaming or video calls.

Figure 8: The camera's versatility for live streaming, video calls, and vlogging.
8. Viewing and Transferring Files
- Playback: In playback mode, use the directional buttons to browse through your photos and videos on the 2.83-inch LED screen.
- Transfer to Computer: Connect the camera to your computer using the USB cable. The camera will appear as a removable disk, allowing you to copy files.
Maintenance
- Cleaning the Lens and Screen: Use a soft, lint-free cloth specifically designed for optical surfaces. Avoid harsh chemicals.
- Battery Care: Store batteries in a cool, dry place. Do not expose them to extreme temperatures. If not using the camera for an extended period, remove the battery.
- Storage: Store the camera in a dry, dust-free environment, preferably in its protective pouch, when not in use.
Troubleshooting
| Problem | Possible Cause / Solution |
|---|---|
| Camera does not power on. | Battery is depleted. Charge the battery fully. Battery is not inserted correctly. Reinsert with correct polarity. |
| Photos are blurry. | Autofocus did not engage. Press the shutter button halfway to focus before fully pressing. Anti-shake feature is off. Enable anti-shake in settings. Insufficient light. Use the flash or shoot in brighter conditions. |
| "Memory Card Error" message. | SD card is not inserted correctly. Reinsert the SD card. SD card is full. Transfer files to a computer and delete from the card, or use a new card. SD card is corrupted. Try formatting the card (this will erase all data). |
| Cannot transfer files to computer. | USB cable is not connected properly. Ensure a secure connection. Camera is not in the correct USB mode (e.g., Mass Storage). Check camera settings. |
Specifications
| Feature | Detail |
|---|---|
| Model | X8 Pro |
| Brand | Acbaeta |
| Video Resolution | Up to 4K |
| Photo Resolution | Up to 50MP |
| Digital Zoom | 16x |
| Autofocus | Yes (AF) |
| Image Stabilization | Digital |
| Screen | 2.83-inch LED |
| Flash | Built-in |
| Storage | Supports SD card (32GB included) |
| Battery Type | Lithium Ion (1 included) |
| Dimensions | 12.5 x 12.4 x 6.1 cm |
| Weight | 100 g |
| Photo Sensor Technology | CMOS |
| Supported File Format | JPEG |
| Maximum Aperture | f/2 |
Warranty and Support
For warranty information, please refer to the documentation included with your product packaging. If you encounter any issues or require technical assistance, please contact Acbaeta customer service at accustomerservice@163.com. Support is available to help resolve product-related concerns.
Ask a question about this manual
Ask about setup, troubleshooting, compatibility, parts, safety, or missing instructions. Manuals+ will review the question and use this page’s manual context to help answer it.