
Introduction
This manual provides detailed instructions for the installation, operation, and maintenance of your Bewinner A78SD3 Motherboard. Please read this manual thoroughly before proceeding with installation to ensure proper setup and functionality.
Product Overview
The Bewinner A78SD3 is an AM3 socket motherboard designed for desktop computers, supporting DDR3 memory and featuring integrated graphics, sound, and network capabilities. It offers a stable platform for various computing needs.
Key Features:
- Extensive Connectivity: Features 4 USB 2.0 ports and 4 Serial ATA 3.0 ports for versatile expansion capabilities and storage options.
- Powerful Performance: Supports AM3 interface APU processors and up to 16GB DDR3 memory (8GB per slot) for flexible applications.
- Seamless Visuals & Audio: Equipped with High Definition Multimedia Interface and VGA outputs for display, 100Mbps Ethernet for network connectivity, and an integrated 6-channel sound chip for audio.
- Stability Guaranteed: Utilizes a 4-phase power supply system and multi-phase power design for optimal performance and system stability.
- Ample Storage: Provides 4 SATA 3.0 ports to accommodate multiple hard drives or SSDs, addressing high-capacity storage needs.
Component Layout:

This diagram illustrates the main components and ports of the A78SD3 motherboard, including the CPU socket, DDR3 memory slots, PCI-E X16 slot, SATA ports, and I/O panel connectors.
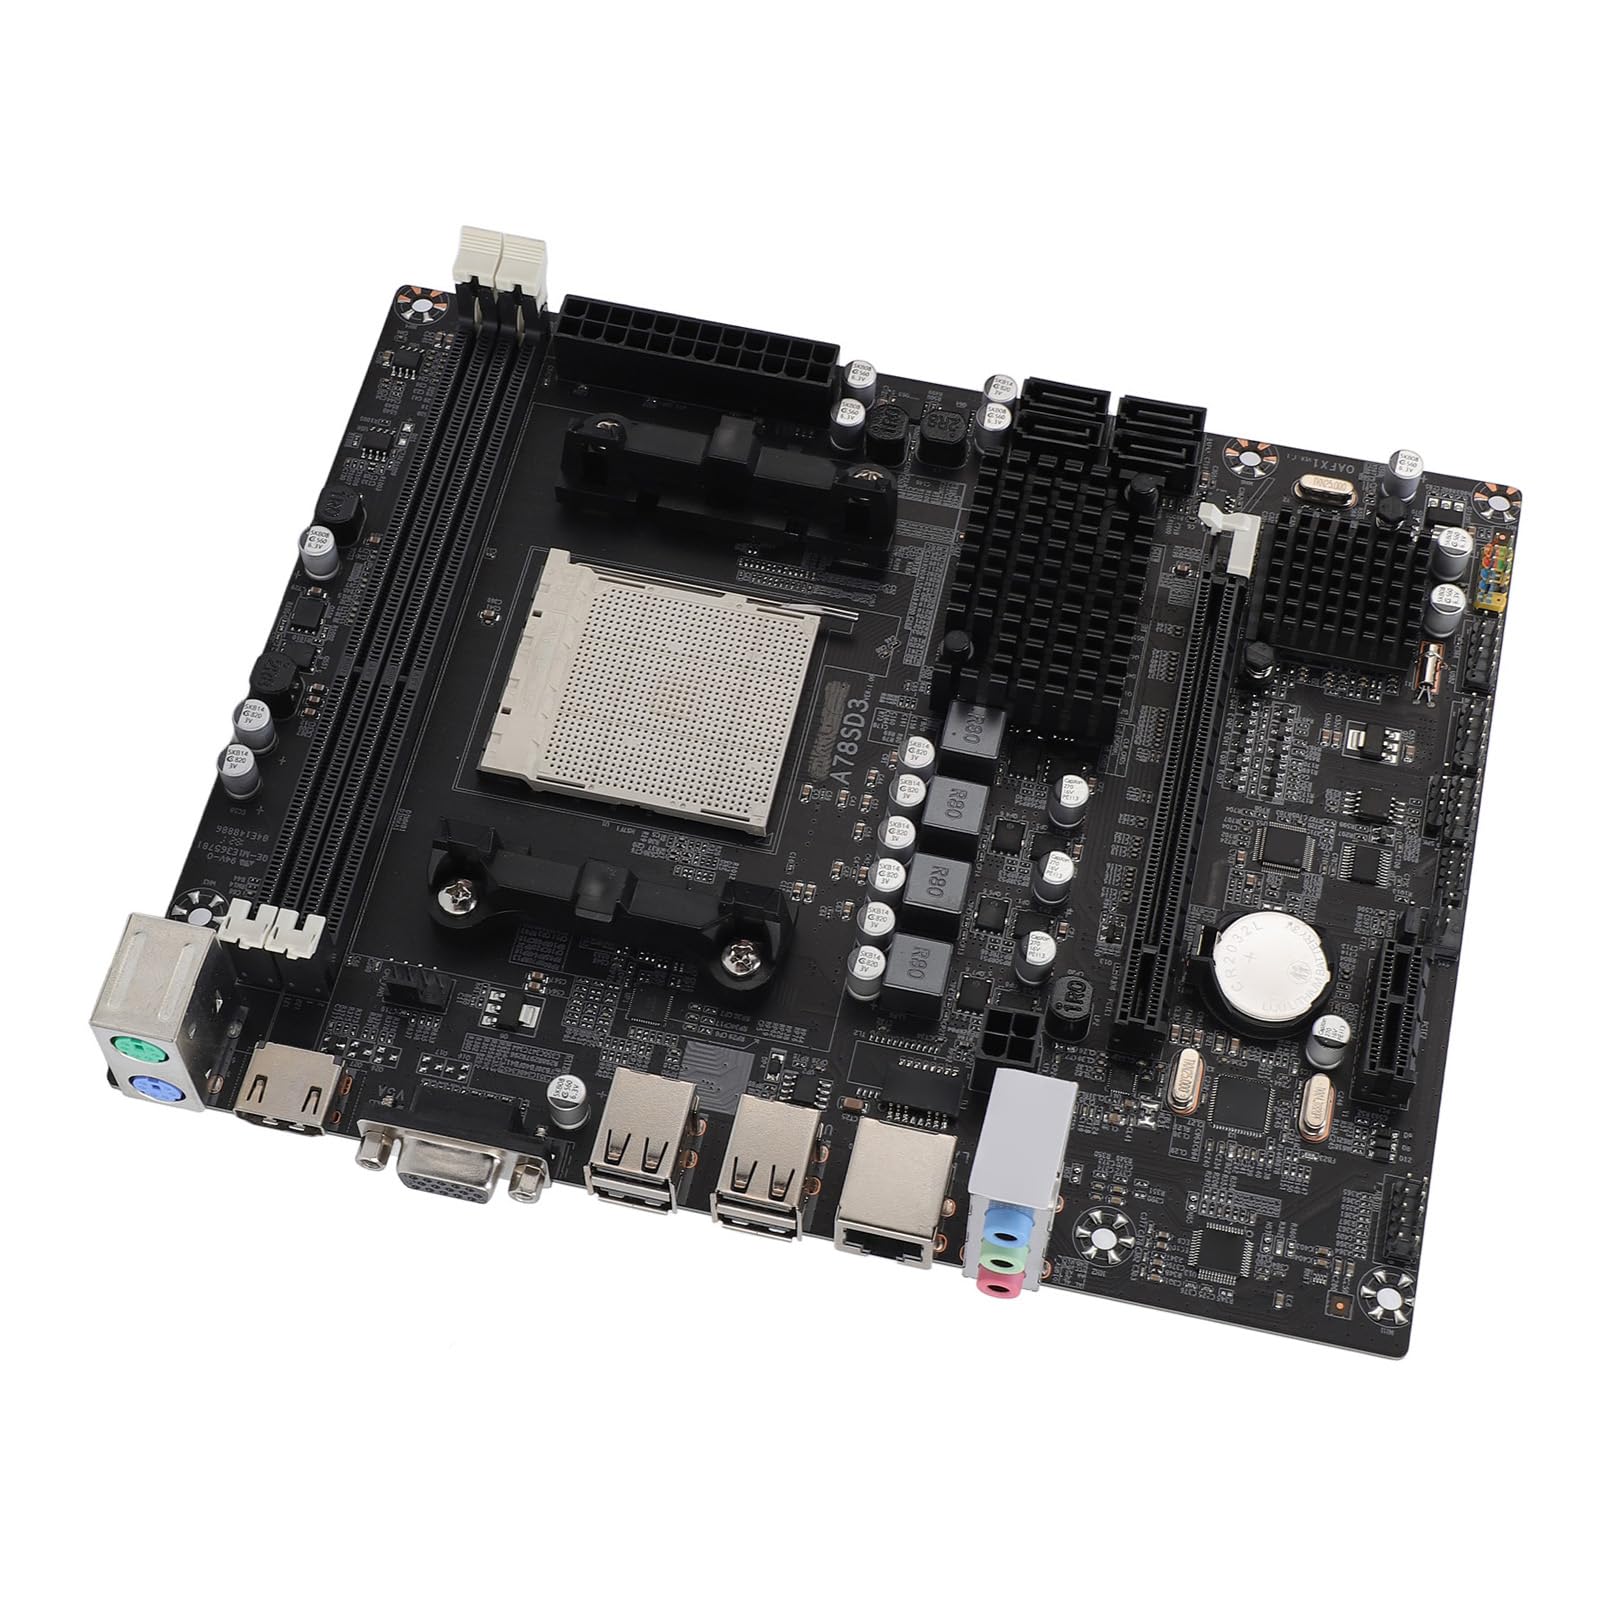
A general view of the Bewinner A78SD3 motherboard, highlighting its compact design and component placement.
Setup and Installation
Before You Begin:
- Ensure your power supply is disconnected from the wall outlet.
- Wear an anti-static wrist strap to prevent electrostatic discharge (ESD) damage to components.
- Gather necessary tools: a Phillips head screwdriver and thermal paste (if your CPU cooler does not have it pre-applied).
Step-by-Step Installation:
- Install the CPU: Open the CPU socket lever. Carefully align the CPU with the socket, matching the triangle or arrow indicator on the CPU to the one on the socket. Gently place the CPU into the socket without forcing it, then close the lever to secure it.
- Install the CPU Cooler: Apply thermal paste to the CPU (if not pre-applied on the cooler). Secure the CPU cooler onto the motherboard according to its manufacturer's instructions.
- Install Memory (RAM): Open the clips on the two DDR3 memory slots. Align the RAM module with the notch in the slot, then press firmly on both ends of the module until the clips snap into place. The A78SD3 has two DDR3 slots.

This image shows the two DDR3 memory slots. Ensure RAM modules are correctly oriented and fully seated.
- Mount the Motherboard: Install the I/O shield into your computer case. Carefully align the motherboard with the standoffs inside the case and secure it with screws.
- Connect Power: Connect the 24-pin ATX power connector and the 4-pin CPU power connector from your power supply unit (PSU) to the corresponding ports on the motherboard.
- Connect Storage Devices: Connect your SATA hard drives or SSDs to the SATA 3.0 ports on the motherboard using SATA data cables. Also, connect power cables from the PSU to these devices.
- Install Expansion Cards (Optional): If you are using a dedicated graphics card or other PCI-E cards, insert them into the PCI-E X16 slot and secure them with a screw or retention clip.
- Connect Front Panel Cables: Connect the power button, reset button, USB ports, and audio jacks from your computer case to the corresponding headers on the motherboard. Refer to your case manual for specific pin assignments.
- Connect Peripherals: Connect your keyboard, mouse, monitor, and other external peripherals to the appropriate I/O ports on the back of the motherboard.

The motherboard is shown alongside its accessories: a SATA data cable and the I/O shield, which should be installed in the computer case before mounting the motherboard.
Operating Instructions
First Boot:
After completing the hardware installation, connect your monitor, keyboard, and mouse. Connect the power supply to a wall outlet and power on your system. The system should display the BIOS/UEFI screen or begin the operating system installation process.
BIOS/UEFI Setup:
To enter the BIOS/UEFI setup, press the designated key (commonly DEL or F2) during the initial startup sequence. Within the BIOS/UEFI interface, you can configure boot order, system time, and other hardware-related settings. Consult the on-screen interface for specific options and navigation.
Driver Installation:
After successfully installing your operating system, it is crucial to install the necessary drivers for the motherboard's integrated components (chipset, audio, network, graphics). These drivers are typically provided on a CD/DVD included with the motherboard or can be downloaded from the official Bewinner support website.
Maintenance
Cleaning:
- Regularly clean dust from the motherboard and other internal components using compressed air. Always ensure the system is powered off and unplugged from the wall outlet before performing any cleaning.
- Avoid using liquid cleaners directly on electronic components.
Firmware Updates:
- Periodically check the Bewinner support website for BIOS/UEFI updates. These updates can improve system stability, enhance compatibility with new hardware, and optimize performance. Follow the provided update instructions carefully to avoid potential system damage.
Troubleshooting
No Power:
- Verify all power connections: the 24-pin ATX connector, the 4-pin CPU power connector, and the power supply connection to the wall outlet.
- Ensure the power supply's main switch is in the 'ON' position.
- Confirm that the case's power button cable is correctly connected to the corresponding header on the motherboard.
No Display:
- Ensure your monitor is properly connected to the correct video output port and is powered on.
- If a dedicated graphics card is installed, check that it is properly seated in its PCI-E slot and has all necessary power cables connected.
- If using integrated graphics, ensure the monitor is connected to the motherboard's VGA or HDMI port.
- Try reseating the RAM modules in their slots.
System Instability/Crashes:
- Monitor CPU and GPU temperatures. Overheating can lead to system instability and unexpected shutdowns.
- Ensure all motherboard and component drivers are correctly installed and up to date.
- If you suspect a memory issue, test RAM modules individually or run a memory diagnostic tool.
No Audio:
- Verify that your speakers or headphones are correctly connected to the appropriate audio jacks on the motherboard's I/O panel.
- Ensure audio drivers are installed and updated.
- Check the audio output settings within your operating system.
Specifications
| Feature | Detail |
|---|---|
| Brand | Bewinner |
| Model Name | A78SD3 (Item Model Number: Bewinner2oeg4qkn07) |
| Motherboard Chip | Integrated Sound Card, Network Card with Integrated Graphics |
| Main Chipset | for RS780 Series |
| Network Card Chip | Integrated 100Mbps Ethernet |
| Sound Chip | Integrated 6 Channel Sound Chip |
| Processor Specifications | Supports AM3 Interface for APU Processors |
| CPU Socket | AM3 |
| Supported CPU Quantity | 1 Piece |
| Memory Type | DDR3 1600/1333/1066MHz |
| Memory Slots | 2 x DDR3 (Maximum supported 16GB, 8GB per stick) |
| Expansion Slots | 1 x PCI-E X16 Graphics Card Slot, 1 x COM Serial Port Header, 2 x USB 2.0 Headers, 4 x Serial ATA 3.0 Ports |
| I/O Interfaces | PS/2 (Keyboard/Mouse), 1 x RJ45 Ethernet Port, 1 x VGA Port, 1 x High Definition Multimedia Interface Output, 4 x USB 2.0 Ports, Sound Interfaces |
| Motherboard Size | Approx. 17x21.3cm / 6.7x8.4in |
| Battery Type | 1 x CR2032L Battery (240mAh) |
| Power Connectors | 4 Pin and 24 Pin Power Connector |
| Power Supply Mode | 4 Phase |
| Item Weight | 1.22 pounds |
| Package Dimensions | 11.02 x 8.27 x 2.36 inches |
| ASIN | B0DYDWRCQM |
| Date First Available | February 25, 2025 |

The physical dimensions of the motherboard are approximately 17cm (6.7 inches) in width and 21.3cm (8.4 inches) in length.
Warranty and Support
Warranty Information:
Please refer to the warranty card included with your product packaging for specific warranty terms and conditions. Bewinner typically provides a limited warranty for manufacturing defects. Retain your proof of purchase for warranty claims.
Customer Support:
For technical assistance, troubleshooting, or warranty claims, please contact Bewinner customer support through their official website or the retailer where the product was purchased. When contacting support, please have your purchase receipt and product serial number readily available.