1. Introduction
Thank you for choosing the Fudajo Automatic Egg Incubator. This manual provides essential information for the safe and efficient operation of your incubator. Please read it thoroughly before use and keep it for future reference.
This compact and efficient incubator is designed for incubating up to 24 eggs, featuring automatic egg turning, precise temperature and humidity control, an integrated ovoscope, and an emergency power supply option. It is ideal for various poultry eggs, including chickens, ducks, geese, pigeons, and quails.

Image: The Fudajo Automatic Egg Incubator, a compact device designed for efficient egg incubation.
2. Safety Information
- Always connect the incubator to a grounded power outlet.
- Do not immerse the unit in water or any other liquid.
- Keep out of reach of children and pets.
- Unplug the incubator before cleaning or maintenance.
- Ensure proper ventilation around the unit.
- Do not operate if the power cord or plug is damaged.
3. Product Components
The Fudajo Automatic Egg Incubator comes with the following main components:
- Incubator Unit with transparent lid
- Automatic Egg Turning Mechanism
- Digital Display and Control Panel
- Integrated Ovoscopy Lamp
- Water Bottles/Reservoirs for Humidity Control
- Power Cable (AC)
- Emergency Power Cable (DC, for battery connection)
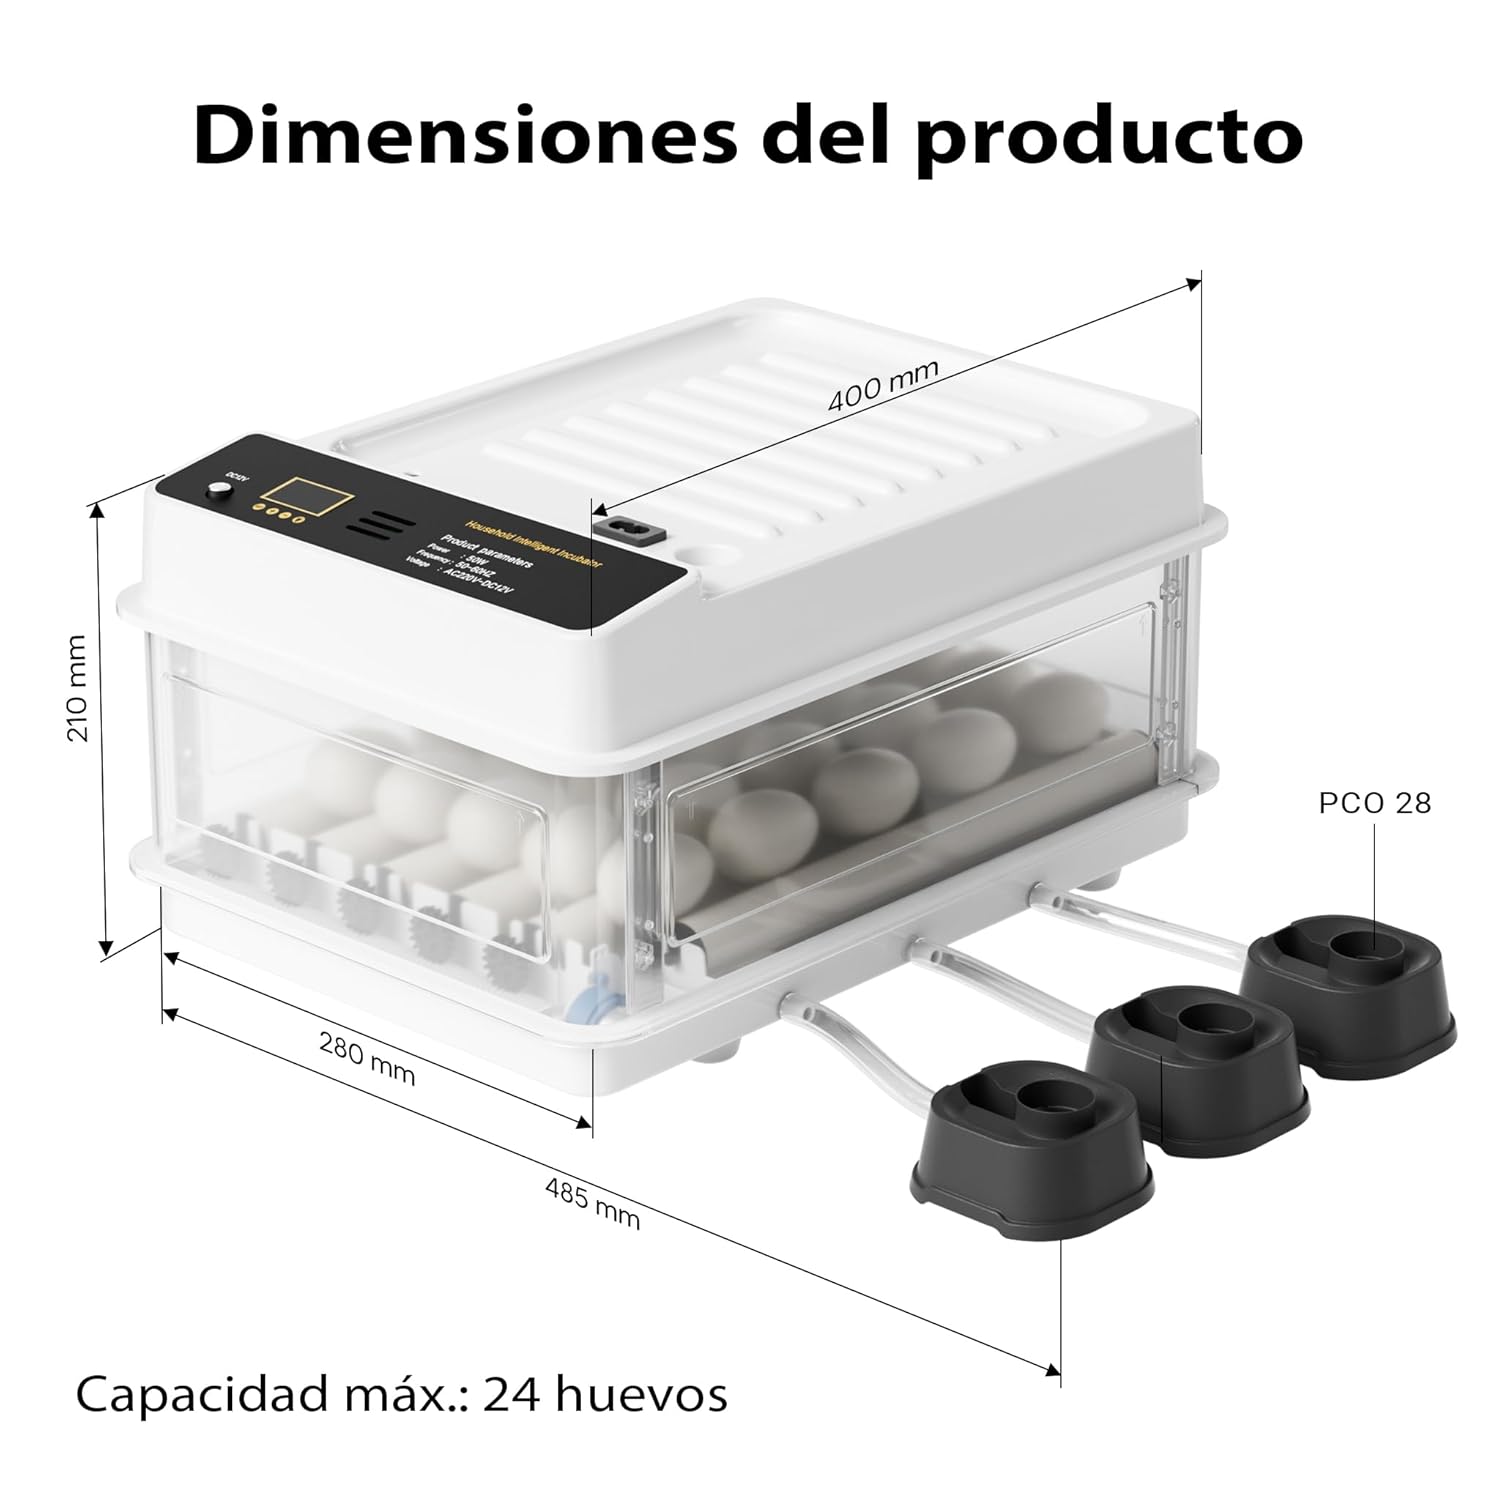
Image: Product dimensions showing the compact size of the incubator (400 x 485 x 210 mm).
4. Setup and Preparation
- Unpacking: Carefully remove all components from the packaging.
- Placement: Place the incubator on a stable, level surface away from direct sunlight, drafts, and extreme temperature fluctuations.
- Water Filling: Fill the external water bottles/reservoirs with distilled water and connect them to the incubator's humidity system. Ensure the water level is maintained throughout the incubation period.
- Power Connection: Connect the AC power cable to the incubator and then to a suitable power outlet. For emergency backup, connect the DC cable to a 12V battery (not included).
- Pre-heating: Allow the incubator to run for at least 2-3 hours before placing eggs inside to stabilize the internal temperature and humidity.

Image: The incubator demonstrating its dual power supply capability, allowing connection to both AC mains and a 12V battery for emergency backup.
5. Operating Instructions
5.1. Temperature and Humidity Control
The incubator features a precise digital display for monitoring and adjusting temperature and humidity. Refer to the specific requirements for the type of eggs you are incubating.
- Use the control panel buttons to set the desired temperature.
- Monitor humidity levels via the display and replenish water in the external reservoirs as needed to maintain optimal conditions.
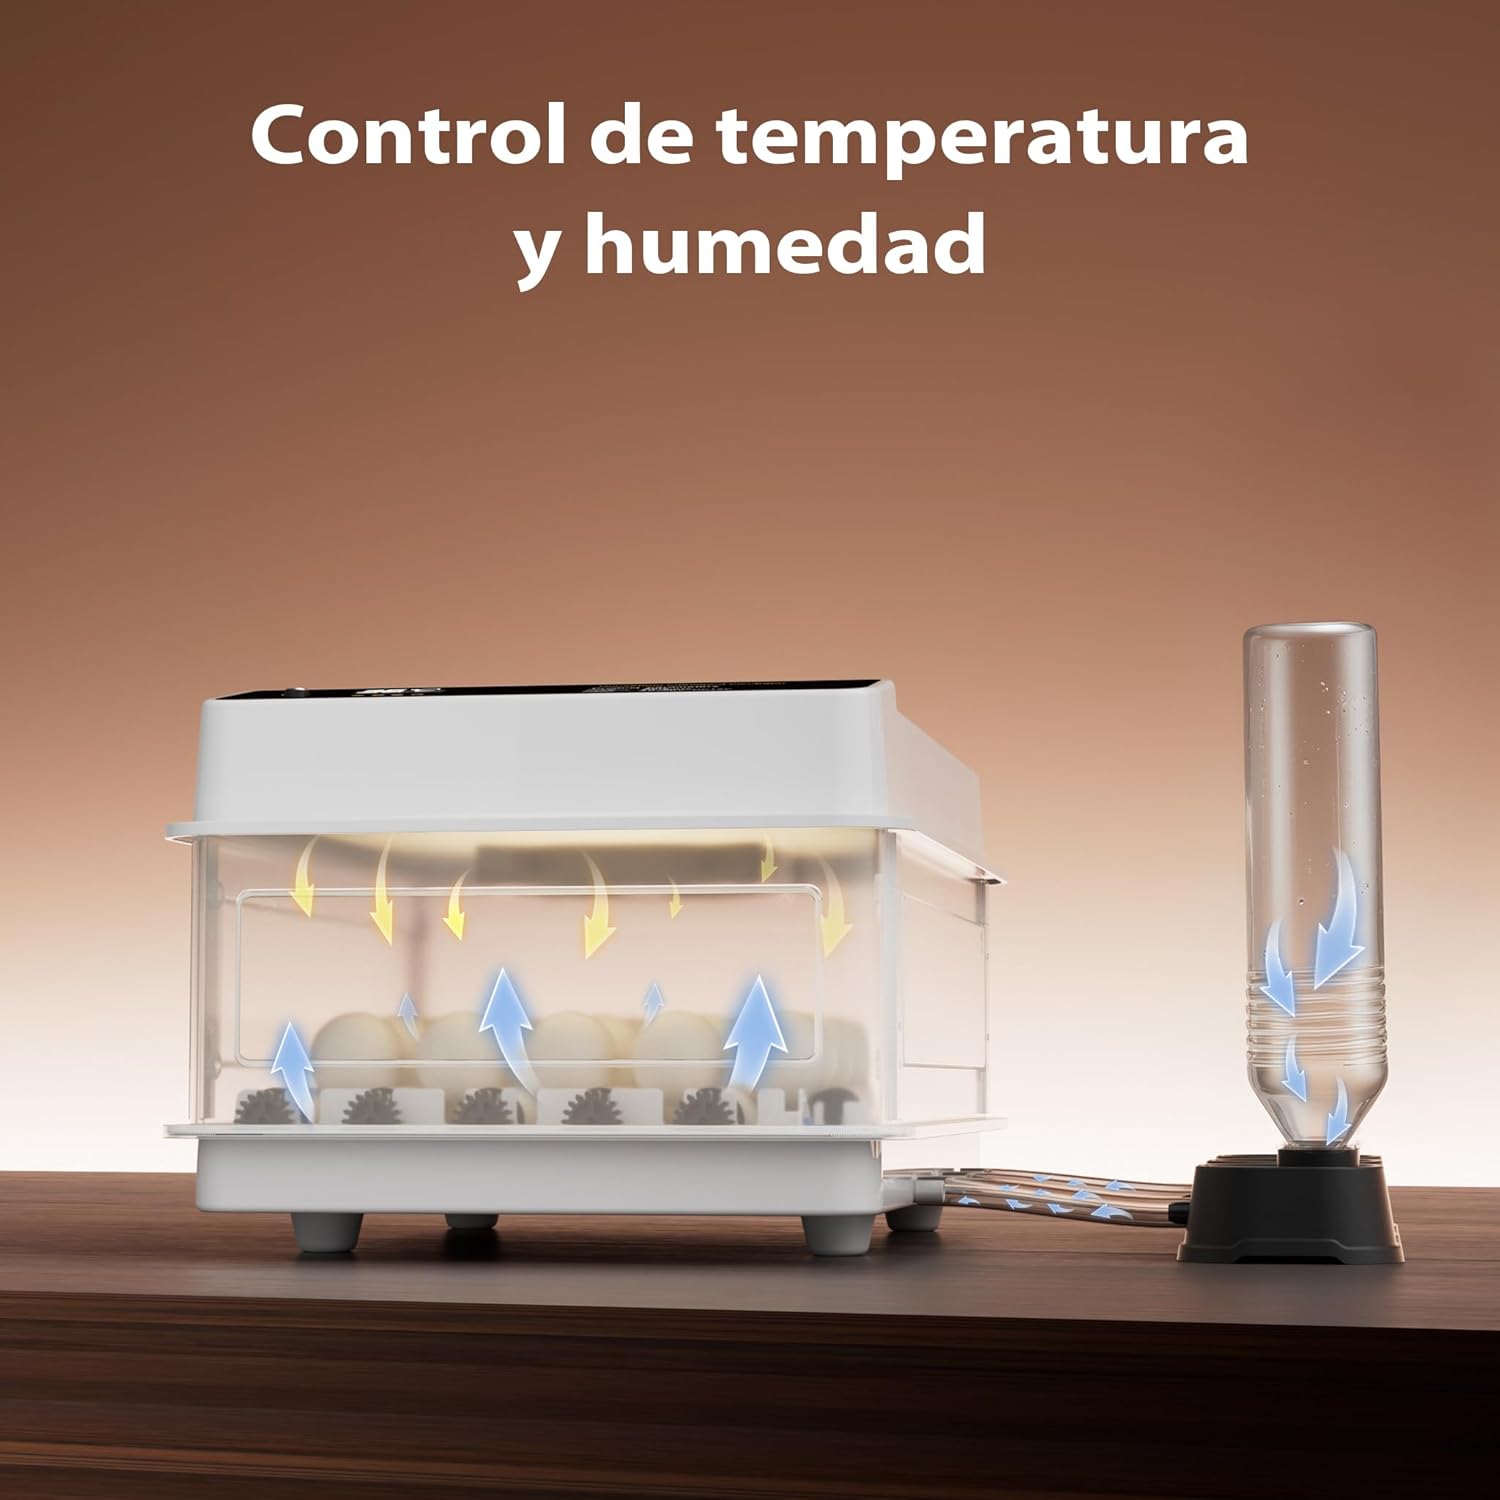
Image: Visual representation of the incubator's temperature and humidity control system, ensuring uniform air circulation.
5.2. Egg Placement and Automatic Turning
Carefully place the fertilized eggs into the rolling tray. The incubator's integrated motor will automatically turn the eggs at regular intervals to ensure even heat distribution and prevent the embryo from sticking to the shell.
- The customizable rolling tray accommodates various egg sizes (chicken, duck, goose, quail).
- The automatic turning function is pre-set for optimal embryonic development.

Image: Close-up of the automatic egg turning mechanism, showing gears that gently rotate the eggs.
5.3. Using the Integrated Ovoscope
The built-in ovoscope allows you to monitor the development of the embryos without disturbing the incubation process. Simply place an egg over the ovoscope light to observe the internal changes.

Image: The integrated ovoscope illuminating an egg, with illustrations showing different stages of embryonic development.
5.4. Emergency Power Supply
In case of a power outage, the incubator can be connected to a 12V battery using the provided emergency power cable. This ensures continuous heat supply and protects the incubation process from interruptions.

Image: The incubator shown with various types of eggs (quail, duck, goose, chicken), highlighting its versatility.
6. Maintenance and Cleaning
- Always unplug the incubator before cleaning.
- Clean the interior and exterior surfaces with a soft, damp cloth. Do not use abrasive cleaners.
- Ensure all components are dry before re-connecting power.
- Regularly check and clean the water reservoirs to prevent algae or bacterial growth.
- After each incubation cycle, thoroughly clean and disinfect the incubator to prevent contamination for the next batch.
7. Troubleshooting
| Problem | Possible Cause | Solution |
|---|---|---|
| Incubator not turning on | No power supply; damaged cable | Check power connection; inspect cable for damage. |
| Temperature fluctuations | Room temperature unstable; lid not sealed properly | Move incubator to a stable environment; ensure lid is closed securely. |
| Humidity too low | Insufficient water in reservoirs | Refill water reservoirs; check for blockages in humidity system. |
| Eggs not turning | Turning mechanism jammed; motor issue | Check for obstructions; contact customer support if motor is faulty. |
8. Specifications
- Model: 64151 (B0C544J1JN)
- Capacity: Up to 24 eggs
- Power: 80 W
- Dimensions: 400 x 485 x 210 mm (15.7 x 19.1 x 8.3 inches)
- Weight: 1.68 kg (3.7 lbs)
- Power Supply: AC (Mains) / DC (12V Battery)
- Features: Automatic egg turning, precise temperature/humidity control, integrated ovoscope, emergency power connection.
9. Warranty and Support
Fudajo products are manufactured to high-quality standards. For warranty information or technical support, please refer to the contact details provided with your purchase or visit the official Fudajo website. Please have your model number (64151) and purchase date ready when contacting support.


