1. Product Overview
The AOOCOO Dual Monitor KVM Switch allows you to control two computers or laptops using a single set of wired or wireless keyboard and mouse. It enables sharing of two monitors and four USB 3.0 devices between the two connected computers.
This KVM switch supports high resolutions up to 8K@30Hz and 4K@144Hz, and is backward compatible with lower resolutions. It is designed for seamless switching and enhanced productivity in various environments.

Image: Front and rear view of the AOOCOO Dual Monitor KVM Switch, showing all ports and included cables.

Image: Visual representation of the KVM switch supporting various resolutions, including 8K@30Hz, 4K@144Hz, and 1080P.
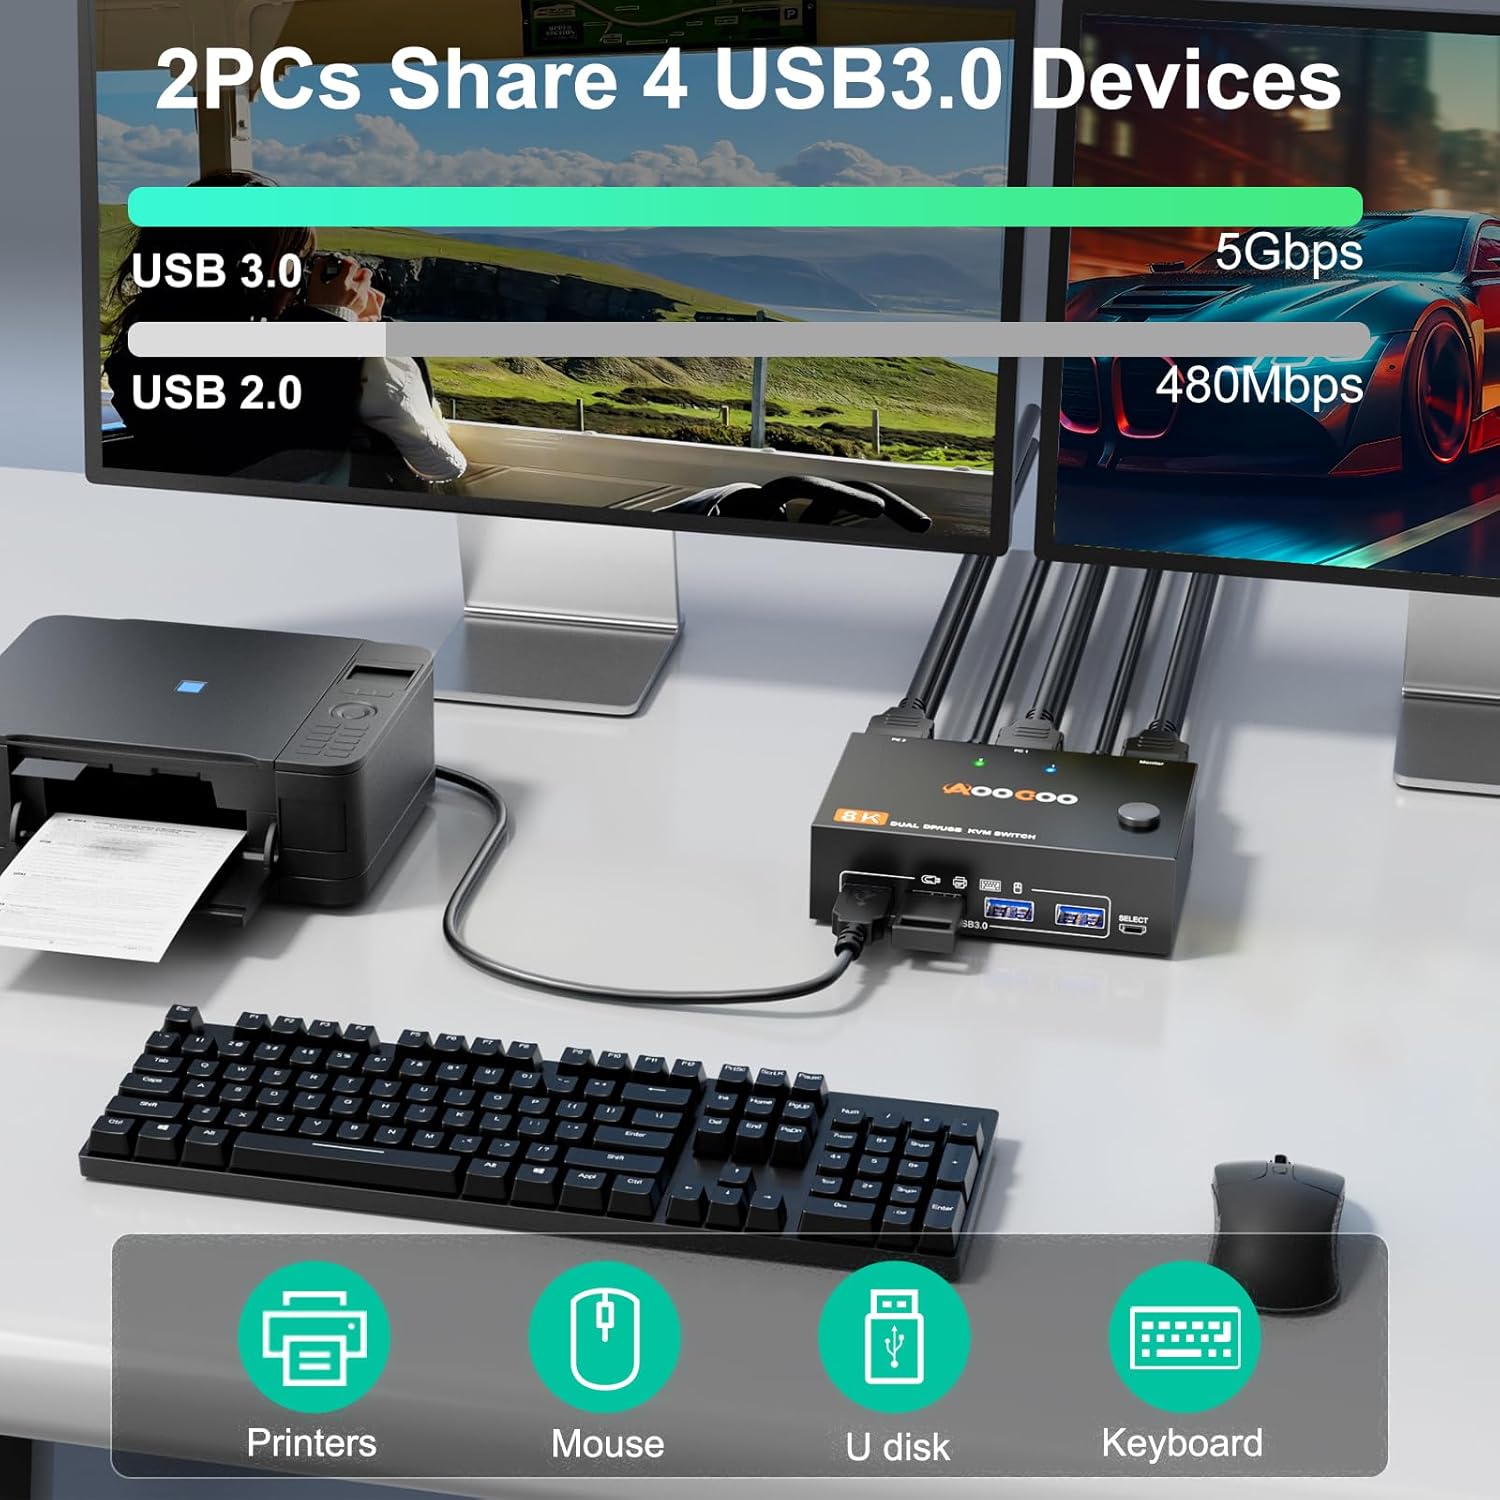
Image: Diagram illustrating two personal computers connected to the KVM switch, sharing a printer, mouse, USB disk, and keyboard through the USB 3.0 ports.

Image: The KVM switch shown in a minimalist setting, highlighting its driver-free, plug-and-play compatibility with Windows, Chrome OS, and Mac OS.

Image: Collage showing diverse applications of the KVM switch, including working from home, office use, media teaching, video conferencing, and gaming setups.
2. Package Contents
Please verify that all items are present in the package:
- 1 x Dual Monitor KVM Switch
- 2 x USB 3.0 Cables (1.5m / 4.92ft)
- 1 x Wired Remote Control (1.5m / 4.92ft)
- 1 x User Manual
- 1 x Power Cable (1.5m / 4.92ft) - Note: Power cable is mentioned in the image, not in feature bullets. Adding it for completeness.

Image: A visual list of all items included in the product package, detailing the KVM switch, USB cables, wired controller, power cable, and user manual.
3. Setup Instructions
Follow these steps to connect your KVM switch:
- Ensure both computers and monitors are powered off before beginning the connection process.
- Connect two DisplayPort cables from the DisplayPort output ports of PC1 to the "DP INPUT B1" and "DP INPUT A1" ports on the KVM switch.
- Connect two DisplayPort cables from the DisplayPort output ports of PC2 to the "DP INPUT B2" and "DP INPUT A2" ports on the KVM switch.
- Connect one USB 3.0 cable from a USB 3.0 port on PC1 to the "USB3.0" port next to "PC 1" on the KVM switch.
- Connect one USB 3.0 cable from a USB 3.0 port on PC2 to the "USB3.0" port next to "PC 2" on the KVM switch.
- Connect your two monitors to the "DP OUT B" and "DP OUT A" ports on the KVM switch using DisplayPort cables.
- Connect your keyboard, mouse, and other USB 3.0 devices (e.g., printer, USB drive) to the USB 3.0 ports on the front panel of the KVM switch.
- (Optional) Connect the wired remote control to the dedicated port on the KVM switch for convenient switching.
- Connect the power cable to the KVM switch and a power outlet.
- Power on your monitors and then your computers.
Important Note:
- Each computer requires two DisplayPort output ports to support extended display.
- If your PC lacks dual DP outputs, adapters (HDMI to DP, Mini DP to DP, or USB-C to DP) are necessary and preferred.
- Use DP1.4 cables and keep cable lengths as short as possible for stable signal transmission.
- This KVM switch does not support EDID emulation. Desktop icon positions may rearrange upon switching or system startup.

Image: Detailed connection diagram showing how to connect two PCs, two monitors, and USB devices to the KVM switch using DP1.4 and USB 3.0 cables.
4. Operating Instructions
The KVM switch offers two convenient methods for switching between connected computers:
4.1 Switching Methods
- Physical Button Switch: Press the "SELECT" button located on the front panel of the KVM switch to toggle between PC1 and PC2.
- Wired Remote Control: Use the included wired remote control to switch between PC1 and PC2. This provides flexibility for placement.
A two-color indicator light on the KVM switch will illuminate to show which computer is currently active.

Image: Illustration demonstrating the two switching methods: pressing the physical button on the KVM unit and using the wired remote control.
4.2 Display Modes (Extended vs. Copy)
When using two monitors, you can configure them in either Extended Mode or Copy Mode:
- Extended Mode: In this mode, the two monitors display different images, extending your desktop workspace. You can drag windows between the monitors.
- Copy Mode: In this mode, both monitors display the same image from the selected PC (PC1 or PC2).
To switch between these display modes on your computer, press "Windows + P". A small window will pop up, allowing you to choose "copy" mode or "extend" mode.

Image: Comparison of Extended Mode (two distinct displays) and Copy Mode (mirrored displays) for dual monitor setups, with instructions on how to switch modes using "Windows + P".
5. Specifications
| Feature | Description |
|---|---|
| Model | 8K DP 2 PC 2 Dual Monitor KVM Switch (B0DYCFXDJJ) |
| Brand | AOOCOO |
| Video Ports | DisplayPort 1.4 |
| USB Ports | 4 x USB 3.0 (for peripherals), 2 x USB 3.0 (for PC connection) |
| Max Resolution | 8K@30Hz, 4K@144Hz |
| Backward Compatibility | Yes (e.g., 4K@60Hz, 4K@30Hz, 1440P@60Hz) |
| Switching Methods | Physical button, Wired remote control |
| Operating Mode | ON-ON |
| Current Rating | 2 A |
| Operating Voltage | 5 Volts |
| Contact Type | Normally Open |
| Connector Type | Plug In |
| Terminal | Solder |
| Circuit Type | 2 Way |
| Mounting Type | Rack Mount |
| Contact Material | Metal |
6. Maintenance
To ensure the longevity and optimal performance of your KVM switch, follow these maintenance guidelines:
- Keep the device in a cool, dry place, away from direct sunlight, heat sources, and excessive humidity.
- Avoid placing heavy objects on top of the KVM switch.
- Clean the exterior of the device with a soft, dry cloth. Do not use liquid cleaners or aerosols.
- Ensure all cables are securely connected to prevent signal loss or intermittent issues.
- Periodically check for dust accumulation in the ports and vents, and gently clean if necessary using compressed air.
7. Troubleshooting
If you encounter issues with your KVM switch, please refer to the following common troubleshooting steps:
- No Display on Monitor:
- Ensure all DisplayPort cables are securely connected to both the KVM switch and your monitors/computers.
- Verify that each computer has two active DisplayPort outputs.
- Check if the correct input source is selected on your monitors.
- Try restarting the KVM switch and then the computers.
- Ensure you are using DP1.4 cables and that their length is appropriate (shorter is better for high resolutions).
- Keyboard/Mouse Not Responding:
- Ensure the USB 3.0 cables connecting the KVM switch to your PCs are properly plugged in.
- Verify that your keyboard and mouse are connected to the correct USB 3.0 ports on the KVM switch's front panel.
- Try connecting the keyboard/mouse directly to the computer to confirm they are functional.
- Some specialized gaming keyboards/mice with high power consumption or specific drivers might not be fully compatible. Try a standard keyboard/mouse.
- Desktop Icons Rearrange After Switching:
- This KVM switch does not support EDID emulation. This behavior is normal and expected.
- Consider using third-party software to save and restore desktop icon layouts if this is a frequent inconvenience.
- Resolution Issues or Flickering:
- Ensure your graphics card drivers are up to date on both computers.
- Verify that your DisplayPort cables are DP1.4 compliant and of good quality.
- Reduce the cable length if possible.
- Check your monitor's refresh rate settings.
8. Warranty and Support
AOOCOO products are designed for reliability and performance. For specific warranty information, please refer to the warranty card included with your product or contact your retailer.
For technical support, troubleshooting assistance, or product inquiries, please contact AOOCOO customer service through the contact information provided on the product packaging or the official AOOCOO website.
Please have your product model number (B0DYCFXDJJ) and purchase details ready when contacting support.


