1. Introduction
This manual provides detailed instructions for the installation, operation, and maintenance of your ARES WING Dual Monitor Mount. This heavy-duty gas spring monitor desk stand is designed to support two monitors, including ultrawide screens, enhancing your workspace ergonomics and organization.
The ARES WING Dual Monitor Mount is engineered for durability and flexibility, accommodating a wide range of monitor sizes and weights. Please read this manual thoroughly before installation and use to ensure proper setup and safe operation.
2. Safety Information
Please observe the following safety precautions to prevent injury or damage to the product and your equipment:
- Weight Capacity: Do not exceed the maximum weight capacity of 59 lbs for flat monitors and 48 lbs for curved monitors per arm. Overloading can cause instability and damage.
- Proper Installation: Ensure the mount is securely attached to a stable desk surface according to the instructions. Improper installation can lead to the mount falling or tipping.
- Gas Spring Adjustment: Adjust the gas spring tension carefully. Incorrect tension can cause monitors to drop unexpectedly or be difficult to position. Refer to the adjustment section for detailed steps.
- Cable Management: Route cables properly to prevent pinching or snagging, which can damage cables or cause monitors to move unexpectedly.
- Children and Pets: Keep children and pets away from the monitor mount during installation and adjustment to prevent accidents.
- Regular Checks: Periodically check all screws and connections to ensure they remain tight and secure.
3. Package Contents
Verify that all components are present before beginning installation. If any parts are missing or damaged, please contact customer support.

Image: The ARES WING Dual Monitor Mount with its main components, including the desk clamp, grommet mount, USB cable, and cable clips.
- Dual Monitor Arm Assembly (2 arms)
- Desk Pole
- C-Clamp Mounting Base
- Grommet Mounting Base
- VESA Plates (2 units)
- USB-A to USB-C Cable
- Cable Management Clips
- Hardware Kit (screws, washers, Allen wrenches)
- Instruction Manual
4. Specifications
| Feature | Detail |
|---|---|
| Brand | ARES WING |
| Model | B0DY7S2W1K |
| Material | Premium-grade Steel and Aluminum |
| Color | Black |
| Monitor Compatibility (Flat) | 24-57 inches, up to 59 lbs per arm |
| Monitor Compatibility (Curved) | 24-57 inches, up to 48 lbs per arm |
| VESA Compatibility | 75x75mm, 100x100mm, 100x200mm, 200x100mm, 200x200mm |
| Tilt Range | +70° to -45° |
| Swivel Range | +90° to -90° |
| Rotation Range | 360° |
| Maximum Height | 25.8 inches (from desk surface) |
| Maximum Arm Extension | 29.7 inches |
| Desk Thickness (C-Clamp) | 0.47 - 1.77 inches |
| Desk Thickness (Grommet) | 0.47 - 1.97 inches |
| Integrated USB Ports | 1x USB-A 3.0, 1x USB-C (10W charging, 5Gbps data transmission) |
| Product Weight | 23.9 pounds |
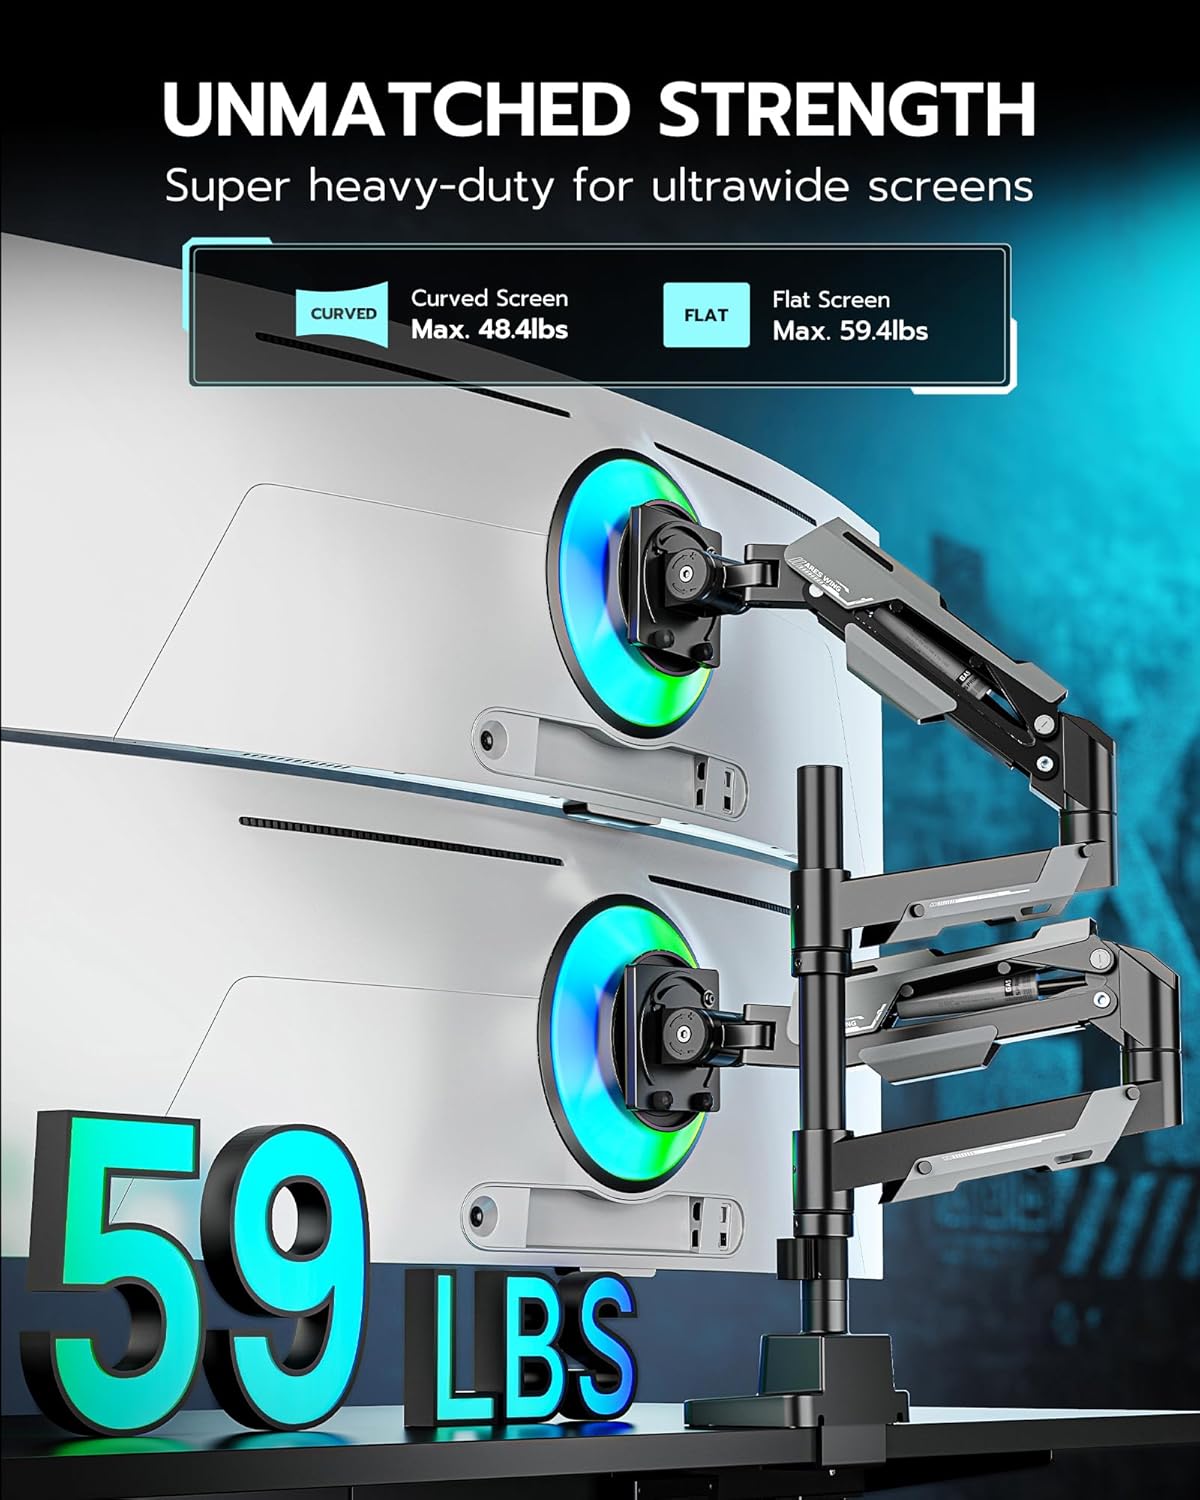
Image: Illustration of the maximum weight capacity for flat (59 lbs) and curved (48 lbs) monitors per arm.

Image: Visual representation of the monitor mount supporting two ultrawide screens up to 57 inches, highlighting VESA patterns (75x75, 100x100, 100x200, 200x100, 200x200).
5. Setup & Installation
Follow these steps carefully for a secure and stable installation of your ARES WING Dual Monitor Mount.
5.1 Choose Your Mounting Option
The mount offers two installation methods: C-clamp or Grommet mount. Select the option best suited for your desk.
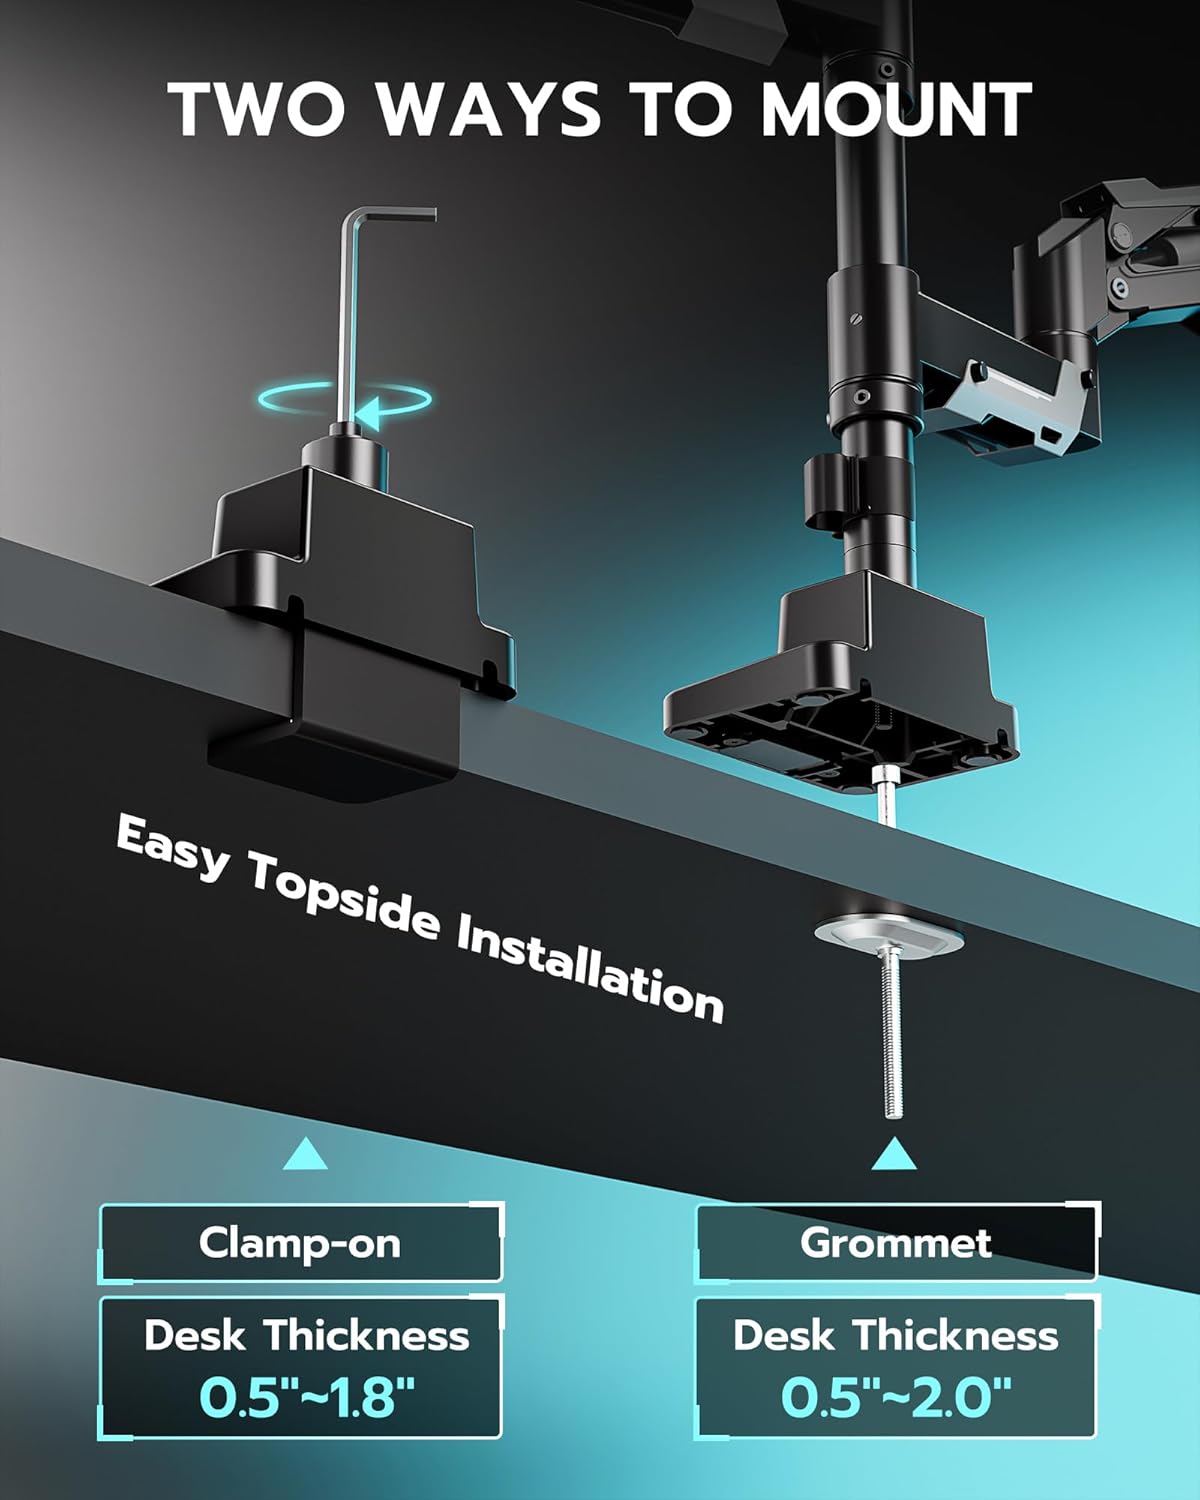
Image: Illustration of the two mounting methods: C-clamp for desk edges (0.47-1.77 inches thick) and Grommet mount for desks with a pre-drilled hole (0.47-1.97 inches thick).
C-Clamp Installation:
- Attach the C-clamp base to the desk pole using the provided screws.
- Position the C-clamp on the edge of your desk.
- Tighten the clamp screw until the mount is firmly secured to the desk. Ensure it does not wobble.
Grommet Mount Installation:
- Attach the grommet base to the desk pole.
- Insert the grommet bolt through the desk hole and secure it from underneath with the washer and nut.
- Tighten the nut until the mount is stable.
5.2 Attaching VESA Plates to Monitors
Before attaching monitors, ensure they are compatible with VESA 75x75mm, 100x100mm, 100x200mm, 200x100mm, or 200x200mm patterns. If your monitor lacks VESA holes, a VESA adapter may be required (not included, but ARES WING offers compatible adapters).
- Carefully place your monitor face down on a soft, clean surface.
- Align the VESA plate with the mounting holes on the back of your monitor.
- Secure the VESA plate using the appropriate screws from the hardware kit. Do not overtighten.
5.3 Mounting Monitors to Arms
- Slide the monitor arm onto the desk pole and adjust to your desired initial height. Secure with the collar.
- With the VESA plate attached to your monitor, carefully slide the monitor onto the VESA head of the arm until it clicks into place.
- Ensure the quick-release mechanism is engaged and the monitor is securely locked.
- Repeat for the second monitor.
5.4 Gas Spring Tension Adjustment
The gas spring tension needs to be adjusted to match the weight of your monitors. This ensures the arms hold their position and move smoothly.
- Once monitors are mounted, position the arm horizontally.
- Use the provided Allen wrench to adjust the tension screw located on the arm.
- If the arm drops: Turn the screw clockwise (indicated by a '+' sign) to increase tension.
- If the arm rises: Turn the screw counter-clockwise (indicated by a '-' sign) to decrease tension.
- Adjust incrementally until the arm stays in position when released and moves smoothly with minimal effort.
5.5 Cable Management
Utilize the integrated cable management system to keep your workspace tidy.
- Route monitor cables (power, video) along the underside of the monitor arms.
- Use the provided cable clips to secure the cables neatly within the arm channels and down the desk pole.
- Connect the integrated USB cable from the mount's base to your computer's USB port to enable the USB-A and USB-C ports on the mount.
6. Operation & Adjustments
The ARES WING Dual Monitor Mount offers extensive adjustability for an ergonomic viewing experience.
6.1 Monitor Position Adjustments

Image: Visual guide to the flexible adjustments: Tilt (+70° to -45°), Swivel (+90° to -90°), and Rotation (360°).
- Height Adjustment: Loosen the collar on the desk pole to slide the entire arm assembly up or down. Retighten to secure. The gas spring arms also allow for vertical movement within their range.
- Tilt: Grasp the top and bottom edges of your monitor and gently tilt it forward or backward to achieve an angle between +70° and -45°.
- Swivel: Rotate your monitor left or right at the VESA plate connection point, up to 90° in either direction.
- Rotation: Rotate your monitor 360° from landscape to portrait orientation.
- Arm Extension/Retraction: Push or pull the monitor arms to extend or retract them, providing a maximum extension of 29.7 inches.
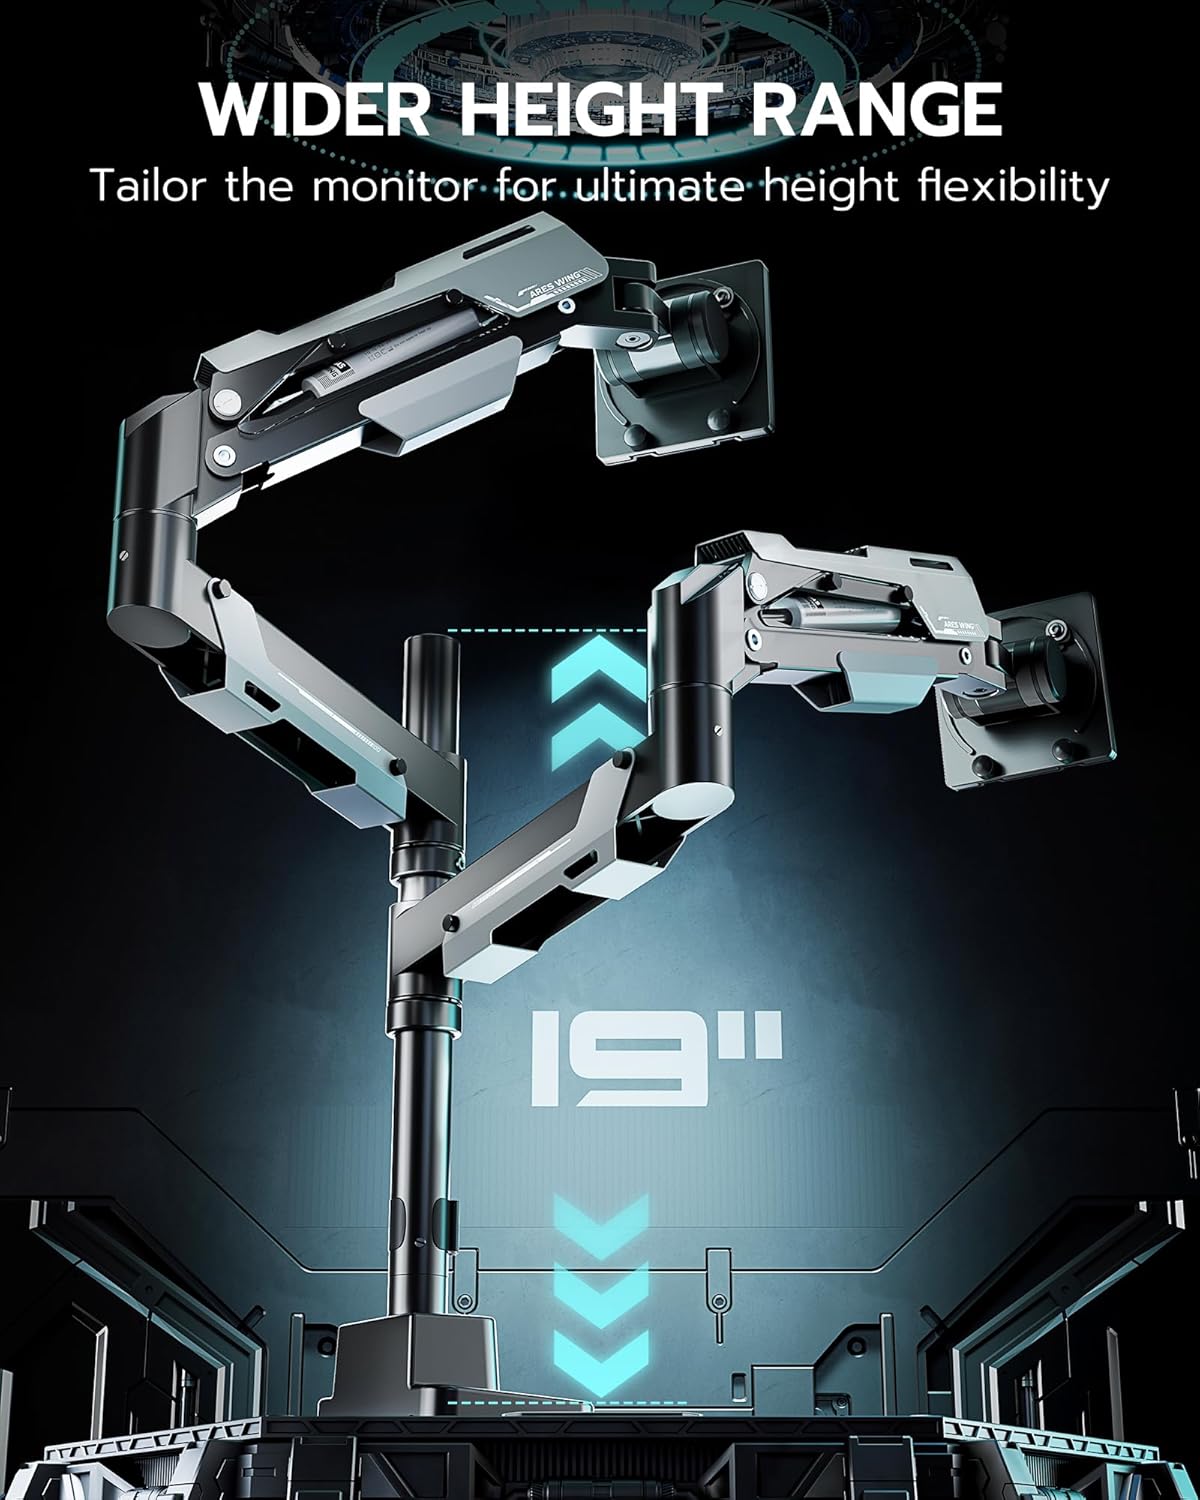
Image: Illustration demonstrating the 19-inch height adjustment range of the monitor mount, allowing for various screen stacking configurations.
6.2 Using Integrated USB Ports
The base of the monitor mount includes a USB-A 3.0 and a USB-C port for convenient connectivity and charging.

Image: Detailed view of the USB-A 3.0 and USB-C ports integrated into the mount's base, offering 5Gbps data transmission and 10W charging.
- Ensure the included USB cable is connected from the mount's base to an available USB port on your computer.
- These ports provide 10W charging for devices like phones, tablets, smartwatches, and headphones.
- The USB-A 3.0 port supports data transmission speeds of up to 5Gbps.
7. Maintenance
Regular maintenance helps ensure the longevity and optimal performance of your monitor mount.
- Cleaning: Wipe the mount surfaces with a soft, damp cloth. Avoid abrasive cleaners or solvents that could damage the finish.
- Check Connections: Periodically inspect all screws and bolts, especially those securing the mount to the desk and the VESA plates to the monitors. Tighten if necessary.
- Gas Spring Performance: If the gas spring performance changes (e.g., arms become too loose or too stiff), re-adjust the tension as described in Section 5.4.
8. Troubleshooting
If you encounter issues with your ARES WING Dual Monitor Mount, refer to the following common problems and solutions:
8.1 Monitor Arm Does Not Hold Position / Sags
- Cause: Gas spring tension is too low for the monitor's weight.
- Solution: Increase the gas spring tension by turning the adjustment screw clockwise (towards '+') using the provided Allen wrench. Adjust incrementally until the arm holds the monitor securely.
8.2 Monitor Arm is Too Stiff / Difficult to Move
- Cause: Gas spring tension is too high for the monitor's weight.
- Solution: Decrease the gas spring tension by turning the adjustment screw counter-clockwise (towards '-') using the provided Allen wrench. Adjust incrementally until the arm moves smoothly.
8.3 Monitor Wobbles or Feels Unstable
- Cause 1: Mount is not securely fastened to the desk.
- Solution 1: Re-tighten the C-clamp or grommet bolt. Ensure the desk surface is stable and strong enough to support the mount and monitors.
- Cause 2: VESA plate screws are loose.
- Solution 2: Check and tighten the screws securing the VESA plate to the monitor.
- Cause 3: Monitor weight exceeds capacity.
- Solution 3: Verify your monitor's weight against the mount's specifications (max 59 lbs flat, 48 lbs curved per arm). If overloaded, remove the monitor.
8.4 USB Ports Not Functioning
- Cause: The USB cable connecting the mount to the computer is not properly connected or is faulty.
- Solution: Ensure the USB cable is securely plugged into both the mount's base and an active USB port on your computer. Try a different USB port on your computer or a different USB cable if available.
9. Warranty & Support
The ARES WING Dual Monitor Mount is backed by a 3-Year Service Warranty, reflecting its durable construction and quality-proof gas spring, which has undergone over 20,000 fatigue tests.
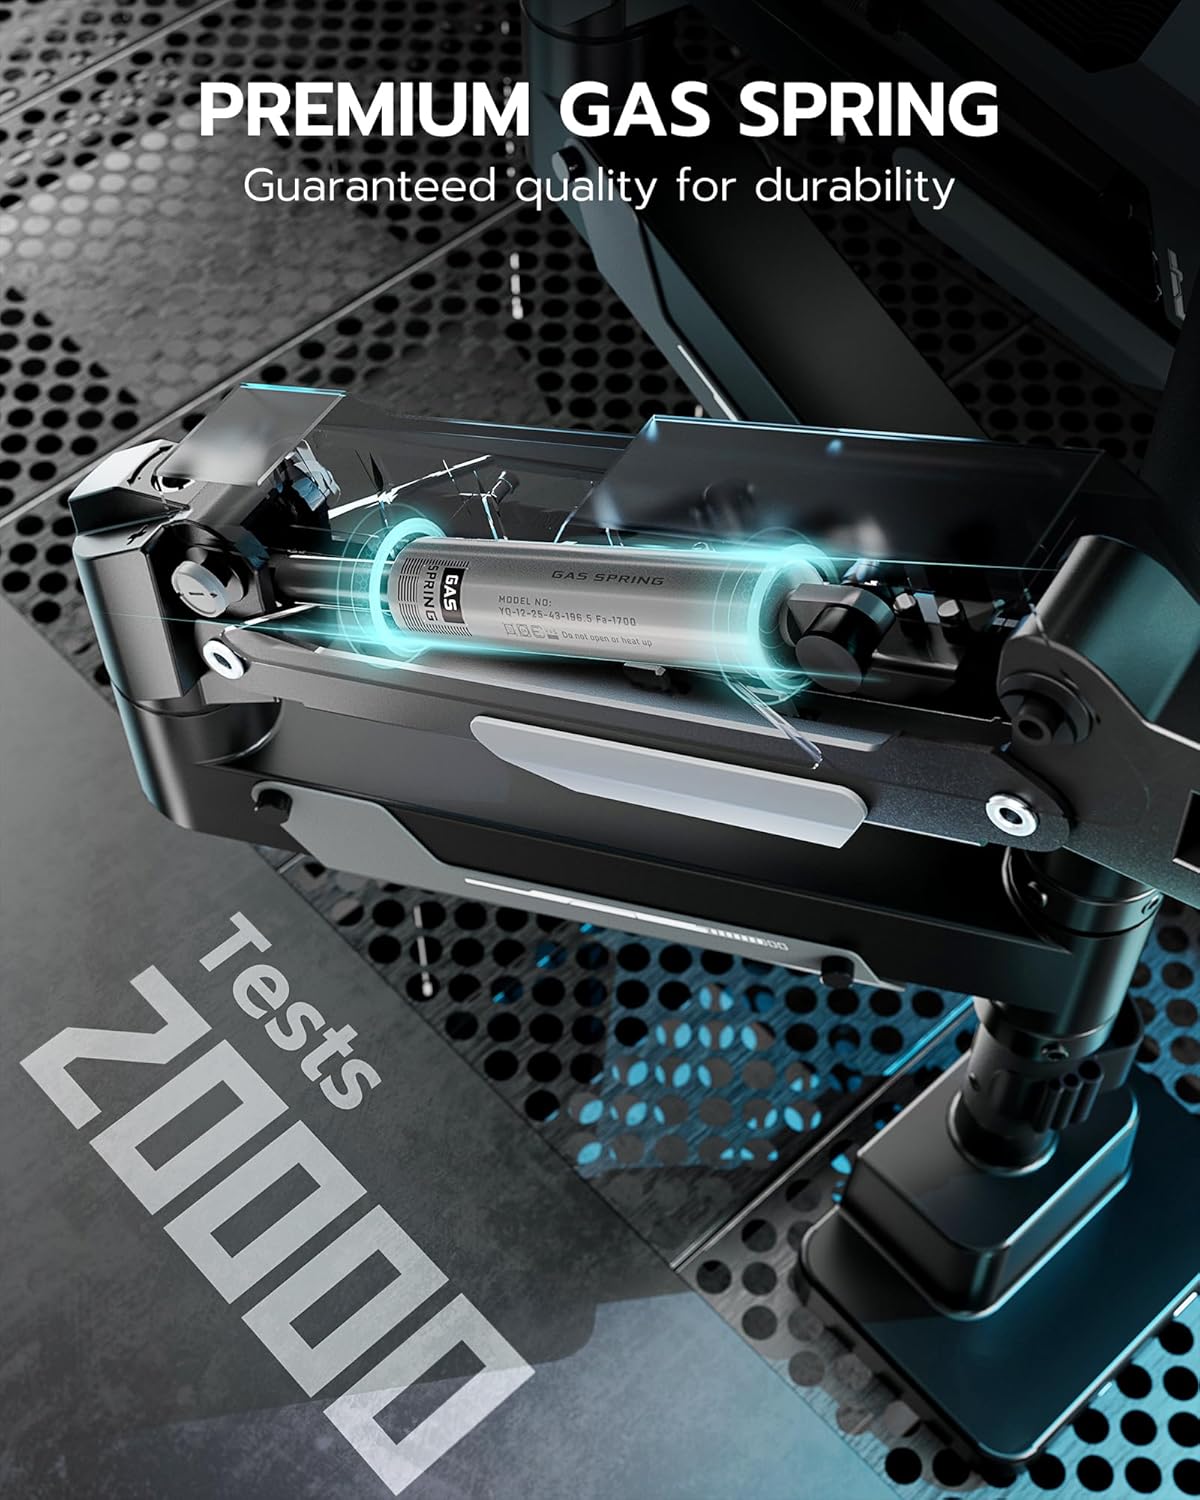
Image: A close-up view of the gas spring mechanism, highlighting its durability and the 3-year service warranty.
For warranty claims, technical assistance, or any questions regarding your product, please contact ARES WING customer support through the retailer where you purchased the product or visit the official ARES WING website for contact information.
Please retain your proof of purchase for warranty purposes.


