
Gemilai G9010B
Gemilai G9010B Electric Conical Burr Coffee Grinder User Manual
Model: G9010B
Introduction
This manual provides comprehensive instructions for the safe and efficient operation, maintenance, and troubleshooting of your Gemilai G9010B Electric Conical Burr Coffee Grinder. Please read this manual thoroughly before using the appliance and retain it for future reference.

Image: The Gemilai G9010B coffee grinder in white, demonstrating its grinding function into a collection cup.
Important Safety Instructions
- Read all instructions before using the appliance.
- Do not immerse the motor base, cord, or plug in water or other liquids.
- Unplug from outlet when not in use, before putting on or taking off parts, and before cleaning.
- Avoid contact with moving parts.
- Do not operate any appliance with a damaged cord or plug, or after the appliance malfunctions or has been dropped or damaged in any manner.
- The use of attachments not recommended or sold by the manufacturer may cause fire, electric shock, or injury.
- Do not use outdoors.
- Do not let cord hang over edge of table or counter, or touch hot surfaces.
- Do not place on or near a hot gas or electric burner, or in a heated oven.
- This appliance is for household use only.
- For grinding roasted, brittle coffee beans only. Do not grind other substances.
- Avoid overloading: Use for a maximum of 5 minutes to prevent overheating.
Product Components
Familiarize yourself with the parts of your Gemilai G9010B coffee grinder:

Image: An exploded diagram illustrating the various components of the Gemilai G9010B coffee grinder, including the magnet hopper lid, 80g single-dose hopper, detachable grinding burrs, 38mm conical burrs, rotary adjustment disk, sloped powder pouring spout, touch screen display, filter holder, and non-slip foot.
- Magnet Hopper Lid
- 80g Single-Dose Hopper
- Detachable Grinding Burrs
- 38mm Conical Burrs (SUS420 Stainless Steel)
- Rotary Adjustment Disk (for grind settings)
- Sloped Powder Pouring Spout
- Touch Screen Display
- Filter Holder (compatible with 58mm portafilters)
- Non-Slip Foot
What's Included
Upon unboxing, ensure all the following items are present:

Image: The complete package contents for the Gemilai G9010B, including the grinder unit, dosing cup, cleaning brush, instruction manual, and user guide.
- G9010B Coffee Grinder (Ivory White)
- Dosing Cup
- Small Brush
- Instruction Manual
- User Guide
Setup
Follow these steps to set up your coffee grinder for first use:
- Unpack: Carefully remove all components from the packaging.
- Placement: Place the grinder on a stable, flat, and dry surface. Ensure there is adequate space around the unit for ventilation.
- Clean: Before first use, wipe down the exterior of the grinder with a damp cloth. Wash the dosing cup and hopper lid with warm, soapy water, rinse thoroughly, and dry completely.
- Assemble Hopper: Place the 80g single-dose hopper onto the top of the grinder. Ensure it is seated correctly.
- Connect Power: Plug the power cord into a standard 120V electrical outlet.
Operating Instructions
1. Adjusting Grind Settings
The Gemilai G9010B offers 60 precise micro-adjustment settings to achieve the perfect grind for any brewing method. Rotate the adjustment disk located around the hopper to select your desired grind size.

Image: A visual guide to the 60 grind settings, ranging from 'Fine' (Espresso, settings 3-6) to 'Coarse' (Cold Brew, setting 12), with intermediate settings for Mocha Pot, French Press, and Pour Over.
- Fine (Espresso): Settings 3-6
- Medium-Fine (Mocha Pot): Settings 6-7
- Medium (French Press): Settings 7-9
- Medium-Coarse (Pour Over): Settings 10-12
- Coarse (Cold Brew): Setting 12
2. Dual Usage Modes: Timed Mode & Manual Mode
The grinder features an intuitive touchscreen display allowing you to switch between Timed Mode and Manual Mode.
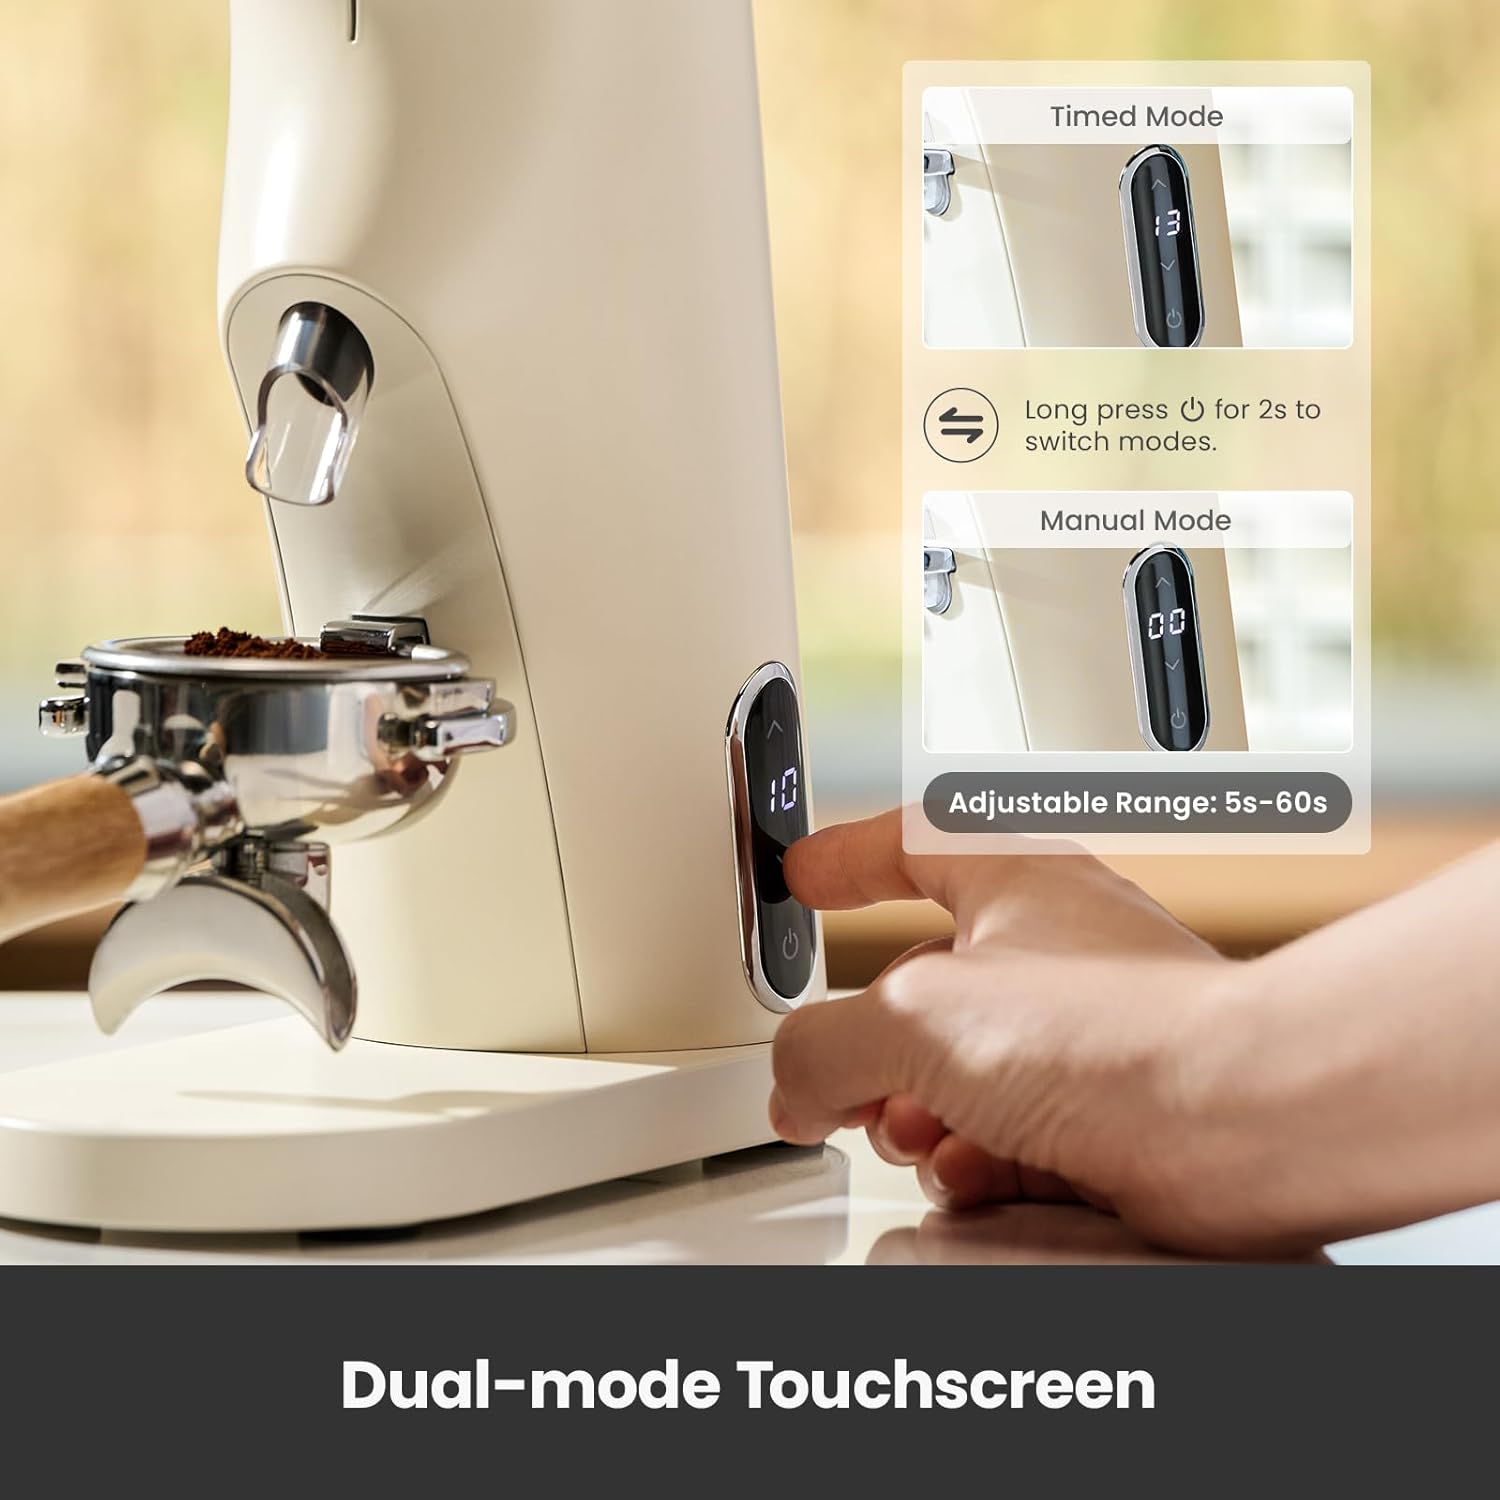
Image: The grinder's touchscreen interface, highlighting the Timed Mode (adjustable from 5-60 seconds) and Manual Mode, with instructions for switching between them.
- Switching Modes: Long press the power button for 2 seconds to toggle between Timed Mode and Manual Mode.
- Timed Mode: In this mode, you can adjust the grinding time from 5 to 60 seconds using the up/down arrows on the touchscreen. The grinder will automatically stop after the set time.
- Manual Mode: In this mode, the grinder will operate continuously as long as the grind button is pressed. Release the button to stop grinding.
3. Grinding Coffee Beans
The G9010B supports grinding directly into a 58mm portafilter or into the included collection cup.
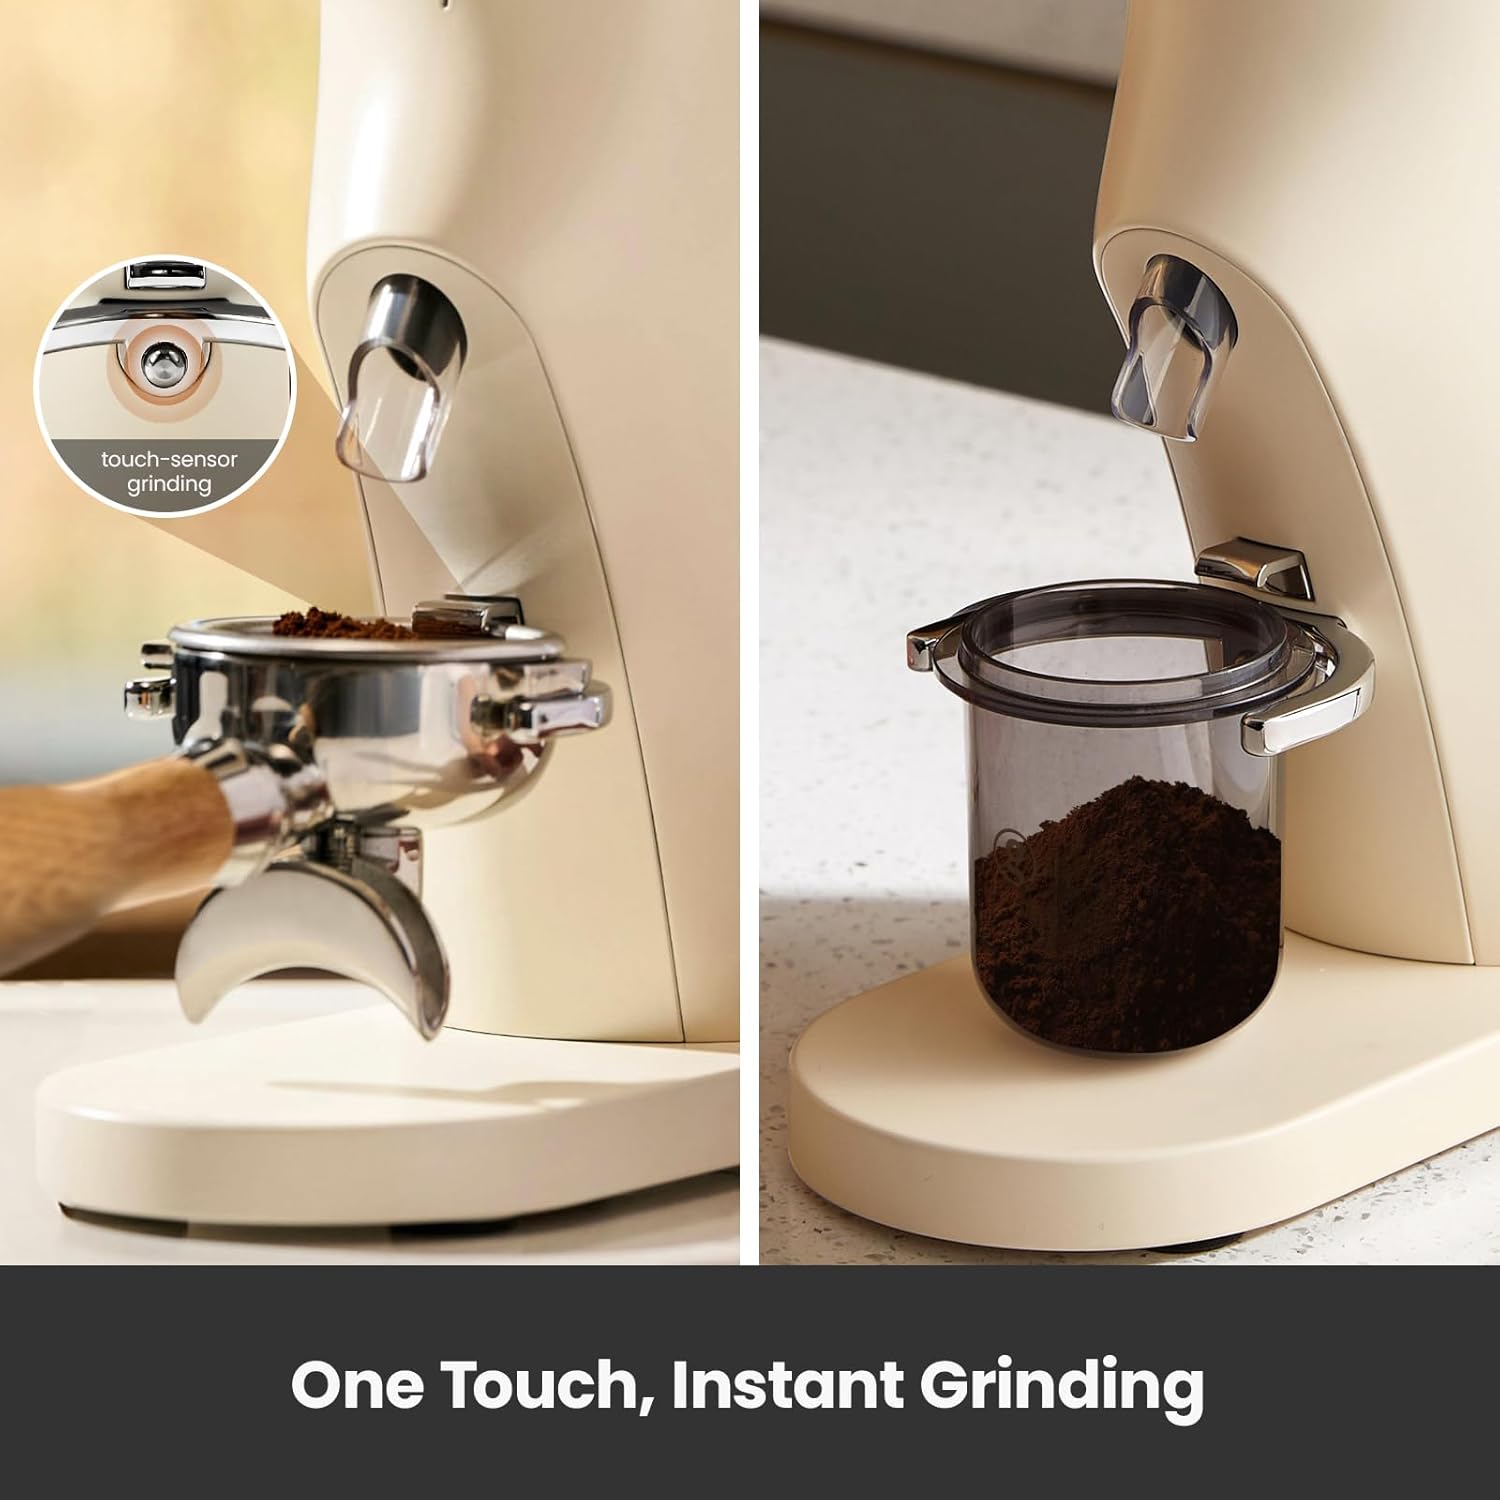
Image: The grinder in action, showing its versatility in grinding directly into a portafilter for espresso preparation or into the provided collection cup.
- Add Beans: Pour roasted coffee beans into the 80g single-dose hopper.
- Position Receptacle:
- For portafilter: Place your 58mm portafilter securely under the grinding spout. The grinder features automatic touch-to-grind functionality when a portafilter is detected.
- For collection cup: Place the included dosing cup under the grinding spout.
- Start Grinding:
- In Timed Mode: Press the grind button once. The grinder will operate for the preset time.
- In Manual Mode: Press and hold the grind button for continuous grinding. Release to stop.
- Remove Grounds: Once grinding is complete, carefully remove the portafilter or collection cup.
Maintenance and Cleaning
Regular cleaning ensures optimal performance and extends the lifespan of your grinder. The G9010B features removable parts for effortless cleaning.

Image: Demonstrating the simple process of detaching the grinding burr for thorough cleaning.

Image: A summary of usage and maintenance tips, emphasizing proper cleaning techniques and precautions.
- Unplug Before Cleaning: Always ensure the grinder is unplugged from the power outlet before attempting any cleaning or maintenance.
- Clean Residue: Use the provided small brush or a dry cloth to clean any coffee residue from the burrs and grinding chamber.
- Wipe Exterior: Wipe the grinder's exterior with a damp cloth that has been wrung out.
- Do Not Immerse: Do not rinse, immerse, or pour water or cleaning solutions directly into the machine. This can damage the electrical components.
- Detachable Burrs: The grinding burrs are detachable for deeper cleaning. Refer to the "Product Components" section for identification. Carefully remove and brush away any trapped coffee grounds. Ensure they are completely dry before reassembling.
Troubleshooting
If you encounter issues with your Gemilai G9010B coffee grinder, refer to the following common problems and solutions:
| Problem | Possible Cause | Solution |
|---|---|---|
| Grinder does not turn on. | Not plugged in; power outage; faulty outlet. | Ensure the grinder is securely plugged into a working electrical outlet. Check your circuit breaker. |
| Grinder stops during operation. | Overheating; motor overload; coffee beans jammed. | Unplug the grinder and let it cool down for 30 minutes. Check for any jammed beans in the burrs and clear them. Avoid continuous operation for more than 5 minutes. |
| Inconsistent grind size. | Burrs are dirty or worn; incorrect grind setting. | Clean the burrs thoroughly. Ensure the grind setting is appropriate for your desired brewing method. |
| Beans not feeding into burrs. | Hopper empty; beans stuck in hopper. | Ensure there are enough beans in the hopper. Gently shake the grinder to dislodge any stuck beans. |
Specifications
Detailed technical specifications for the Gemilai G9010B Electric Conical Burr Coffee Grinder:

Image: A detailed view of the 38mm conical burrs, highlighting key technical specifications such as material, motor voltage, power, and speed.
- Model Number: G9010B
- Color: White
- Brand: Gemilai
- Product Dimensions: 8.7"L x 4.09"W x 12.32"H
- Item Weight: 7.74 pounds (approx. 3.51 kg)
- Capacity: 80 Grams (bean hopper)
- Burr Type: 38mm Conical Burr (SUS420 Stainless Steel)
- Motor: 120V DC Motor
- Power: 150W
- Speed: 430rpm
- Grind Settings: 60 precise micro-adjustments
- Control: Smart Touchscreen with Timed and Manual Modes
- Compatibility: Supports 58mm portafilters
- Manufacturer: Guangdong Gemilai Intelligent Technology Co., Ltd.
- Global Trade Identification Number (GTIN): 06972501862149
Warranty and Support
For warranty information or technical support, please contact Gemilai customer service through the retailer where the product was purchased or visit the official Gemilai website. Please have your model number (G9010B) and purchase date available when contacting support.
You can visit the official Gemilai store on Amazon for more information and related products: Gemilai Amazon Store
Related documentsG9010B


Ask a question about this manual
Ask about setup, troubleshooting, compatibility, parts, safety, or missing instructions. Manuals+ will review the question and use this page’s manual context to help answer it.