1. Introduction
This manual provides comprehensive instructions for the Sheawasy Mini Digital Camera GLX2-WHITE. It covers essential information regarding product setup, operation, maintenance, and troubleshooting to ensure optimal performance and enjoyment of its unique retro photography features. Please read this manual thoroughly before using the camera.
2. What's in the Box
Carefully unpack your Sheawasy Mini Digital Camera package and ensure all items listed below are present:
- Sheawasy Mini Digital Camera (White)
- 32GB Memory Card (pre-installed)
- USB Charging/Data Cable
- Lanyard
- Keychain Attachment
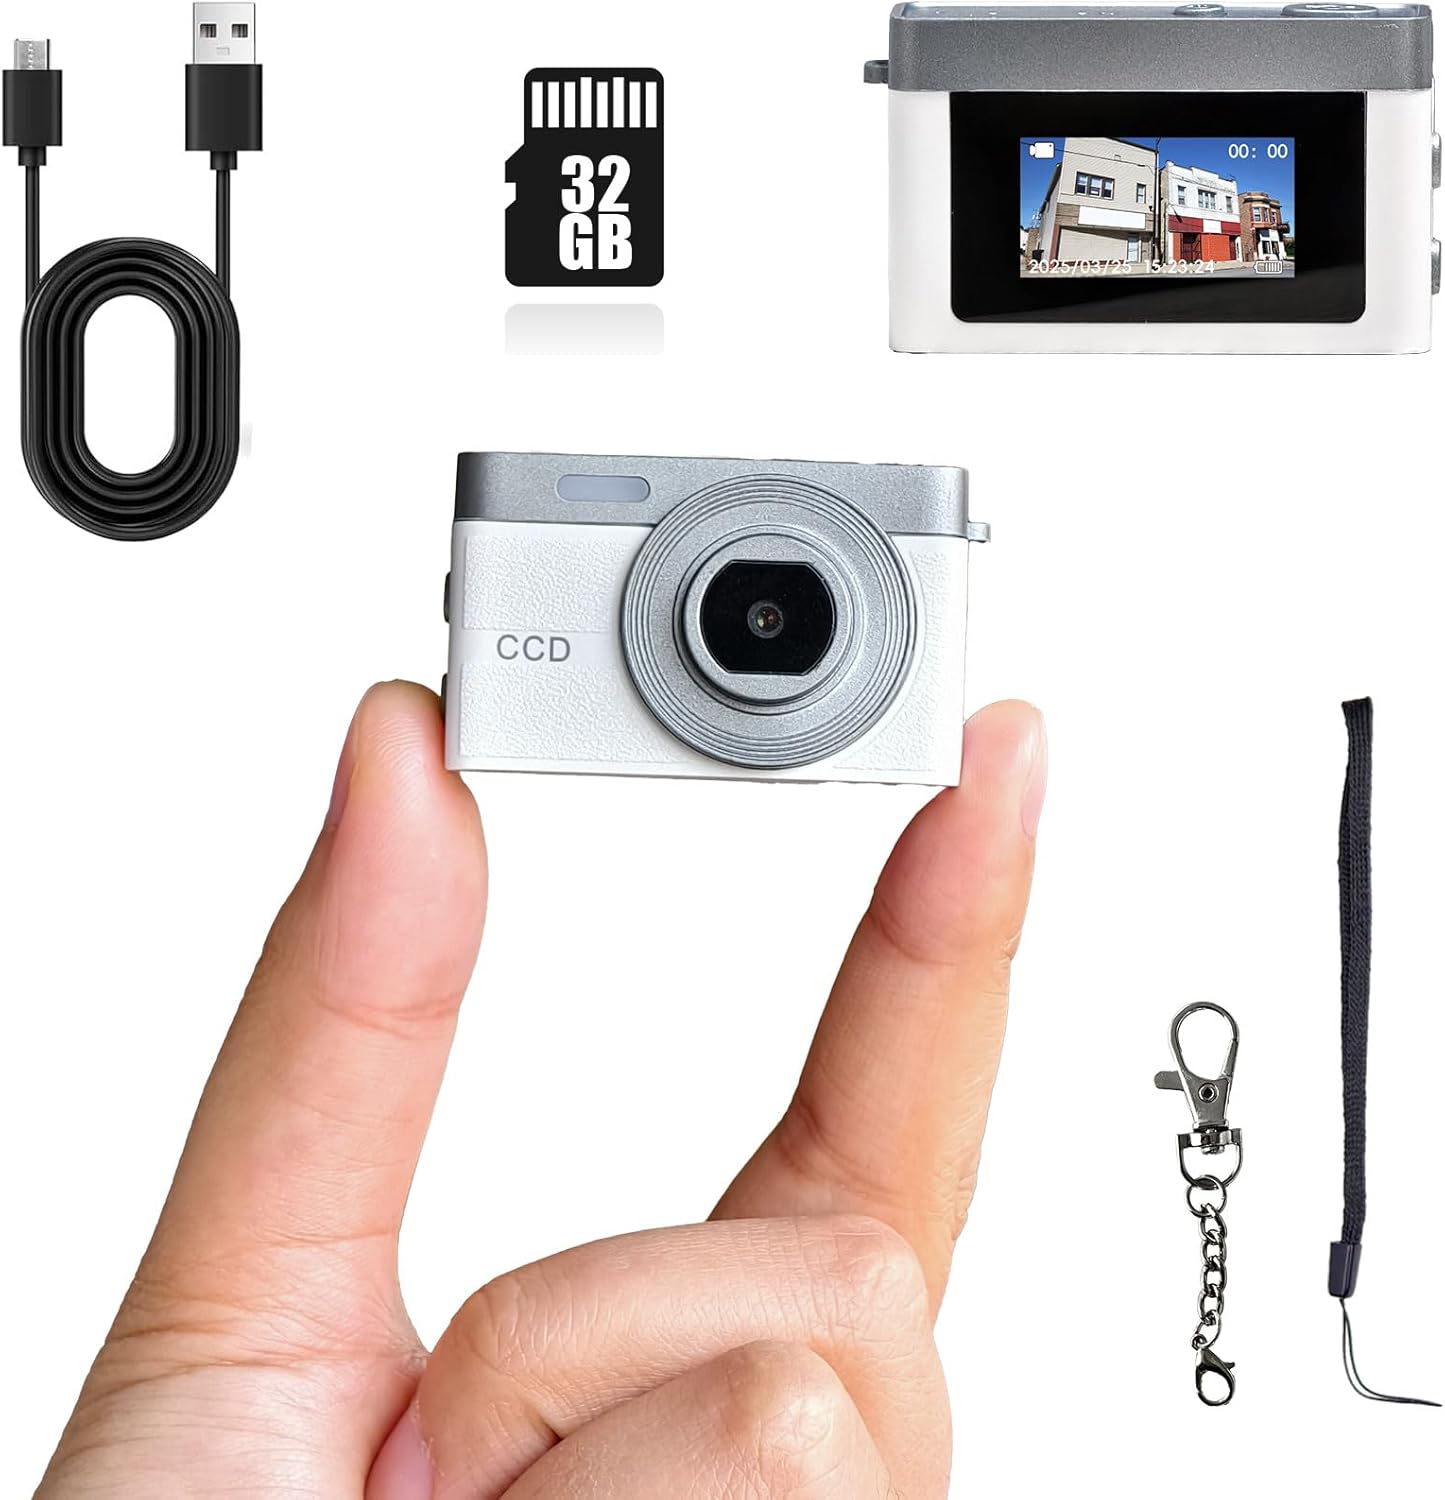
Image: The Sheawasy Mini Digital Camera, USB cable, 32GB memory card, and keychain attachment.
3. Product Overview
Familiarize yourself with the camera's components and controls for proper operation.

Image: A detailed diagram illustrating the camera's buttons (Power/Menu, Shutter, Reset, Mic) and its compact dimensions (1.77 x 1.1 x 0.79 inches).
3.1 Camera Components
- Lens: Front-facing lens for capturing images and videos.
- 0.96-inch LCD Screen: Located on the back, displays live feed, status, and playback.
- Micro USB Port: For charging and data transfer.
- LED Fill Light: Provides additional illumination.
- Microphone: For audio recording during video capture.
3.2 Controls
- Power/Menu Button: Press and hold to power on/off. Short press to access menu options.
- Shutter Button: Press to take a photo or start/stop video recording.
- Reset Button: Small pinhole button for factory reset (requires a thin tool).

Image: The camera's compact size, measuring 1.77 x 1.1 x 0.79 inches, shown next to a coin for scale.
4. Setup
4.1 Initial Preparation
- Remove Protective Films: Before first use, carefully peel off any protective films from the camera lens and the LCD screen.
- Charge the Battery: Connect the camera to a USB power source using the provided USB cable. The camera will typically power on automatically when connected for charging. Ensure the camera is fully charged before initial use.
- Memory Card: The 32GB memory card is pre-installed and ready for use. No additional setup is required for storage.

Image: The camera held in a hand, highlighting the included 32GB memory for storing photos and videos.
5. Operating Instructions
5.1 Power On/Off
- To Power On: Press and hold the Power/Menu button for a few seconds until the LCD screen illuminates.
- To Power Off: Press and hold the Power/Menu button again until the screen turns off.
5.2 Using the LCD Screen
The 0.96-inch LCD screen provides real-time feedback and access to camera functions:
- Live Feed: Displays the current view from the lens for framing shots.
- Status View: Shows current working modes, battery level, and other indicators.
- Playback: Allows direct review of captured photos and videos.

Image: The camera's 0.96-inch LCD screen showing a live view, indicating its functions for monitoring, status, and playback.
5.3 Taking Photos
- Ensure the camera is powered on and in photo mode (indicated on the LCD).
- Frame your shot using the LCD screen.
- Press the Shutter button once to capture a photo.
5.4 Recording Videos
- Ensure the camera is powered on and in video mode (indicated on the LCD).
- Frame your scene using the LCD screen.
- Press the Shutter button once to start recording. A recording indicator will appear on the screen.
- Press the Shutter button again to stop recording.

Image: Illustrates the camera's capability to capture 720p video and produce photos with a distinct 90s grainy, nostalgic aesthetic.
5.5 Applying Filters
The camera offers various filters to enhance the retro feel of your photographs. Navigate through the menu using the Power/Menu button to select desired filters such as Wine Red, Grass Green, Light Blue, Monochrome, or Sunshine Yellow.

Image: Demonstrates the visual effect of various color filters (Wine Red, Grass Green, Light Blue, Monochrome, Sunshine Yellow) that can be applied to photos.
6. Connecting to a Computer and Transferring Files
To access and transfer your photos and videos, connect the camera to a computer:
- Connect the camera to your computer using the provided USB cable.
- The camera will appear as a removable disk drive on your computer.
- Open the disk drive to view and copy your files (photos and videos) to your computer for editing, playback, or storage.

Image: Instructions for outputting files by connecting the camera to a computer via USB, where it appears as a removable disk.
7. Maintenance
- Cleaning: Use a soft, dry cloth to clean the camera body. For the lens and screen, use a specialized lens cleaning cloth. Avoid abrasive materials or harsh chemicals.
- Storage: Store the camera in a cool, dry place away from direct sunlight and extreme temperatures.
- Battery Care: To prolong battery life, avoid fully discharging the battery frequently. Charge the camera regularly, even if not in use for extended periods.
- Water Resistance: This camera is not water resistant. Avoid exposure to water or high humidity.
8. Troubleshooting
- Camera does not power on: Ensure the battery is charged. Connect to a USB power source to charge.
- Camera powers on automatically when charging: This is a normal operational characteristic of the device. To power it off while charging, set the automatic shutoff feature for a specific duration in the camera's settings. Once the timer expires, the camera will remain off even while plugged in.
- Cannot transfer files to computer: Ensure the USB cable is securely connected to both the camera and the computer. Try a different USB port or cable. Verify the camera appears as a removable disk.
- Poor image quality: Ensure the lens is clean and free from smudges. The camera is designed to produce a '90s retro, grainy aesthetic, which may differ from modern digital camera quality.
- Camera freezes or becomes unresponsive: Use a thin tool (like a paperclip) to gently press the Reset button. This will restart the camera without deleting data.
9. Specifications
| Feature | Specification |
|---|---|
| Brand | Sheawasy |
| Model Name | GLX2-WHITE |
| Dimensions (L x W x H) | 1.77 x 1.1 x 0.79 inches (approx.) |
| Weight | 0.564 ounces (approx.) |
| Photo Sensor Technology | CCD |
| Effective Still Resolution | 1 MP |
| Video Resolution | 1080p (AVI format) |
| Frame Rate | 24, 30, 60 FPS |
| Screen Size | 0.96 Inches |
| Display Type | LCD (Color Screen) |
| Memory Storage | 32 GB (included) |
| Connectivity Technology | Micro USB |
| Battery Type | Lithium Polymer (1 included) |
| Exposure Control | Automatic, Manual |
| White Balance Settings | Auto |
| Autofocus | No (Contrast Detection Focus) |
| Image Stabilization | No |
| Water Resistance Level | Not Water Resistant |
10. Warranty and Support
For warranty information or technical support, please refer to the product packaging or contact Sheawasy customer service through the retailer where the product was purchased. Keep your purchase receipt as proof of purchase.