1. Important Safety Information
Read all instructions carefully before installing and operating this ceiling fan. Retain this manual for future reference.
- Electrical Safety: All electrical connections must be performed by a qualified electrician. Disconnect power at the main circuit breaker before installation or servicing. Ensure the electrical supply matches the fan's voltage (110 Volts).
- Mounting: The ceiling fan must be mounted to a structurally sound ceiling joist or outlet box capable of supporting the fan's weight (approximately 8.37 kg / 18.45 lbs).
- Blade Clearance: Ensure there is adequate clearance from walls and other objects for the fan blades to rotate freely.
- Light Bulbs: Use only E26 base bulbs. Do not exceed the maximum wattage specified for the light kit.
- Remote Control: Keep the remote control away from children.
- Cleaning: Always turn off the power before cleaning the fan.
2. Package Contents
Verify that all components are present before beginning installation. If any parts are missing or damaged, contact customer support.
- Ceiling Fan Assembly (Wagon Wheel Chandelier with integrated fan motor and blades)
- Downrods (various lengths for adjustable height)
- Mounting Bracket
- Hardware Pack (screws, washers, wire nuts)
- Remote Control
- User Manual
- Note: Light bulbs (E26 base, 12 required) are not included.
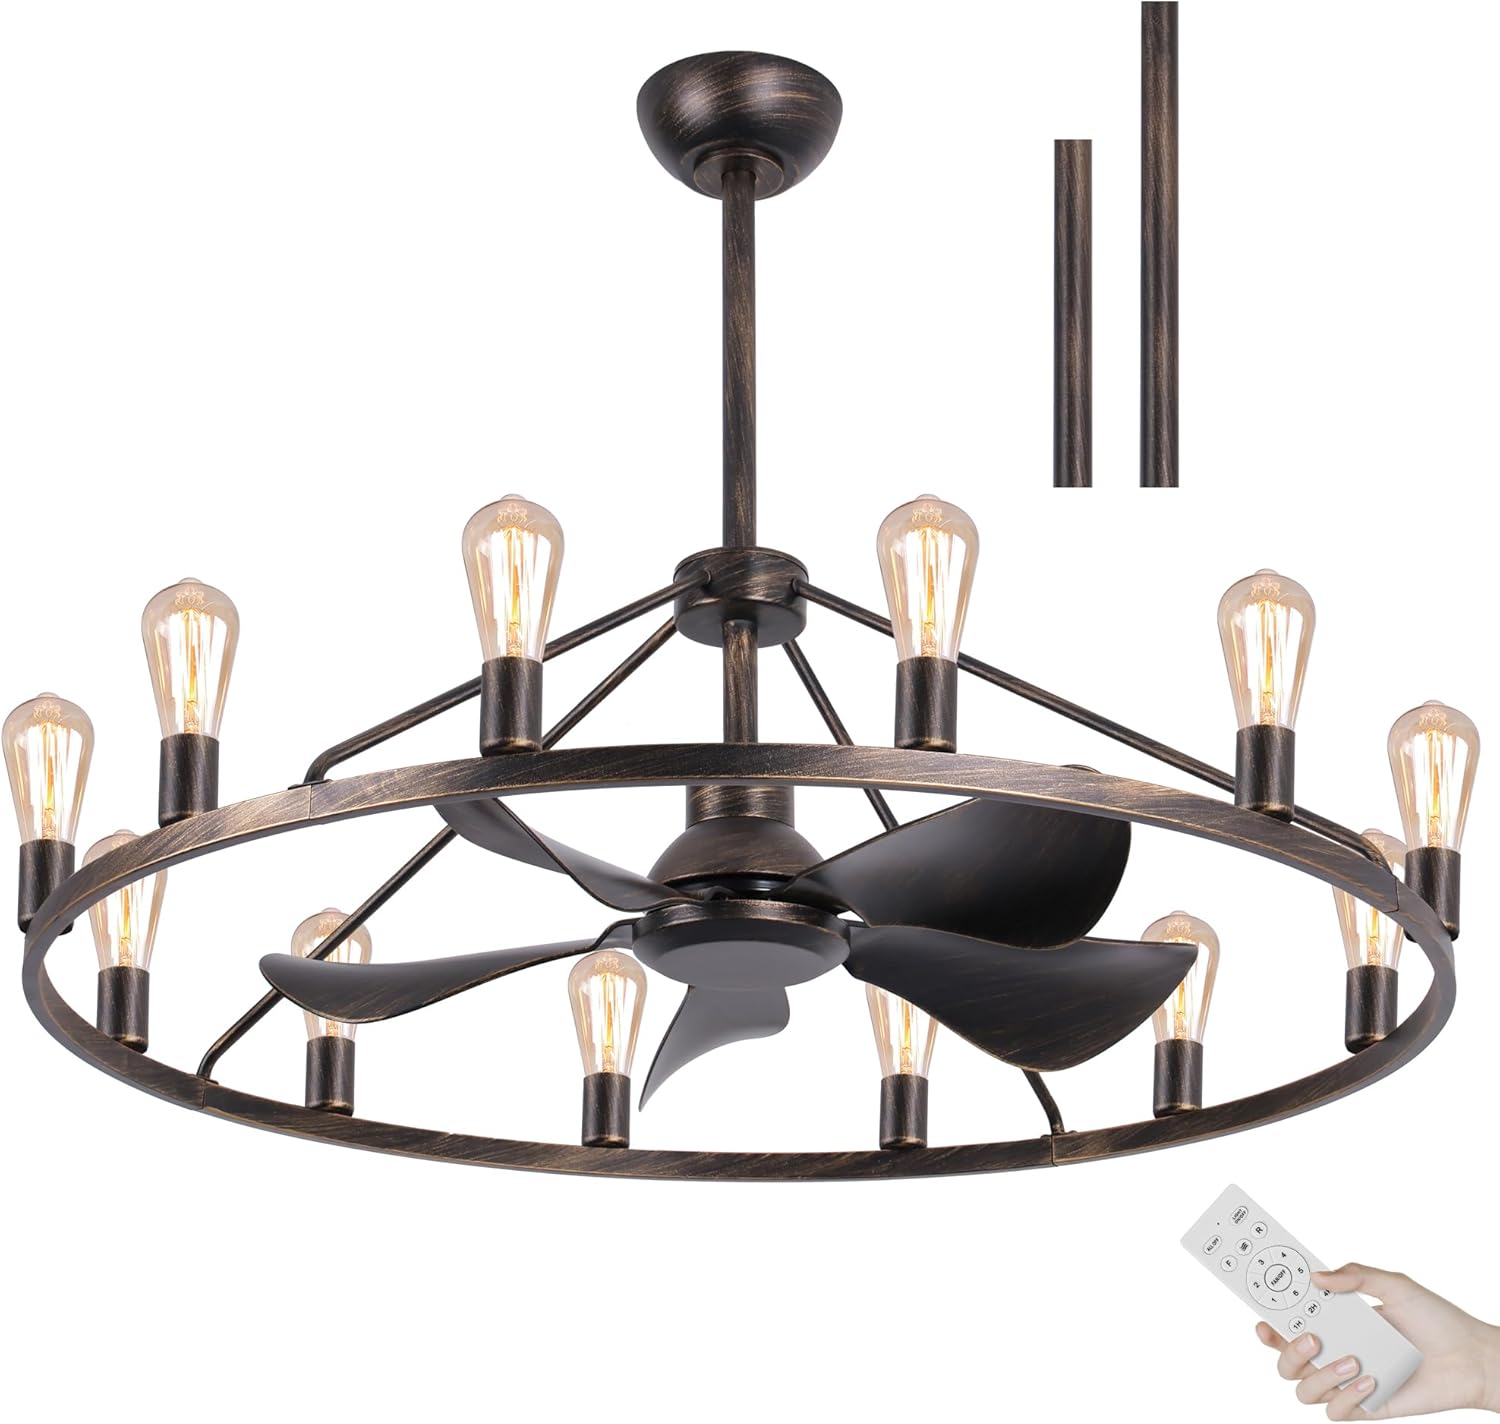
Image 2.1: Overview of the KINGTORO 44-inch Wagon Wheel Ceiling Fan with Lights, showing the main unit and remote control.
3. Setup and Installation
Professional installation by a qualified electrician is recommended for safety and proper function.
3.1 Pre-Installation Checks
- Power Disconnection: Ensure power is turned off at the circuit breaker before starting.
- Mounting Location: Confirm the ceiling can support the fan's weight (8.37 kg) and that there is sufficient clearance for the 44-inch diameter blades.
- Voltage: Verify that your electrical system provides 110 Volts.
3.2 Mounting the Fan
- Attach the mounting bracket securely to the ceiling outlet box or joist.
- Select the appropriate downrod length for your ceiling height. The fan supports both flat and angled ceiling installations (up to 15 degrees).
- Feed the electrical wires from the fan through the downrod and canopy.
- Hang the fan assembly onto the mounting bracket.
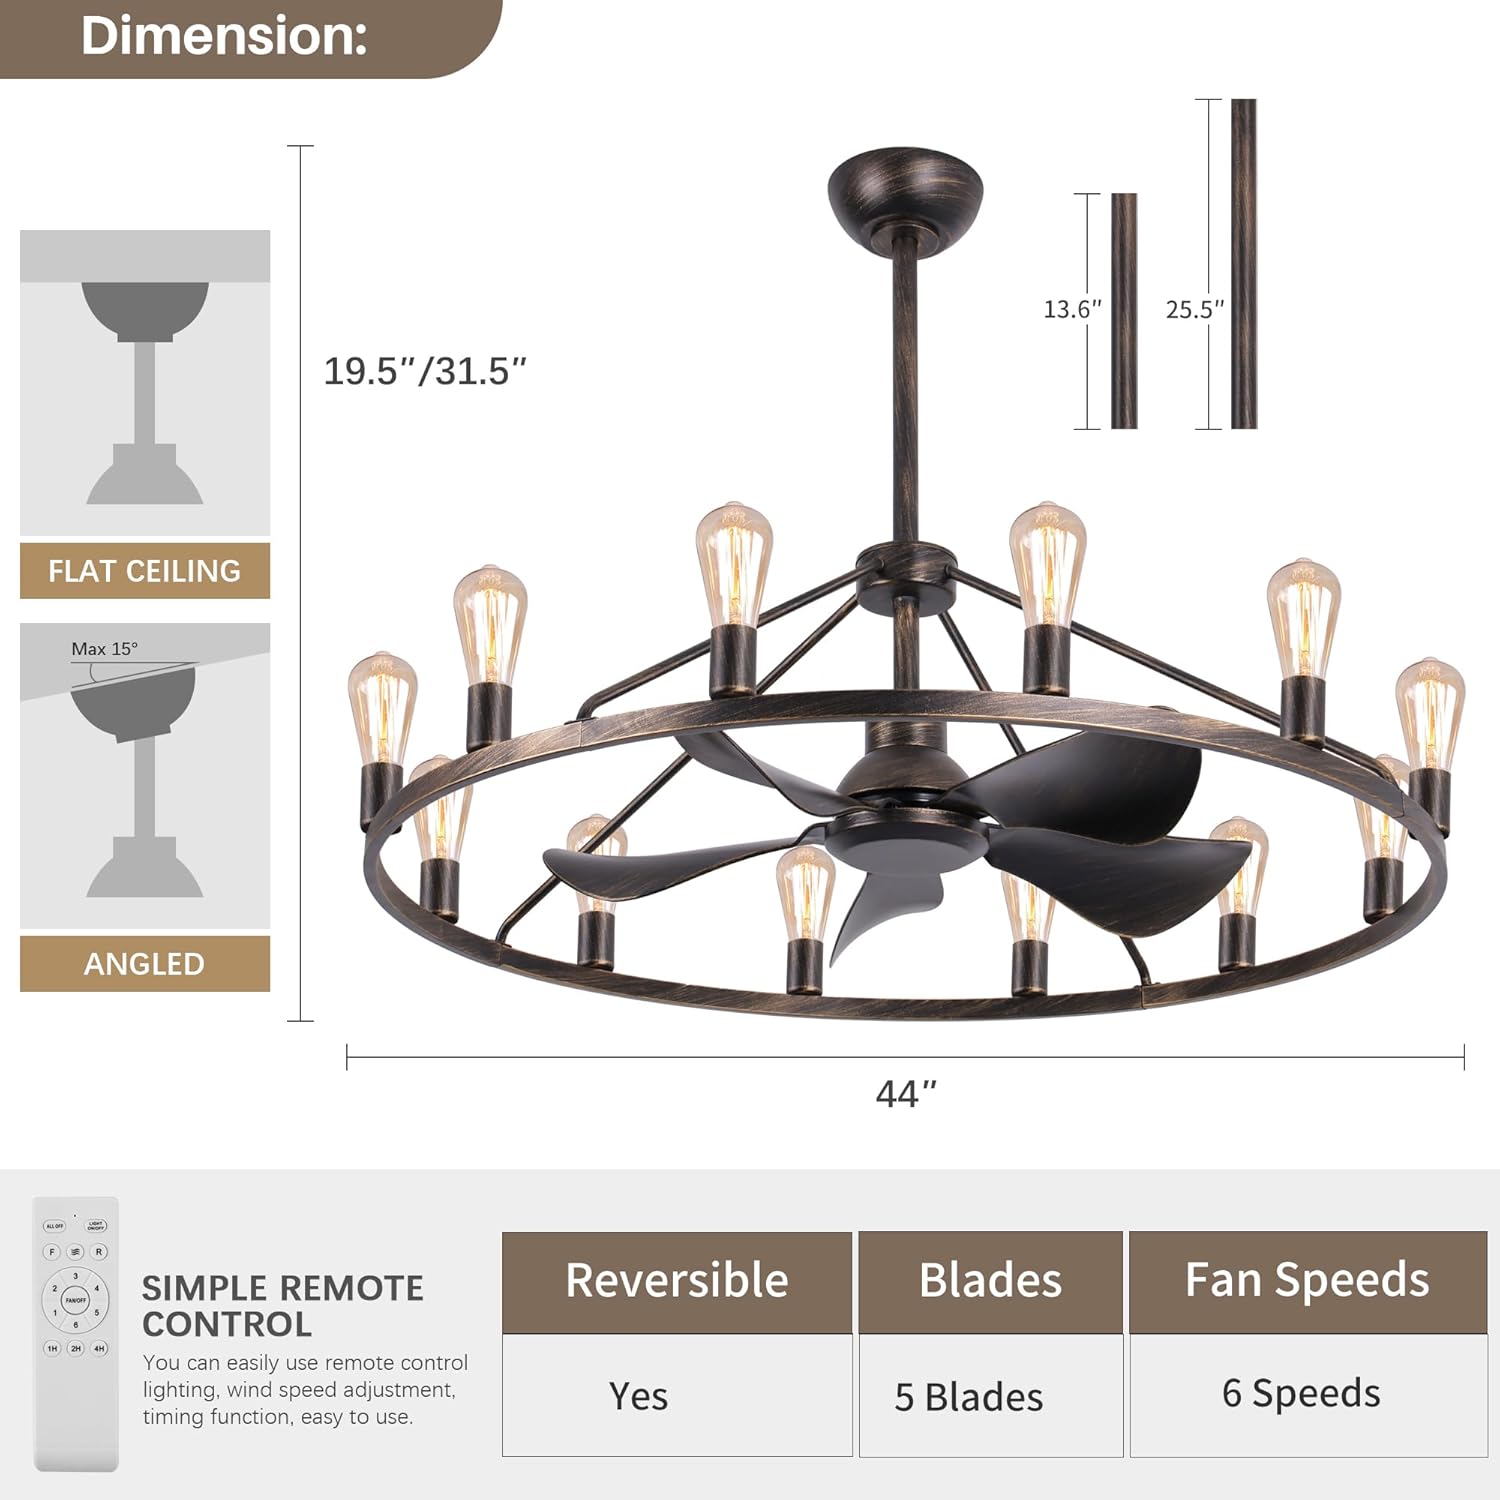
Image 3.1: Diagram showing the 44-inch fan dimensions, downrod lengths (13.6" and 25.5"), and compatibility with flat and angled ceilings (max 15 degrees).
3.3 Electrical Connections
- Connect the fan's electrical wires to the household wiring according to local electrical codes. Typically, this involves connecting live, neutral, and ground wires.
- Ensure all connections are secure using wire nuts.
- Carefully tuck the wires into the outlet box and secure the canopy to the mounting bracket.
3.4 Installing Light Bulbs
- Install 12 E26 base light bulbs into the sockets.
- Do not overtighten the bulbs.

Image 3.2: Detailed view of the fan's ABS blades and the E26 base light bulb sockets, highlighting the design and material.
4. Operating Instructions
This ceiling fan is operated using the included remote control.
4.1 Remote Control Functions

Image 4.1: Diagram illustrating the various functions of the remote control, including light on/off, fan speed, timer, and reversal.
- Light On/Off: Press the light button to turn the lights on or off.
- Fan Speed Control: Select from 6 available fan speeds to adjust airflow.
- Timer Function: Set the fan to turn off automatically after 1, 2, or 4 hours.
- Reversal/Corotation: This fan features a reversible motor, allowing you to change the direction of airflow for summer (downward airflow) or winter (upward airflow to circulate warm air).
- Power On/Off: Main power button for the fan and lights.
4.2 Silent Motor Operation
The fan is equipped with a multi-capacitor silent motor designed for quiet operation and maximum air movement, suitable for interior use to maintain a comfortable environment.

Image 4.2: Illustration emphasizing the silent operation of the fan's motor, designed for quiet performance.
5. Maintenance
Regular maintenance ensures optimal performance and extends the life of your ceiling fan.
- Cleaning: Periodically clean the fan blades and motor housing with a soft, damp cloth. Do not use abrasive cleaners or solvents. Ensure power is off before cleaning.
- Bulb Replacement: Turn off power before replacing light bulbs. Allow bulbs to cool before handling. Replace with E26 base bulbs of the appropriate wattage.
- Tighten Screws: Check all screws and connections annually to ensure they are secure.
6. Troubleshooting
If you encounter issues, refer to the following troubleshooting guide before contacting customer support.
| Problem | Possible Cause | Solution |
|---|---|---|
| Fan does not start. | No power supply; loose wire connections; remote control battery low. | Check circuit breaker. Verify all wire connections are secure. Replace remote control batteries. |
| Lights do not work. | Light bulbs faulty or loose; loose wire connections; remote control battery low. | Check and tighten bulbs. Replace faulty bulbs. Verify wire connections. Replace remote control batteries. |
| Fan wobbles. | Loose mounting screws; unbalanced blades; downrod not seated correctly. | Ensure mounting bracket and downrod screws are tight. Check for bent blades. Use a balancing kit if necessary. |
| Remote control not responding. | Low battery; incorrect pairing. | Replace remote control batteries. Refer to remote pairing instructions (if applicable, not detailed in provided data). |
7. Specifications
| Feature | Detail |
|---|---|
| Brand | KINGTORO |
| Model Number | F491WH-12 |
| Product Dimensions (L x W x H) | 109.22 x 109.22 x 78.74 cm (43 x 43 x 31 inches) |
| Product Weight | 8.37 Kilograms (18.45 lbs) |
| Material | Metal (housing), ABS (blades) |
| Number of Light Bulbs | 12 (E26 base, bulbs not included) |
| Wattage (Fan Motor) | 40 watts |
| Voltage | 110 Volts |
| Power Source | Wired Electric |
| Installation Type | Ceiling Mount / Semi-flush Mount |
| Included Components | Remote Control |
| Fan Blades | 5 |
| Fan Speeds | 6 |
| Reversible Fan | Yes |
8. Warranty and Support
For warranty information or technical support, please refer to the documentation provided with your purchase or contact KINGTORO customer service directly. Keep your proof of purchase for warranty claims.


