
1. Introduction
Thank you for choosing the Linyuvo KS11 Wireless Gamepad Joystick. This controller is designed to provide an enhanced gaming experience on your Nintendo Switch console, offering advanced features such as customizable macro programming, adjustable vibration, and responsive controls. Please read this manual carefully before use to ensure proper operation and to maximize your enjoyment of the product.
2. Product Features
- Metal mushroom head and honeycomb design for improved operational feedback and enhanced anti-slip function.
- One-click three-speed continuous firing, offering more flexible operation possibilities for players to control the overall situation.
- Integrated six-axis gyroscope for precise motion control; adjustable vibration level for immersive feedback.
- Rocker aperture changes in a single color cycle, complemented by luminous crystal colored buttons.
- Back-key macro buttons with customizable macro programming for multi-step combined key output.
- Ergonomic design for a comfortable grip during extended gaming sessions.
- High-capacity 950mAh battery providing 9-12 hours of playtime.
3. Package Contents
Please check the package contents upon opening. If any items are missing or damaged, please contact your retailer.
- Linyuvo KS11 Wireless Gamepad Joystick
- USB Charging Cable
- User Manual
4. Component Identification

Figure 4.1: Front View of the Gamepad. This image displays the front of the white Linyuvo KS11 gamepad, showing the left and right joysticks with blue LED rings, the D-pad, ABXY buttons, Home button, Capture button, Plus and Minus buttons, and shoulder buttons (L/R, ZL/ZR).

Figure 4.2: Back View and Customizable Buttons. This image illustrates the back of the gamepad, highlighting the customizable back-key macro buttons (M1, M2, M3, M4) and the reset button. It also shows the USB-C charging port and LED indicators for player number/charging status.
Key Components:
- Left/Right Analog Sticks: For 360-degree movement and camera control.
- D-Pad: Directional input for menu navigation and specific game actions.
- ABXY Buttons: Standard action buttons.
- L/R, ZL/ZR Buttons: Shoulder and trigger buttons for various in-game actions.
- Home Button: Returns to the Nintendo Switch HOME Menu.
- Capture Button: Takes screenshots or video clips.
- Plus (+) / Minus (-) Buttons: Used for in-game menus and options.
- Macro Buttons (M1-M4): Customizable back buttons for complex commands.
- Reset Button: Used to reset the controller.
- USB-C Port: For charging the controller.
- LED Indicators: Show player number, charging status, and connection status.
5. Setup
5.1 Charging the Controller

Figure 5.1: Battery Life Indication. This image highlights the controller's 950mAh battery capacity, providing approximately 9-12 hours of continuous playtime on a full charge.
- Connect the supplied USB charging cable to the USB-C port on the controller.
- Connect the other end of the cable to a USB power source (e.g., Nintendo Switch dock, USB wall adapter, computer USB port).
- The LED indicators on the controller will flash during charging and turn solid when fully charged. A full charge typically takes 2-3 hours.
5.2 Pairing with Nintendo Switch
- On your Nintendo Switch HOME Menu, select Controllers > Change Grip/Order.
- Press and hold the Home button on the Linyuvo KS11 controller for 3-5 seconds until the LED indicators start flashing rapidly. This indicates the controller is in pairing mode.
- Once the controller is successfully paired, the LED indicator(s) corresponding to the player number will remain solid.
- To wake the console from sleep mode, simply press the Home button on the controller.
6. Operating Instructions
6.1 Basic Controls
The Linyuvo KS11 controller functions similarly to a Nintendo Switch Pro Controller. Refer to your game's instructions for specific button mappings.
6.2 Macro Programming (M1-M4 Buttons)
Figure 6.1: Macro Customization. This image illustrates the customizable back buttons (M1-M4) which can be programmed for multi-step combined key outputs, allowing for personalized game combos.
The M1, M2, M3, and M4 buttons on the back of the controller can be programmed to execute a sequence of button presses. This allows for complex actions to be performed with a single press.
- Enter Programming Mode: Press and hold the desired Macro button (e.g., M1) and the Plus (+) button simultaneously for 3 seconds until the controller vibrates. The LED indicators will flash slowly.
- Record Sequence: Press the sequence of buttons you wish to record (e.g., A, B, X, Y). The controller will record up to 16 button presses.
- Exit Programming Mode: Press the same Macro button (e.g., M1) again. The controller will vibrate once, and the LEDs will return to normal, indicating the macro is saved.
- Execute Macro: Simply press the programmed Macro button (e.g., M1) during gameplay to execute the recorded sequence.
6.3 Turbo Function (Continuous Firing)
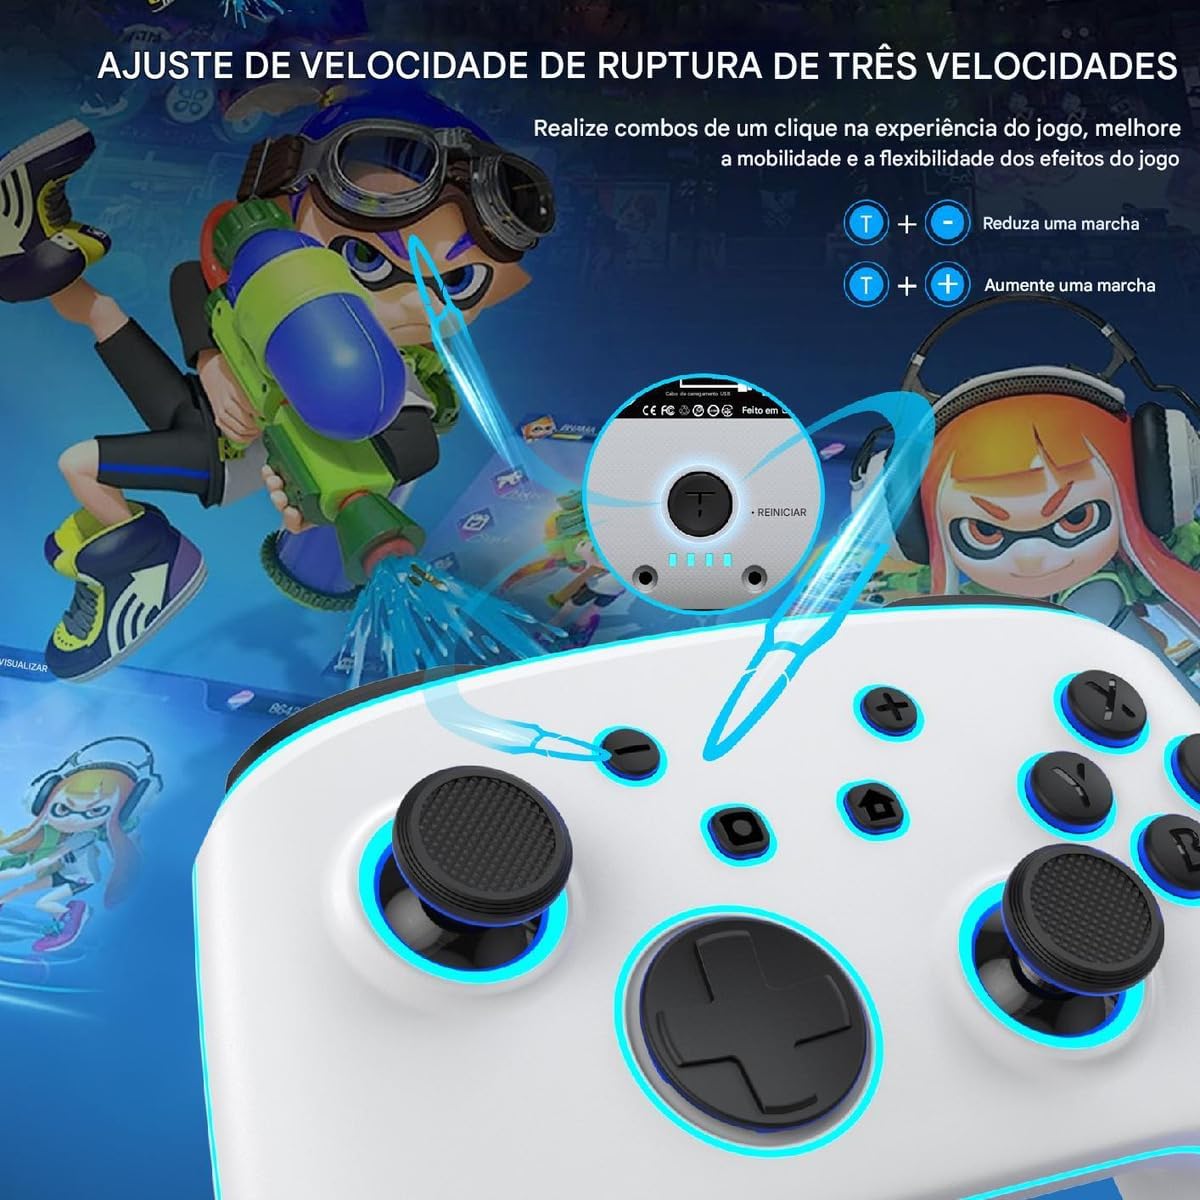
Figure 6.2: Three-Speed Turbo Adjustment. This image demonstrates how to adjust the turbo (continuous firing) speed, allowing players to perform rapid actions with a single button press.
The controller supports a three-speed turbo function for certain buttons (A/B/X/Y, L/R, ZL/ZR, D-pad directions).
- Activate Turbo: Press and hold the button you want to set to turbo (e.g., A) and then press the Turbo button (usually located near the Home button) once. The button will now continuously fire when held down.
- Adjust Turbo Speed: While holding the turbo-enabled button, press the Turbo button again to cycle through the three speeds (slow, medium, fast).
- Deactivate Turbo: Press and hold the turbo-enabled button and then press the Turbo button a third time to turn off the turbo function for that button.
6.4 Vibration Adjustment
The controller features adjustable vibration levels for enhanced immersion.
- To adjust vibration intensity, press and hold the Turbo button and press the D-pad Up or D-pad Down button. Cycle through different vibration levels (e.g., Strong, Medium, Weak, Off).
6.5 LED Lighting Adjustment
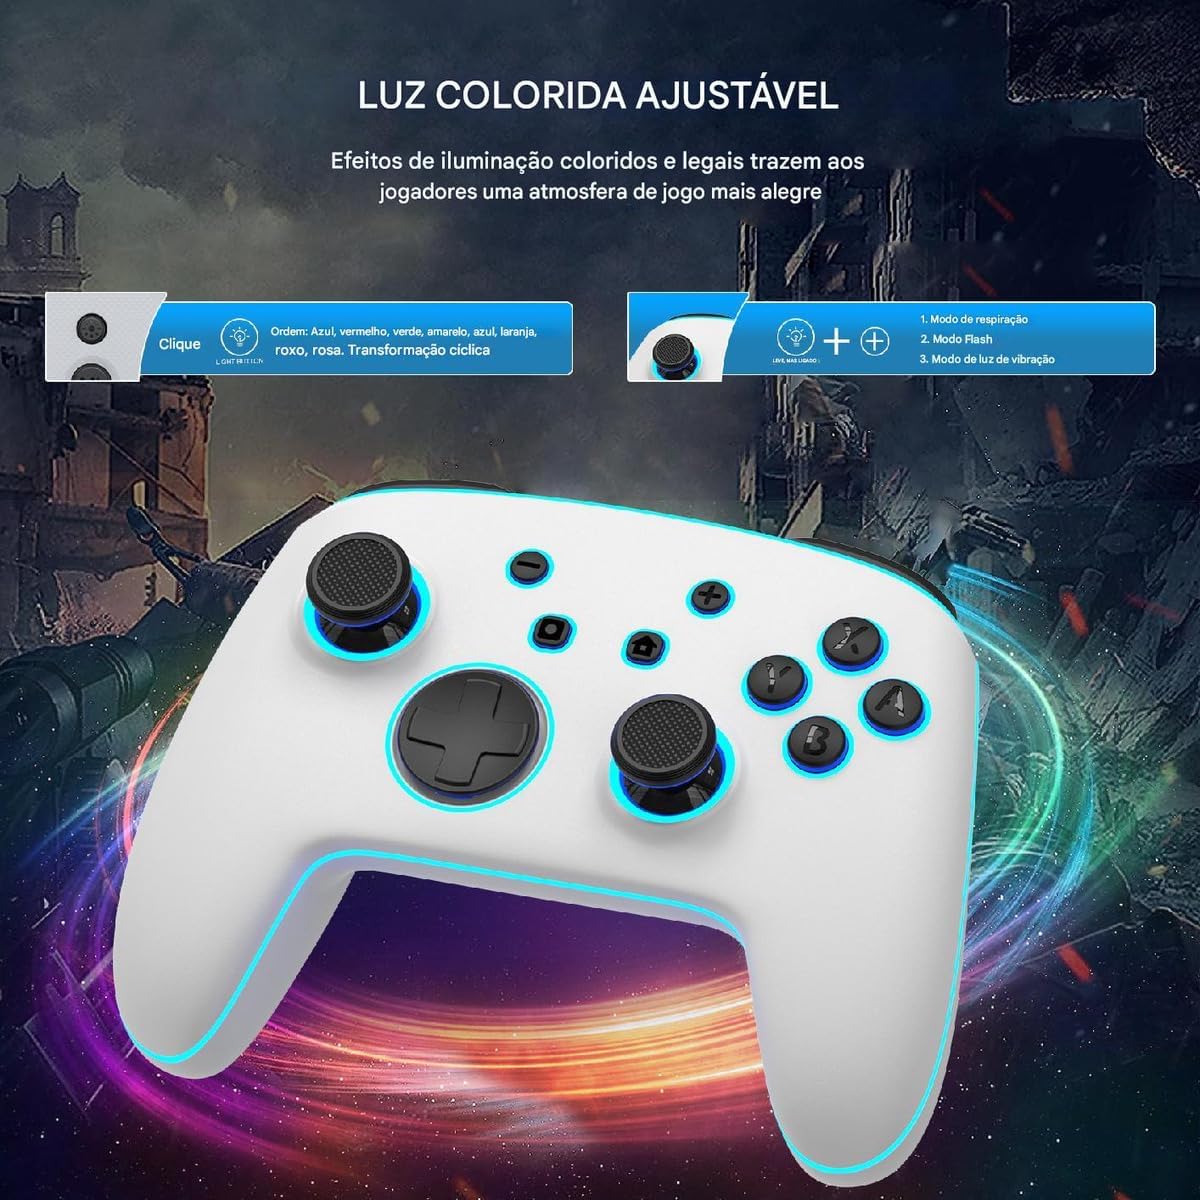
Figure 6.3: Adjustable Colored Lighting. This image illustrates the various lighting effects and color cycles available for the gamepad's joysticks and buttons, including breathing mode, flash mode, and vibration light mode.
The controller features adjustable LED lighting around the joysticks and buttons.
- To change the lighting mode, press and hold the Light button (usually a small button near the Home button). Cycle through modes such as Breathing, Flash, and Vibration Light.
- To change the color, press the Light button briefly. Colors may cycle through blue, red, yellow, green, orange, purple, pink, and a cyclical transformation.
6.6 Motion Control (6-Axis Gyroscope)

Figure 6.4: 6-Axis Gyroscope Support. This image demonstrates the controller's 6-axis gyroscope, enabling stable and precise directional control for in-game actions like visual transformation, general control, and aiming.
The integrated 6-axis gyroscope allows for precise motion control in compatible games. This feature provides an immersive experience for games that utilize tilting, shaking, or other physical movements.
7. Maintenance
- Cleaning: Use a soft, dry cloth to clean the controller. For stubborn dirt, slightly dampen the cloth with water. Do not use harsh chemicals or abrasive cleaners.
- Storage: Store the controller in a cool, dry place away from direct sunlight and extreme temperatures.
- Battery Care: To prolong battery life, avoid fully discharging the controller frequently. Charge it regularly, even if not in use for extended periods.
- Avoid Drops: Do not drop or subject the controller to strong impacts, as this can damage internal components.
8. Troubleshooting
| Problem | Possible Cause | Solution |
|---|---|---|
| Controller does not connect/pair. | Low battery; out of range; pairing mode not activated; interference. | Charge the controller fully. Ensure it is within 10 meters of the Switch. Re-enter pairing mode. Move away from other wireless devices. |
| Buttons are unresponsive or delayed. | Low battery; software glitch; physical damage. | Charge the controller. Reset the controller using the reset button. If issues persist, contact support. |
| Controller does not charge. | Faulty cable/charger; damaged charging port. | Try a different USB-C cable and power source. Ensure the charging port is clean and free of debris. |
| Vibration is too strong/weak or absent. | Vibration level setting. | Adjust the vibration intensity as described in Section 6.4. |
9. Specifications
- Model: KS11
- Connectivity: Wireless
- Compatibility: Nintendo Switch, Nintendo Switch Lite, Nintendo Switch OLED
- Battery Capacity: 950mAh
- Playtime: Approximately 9-12 hours (depending on usage)
- Charging Time: Approximately 2-3 hours
- Motion Sensor: 6-axis Gyroscope
- Vibration: Dual motors with adjustable intensity
- Special Features: Macro programming, 3-speed turbo, adjustable LED lighting, wake-up function
- Country of Origin: China
- ASIN: B0DXZZZZFX
- Release Date: February 19, 2025
10. Warranty and Support
This product comes with a standard manufacturer's warranty. Please refer to the warranty card included in your package or contact your point of purchase for specific warranty terms and conditions.
For technical support, troubleshooting assistance, or inquiries about your Linyuvo KS11 controller, please contact the retailer or manufacturer's customer service. Keep your purchase receipt as proof of purchase for warranty claims.


